Article Number: 000126038
在 Windows 中安装 PCIe 卡:综合指南
Summary: 了解如何在 Windows 系统中安装 PCIe 卡。查找有关 PCIe 插槽、适配器选项的提示以及简单的分步安装说明
Article Content
Instructions
如果您想要在戴尔系统中添加 PCIe 卡,请按照以下步骤完成安装。
- 卸下侧盖。如果您不知道如何删除它,请参阅 戴尔支持 页面以获取系统文档。
- PCIe 卡已添加到 PCIe 插槽。(参见图 1)
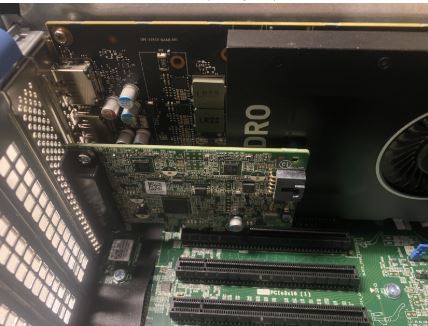
(图 1 — PCIe 插槽)
- 添加 PCIe 卡 ID 后。您需要一条 Display Port 转 Display Port 线缆才能从 PCIe 卡 Display Port 插入显卡 Display Port。(请参见图 2)
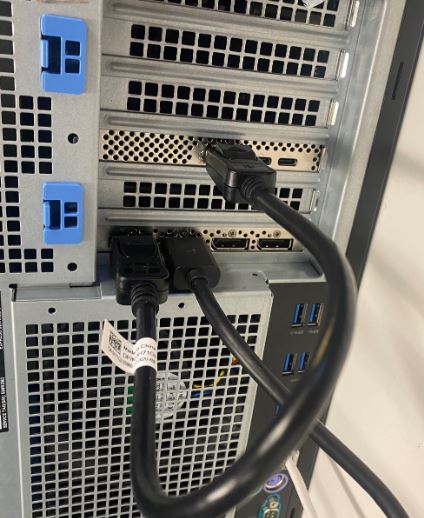
(图 2 — DP 到 DP 线缆)
- 安装卡后,如果是 Thunderbolt PCIe 卡,则必须更新最新的 Thunderbolt 控制器驱动程序。请访问我们的 驱动程序站点 ,搜索与您的系统相匹配的驱动程序。Thunderbolt 控制器驱动程序可在“Chipset”下找到。(请参见图3)
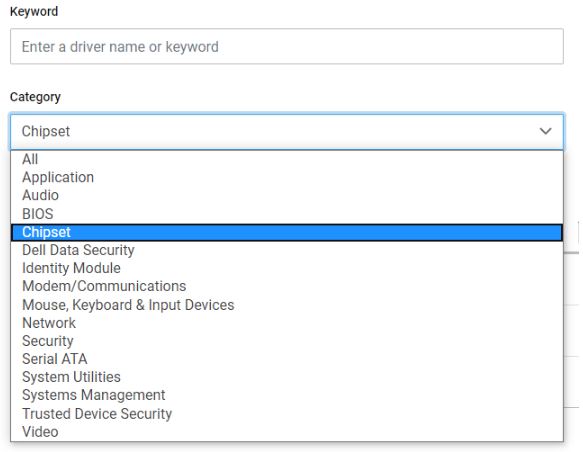
(图 3 — 戴尔驱动程序类别)
完成此驱动程序安装并重新启动系统后,PCIe 卡功能现在应该能够使用 PCIe 插槽。
Additional Information
Article Properties
Last Published Date
03 Apr 2024
Version
8
Article Type
How To