Bienvenue
Bienvenue dans l’univers Dell
Mon compte
- Passer des commandes rapidement et facilement
- Afficher les commandes et suivre l’état de votre expédition
- Profitez de récompenses et de remises réservées aux membres
- Créez et accédez à une liste de vos produits
- Gérer vos sites, vos produits et vos contacts au niveau des produits Dell EMC à l’aide de la rubrique Gestion des informations de l’entreprise.
Numéro d’article: 000147320
How to reset your PC Using the Dell Recovery Partition
Résumé: Steps to resetting your Windows PC with the aid of the Dell Recovery Partition option
Contenu de l’article
Instructions
How to reset your PC Using the Dell Recovery Partition
Dell Backup and Recovery can recover the Operating system or backup from the recovery partition as well.
To recover the OS from the recovery partition, follow these steps:
- Plug in the AC adapter.
- At the Windows login Screen Click the shutdown button, hold down the Shift Key and click Restart (this step works even if the system is password protected)
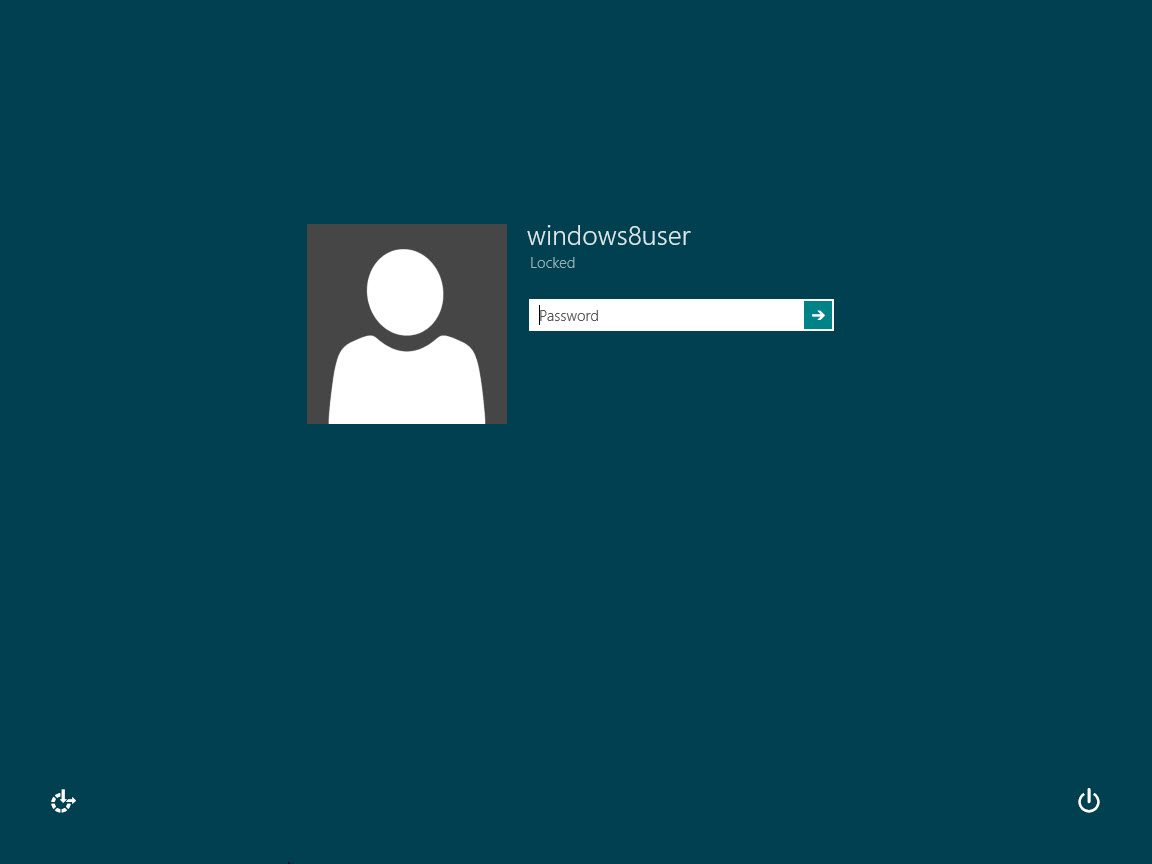
Image 1 - Windows 8 login Screen - The system restarts, click Troubleshoot.
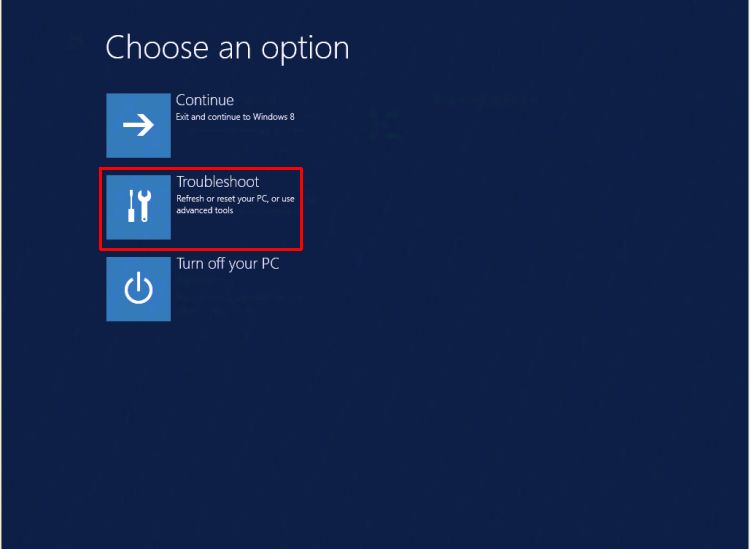
Image 2 - Windows 8 Troubleshoot tile - Click the Dell Backup and Recovery icon.
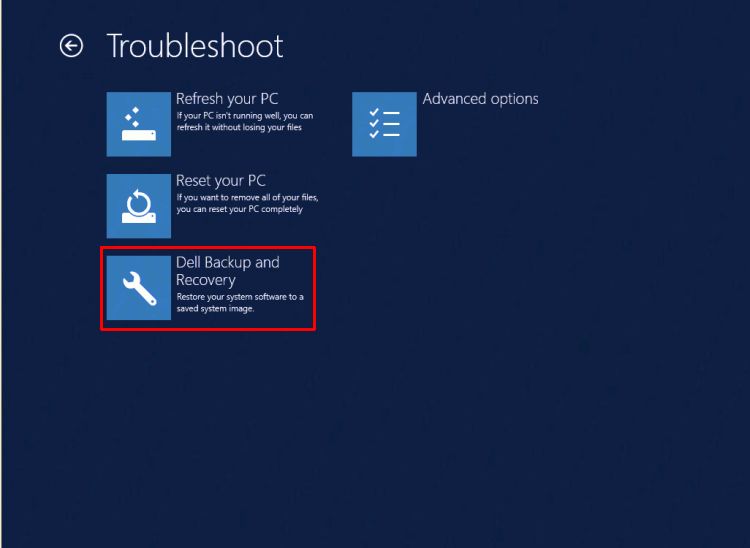
Image 3 - Dell Backup and Recovery - The system restarts and comes back up, click Next on the Dell Backup and Recovery Screen.
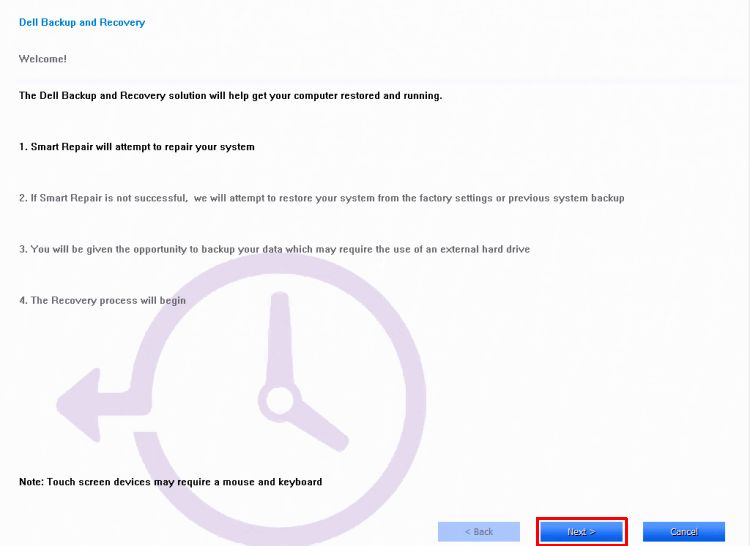
Image 4 - Clicking Next on the Backup and Recovery screen - The system would be checked to see if the smart repair option can fix the issue, click Next once this is done.
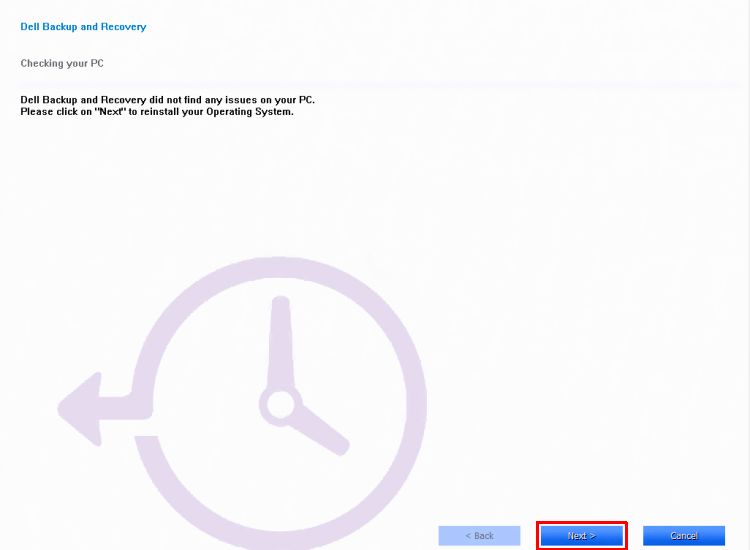
Image 5 - Smart repair option - You will be prompted to select the backup to be used, click the factory image option or select from one of the backups. Click Next.

Image 6 - Select Backup - You will be prompted to backup your files, if needed do so by selecting the option Yes, backup my personal files (Make sure to have an external backup hard drive handy.) or select No, Erase my files.
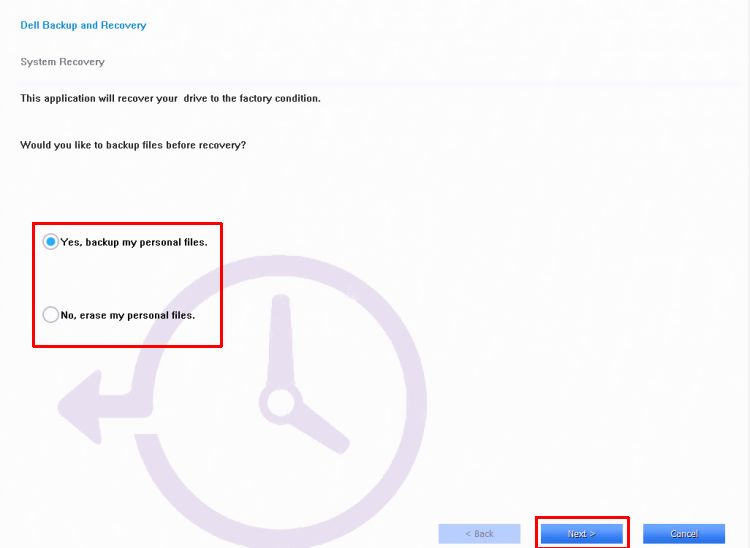
Image 7 - Backup files - The system goes ahead and completes the restore of the operating system.

Image 8 - Completing the restore - Click Restart when prompted. Follow the on-screen instructions to setup the system with windows
Note: If Dell Backup and Recovery Option Does not work you can use the Windows 8 Reset option on step 4 troubleshoot picture attached. You can follow the Reset option Screens Below.
To reset your PC Using the Windows Recovery Feature (Within windows):
- Swipe in from the right edge of the screen, tap Settings, and then tap Change PC settings.(If you're using a mouse, point to the upper-right corner of the screen, move the mouse pointer down, click Settings, and then click Change PC settings.)
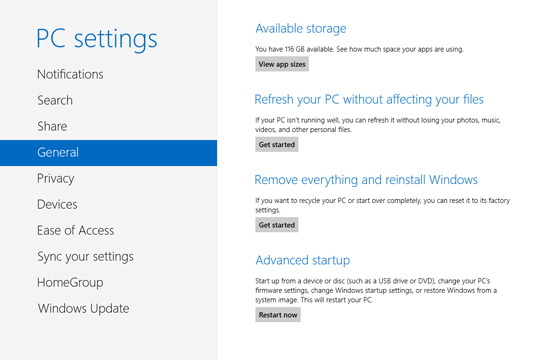
Image 9 - Change PC settings - Under PC settings, tap or click General.
- Under Remove everything and reinstall Windows, tap or click Get started. Follow the instructions on the screen.
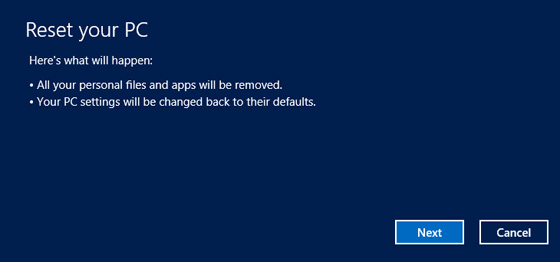
Image 10 - Rest your PC - Choose Fully Clean your Drive
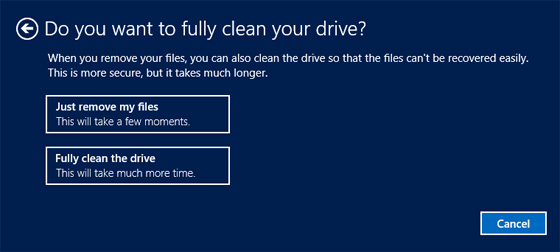
Image 11 - Clean drive - Note: You'll be prompted to choose whether you want to erase data quickly or thoroughly. If you choose to erase data quickly, some data might be recoverable using special software. If you choose to erase data thoroughly, this will take longer but it makes recovering data far less likely. The second option, "Fully clean the drive," is there for when you are giving or selling the PC to someone else and you want to ensure that they can’t use a PC forensics utility to mine data off the supposedly erased hard drive. It’s much more time consuming than the first option, but also makes your PC safe for transfer to a new owner.
If the above steps fail and we are not able to restore, please perform a complete OSRI – this would contain a generic image with Chipset Drivers, Lan and WLAN drivers for Intel based cards Pre Installed. Rest of the drivers can be installed from Dell Support and Windows Updates will need to be downloaded again. Also make sure Windows QFE is applied - MS KB QFE 2756872. Please also ensure Bios is updated with the latest version available form Dell Support along with any updated drivers. This can be used if the system is setup with or without a password.
Informations supplémentaires
Recommended Articles
Here are some recommended articles related to this topic that might be of interest to you.
Propriétés de l’article
Dernière date de publication
10 janv. 2024
Version
4
Type d’article
How To