The features of the Dell Pro Single Monitor Arm MSA20
Podsumowanie: Learn more about the use and features of the Dell Pro Single Monitor Arm MSA20.
Instrukcje
Table of Contents:
Introduction
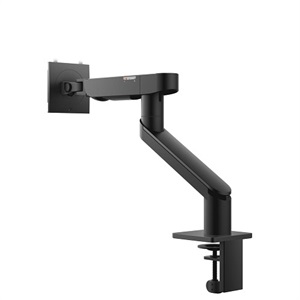
The Dell Pro Single Monitor Arm MSA20 supports mounting either your computer or monitor. Dell UltraSharp, or P-Series monitors can be installed using the Quick Release. It mounts a selected OptiPlex Micro, Ultra, or Wyse computer on the monitor with virtually no tools. The integrated cable management slot with clips can hold up to 10 cables which help to keep your desk neat and uncluttered.
Further information about the Dell Pro Single Monitor Arm MSA20 can be found on the following link:
You can search the Dell Shop for the Dell Pro Single Monitor Arm MSA20 to find out information such as the price.
Features
| Product Type | Desk Mount (Adjustable) |
| Color | Black |
| Installation | Clamp desks up to 53 mm (2.1 in.) thick and
Grommet hole diameter is up to 50.8 mm (2 in.) |
| Panel Mount | Dell Quick Release Mount
VESA-compliant Monitor Mount VESA Adapter Plate Mount Sets included |
| Computer Mount | Select OptiPlex Micro and Ultra models and
Wyse Thin Clients |
| VESA Mounting Interface | 100 x 100 mm (3.9 in. x 3.9 in.) |
| Dynamic Arm Supported Weight Range | 2.2 kg to 10 kg (4.8 lbs to 22.0 lbs) |
| Recommended Use | LCD Flat Display |
| Recommended Display Size | 19 in. to 40 in. |
| Cable Management | Slots in upper and lower arms for up to 10 cables |
Assembly
- Base
- Static Arm
- Dynamic Arm
- VESA adapter plate
- Screws
- Plastic spacer
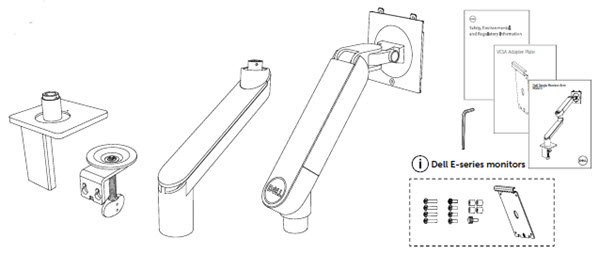
Assembly Steps:
-
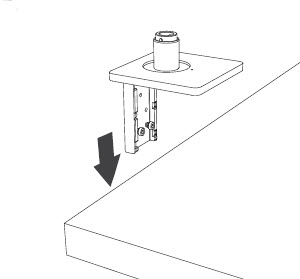
The desk mount fits to a flat edge like the back of your desk.
-
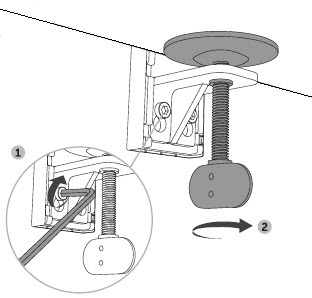
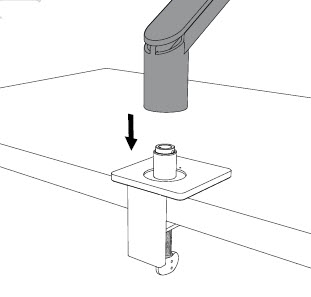
Attach the screw clamp over the bolts in the desk mount and tighten the bolts and then the screw clamp to secure the mount to the desk.
-
Slide the lower arm over the desk mount.
-
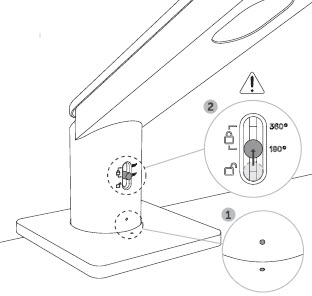
Line up the dots on the arm and mount and move the slider to lock the arm at either 180° or 360°.
-
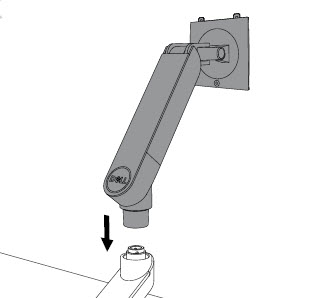
Slide the upper arm down on to the lower arm.
-
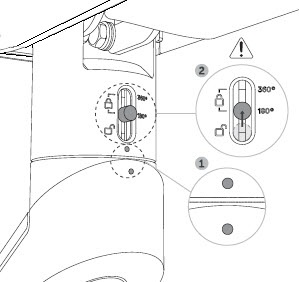
Line up the dots where the lower and upper arms connect and use the slide to lock in your preferred angle
-
Slide and pull the covers off the lower and upper arms.
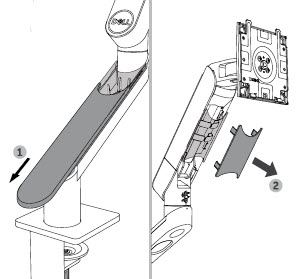
-
Route your cables through the exposed clips to keep them tidy and out of the way.
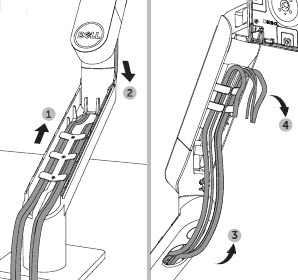
-
Attach your computer or display to the end of the arm.
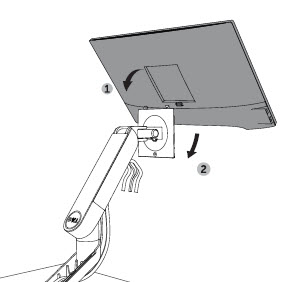
-
Plug up your cables.
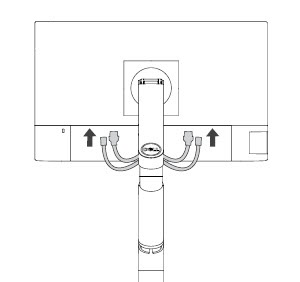
-
Fit the covers back onto the lower and upper arms to conceal the cables.
Range of Movement
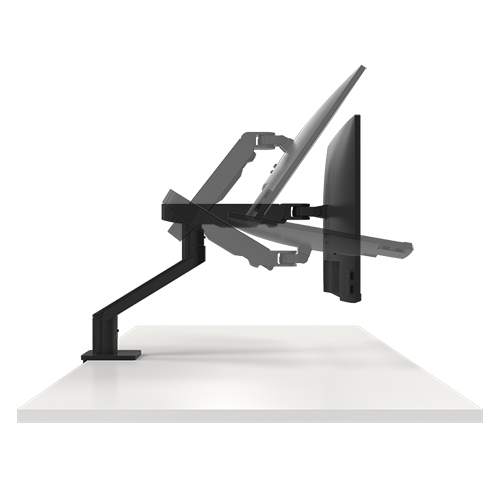
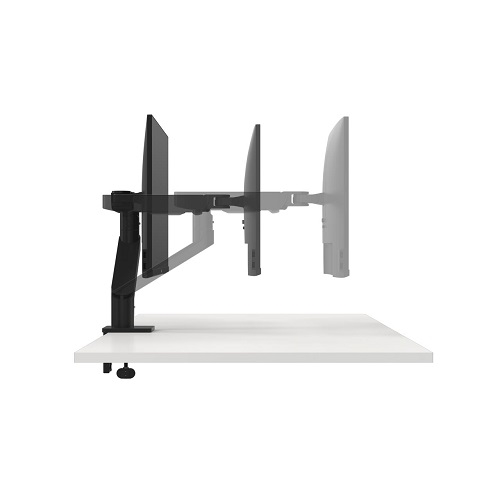
| Movement | Height adjustable, Swivels, Tilts, and Pivots |
| Pivot | 90° clockwise and 90° anti-clockwise |
| Attachment Tilt | Tilts downward 35° and upwards by 80°. |
| Lower Arm | Slide locks between 180° and 360° at the base of the arm. |
| Upper Arm | Slide locks between 180° and 360° at the base of the upper arm. |
| Attachment Swivel | 180° at the end of the upper arm |
| Pan | 180° |
| Height Range | 266 mm (10.5 in.) |
| Depth Range | 548 mm (21.6 in.) |