How to Package Dell Core Services x64 for Microsoft Configuration Manager
Summary: This article provides information about how to package Dell Core Services x64 for Microsoft Configuration Manager as a prerequisite for Dell software solutions.
Acest articol se aplică pentru
Acest articol nu se aplică pentru
Acest articol nu este legat de un produs specific.
Acest articol nu acoperă toate versiunile de produs existente.
Instructions
Affected Products:
- Dell Pro AI Studio
- Dell Client Device Manager
- Dell Display and Peripheral Manager
Prerequisites:
- Download the latest version of Dell Core Services.
Note: Dell Core Services is available in download packages for Dell software solutions that require it (for examples, Dell Pro AI Studio, Dell Client Device Manager, Dell Display and Peripheral Manager).
- Place the Dell Core Services ARM64 installation file on a file share in your environment.
Packaging for Microsoft Configuration Manager:
- Open the Configuration Manager Console.

- Go to Software Library > Application Management > Applications

- Click the Create Application button in the top ribbon.

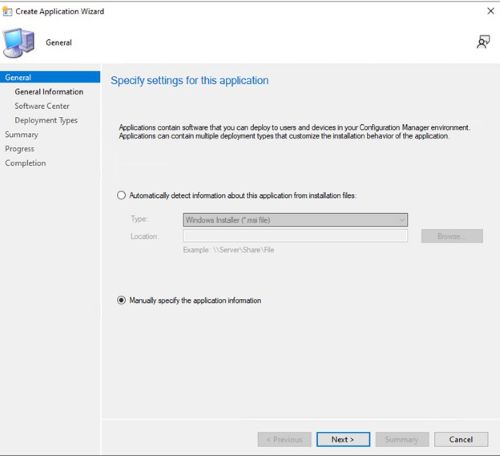
- Click the radio button for Manually specify the application information and click Next.
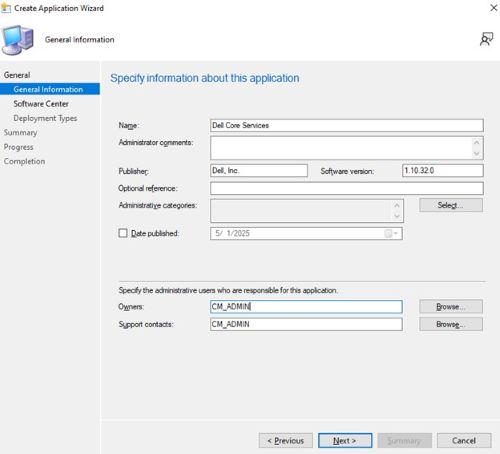
- Enter a name and provide any needed information such as publisher and software version, then update the application owner, and support contact if needed and click Next.
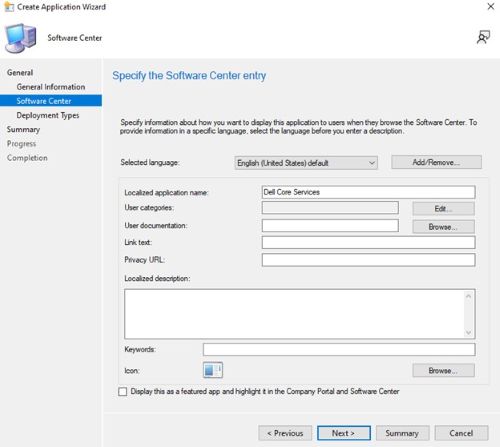
- On the Software Center entry screen, update the language if needed and click Next.
- On the Deployment Types screen, click Add.

- Click the radio button to Manually specify the deployment type information and click Next.

- Provide a name and select a language if needed then click Next.

- Click browse next to Content Location and select the folder where the installer is located.

- In the installation program field, type
msiexec /i Dell.Core.Services.Installer_Arm64.msi /norestart /qn.
- For uninstall program, type
msiexec /x "Dell.Core.Services.Installer_Arm64.msi" /norestart /qn. Then click Next.
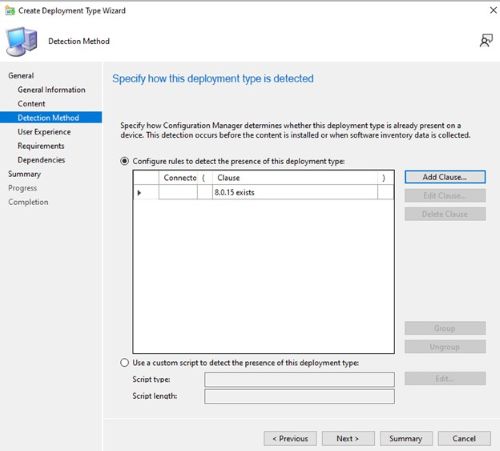
- On the Detection Method page, click the Add Clause button.

- On the Setting Type drop down menu, select Windows Installer then click Browse next to the product code and select the Dell Core Services installer. Then click OK.

- Click Next.
- On the User Experience page, set the options below and click Next.
Installation behavior: Install for system
Logon requirement: Whether or not a user is logged on
Installation program visibility: Hidden

- On the Requirements page, click Add and select the requirements based on your needs, then click Ok and add any additional requirements.

- Once finished click Next.

- On the Dependencies page, click Add.

- Provide a dependency group name then click Add.

- Select .NET Desktop Runtime 8 ARM64 then click OK. Repeat this process again and select ASP.NET Core 8 Runtime ARM64 then click OK.

- Click OK on the Add Dependency screen.

- Back on the Dependencies screen click Next.

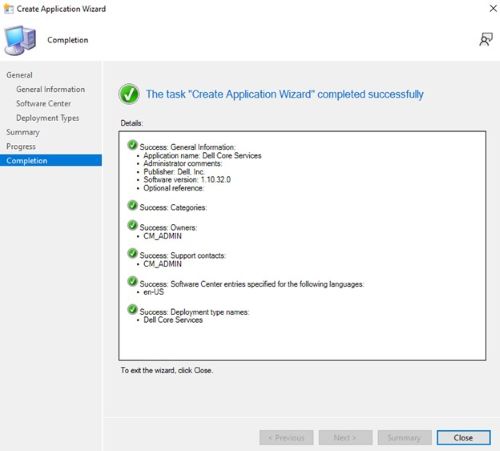
- On the Summary page, click Next then on the completion page click Close.

- Click Next on the Deployment Type page.

- On the Summary page, click Next then on the completion screen click Close.
Produse afectate
Dell Client Device Manager, Dell Display and Peripheral Manager, Dell Pro AI StudioProprietăți articol
Article Number: 000322294
Article Type: How To
Ultima modificare: 20 May 2025
Version: 1
Găsiți răspunsuri la întrebările dvs. de la alți utilizatori Dell
Servicii de asistență
Verificați dacă dispozitivul dvs. este acoperit de serviciile de asistență.