How to Enable XMP Memory Speed on Alienware Laptops
摘要: Enabling Extreme Memory Profiles (XMP) memory on Alienware m16 R1 and Alienware m18 R1 using BIOS or Alienware Command Center (AWCC).
本文适用于
本文不适用于
本文并非针对某种特定的产品。
本文并非包含所有产品版本。
说明
There are two methods to enable XPM memory speed On Alienware m16 R1 and Alienware m18 R1.
Method 1: Enable in BIOS
- Press the F2 key as the computer boots, to enter the BIOS.
- Select Advanced > Performance Options (Figure 1).
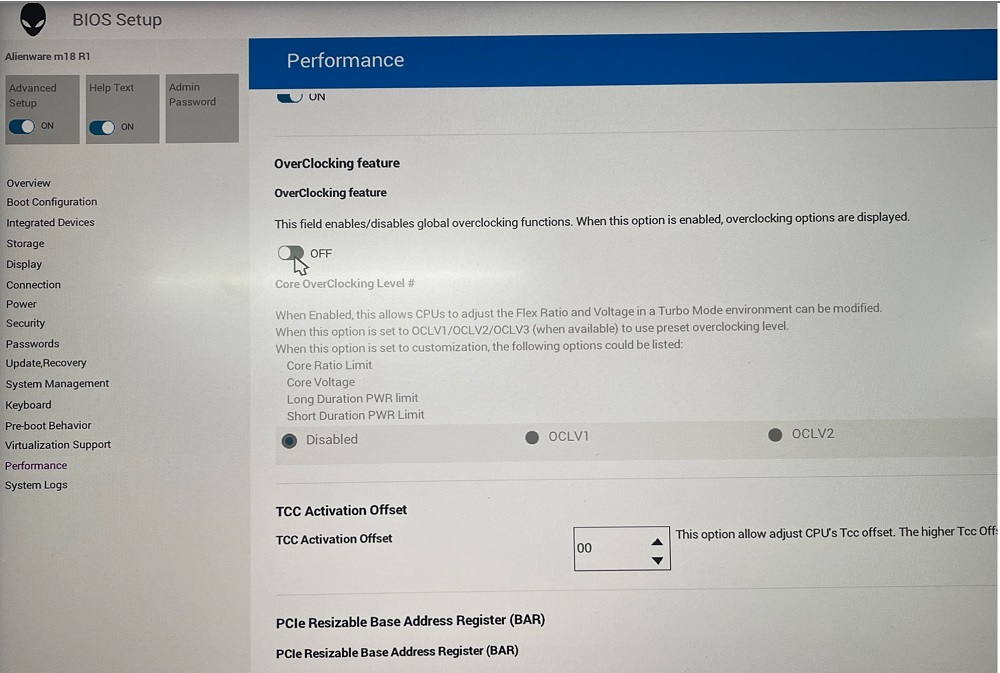
Figure 1: Performance Options - Overclocking Feature Disable change to Enable. Click OK when the warning message is displayed (Figure 2).
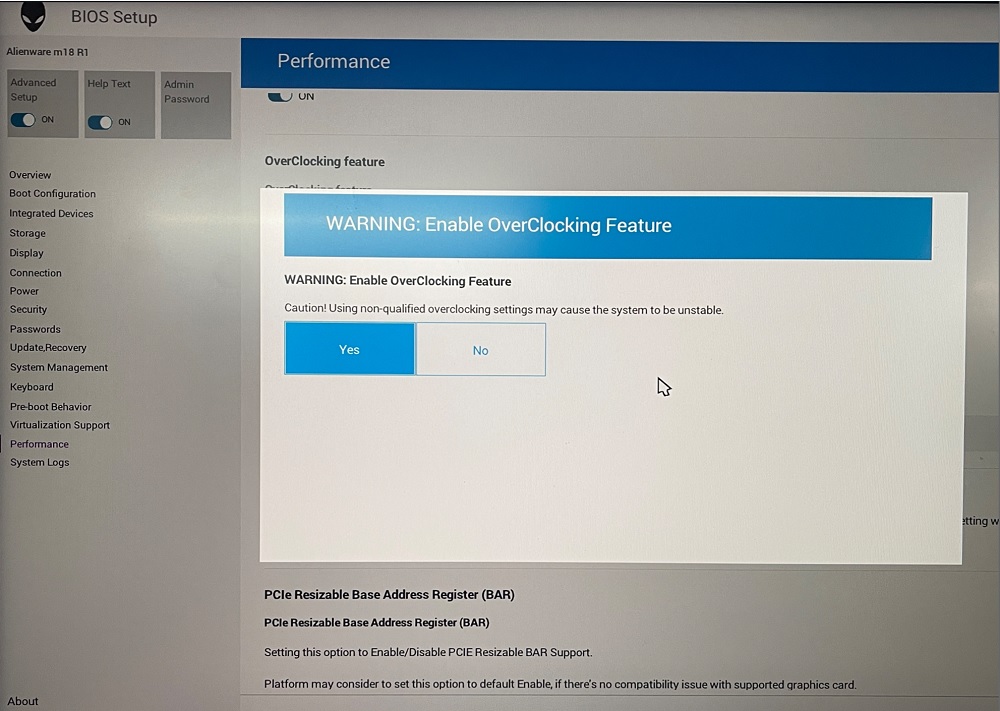
Figure 2: Warning Enable OverClocking Feature - Change XMP memory from Disable to XMP1 (Figure 3).
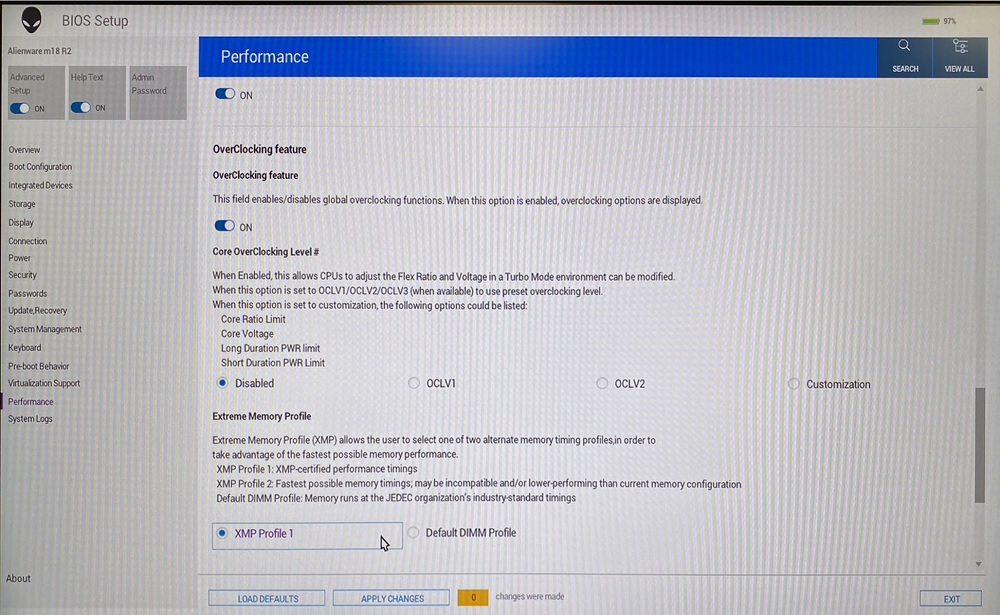
Figure 3: XMP1
Method 2: Enable in AWCC:
AWCC default set as RAM1, you could choose other XMP memory or turn off:
- Open AWCC choose Performance> Custom > Advanced View (Figure 4).
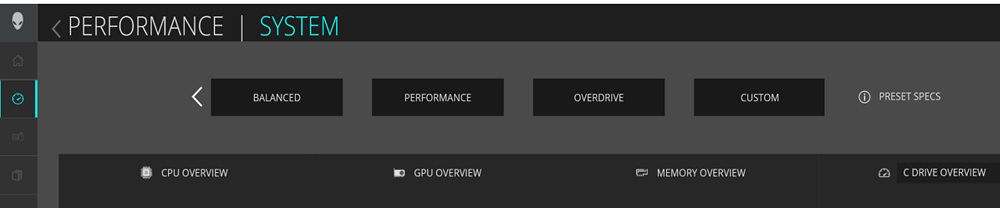
Figure 4: Performance Custom Advanced View - Switch to RAM2 or off per your request (Figure 5).
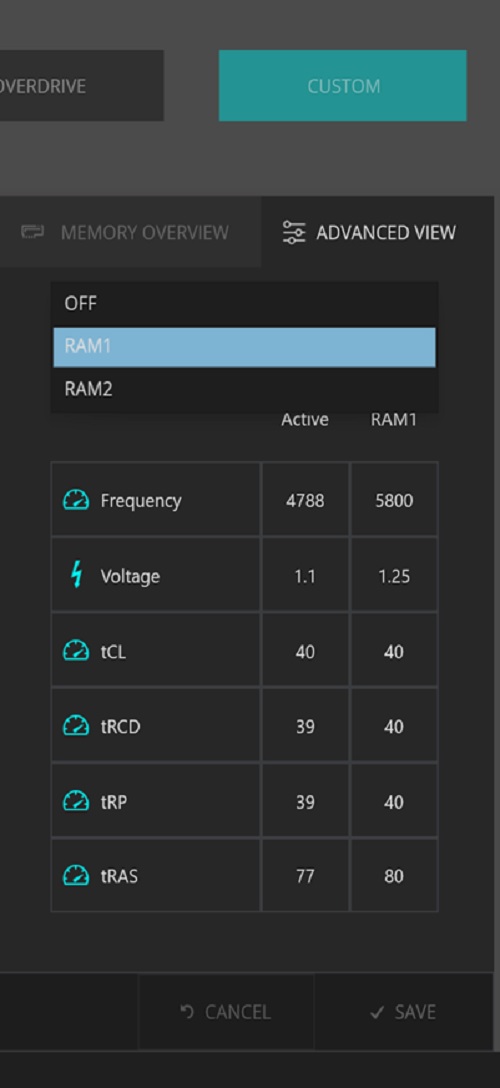
Figure 5: RAM2 or off
Note: After enabling the XMP memory for the first time, the bootup time will be longer, about 3 minutes and 30 seconds.
Affected Platforms:
- Alienware m16 R1
- Alienware m18 R1
Note: When purchasing your computer Dell offers an XMP memory configuration of 32 GB with 5800 MT/s speed. To use this speed, ensure that you enable XMP by going to the system settings or BIOS.
Your computer will not support upgrading to an XMP memory later after point of sale. Also, if the memory is upgraded from 32 GB to 64 GB, your computer will not support the XMP feature.
Your computer will not support upgrading to an XMP memory later after point of sale. Also, if the memory is upgraded from 32 GB to 64 GB, your computer will not support the XMP feature.
受影响的产品
Alienware m16 R1, Alienware m18 R1文章属性
文章编号: 000218606
文章类型: How To
上次修改时间: 22 4月 2025
版本: 3
从其他戴尔用户那里查找问题的答案
支持服务
检查您的设备是否在支持服务涵盖的范围内。