Article Number: 000123839
Dell Inspiron 5675 Desktop Usage and Troubleshooting Guide
Summary: Learn how to use and troubleshoot issues related to webcam, Windows, input devices, LCD, drivers, networking and more on your Dell Inspiron 5675 gaming desktop PC.
Article Content
Symptoms
Cause
For help with issues such as: internet connectivity, Microsoft Windows, mouse, keyboard, monitor, webcam and downloading drivers, refer to an expanding section below.
Resolution
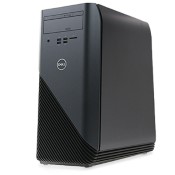
Dell Inspiron 5675 PC is an all-new gaming desktop featuring powerful AMD Ryzen processor, graphics ready for VR, optional LED lighting and a meticulous design for optimal cooling.
For specifications, browse to the Dell Inspiron 5675 Desktop Online Manual Page, and then click Dell Inspiron 5675 Desktop Setup and Specifications (refer to the Specifications section).
For port locations, browse to the Dell Inspiron 5675 Desktop Online Manual Page, and then click Dell Inspiron 5675 Desktop Setup and Specifications (refer to the Views section).
To locate your Service Tag or Express Service Code, browse to the Where is the Service Tag located? page.
For Dell Light Bar Controller, refer to the Additional Information section of this Dell knowledge-base article.
Connect your PC to the internet using cable, DSL, Wi-Fi (if available) or a mobile broadband (WWAN) connection. You may also install a wired or wireless router to share your cable or DSL internet connection with multiple devices. Some cable and DSL modems also have built-in wireless routers.
Note: Before connecting your PC to the internet using a cable or DSL modem, make sure your broadband modem and router are configured. For more information on setting up your modem and router, contact your internet service provider (ISP).
Connecting to the internet using ethernet cable (LAN)
- Connect the ethernet (LAN) cable to the modem or router and to the PC.
- Check for activity lights (LEDs) on the modem or router and the PC.
Note: Some PCs may not have activity lights on the ethernet (LAN) port. Refer to the User Manual of your PC for more information.
- Open a web browser (e.x Internet Explorer or Google Chrome or Mozilla Firefox) to verify internet connection.
For how-to's and troubleshooting information on Wired networking, browse to the Dell Networking and Wireless Support Center.
Dell SupportAssist
- Using the SupportAssist application provides automatic computer updates and detects issues that will be resolved for you. Let us take the effort out of maintaining your Dell Computer or Tablet. For more information about SupportAssist, browse to the SupportAssist for PCs and tablets page.
- To run online hardware diagnostics to make sure your hardware is working correctly, refer to the Dell knowledge-base article Dell Diagnostic Tools to Diagnose and Fix Hardware Problems on Your Dell PC, Tablet or Servers . The article explains how to access the hardware diagnostics and the different kinds of test available for your Dell computer or tablet.
Note: The diagnostics will either fix the problem automatically, or it will guide you through the steps to resolve the problem. When the diagnostic identifies a failing part, depending on the failing part, we will immediately start the process for a free in-warranty replacement part.
- When the computer cannot access the Internet, you can run the built-in diagnostics (ePSA) on your computer. For more information, refer to the Dell knowledge-base article Resolve Hardware Issues Using ePSA or PSA Diagnostics and Guide to Error Codes.
Dell Enhanced Pre-boot System Assessment (ePSA) diagnostics
The Dell ePSA diagnostics perform a complete check of your computer hardware. The ePSA is embedded in the BIOS and is launched by the BIOS internally (from the advanced boot menu). The embedded system diagnostics provide a set of options for particular devices or device groups allowing you to:
- Run tests automatically or in an interactive mode
- Repeat tests
- Display or save test results
- Run thorough tests to introduce additional test options to provide extra information about the failed device(s)
- View status messages that inform you if tests are completed successfully
- View error messages that inform you of problems encountered during testing
Launching ePSA diagnostics
- Power off the computer.
- Power on the computer and tap F12 key (at the Dell logo screen) until One Time Boot menu appears.
- On the boot menu, select Diagnostics using the arrow keys on the keyboard.
- Press the Enter key to begin ePSA diagnostics.
Note: ePSA diagnostic test for specific devices are interactive and requires user input or interaction. Always ensure that you are present at the computer terminal when the diagnostic tests are performed. The touchpad/mouse will be non-functional when the test is in progress.
This section covers the Microsoft Windows operating system that is installed on your computer; select the tabs below to find out more information.
For help using Microsoft Windows, refer to the Dell Windows Support Center. You will need to select the operating system you need help with.
When the computer stops responding or you are troubleshooting slow performance issues, perform the following steps:
- Press the Power button for at least 15 seconds to make sure the computer turns off.
- Disconnect all external peripherals including the keyboard, mouse, and external monitor. Peripherals also include external storage devices such as flash drives, USB devices, printers, cards etc.
- Press the Power button to see if the computer turns on and boots up correctly. If not, refer to Dell knowledge-base article Computer Does Not Turn on, or is Stuck on the Dell Logo Screen.
- When the computer does boot up correctly, download and install SupportAssist. For more information on how to obtain and install SupportAssist, browse to the SupportAssist for PCs and tablets page.
- Perform system maintenance on your computer, for more information refer to Dell knowledge-base article Optimization and Maintenance of Microsoft Windows or Troubleshooting Slow Performance Issues.
- Start connecting external peripherals one at a time, and check to see if the computer continues to respond.
This link takes you to the Dell knowledge-base article Microsoft Windows Locks Up or an Error Occurs.
For information on the drivers available, browse to the Dell Inspiron 5675 Desktop Drivers Page.
This article provides information on how to download drivers for Dell computers, Drivers and Downloads FAQs.
Refer to the following Dell knowledge-base articles for information on how to use or troubleshoot mouse and keyboard issues.
LCD Built-In Self Test (BIST)
Dell monitors are equipped with a built-in diagnostic tool that helps you determine if the screen abnormality you are experiencing is an inherent problem with the Dell monitor or with the video card (GPU) and PC settings.
When you notice screen abnormalities like distortion, clarity issues, fuzzy image, horizontal or vertical lines, color fade etc., it is always a good practise to isolate the monitor by running the Built-In Diagnostics.
Note: Built-in Self Test can be run only when the video cable(s) is unplugged and the Dell monitor is in Self-Test mode.
To run the monitor built-in self test (BIST):
- Make sure that the monitor screen is clean (no dust particles on the surface of the screen).
- Unplug the video cable(s) from the back of the Dell monitor and the PC. The Dell monitor should now go into Self-Test mode.
- Press and hold Button 1 for 5 seconds. A gray screen should appear. (Picture 4)
- Carefully inspect the screen for abnormalities.
- Press Button 1 on the front panel again. The color of the screen should now change to red.
- Inspect the screen for any abnormalities.
- Repeat Step 5 and Step 6 to inspect the screen in green, blue, black, white and text screens.
- The test is complete when the white screen appears.
- Press Button 1 to exit the built-in self test diagnostics.
Note: If you do not detect any screen abnormalities in built-in self test (BIST) mode, the LCD is functioning properly. Check the video card (GPU) and PC settings.
If you notice any abnormalities in built-in self test (BIST) mode, you may get the monitor repaired/replaced if it is under warranty by contacting Dell Technical Support.
If you notice any abnormalities in built-in self test (BIST) mode, you may get the monitor repaired/replaced if it is under warranty by contacting Dell Technical Support.
For information on troubleshooting a Dell monitor, refer to the Dell knowledge-base article Common Troubleshooting Guide for Dell Monitors.
For information on troubleshooting multiple monitor issues, refer to the Dell knowledge-base article Troubleshooting Guide for Multiple Monitor Problems on Dell PCs.
For help with resolving USB port issues, refer to the Dell knowledge-base article How to resolve USB port issues.
For information about and help with resolving Hard Drive issues, refer to the Dell knowledge-base article Understanding and Troubleshooting Your Hard Drive.
When you experience a situation in which the computer does not start at all, or if it does turn on (lights turn on and fans are spinning) but the computer does not show any image, the computer may provide an indication of the problem using beeps or LEDs blinking in a pattern. These indicators include:
- Power LED
- Beep Codes
- Quad Pack Diagnostic LEDs (available on select Dell PCs only)
Power LED
Note: Amber blinking pattern: The power button LED will blink amber to indicate the fault condition. Repeated pattern has a long pause in the middle.
Example: When no memory (RAM) is detected, the power button LED will blink two times followed by a pause, blink two times, pause again, etc. This pattern continues until the computer is powered off.
Example: When no memory (RAM) is detected, the power button LED will blink two times followed by a pause, blink two times, pause again, etc. This pattern continues until the computer is powered off.
| LED Pattern | Problem description |
|---|---|
| 2 Amber | Memory (RAM) not detected |
| 4 Amber | Memory (RAM) failure |
| 5 Amber | CMOS battery failure |
| 3 Amber, 4 White (Three amber color LED flashes followed by four white color LED flashes) |
Invalid BIOS recovery image found |
| 3 Amber, 3 White (Three amber color LED flashes followed by three white color LED flashes) |
BIOS recovery image not found |
Beep codes
Note: The computer will emit a beep code corresponding to the fault condition (Table 3). Repeated beep pattern has a long pause in the middle.
Example: When no memory (RAM) is detected, the computer will beep two times followed by a pause, beep two times, pause again, etc. This pattern continues until the computer is powered off.
Example: When no memory (RAM) is detected, the computer will beep two times followed by a pause, beep two times, pause again, etc. This pattern continues until the computer is powered off.
Note: The beep sound will be audible if the a speaker is connected to the audio line-out connector at the back of the computer.
| Beep code pattern | Problem description |
|---|---|
| 2 beeps | Memory (RAM) not detected |
| 4 beeps | Memory (RAM) failure |
| 5 beeps | CMOS battery failure |
| 3 beeps, 4 beeps (Three beeps followed by a pause and four beeps) |
Invalid BIOS recovery image found |
| 3 beeps, 3 beeps (Three beeps followed by a pause and three beeps) |
BIOS recovery image not found |
There are times when changes to the settings in the System Setup (BIOS) prevent the computer from booting into Windows or connect to the Internet. Setting the BIOS back to its defaults may help fix these issues.
- Reboot the computer.
- When you see the Dell logo during POST, press the F2 key to enter the setup screen.
- On the System Setup screen, press the F9 key.
- Press the Enter key on YES to Load Optimized Defaults, the computer will restart.
- Press the F10 key to save the changes and reboot.
- Press the Enter key on YES to restart the computer.
This section covers the software that may be installed on your computer; select the tabs below to find out more information.
The Dell Windows Backup Media and Recovery Options page provides information about backing up your Windows Operating System as well as recovery options for when Windows does and does not start correctly.
The Dell Download Center provides information about software you may have bought and software that is already installed on your computer, such as Dell Backup Solutions and Dell SupportAssist for PCs and tablets.
Some of the software sold at the time of purchase has to be downloaded once you receive your computer. You can download and install those programs by using Dell Digital Delivery, for more information refer to the following links:
A free PDF reader (Acrobat Reader DC) is available for free from Adobe. You will need this program to view any PDF files such as the Quick Start Guides or Owner's Manuals. 
This article provides help with Microsoft Office programs, A Guide to the various Microsoft Office programs available on your Dell PC.
- The Skype software can be downloaded from the Skype website. This website also offers instructional videos on how to use the Skype program.
- To uninstall Skype, perform the following steps:
- Close Skype and make sure it is not running in the background.
- In the Search bar type appwiz.cpl
- Touch or click on appwiz.cpl (Control panel item) to open the Programs and Features window.
- Touch and hold or right-click on Skype from the list and select either Remove or Uninstall.
- Reboot your computer and check to make sure the application has been uninstalled.
To access the Dell Security and Virus Support Page click on the following link:
Your computer will come pre-installed with an Anti-virus program. For more information refer to the Dell knowledge-base article Useful Information about the Third Party Anti-virus programs that ship with a Dell PC.
More information about Viruses, Spyware and Malware can be found at the following links:
Dell Light Bar Controller
Dell Light Bar Controller helps you enable or disable the chassis lights.
Note: LED lighting is an optional feature on Dell Inspiron 5675. Dell Light Bar Controller works only if the lighting feature is pre-installed.
- Click Start.
- Click Dell Light Bar Controller and open the Dell Light Bar Controller application.
- Select On to enable or Off to disable the chassis lights.
Article Properties
Affected Product
Inspiron 5675
Last Published Date
21 Feb 2023
Version
7
Article Type
Solution