Article Number: 000134956
Imaging Intel Skylake systems with SCCM 2012 using DCIP 4.1
Summary: Using the Dell Client Integration Pack (DCIP) 4.1 to image Dell Intel Skylake Systems With Microsoft System Center Configuration Manager (SCCM) 2012.
Article Content
Resolution
This article provides the information on "Imaging Intel Skylake Systems With Microsoft System Center Configuration Manager (SCCM) 2012 using the Dell Client Integration Pack (DCIP) 4.1".
Imaging a Skylake system with SCCM 2012
This article provides guidance on applying a Windows image to you Dell system with the Intel Skylake chipset using the Dell Client Integration Pack version 4.1.
 NOTE: This article is for users with a good working knowledge of SCCM 2012 for imaging Windows.
Imaging steps
Download the Dell Client Integration Pack  .
.
 NOTE: Make sure that the WinPE CAB version actually matches the boot image; if it is PE 5.0, use the WinPE 5.0 CAB, etc. Windows 10 PE is recommended for Intel Skylake chipset systems.
 NOTE: If using Server 2008, a Microsoft Hotfix: KB3025419 - Can't import drivers into System Center Configuration Manager
 must be installed prior to proceeding:
- Download: Windows 10 Assessment and Deployment Kit (ADK) 1511
 and choose the Install Path for installation: (See Figure 1.)
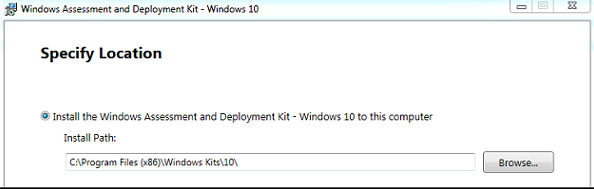
Figure 1. - Set the Windows Assessment and Deployment Kit install path
- Select Deployment Tools and Windows PE from the list of features to install: (See Figure 2.)
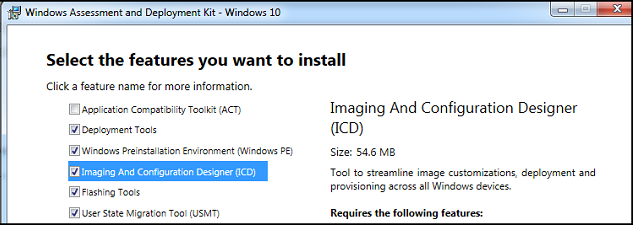
Figure 2. - Selecting the feature you want to install.
C:\Program Files (x86)\Windows Kits\10\Assessment and Deployment Kit\Windows Preinstallation Environment\amd64\en-us - Copy the winpe.wim to a temp directory such as c:\dc\temp\pe10
- Add a new boot image to SCCM 2012: (See Figure 3.)
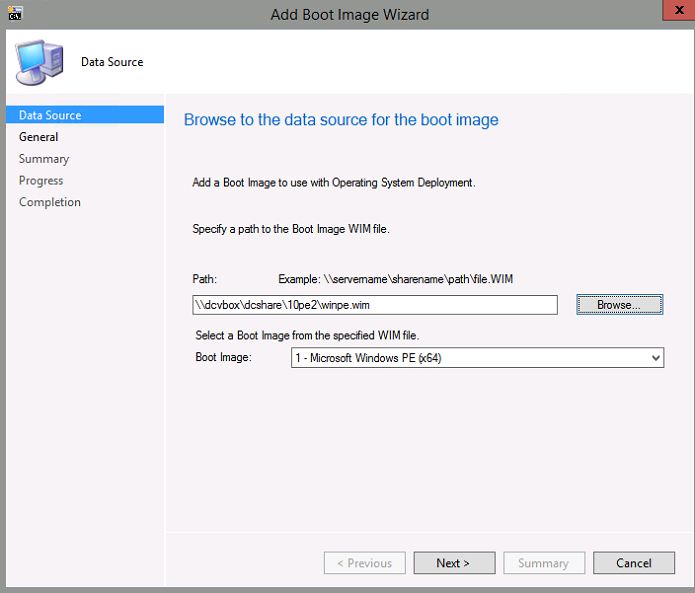
Figure 3. - Adding a boot image to SCCM 2012
 NOTE: The new button under Boot Images with DCIP installed:
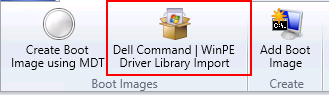
- Add the WinPE 10 CAB file A01 (or later) drivers using the DCIP WINPE Driver Import Wizard: (See Figure 4.)
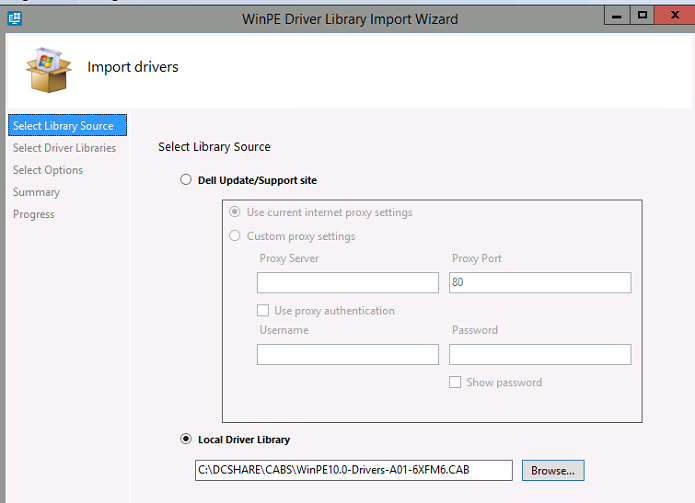
Figure 4. - Adding the WinPE 10 CAB file A01
- Select the new boot image to have the Windows 10 PE CAB integrated: (See Figure 5.)
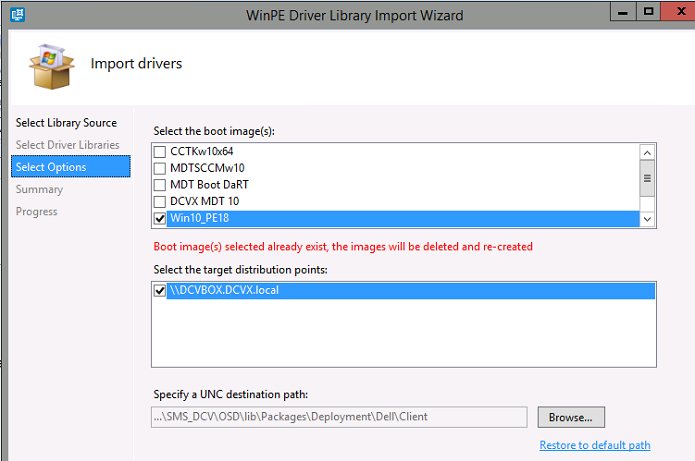
Figure 5. - Selecting the new boot image to have the Windows 10 PE CAB integrated:
If not using DCIP, import the Windows 10 PE CAB drivers to a folder and category called W10PEx64-A01 (or whatever version of CAB file was imported): (See Figure 6.)
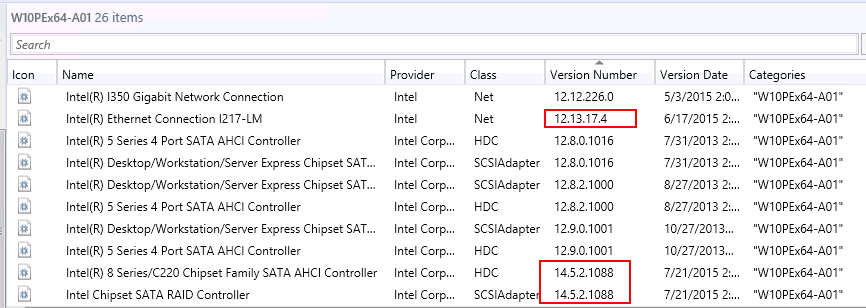
Figure 6. - Importing the Windows 10 PE CAB drivres
Make sure that the Intel Rapid Storage drivers are 14.5.2.x or later and that the Intel Ethernet driver is 12.13.x or later.
Select all of the drivers in the PE10x64 folder and then right click, choose Edit Boot Images:(See Figure 7.)
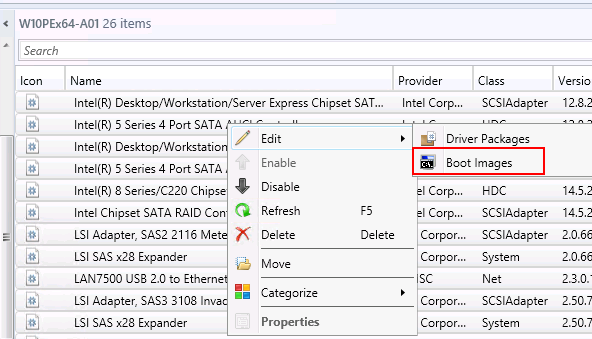
Figure 7. - Editing the Boot images
Select the new boot image: (See Figure 8.)
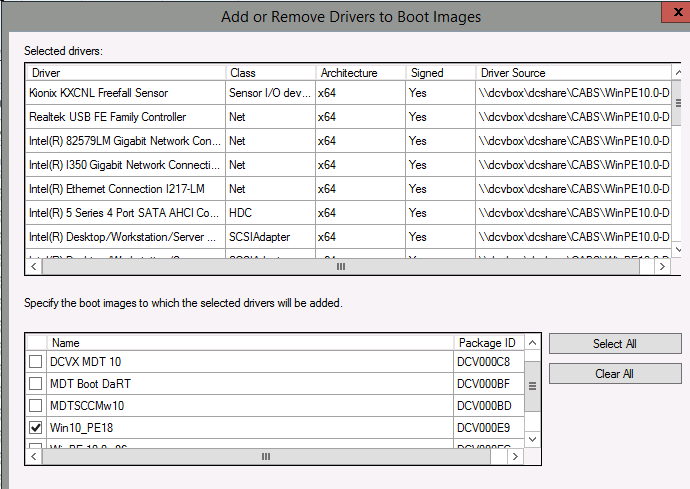
Figure 8 - Adding drivers to the Boot ImagesUpdate the distribution points.
- Make the new Boot image part of the Task Sequence: (See Figure 9.)
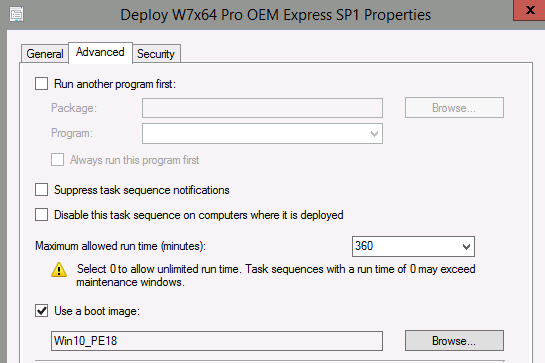
Figure 9. - Adding the new boot image to the Task Sequence.
- Import the proper CAB file for the target system: (See Figure 10.)
 NOTE: The new Dell Command System Driver Library Import button: (See Figure 9.)
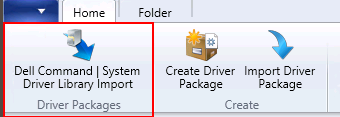
Figure 9. - The new Dell Command System Driver Library Import button
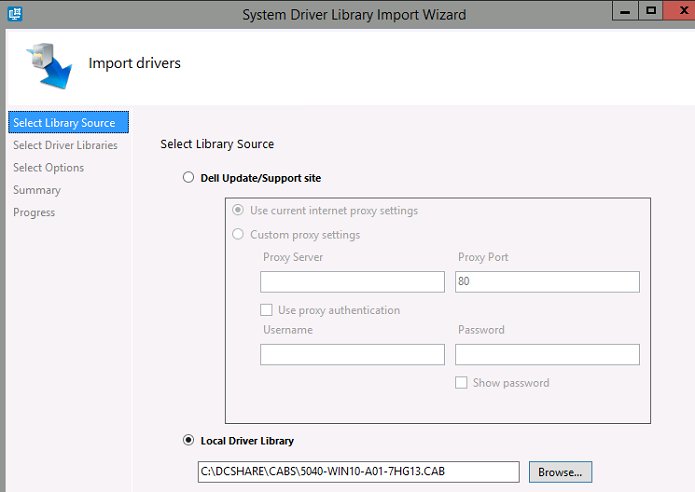
Figure 10. - Import the proper CAB file for the target system
- Add the driver package to the Task Sequence.(See Figure 11.)
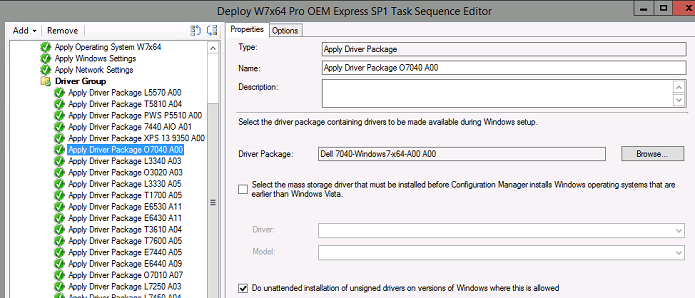
Figure 11. - Adding the driver package to the Task Sequence
- Use Windows Management Instrumentation (WMI) calls to send the correct CAB file to the correct system: (See Figure 12.)
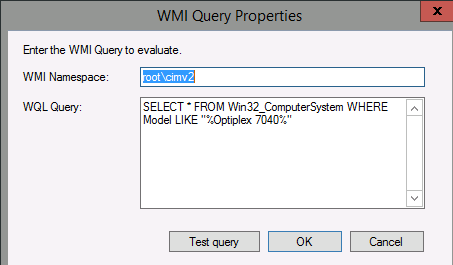
Figure 12. - Configure Windows Management Instrumentation (WMI) Calls
- Start the Task Sequence
Optional Steps that may be required: Injecting the NVMe fix to the Windows 7 image:
Update to add native driver support in NVM Express in Windows 7 and Windows Server 2008 R2 
Extract KB2990941 to C:\dcshare\NVMEw7fix
"0x0000007E" Stop error after you install hotfix 2990941 in Windows 7 SP1 or Windows Server 2008 R2 SP1 
Extract KB3087873 to c:\dcshare\NVMEw7fix2
- Go to the Windows 7 image in SCCM.
- Go to Properties.
- Select Data Source and make note of the location of the image WIM file. (See Figure 13.)
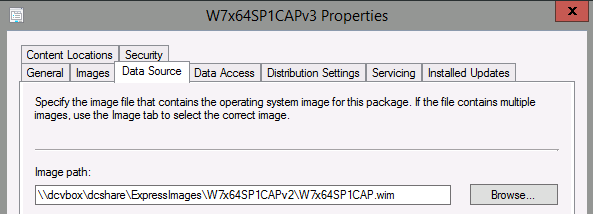
Figure 13. - Select Data Source and make note of the location of the image WIM file
- Mount the Windows 7 image and integrate the NVMe fixes:
- DISM /mount-wim /wimfile:c:\dcshare\ExpressImages\W7x64SP1CAPv2\W7x64SP1CAP.wim /index:1 /mountdir:c:\dcshare\temp
- DISM /image:c:\dcshare\temp /add-package /packagepath:c:\dcshare\nvmew7fix
- DISM /image:c:\dcshare\temp /add-package /packagepath:c:\dcshare\nvmew7fix2
- DISM /unmount-wim /mountdir:c:\dcshare\temp /commit
- Go to Images tab under the Windows 7 image.
- Click Reload.
- Update the Distribution Point for the image.
If you are having trouble imaging systems using USB-C adapters such as the Ethernet dongle or WD15 dock, it is suggested that the RealTek 10.9 driver be added to the boot image for proper functionality of the USB-C hardware:
RealTek 10.9 for Windows 10 PE  should be added to the boot image (versions 10.1, 10.5, and 10.6 should be removed)
SCCM recommended configuration for USB-C equipped systems:
SCCM 2012 Version 1606
Console: 5.0.8412.1307
Site: 5.0.8412.1000
Boot Image: Windows 10 10.0.14393.0
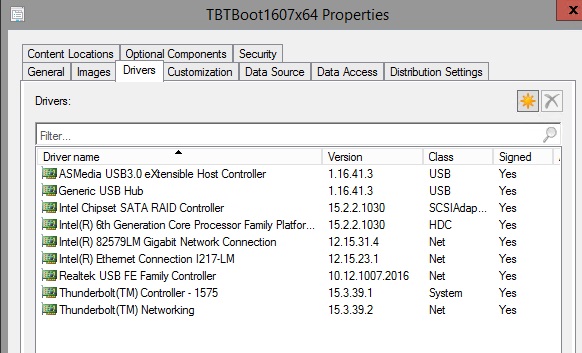
Boot Image Drivers:
ASMedia USB 3.0 eXtensible Host Controller 1.16.41.3
Generic USB Hub 1.16.41.3
Intel Chipset SATA RAID Controller 15.2.2.1030
Intel(R) 6th Generation Core Processor Family Platform AHCI 15.2.2.1030
Intel(R) 82579LM Gigabit Network Connection 12.15.31.4
Intel(R) Ethernet Connection I217-LM 15.15.23.1
Realtek USB FE Family Controller 10.12.1007.2016
Thunderbolt (TM) Controller - 1575 15.3.39.1
Thunderbolt (TM) Networking 15.3.39.1
Article Properties
Last Published Date
20 Nov 2020
Version
2
Article Type
Solution