Camera Does Not Work in Windows: Laptop or USB Webcams
In today's digital age, webcams have become indispensable for staying connected, whether it's for video calls, online classes, or virtual meetings. But what happens when your Dell laptop, USB webcam, or built-in monitor webcam stops working? Don't worry! This article provides simple steps to troubleshoot and resolve common camera issues, ensuring you're back online in no time.

Common Symptoms of Webcam Issues
Webcams may stop working for many reasons, including restrictive privacy settings, driver issues, issues with the app you're using, or configuration issues. Here are some common symptoms of camera problems:
- The webcam light is on, but no image appears.
- Your computer doesn't recognize the camera in Device Manager or apps.
- Error messages such as "Camera not found" or "No input device detected" may appear in apps.
- The video feed appears out of focus, pixelated, or dull.
How to Fix a Camera Not Working
Follow these steps, in the order, to troubleshoot your webcam and get it working again.
Checking Camera Connection
If you're using an external USB webcam, the first step is to ensure that it's properly connected.
- If you're using an external USB camera, ensure its securely connected to the USB port.
- For cameras integrated to monitors, ensure the USB upstream cable is connected between the monitor and your computer.
- Try a different USB port.
- If the USB camera works on a different port, try to fix USB port problems.
If the camera doesn't work on a different port, proceed to the next step.
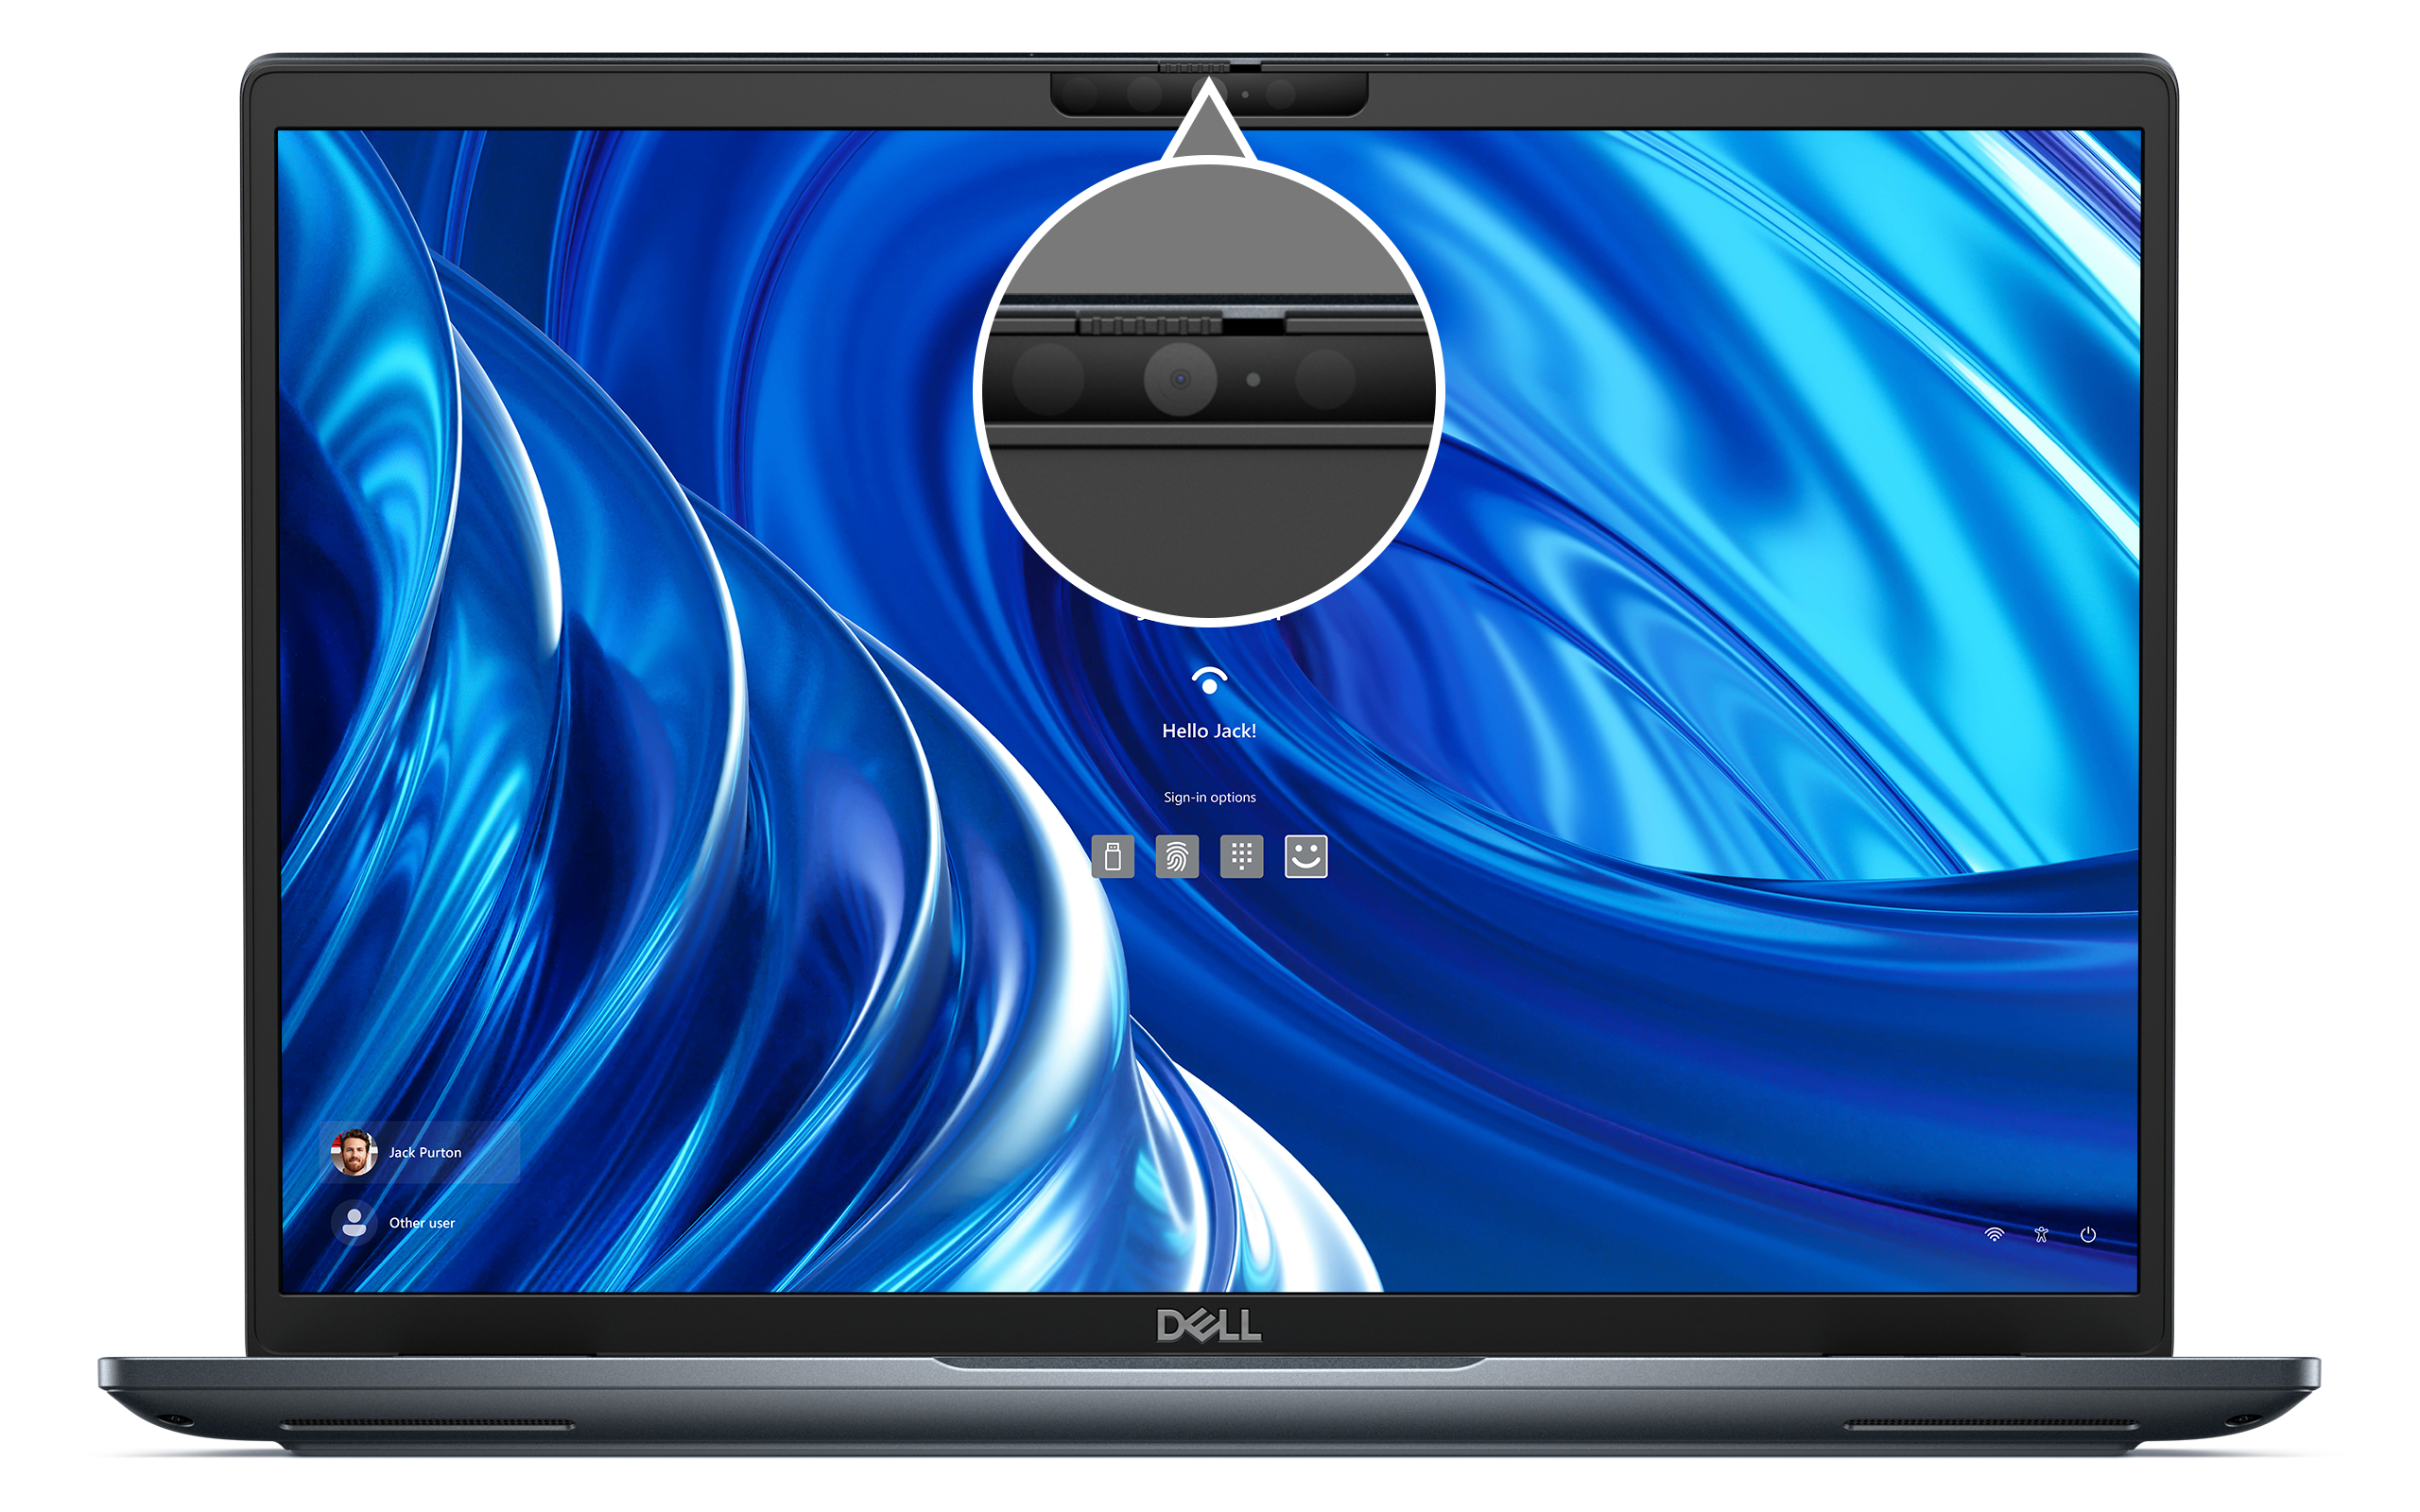
Checking Privacy Shutter
Many laptops and USB webcams come equipped with a privacy shutter that physically blocks the camera lens.
- Locate the shutter or privacy cover on your webcam.
- If you find one, make sure it's in the open position.
- After adjusting the shutter, try using your webcam again.
If the camera issue persists, proceed to the next step.
Allowing Access to the Camera
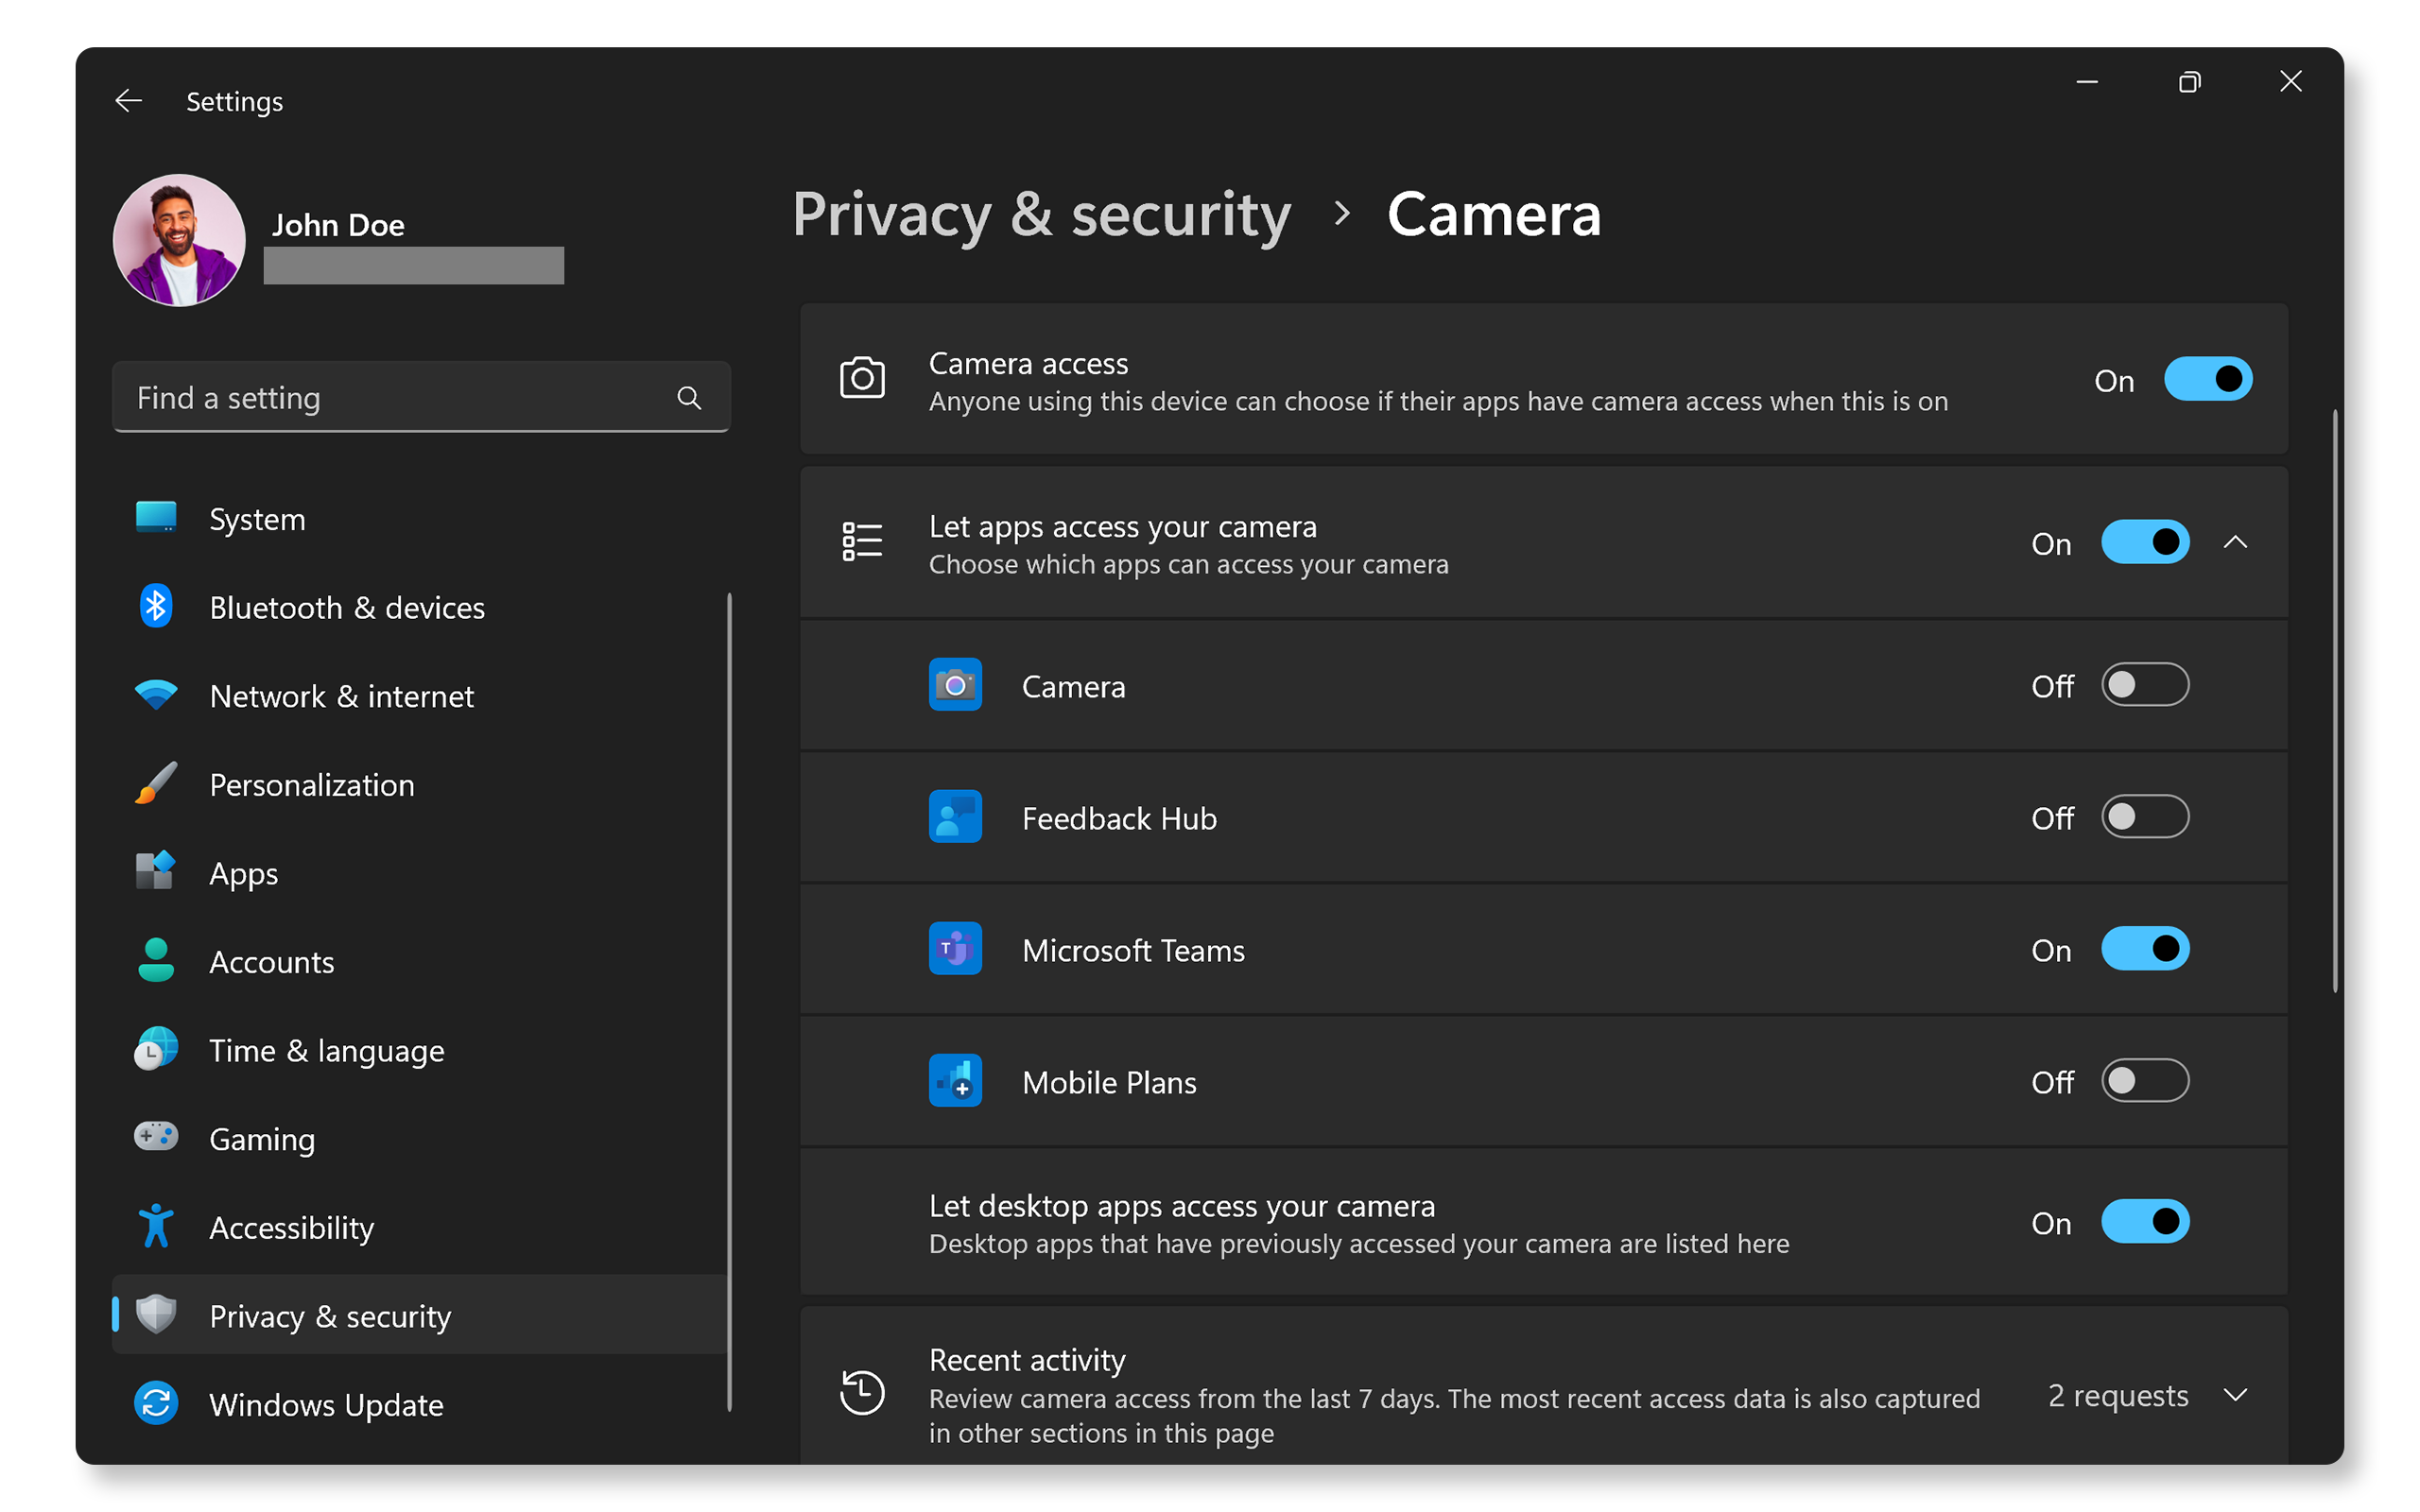
Windows has privacy settings that may restrict apps from accessing your camera. Ensuring these settings are configured correctly is important for allowing apps to use your webcam.
- Go to Start > Settings > Privacy > Camera.
- Enable the option labeled Allow apps to access your camera.
- Scroll down to the list of apps and make sure that the specific app you want to use (such as Teams, Zoom, Skype, etc.) has permission enabled.
If the camera still doesn't work, proceed to the next step.
Enabling the Camera in BIOS
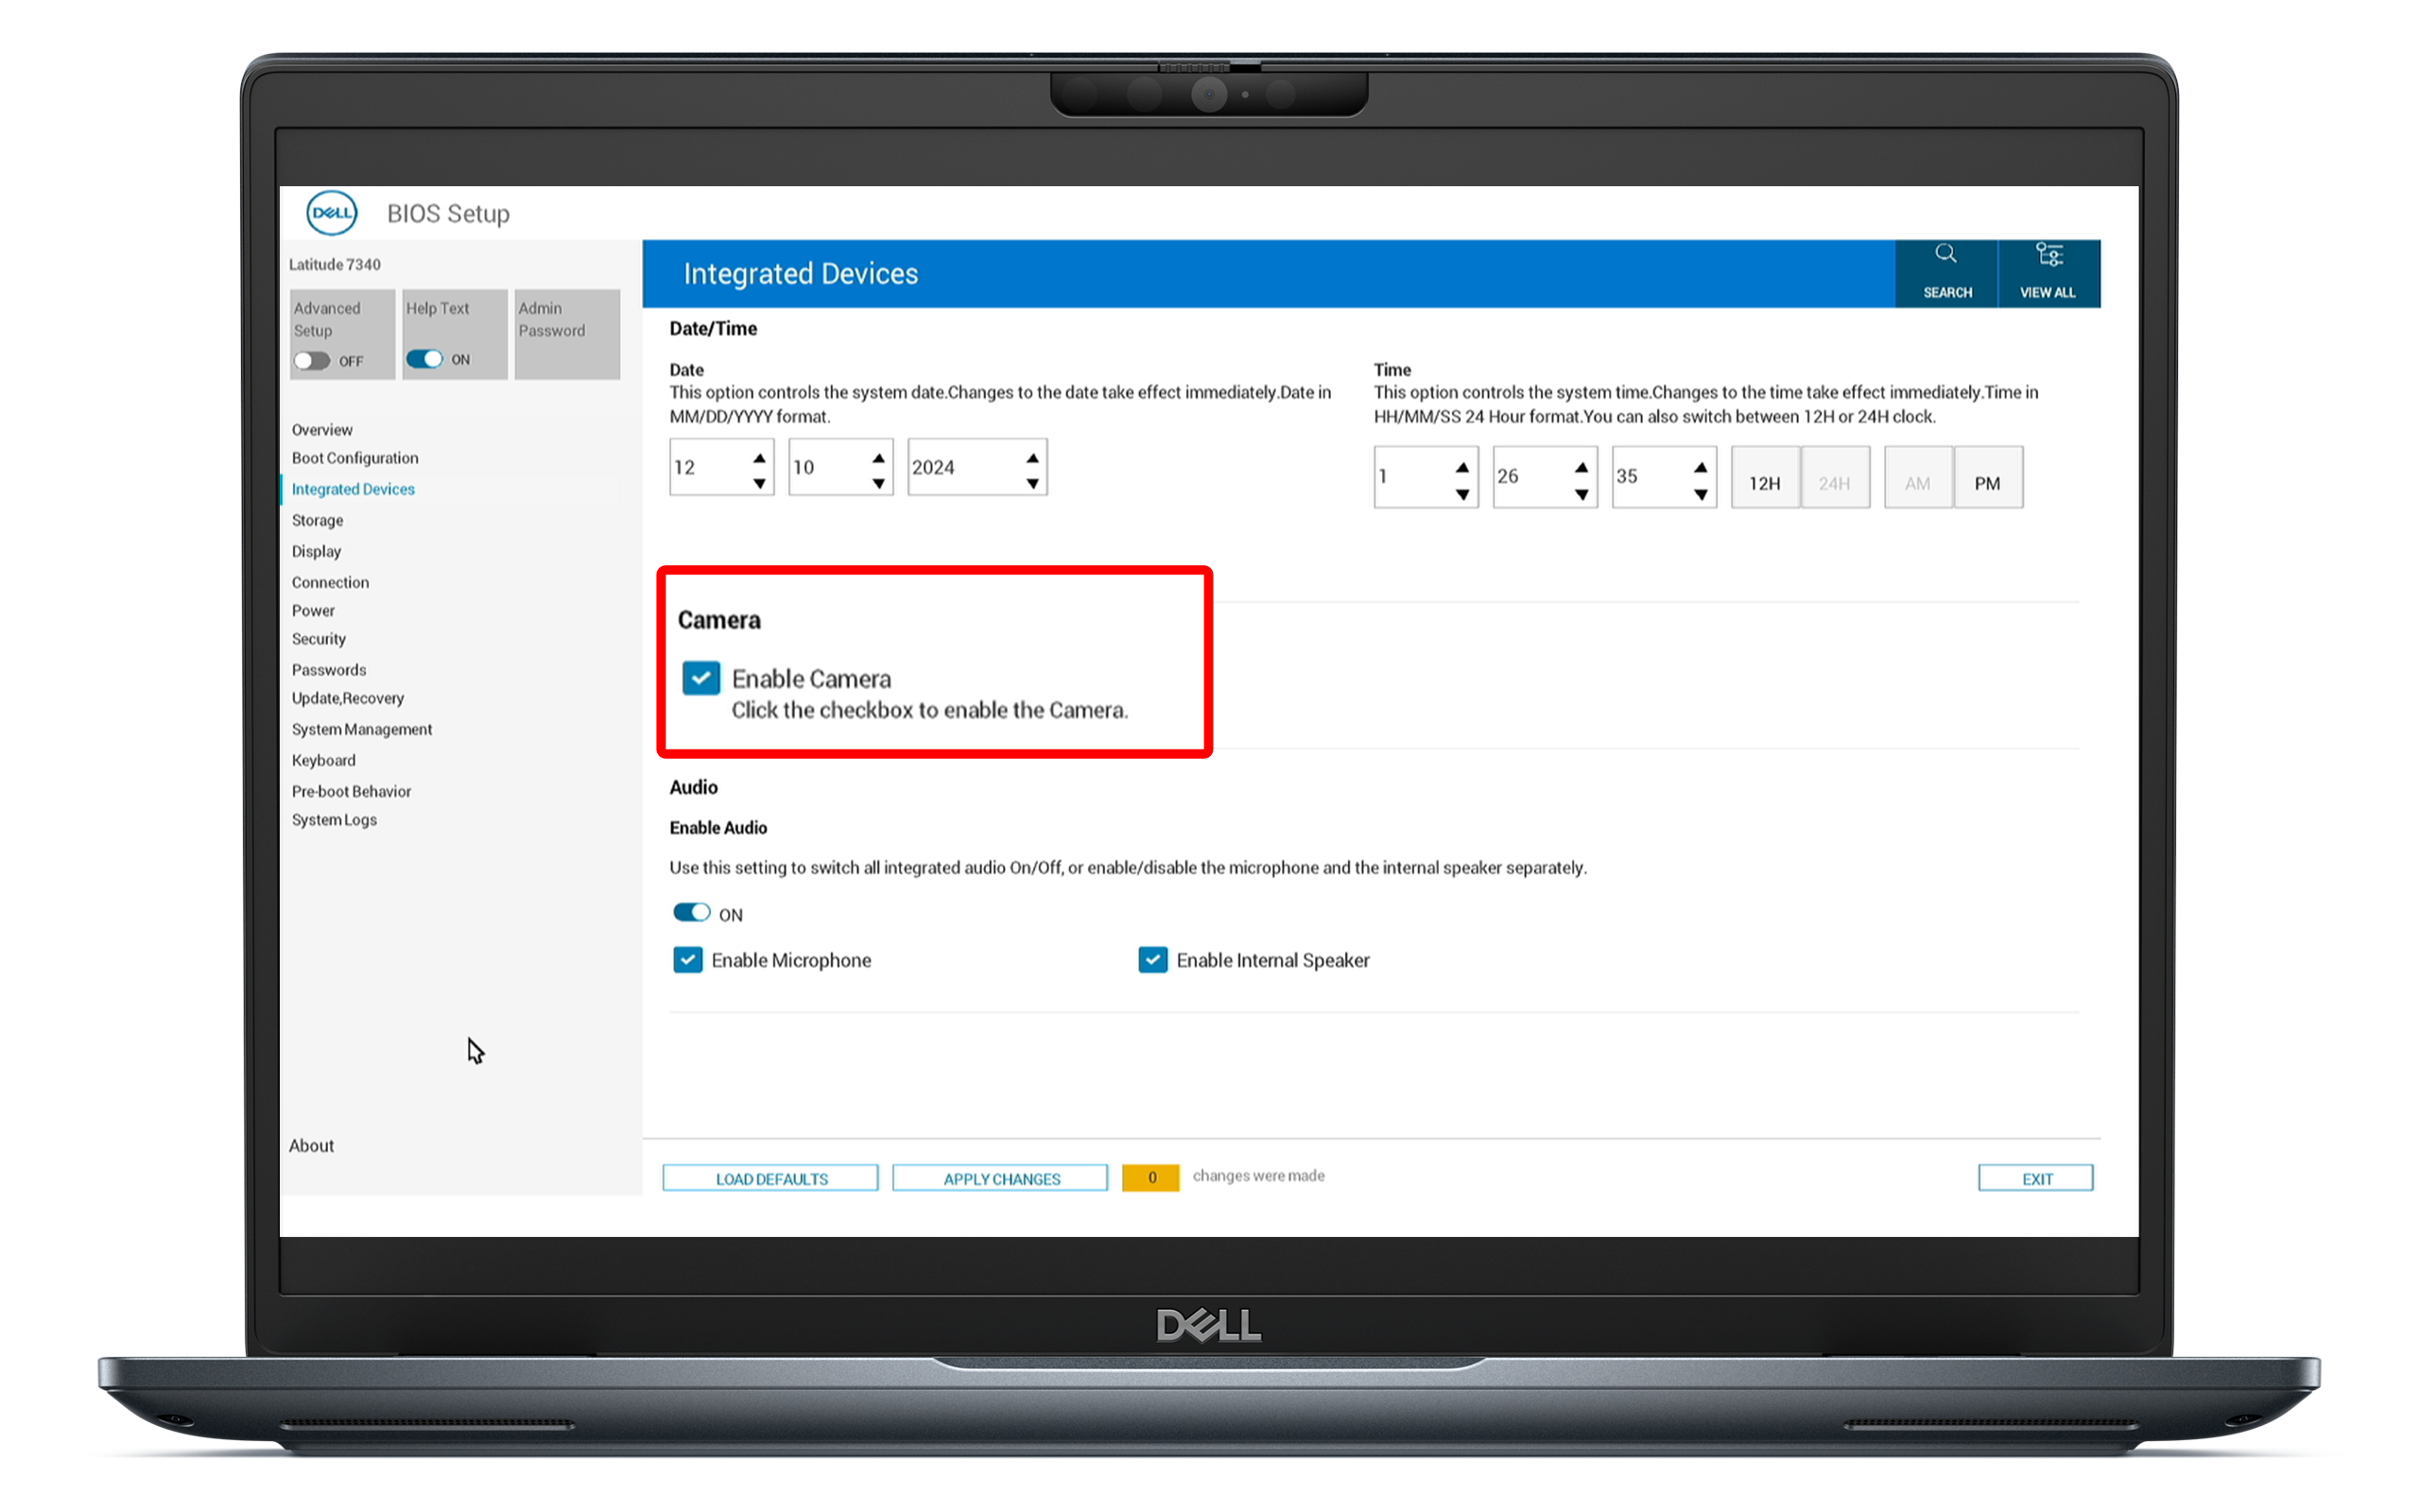
For computers with built-in camera, it's important to ensure that the camera is enabled in the BIOS settings. If it's not, it may prevent the operating system from recognizing the hardware.
- Restart your computer.
- Press the F2 key repeatedly until the BIOS setup screen appears.
- Locate the Enable Camera option under the Integrated Devices section.
- Make sure the camera is enabled.
- Save changes and exit the BIOS.
If the camera is enabled and the issue persists, proceed to the next step.
Testing Your Camera
Verifying that your webcam works using another app such as Windows' built-in Camera app helps determine if the issue is with the camera itself or specific apps.
- Search for Camera in the Start menu and open the app.
- Check if you get a video feed from your webcam.
- If the webcam works, the issue may be limited to a specific app.
If the webcam doesn't work, proceed to the next step.
Checking for Windows Updates
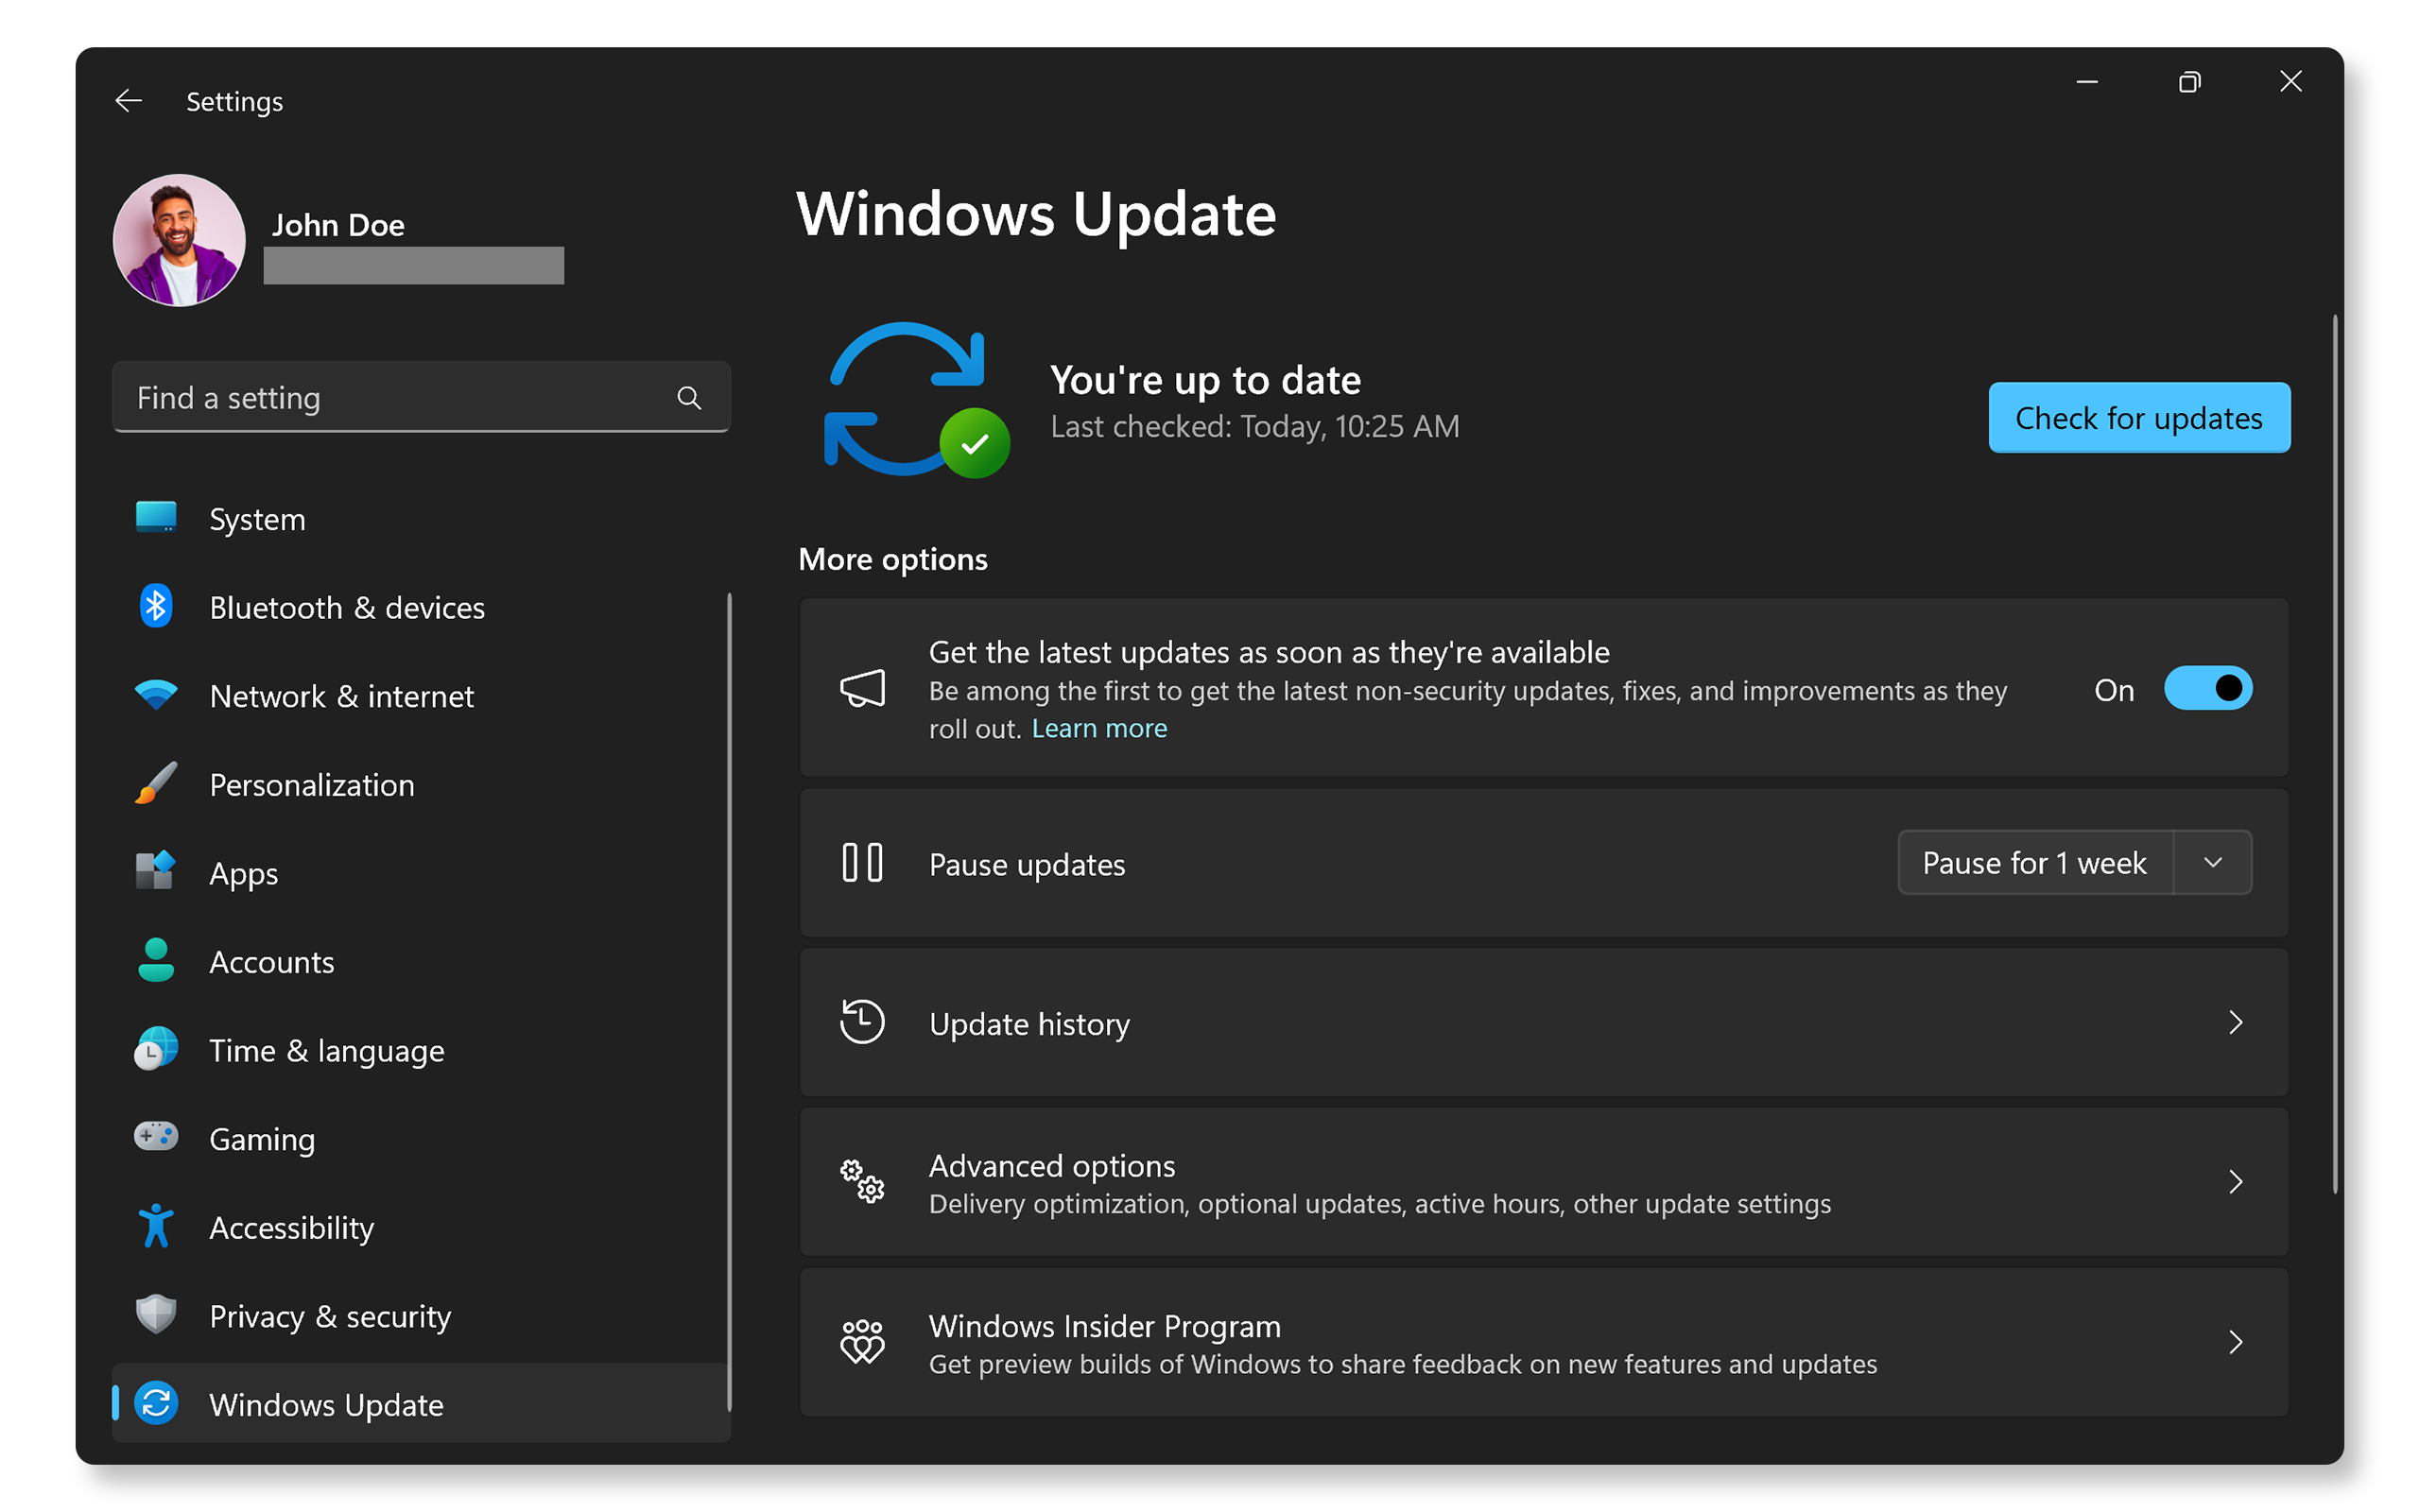
Keeping your operating system updated ensures you have the latest features and fixes. To check for Windows updates:
- Go to Start > Settings > Windows Update. Open Windows Update settings.
- Select Check for updates and install the available updates.
Running the Camera Troubleshooter
The camera troubleshooter can automatically resolve camera issues.
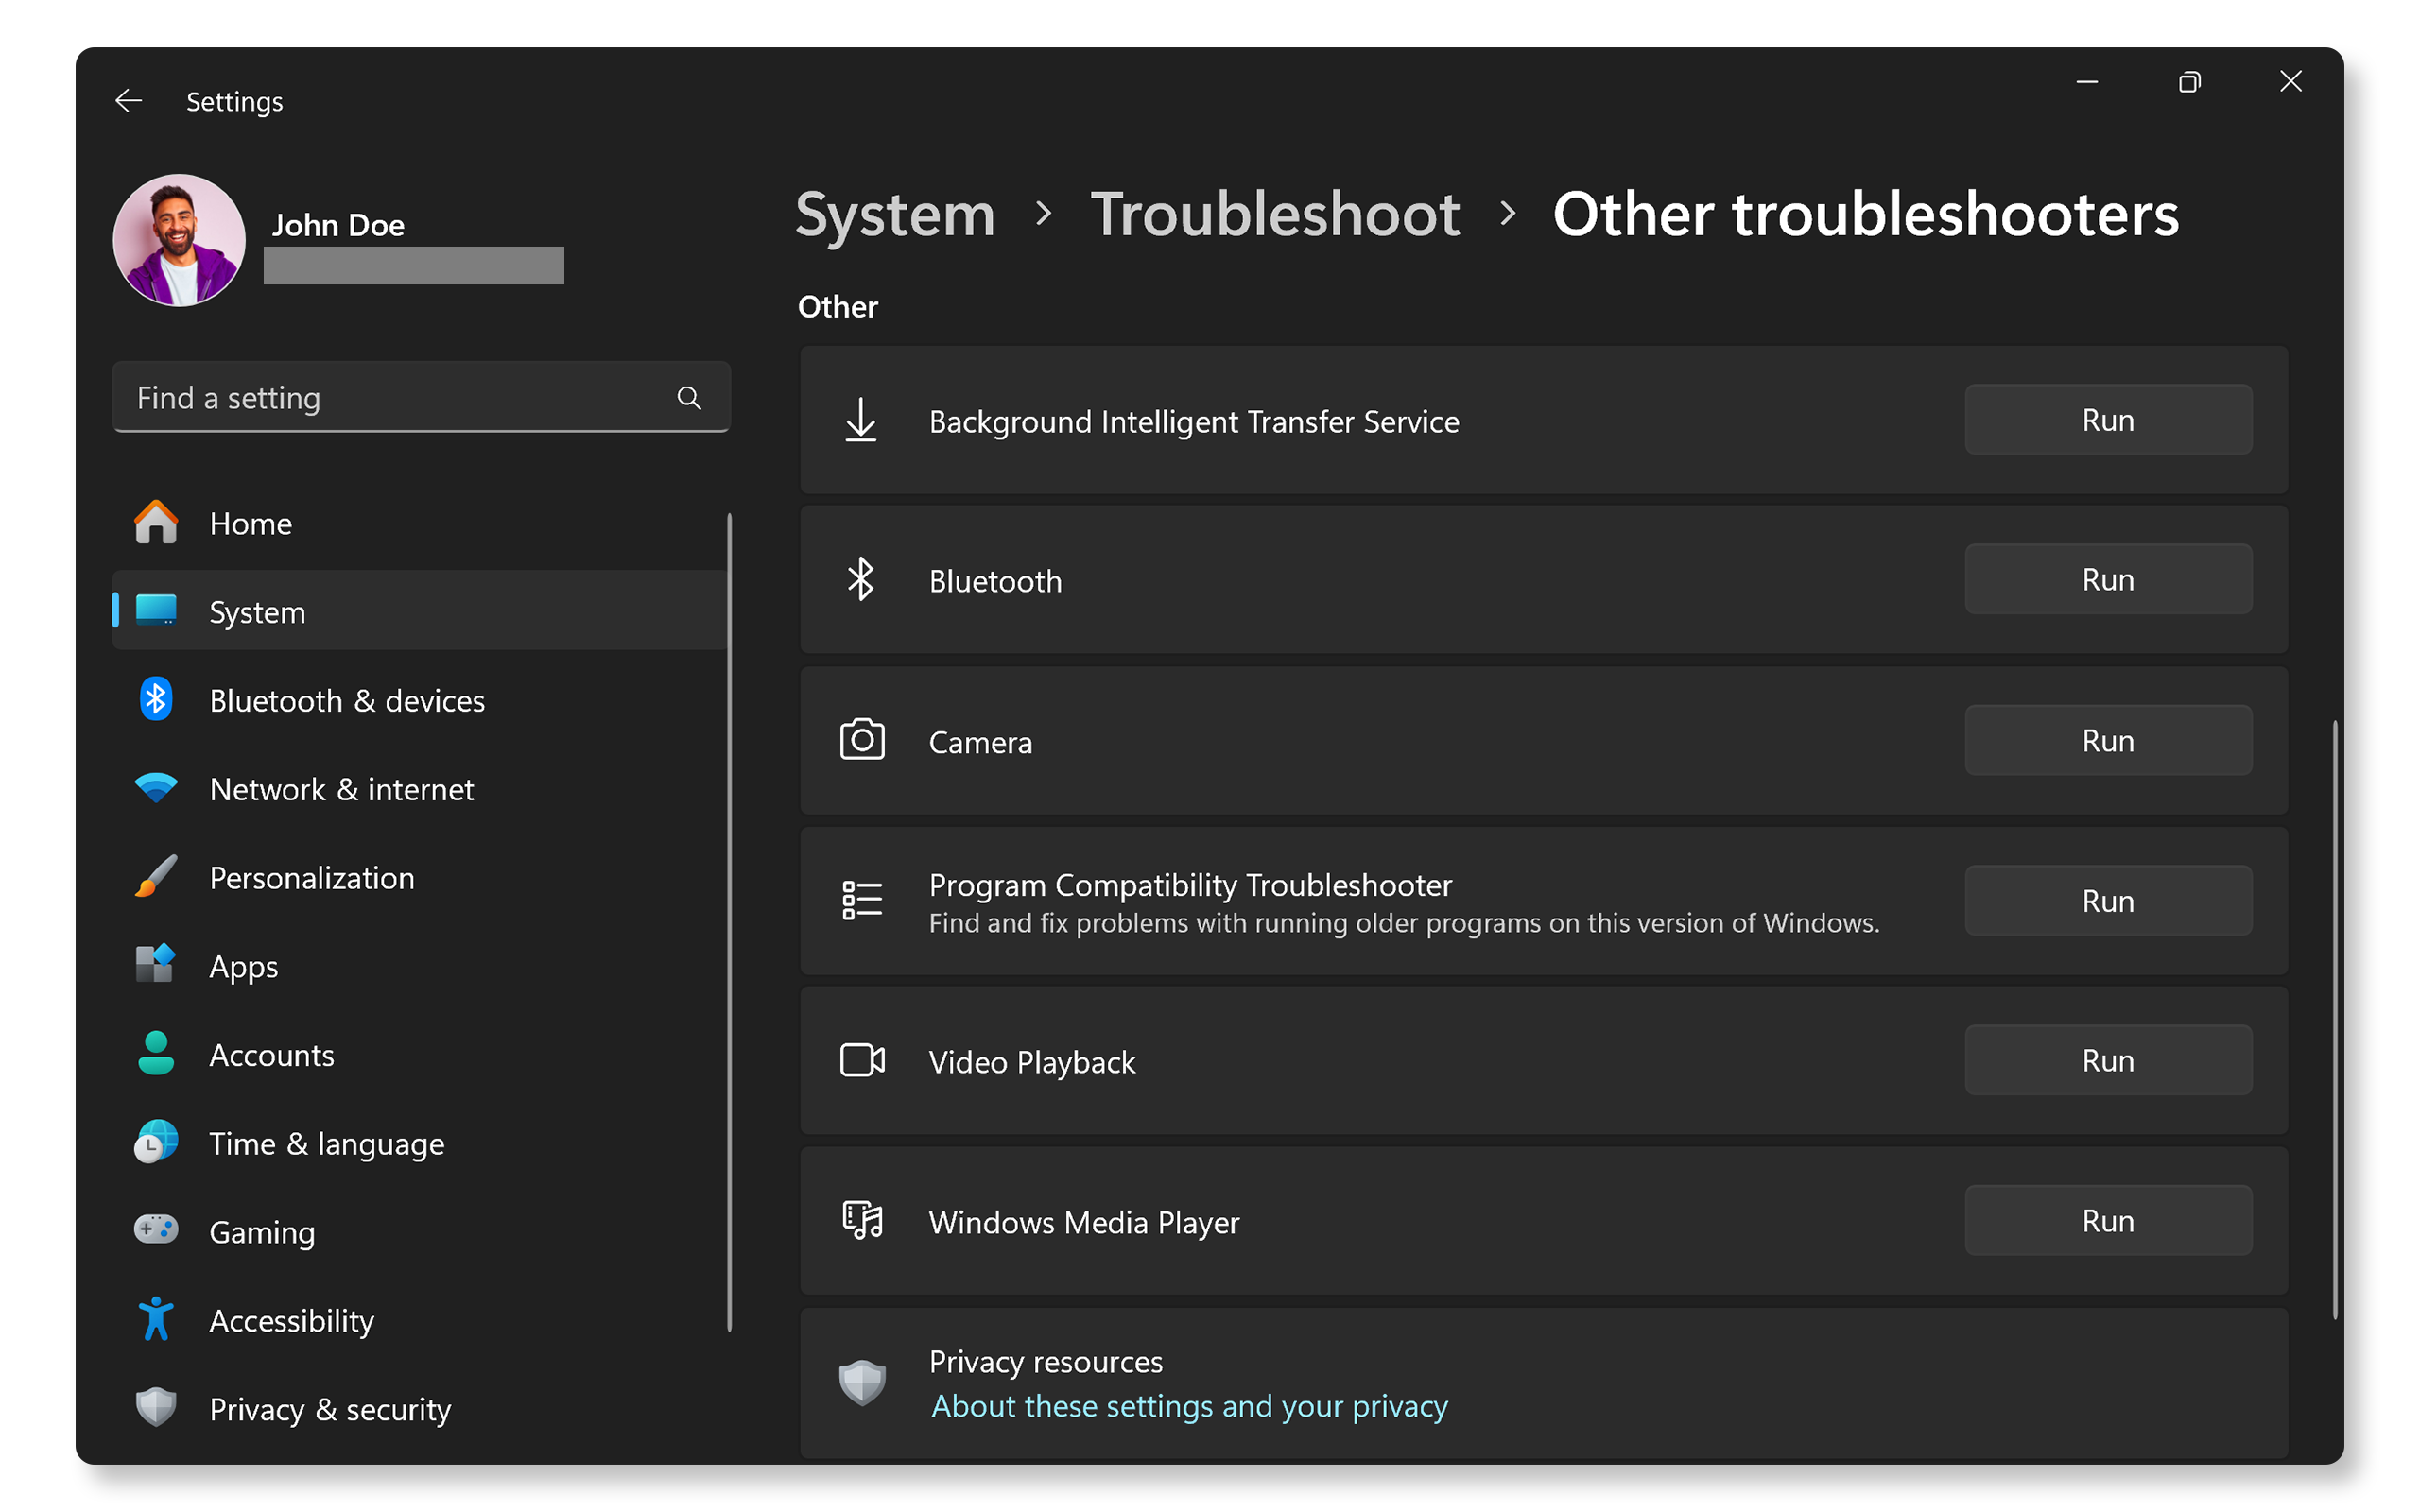
- Go to Start > Settings > System > Troubleshoot. Open Windows troubleshooter settings.
- Select Other troubleshooters.
- Locate the Camera section and click Run to start the troubleshooter.
If the troubleshooter can't resolve the issue, proceed to the next step.
Updating Drivers and BIOS
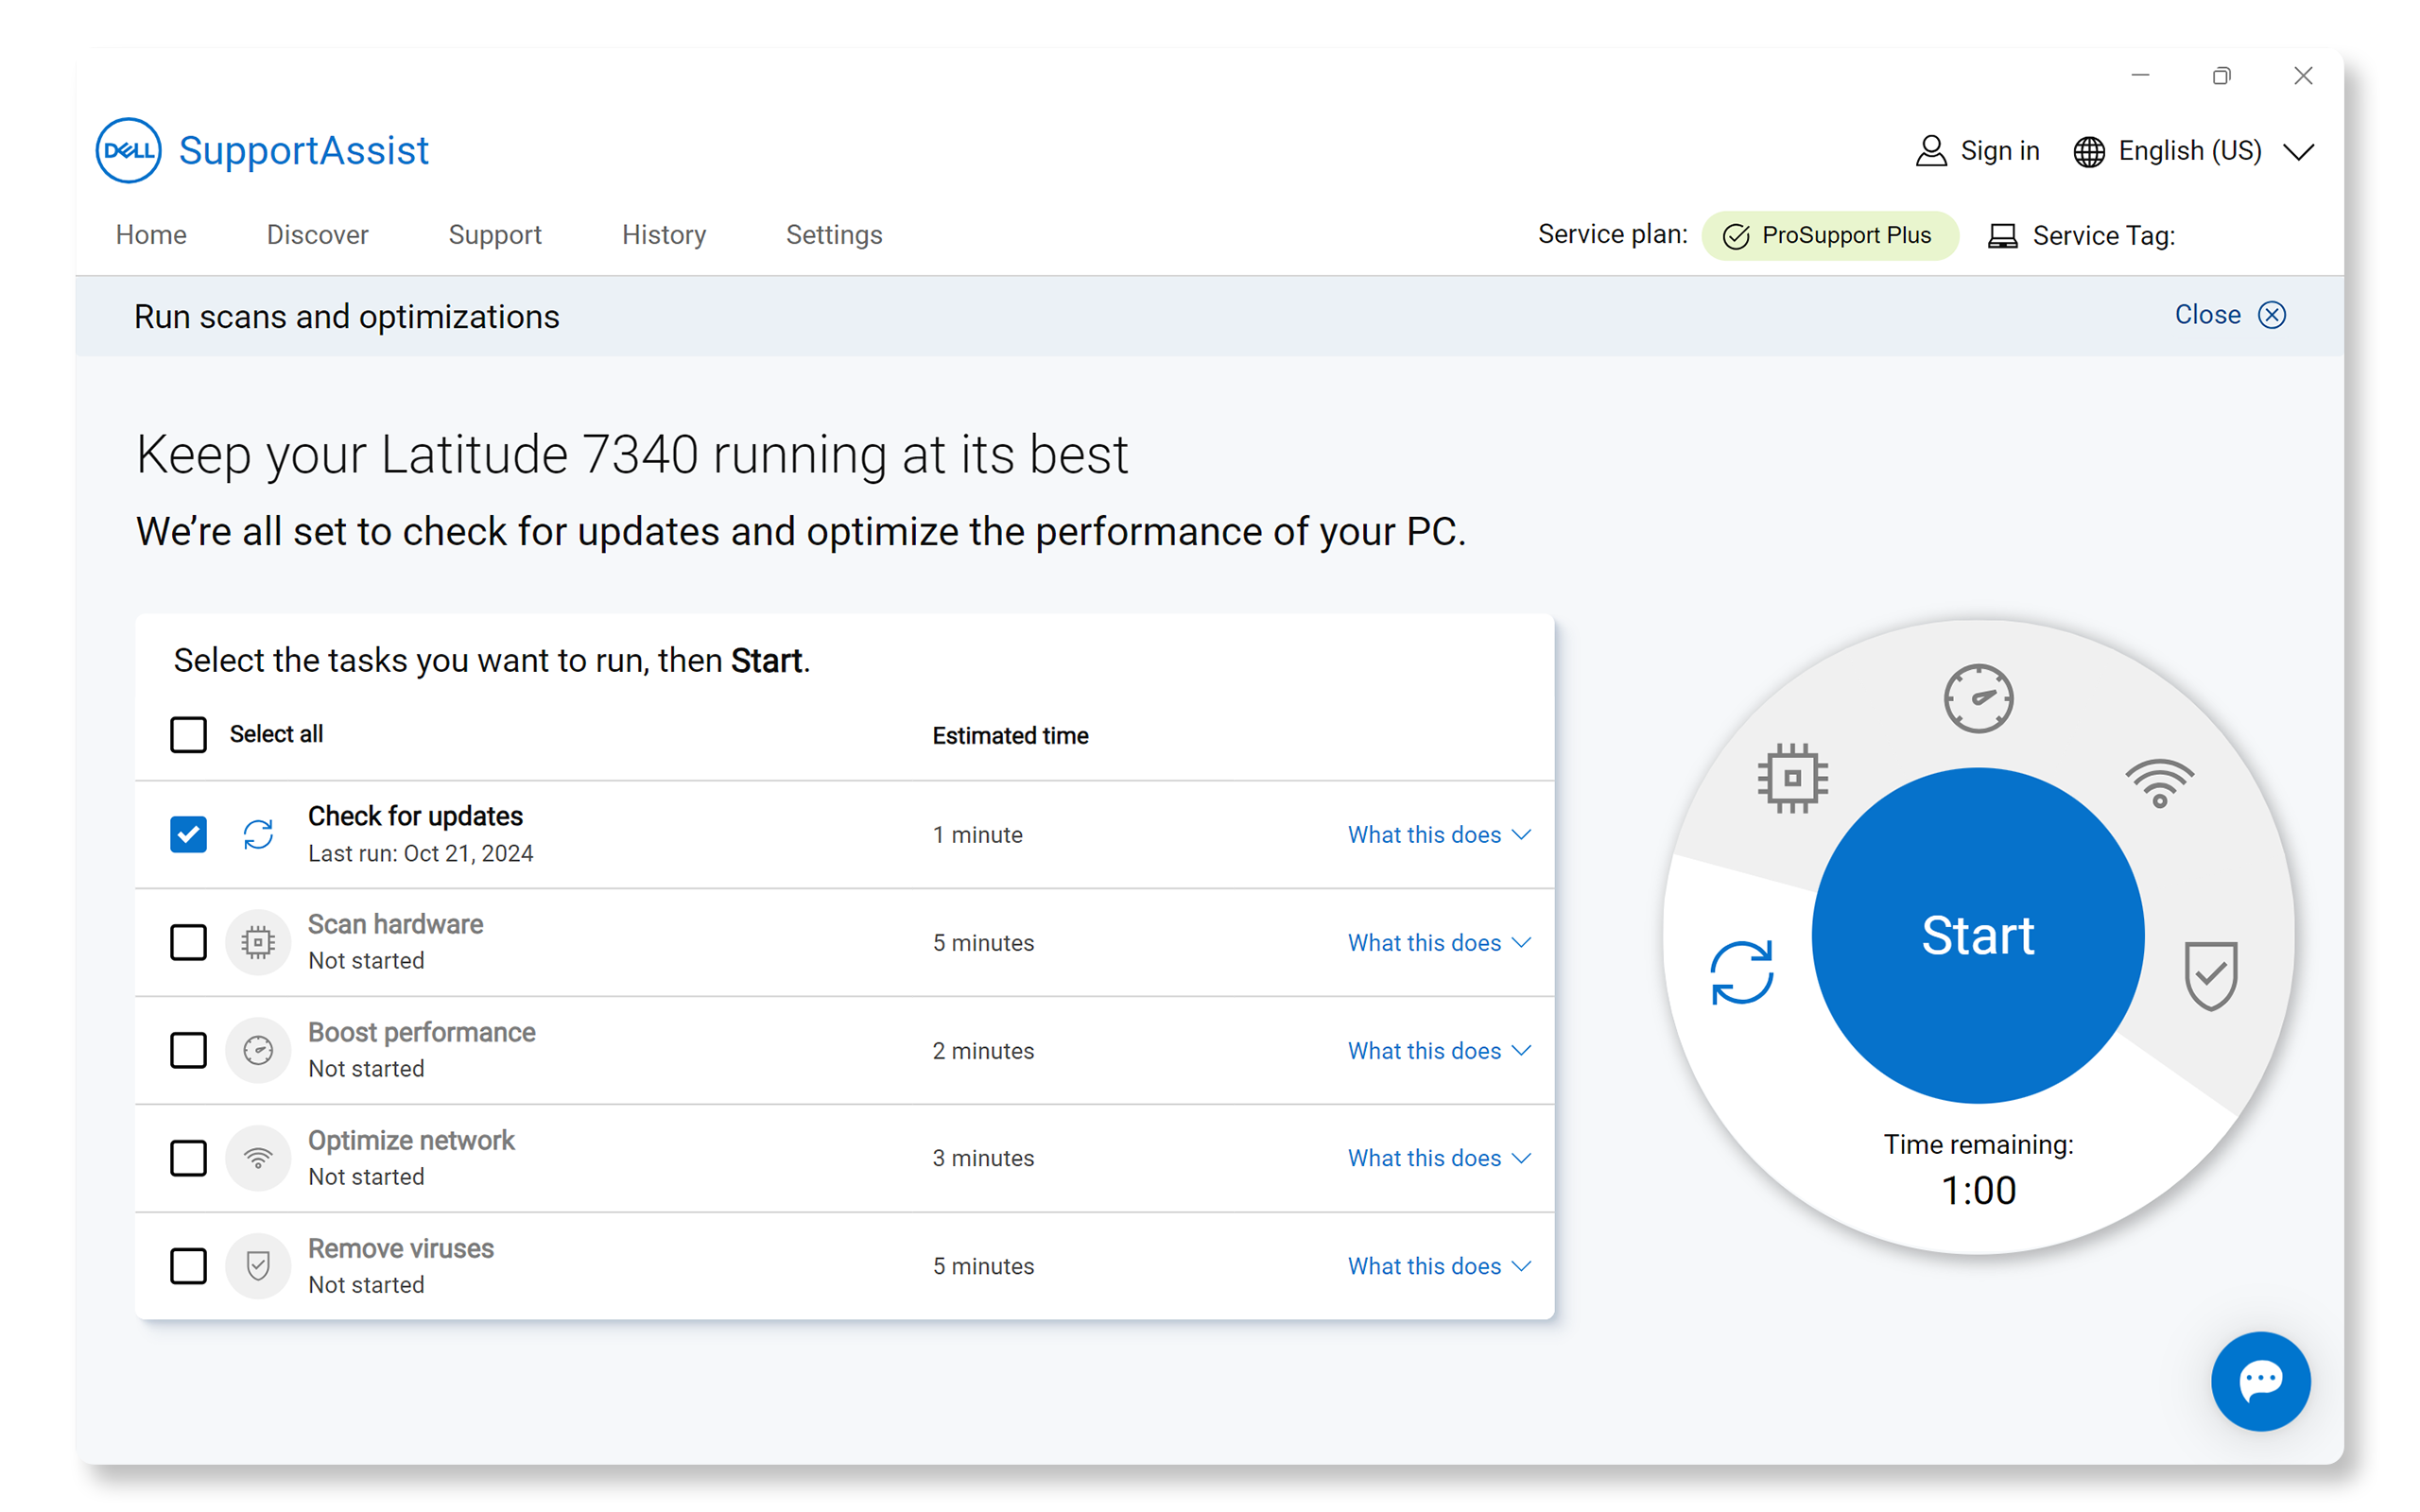
Outdated drivers and BIOS can often lead to functionality issues with hardware components like cameras. SupportAssist is Dell's automated tool that scans your Windows computer for driver and firmware updates, downloads, and installs them.
Using SupportAssist
- Search for SupportAssist in the Start menu and open the app.
- On the Home tab, select Update Software.
- Click Start to check for driver and BIOS updates.
- Follow the on-screen instructions to complete the installation and restart your computer if prompted.
If you don't have SupportAssist, refer to our driver update guide for alternative methods to download and install Dell drivers.
If the camera still doesn't work, try some additional steps to resolve camera problems.
Frequently Asked Questions (FAQs)
Here are some answers to common questions that users ask about webcam or camera issues.
1. Why does my camera app say, "No camera found"?
- This could indicate a driver issue or that Windows does not recognize your camera due to connection problems or disabled settings.
- Follow the steps in the article to resolve camera issues.
2. Why is the camera not listed in my BIOS settings?
- The camera option in BIOS is only available for devices with built-in cameras, such as laptops or all-in-one computers.
- Desktop computers, which use external USB webcams, do not have this option in the BIOS.
3. How do I update my webcam drivers?
- Most cameras or webcams use plug-and-play technology, they don't require any additional drivers to be installed manually. The operating system automatically detects and installs the necessary drivers as soon as you start your computer.
- For external USB cameras to work, USB 3.0 or Thunderbolt drivers are required. Use Dell's automated tools like SupportAssist or Dell Command | Update to download and install these drivers on your Dell computer.
4. Why is my camera image blurry?
- Ensure proper lighting.
- Avoid backlight, do not sit with a light source behind you.
- Clean the camera lens with a soft microfiber cloth.
5. What should I do if my webcam freezes during use?
- Restart your computer.
- Close unnecessary apps as they may be using the camera or consuming system resources.
6. Can I use multiple webcams on one computer?
- Yes, you can install multiple webcams on a computer. For example, if you have a built-in camera, you can also connect a USB webcam.
- Make sure the correct camera is enabled in your apps.
- Check your app settings to select your preferred camera device.
7. What if my external USB webcam isn't recognized?
- For USB cameras such as Dell WB5023 or WB7022, ensure the USB cable is securely connected to your computer.
- For monitor-integrated cameras such as Dell P2724DEB, S2422HZ, ensure the USB upstream cable is connected between your monitor and computer.
- Try a different USB port, as a faulty USB port may cause issues.
- Update drivers and BIOS.
- Install the latest Windows updates.
8. Is there a physical shutter or lens cap for my laptop's camera?
- Not all laptops have a camera shutter, but some Dell models, like the Latitude 7340, do include a privacy shutter. Check your laptop's user manual for specifications.
9. How do I improve the video quality from my camera?
- First, ensure good lighting conditions.
- Avoid backlight, don't sit with a light source behind you.
- Adjust the camera settings in Windows:
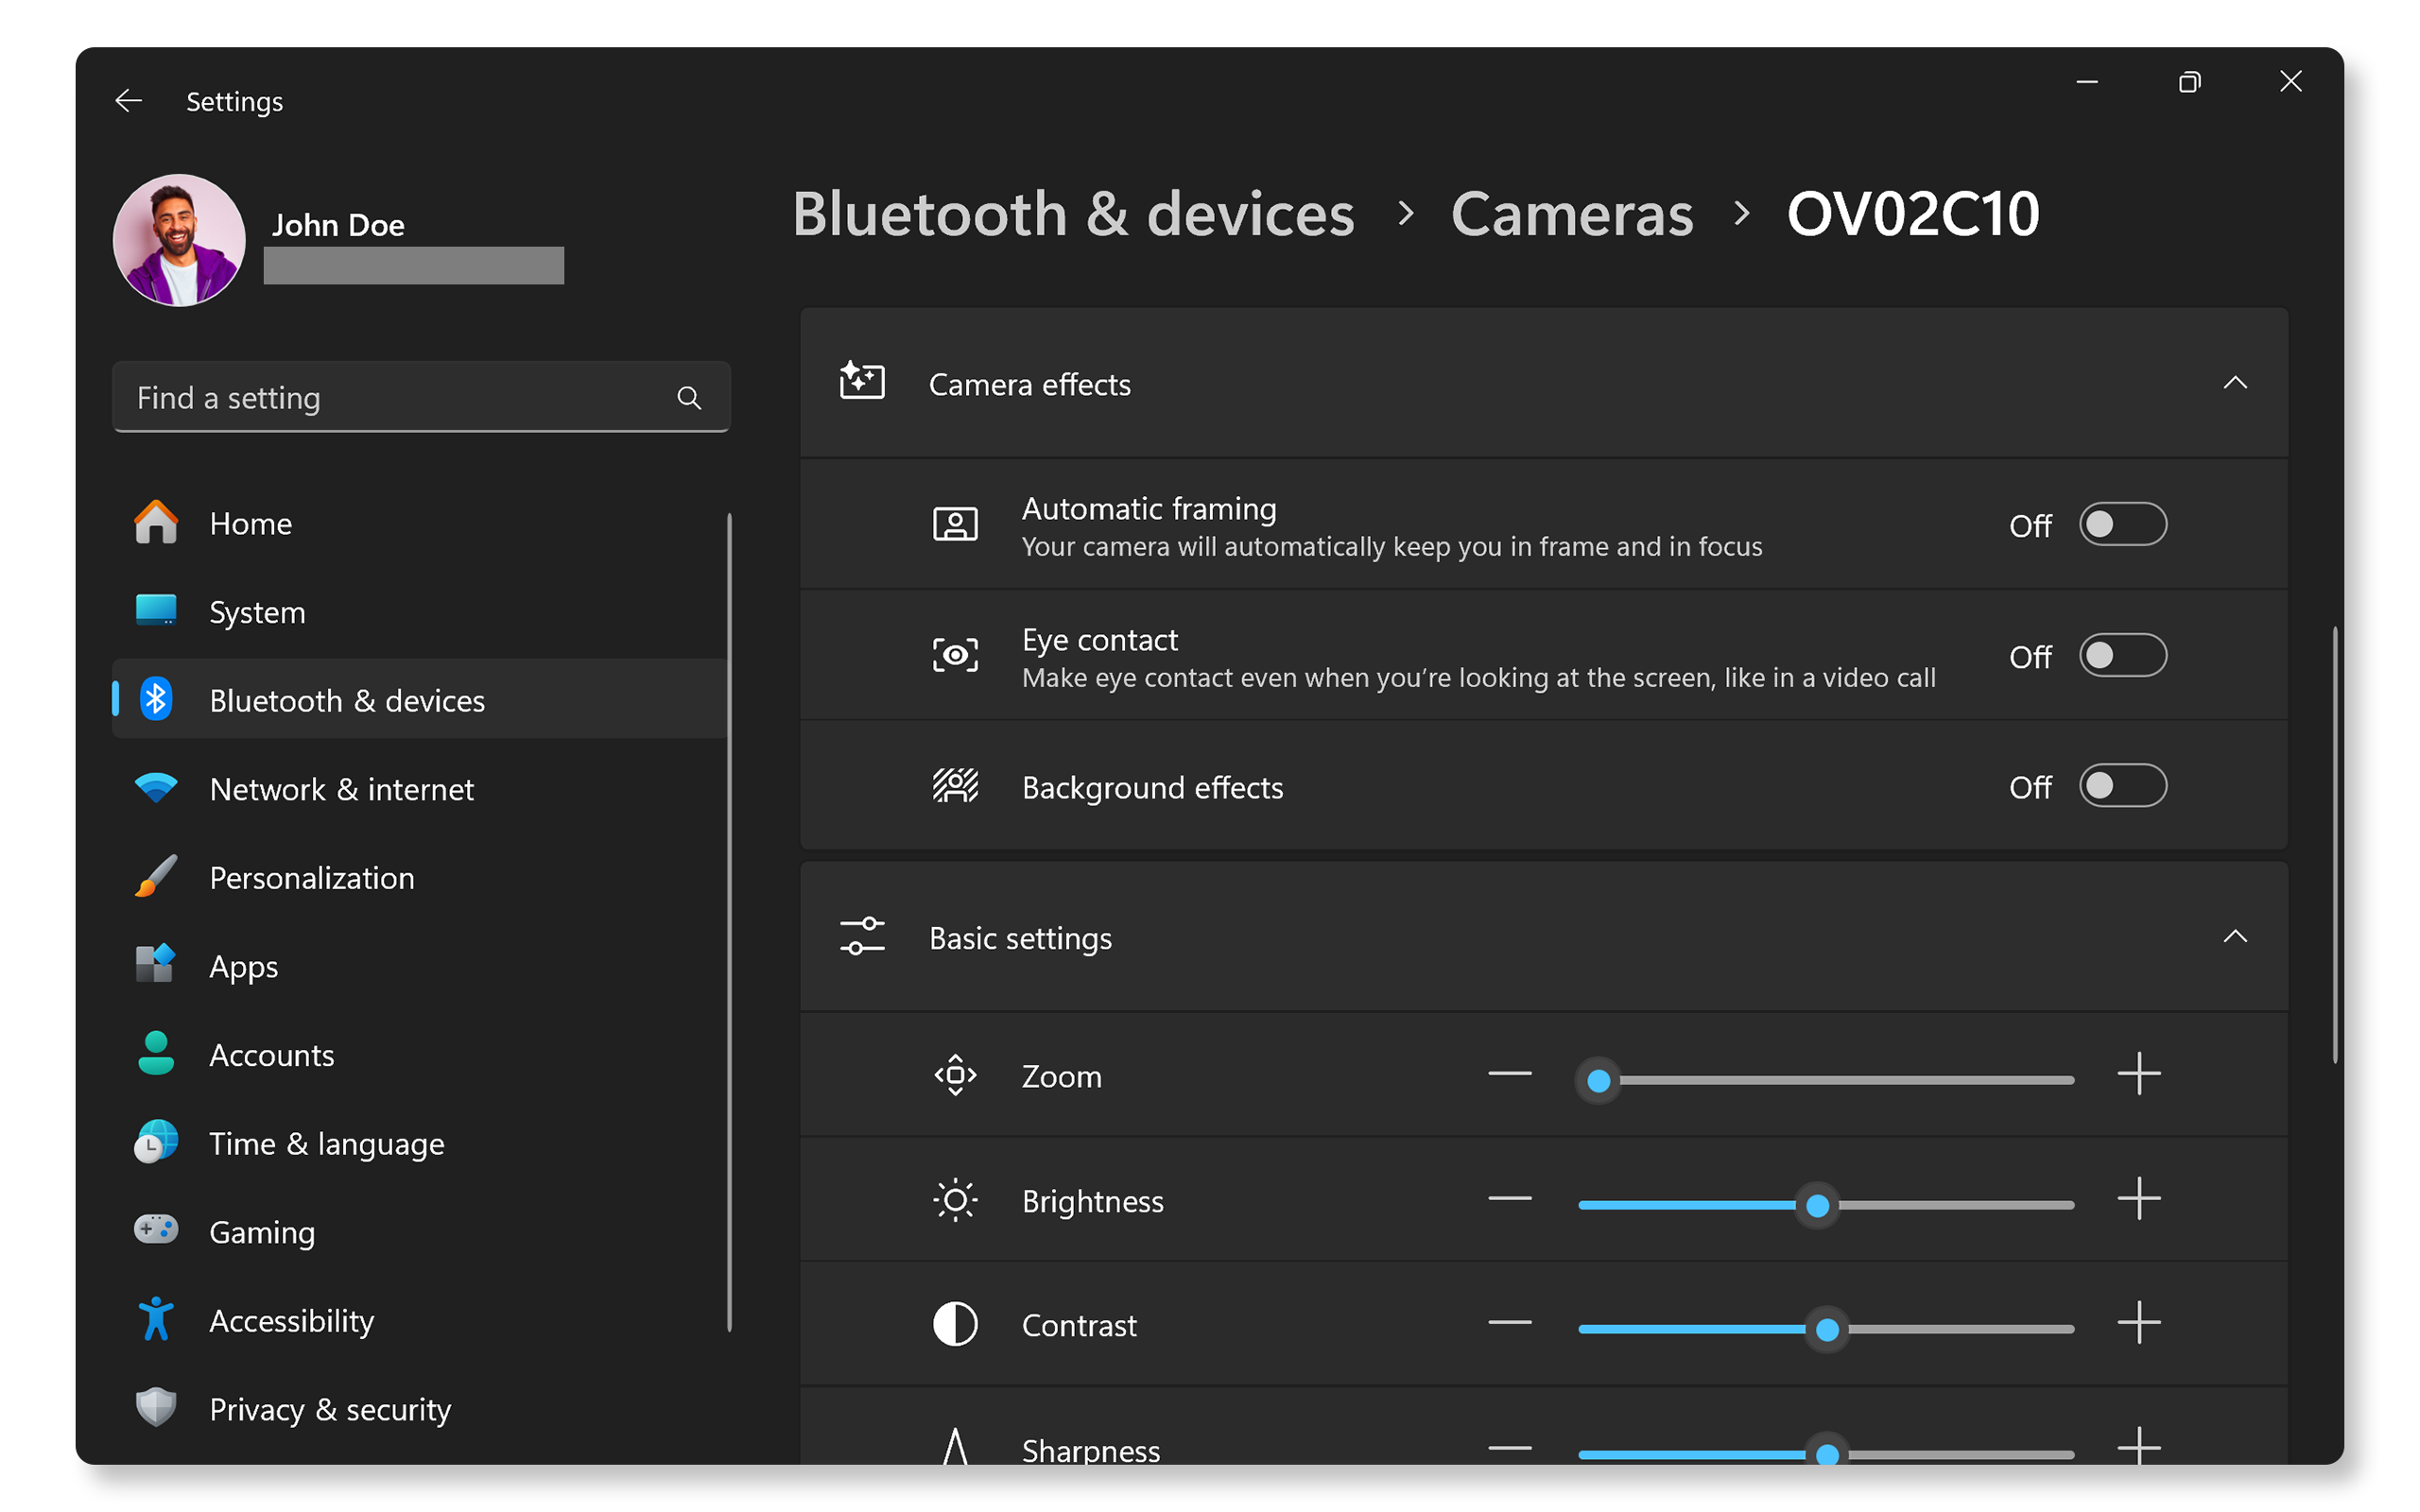
- Go to Start > Settings > Bluetooth & devices > Cameras. Open Windows camera settings.
- Under the Connected cameras section and select your camera.
- Adjust the available settings and camera effects (options may vary by device).
10. What if my built-in camera is disabled?
- Check the BIOS settings and ensure the camera is enabled.
- Use Device Manager to check if the camera is enabled.
- Right-click the Start button and select Device Manager.
- Expand Cameras.
- Right-click on your camera and select Enable device.
11. Can antivirus software block my camera?
- Yes, some security software may restrict camera access. Check your security software settings.
12. Can I use Dell webcams on macOS?
- Yes, Dell webcams such as WB3023, WB5022, WB7022 are compatible with macOS.
- Use Dell Display and Peripheral Manager to manage the webcam settings on macOS.
13. How do I uninstall and reinstall my webcam driver?
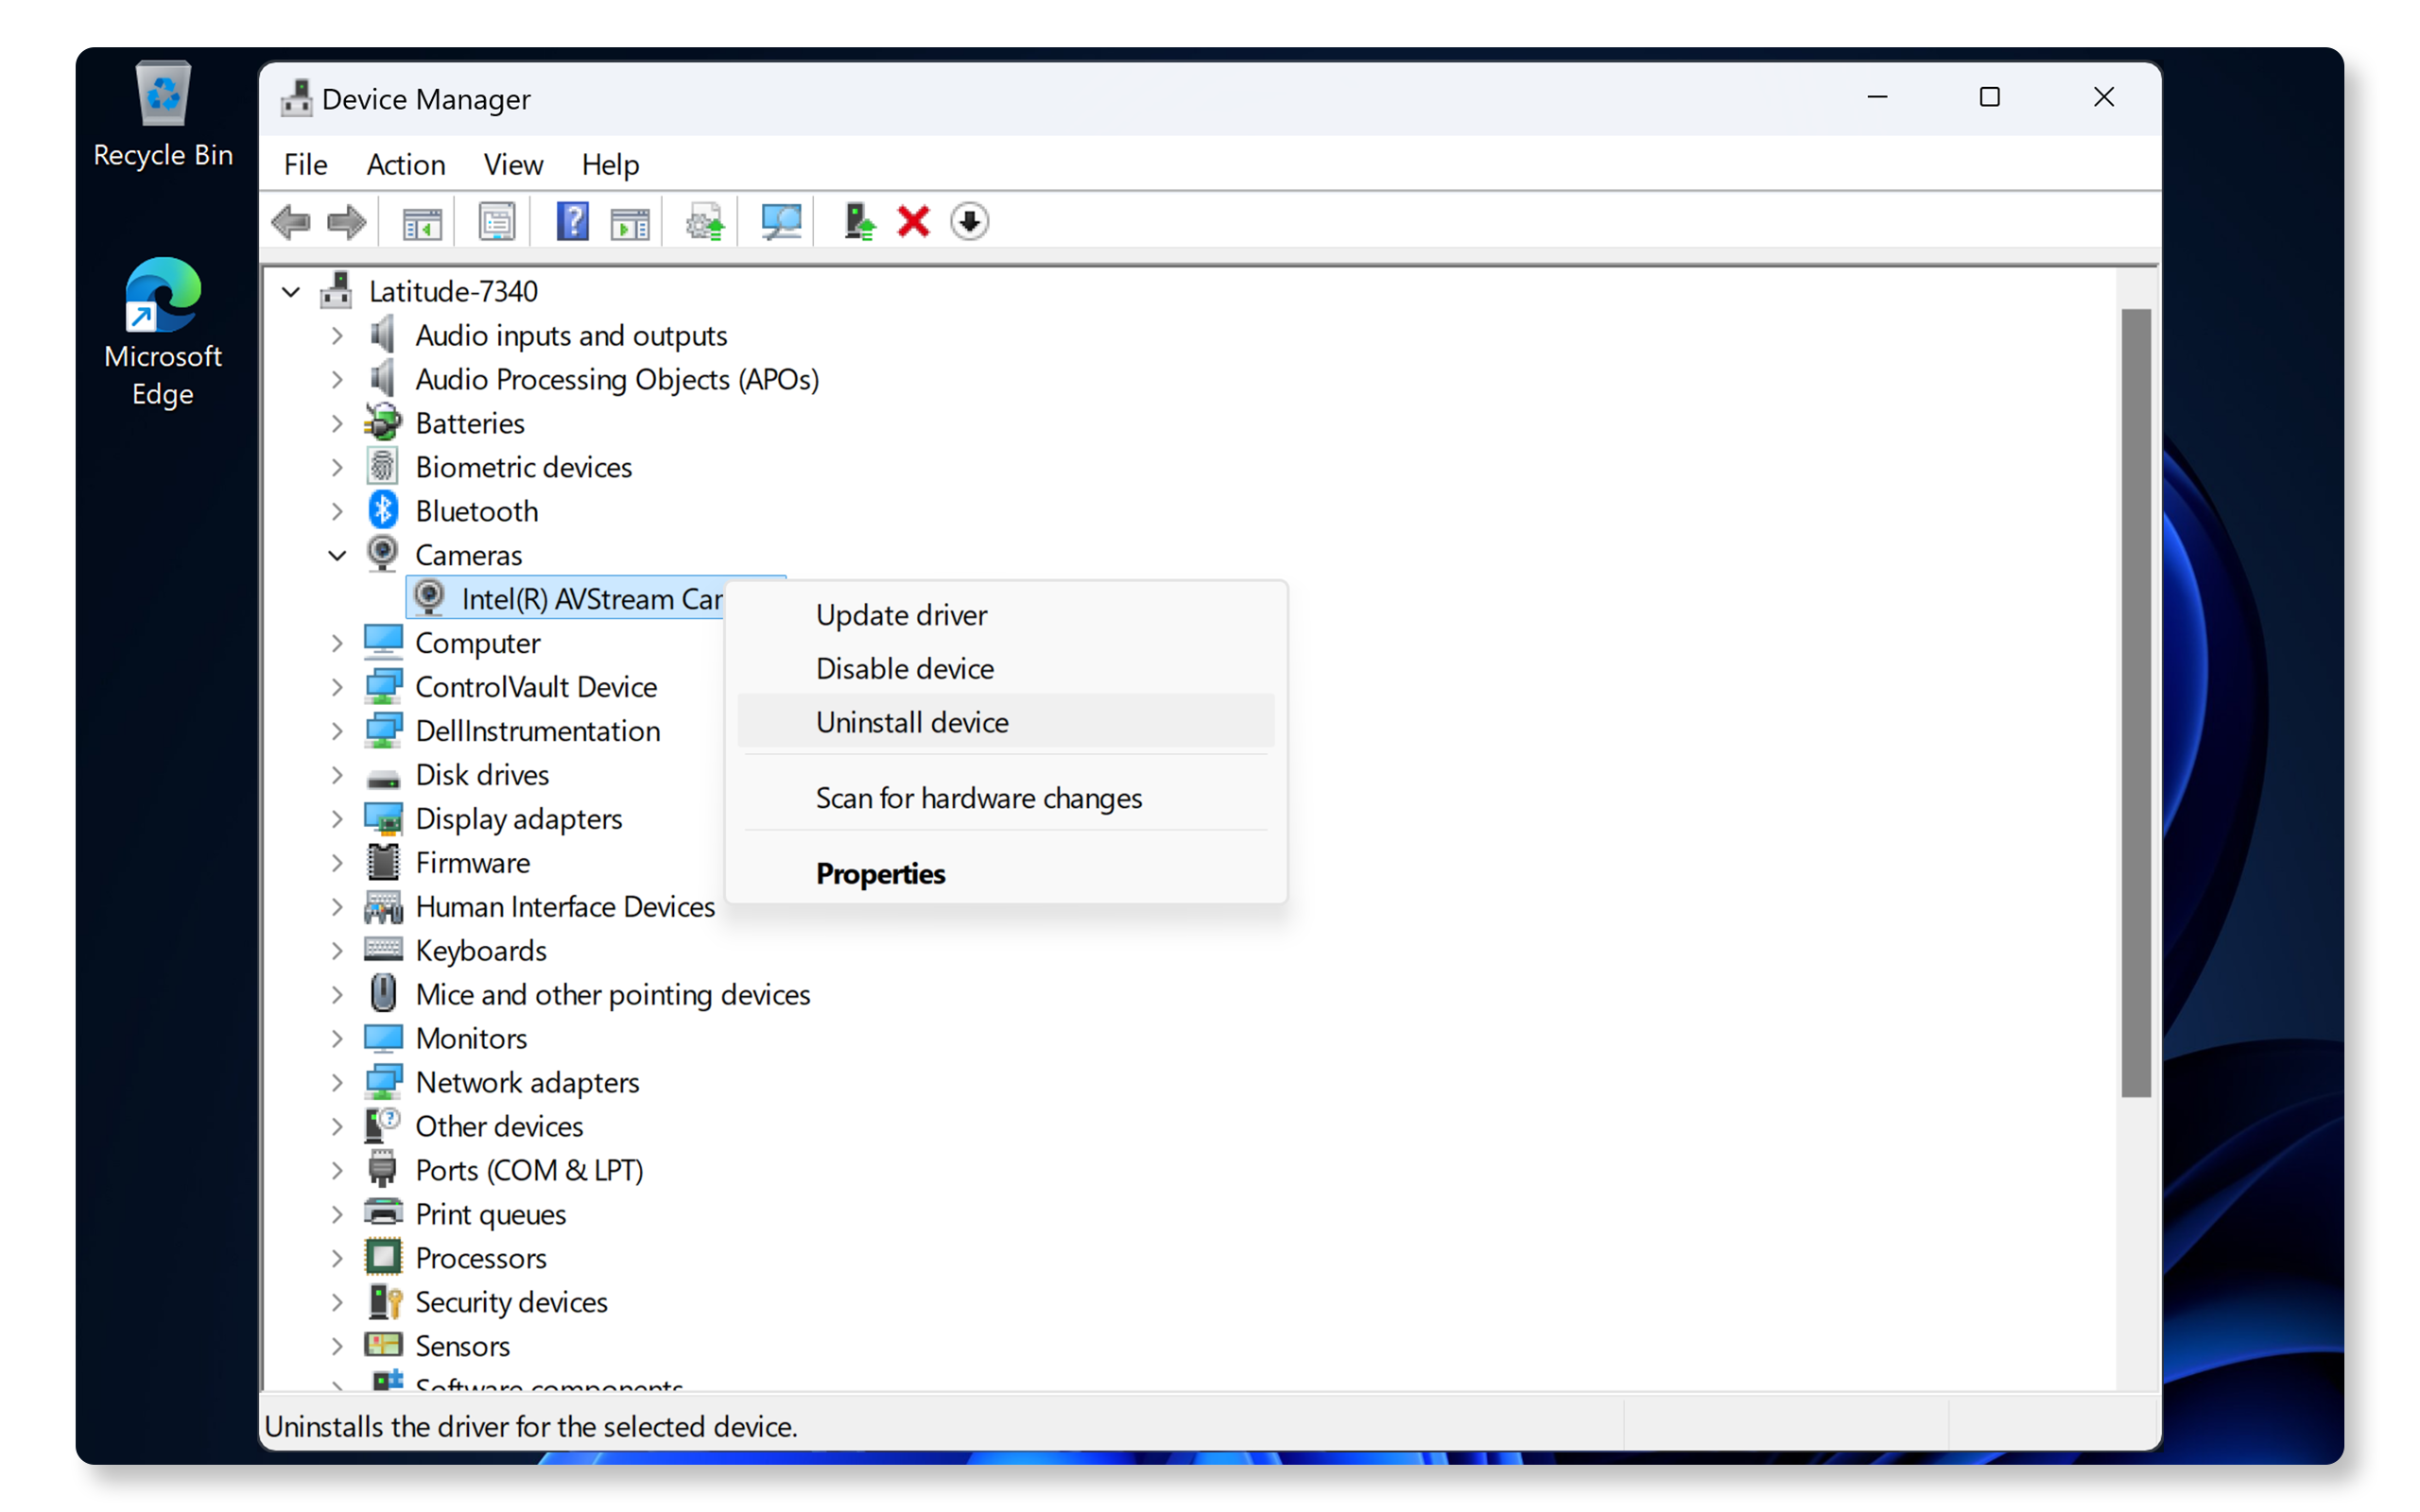
- Right-click the Start button and select Device Manager.
- Expand Cameras.
- Right-click on your camera and select Uninstall device.
- Restart your computer.
- Windows automatically reinstalls the necessary drivers.
14. What should I do if the camera's microphone isn't working?
- First, make sure the camera itself is functioning properly. If it's not, follow the troubleshooting steps in this article to fix webcam issues.
- If the camera works but the microphone doesn't, refer to our guide on resolving microphone problems.
15. What should I do if none of these troubleshooting steps work?
- Additional Troubleshooting: You can try some additional steps to fix webcam problems.
- Use Dell Community Forums: Join the Dell Community Forums to get help from other users.
Video Resources

To troubleshoot webcam issues, run SupportAssist diagnostics by selecting "SupportAssist" in Windows Search, n
avigating to the "Troubleshooting" tab, and choosing "Camera Devices". If an issue is detected, contact support. To give apps access to the camera, go to "Settings" and enable "Allow apps to access your camera". If the webcam is not working, try using it on a different application or enable it within BIOS by pressing F2 during startup and navigating to "Miscellaneous Devices". If the issue persists, update the system BIOS through SupportAssist. Contact support if further assistance is needed.
...

This video describes about how to Unbox and Set Up Dell UltraSharp Webcam.

To download Dell drivers, go to Dell Support Drivers and select your Dell computer or enter the Service Tag. C
lick "Check for Updates" and then "Show drivers" to review the list. Click "Download And Install" and restart the computer. Dell drivers are only available for tested operating systems. You can also manually download drivers by selecting the operating system, driver category, and clicking "Download". Follow the onscreen instructions to install.
...