PowerEdge: How to install Ubuntu Server on Dell Servers
Summary: This article provides information about how to install Ubuntu Server on a Dell PowerEdge.
This article applies to
This article does not apply to
This article is not tied to any specific product.
Not all product versions are identified in this article.
Instructions
Table of Contents
Download Ubuntu Server
- Download the latest ISO of Ubuntu Server here: https://ubuntu.com/download/server
- There are multiple versions listed on the main page, the first is the Long-Term Support (LTS) version and then the latest released version.
- For production server environments, it is recommended to install the LTS version.
Note: The LTS versions receive five years of free security and maintenance updates, extended to 10 years with Ubuntu Pro
.
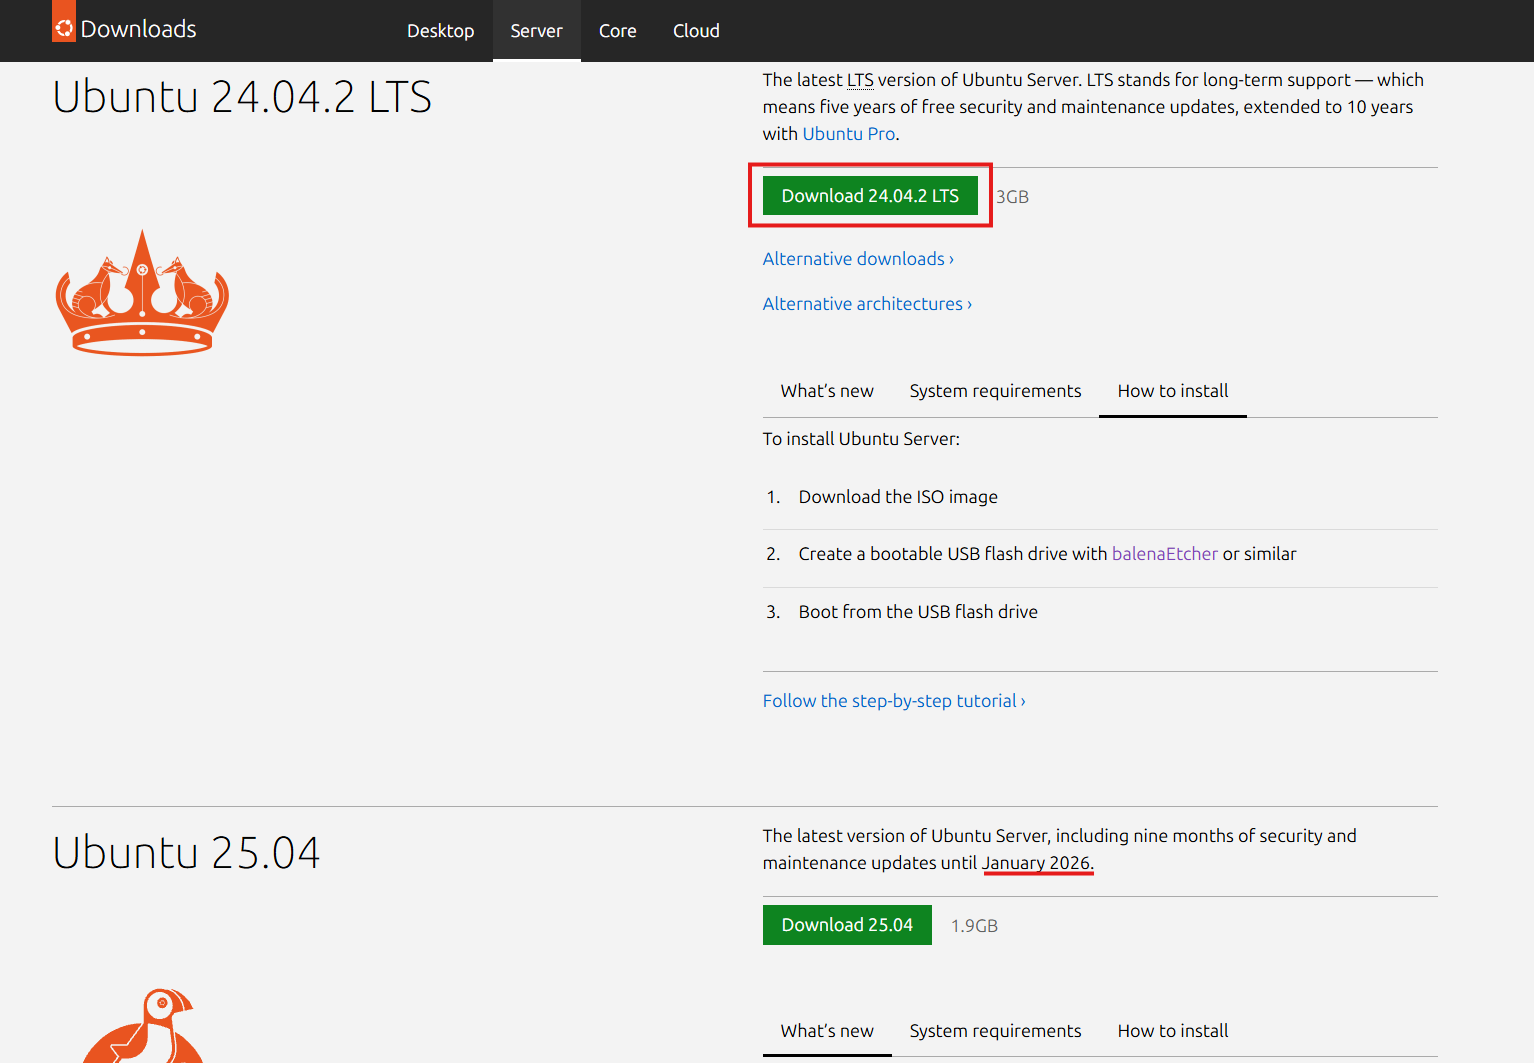
Figure 1: Download Ubuntu Server
Boot Ubuntu Server Media
Ubuntu is not a supported OS to deploy using the LifeCycle Controller (LCC), instead boot the downloaded Ubuntu ISO using either of two methods below to install Ubuntu on your PowerEdge Server.
Using the IDRAC to boot the ISO:
- Provided there is remote access to the server's IDRAC WebUI, map the ISO from your local system to the iDRAC virtual console to boot the ISO remotely.
- For details on this process for your specific iDRAC review the article: PowerEdge: How to use the Virtual Media Function on iDRAC6, iDRAC7, iDRAC8, and iDRAC9
- Once the ISO has been mapped to the virtual console, boot to the Virtual CD/DVD drive.
- To boot the mapped ISO, select the boot option from the virtual console and select the Virtual CD/DVD drive, or press F11 to boot to the boot menu and make the selection there.
Creating bootable USB Media:
- To create a bootable USB drive from the downloaded ISO, use a third-party tool such as: balenaEtcher, or Rufus
- For more information about creating a bootable USB drive, see the article: PowerEdge: How to create a bootable USB drive for OS Installation
- Once the bootable USB drive is created, install the disk into any of the USB ports and during boot press F11 to boot to the boot menu and select the detected USB drive to boot the installer.
Install Ubuntu Server
Follow the guided steps below to install Ubuntu Server:
- Once the installer has booted the first page, select your language then press Enter to proceed with your selection.

Figure 2: Select Language
- Next select your keyboard layout and press Enter to proceed.

Figure 3: Select Keyboard Layout
- On the next page, select your base for install choosing either the default option of Ubuntu Server, or choose the minimized version for a smaller starting base.
- If required choose to select the option to Search for third-party drivers. This option looks for any hardware that has specific vendor drivers that are licensed, for example NVIDIA GPU drivers.
Note: Third-party drivers can be installed after OS installation.

Figure 4: Select installation base
- On the next Network configuration page, it shows all the detected NICs and it will attempt to acquire a DHCP address from each.
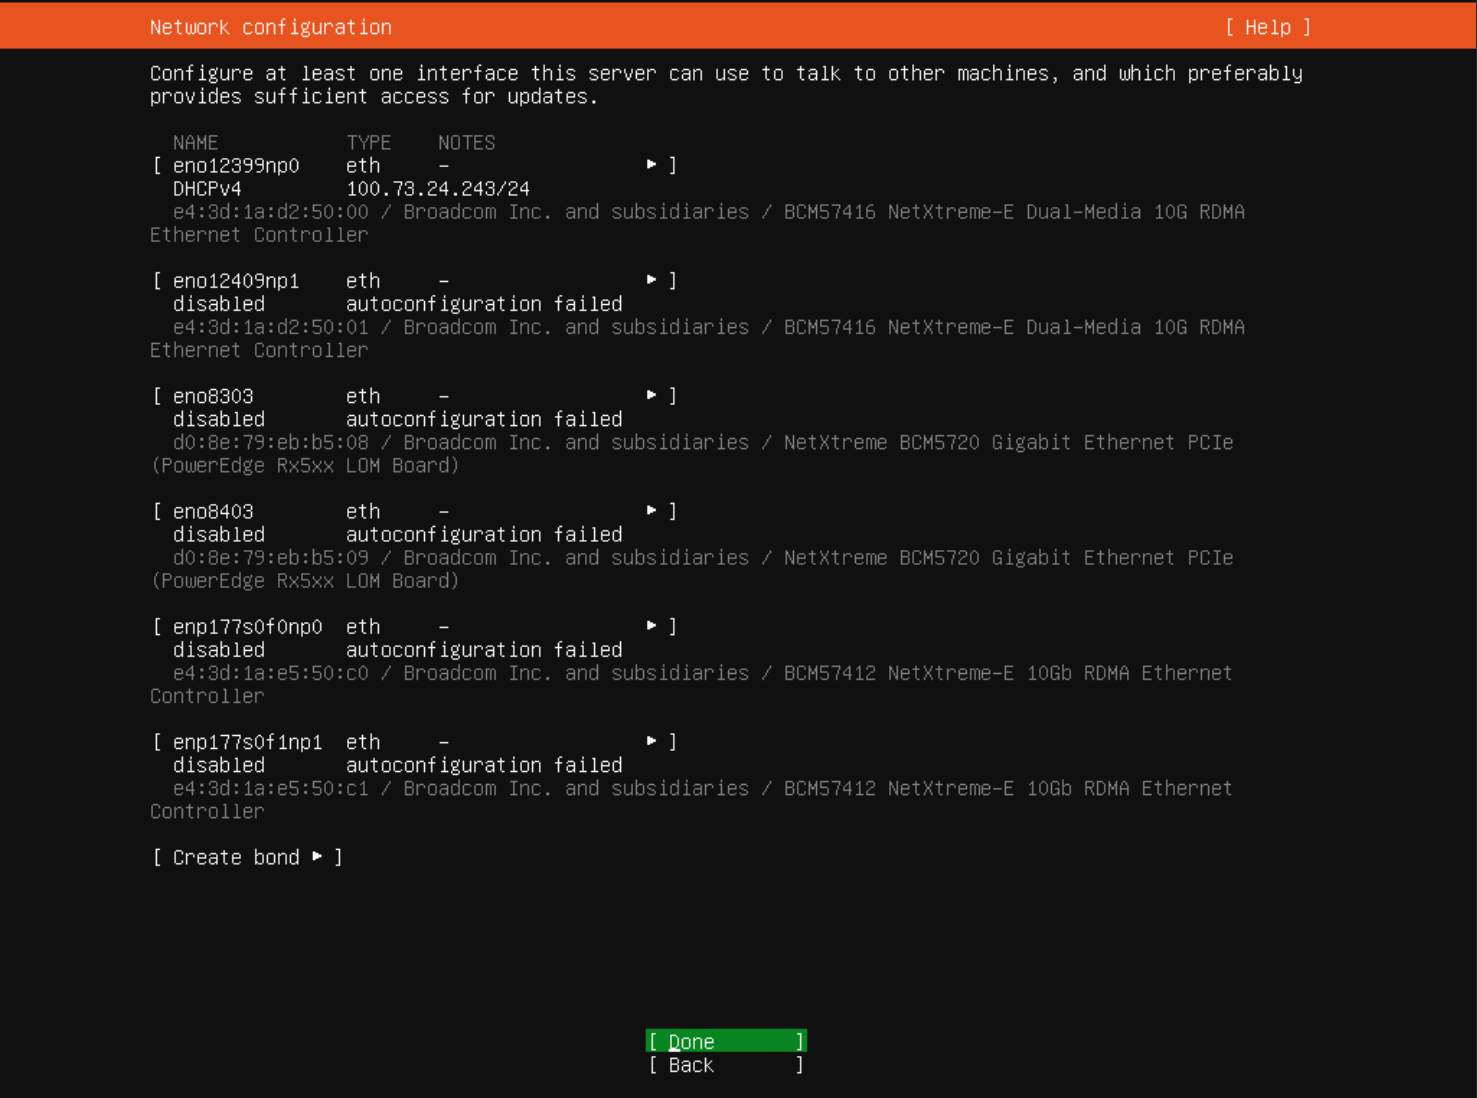
Figure 5: Network Configuration
- It is possible to manually configure each NIC to use a static IP address, or choose to create a bond of multiple NICs combined as well.
Note: The network can be configured after OS install has completed it is not required to proceed. However having access to the Internet allows the download and install of the latest available packages instead of those on the OS media.
- The next page for mirror configuration is where it will attempt to connect to the online repository for latest package updates and installation.
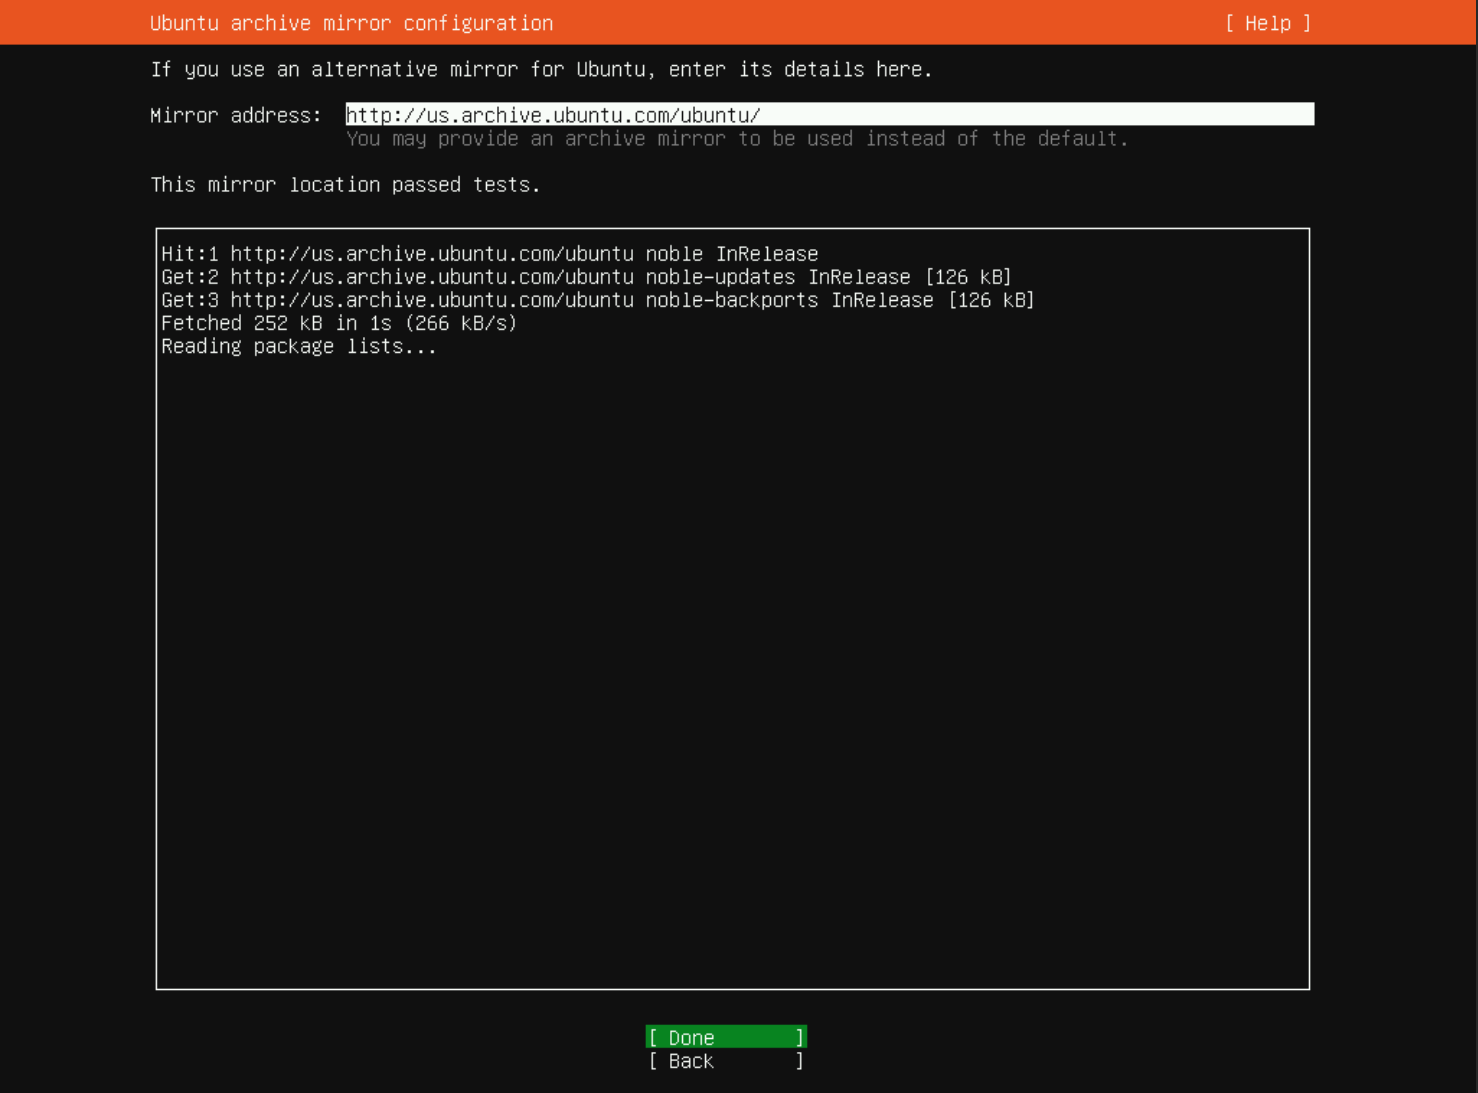
Figure 6: Ubuntu repository configuration
- Next on the storage configuration page, use the guided storage layout by selecting the installation disk and then choose whether to create LVM partitions or not.
- To manually configure the storage using Custom storage layout, view the steps for that under the Additional info section.

Figure 7: Guided Storage Configuration
- Using the Arrow or tab keys, go to the required selection such as the disk selection and press enter to choose the installation disk if the default selection is not correct.
- In our example, it was required to change the installation disk to the BOSS VD disk.

Figure 8: Select installation disk
- After the disk has been selected, select Done and press Enter to continue to the next page and verify storage changes.
- On the Storage Summary page, shows the partitions and volumes it plans to create on the selected disk, if everything looks correct then select Done and press Enter.
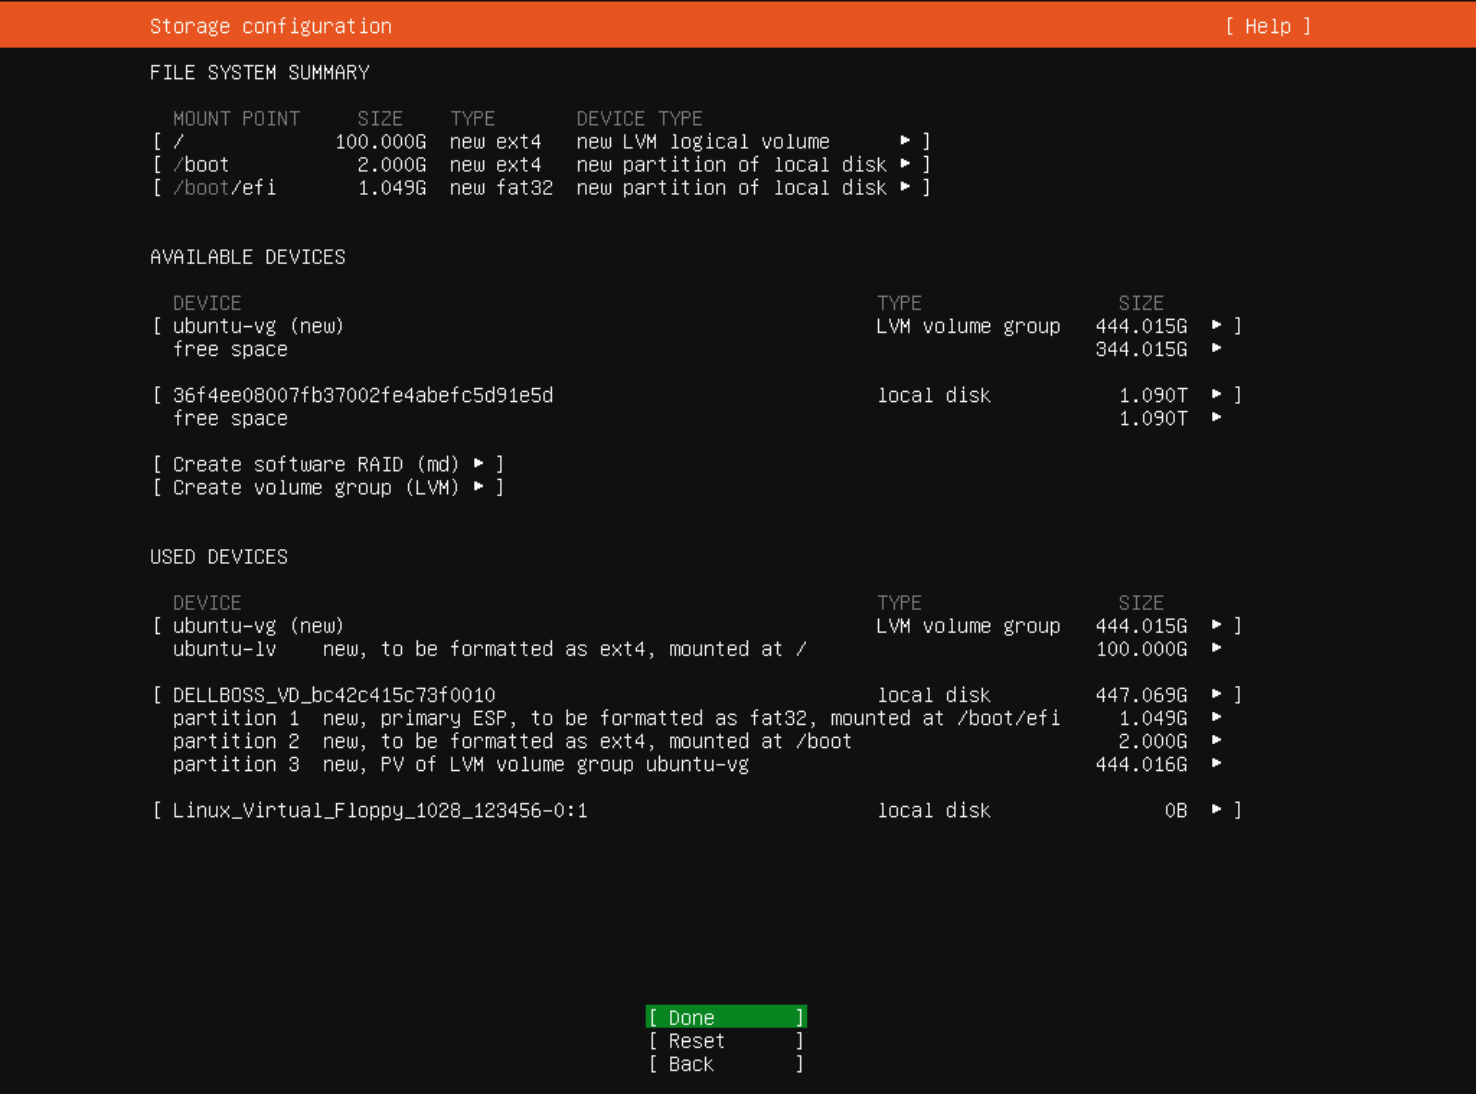
Figure 9: View Storage Configuration
- Before proceeding, it prompts to confirm the changes as this destroys all data on the selected disk to create the new partitions. To proceed, select Continue and press Enter.

Figure 10: Confirm format of disk and partition creation
- The next page requires creation of a user account to log in. Ubuntu does not have a root user account like other Linux OSs such as Red Hat and SUSE have, so the user created here is going to be the default administrator account with
sudoprivileges. - Provide the servers name which sets the hostname for the server.

Figure 11: Create a default admin user account
- The next page gives provides the option to enable Ubuntu Pro. If the Ubuntu Pro subscription is available, it is possible to select to Enable Ubuntu Pro, and the next pages will ask for the account login information.
- If Ubuntu Pro has not been purchased or to configure it later, select the default option of Skip for now, select Continue, and press Enter.
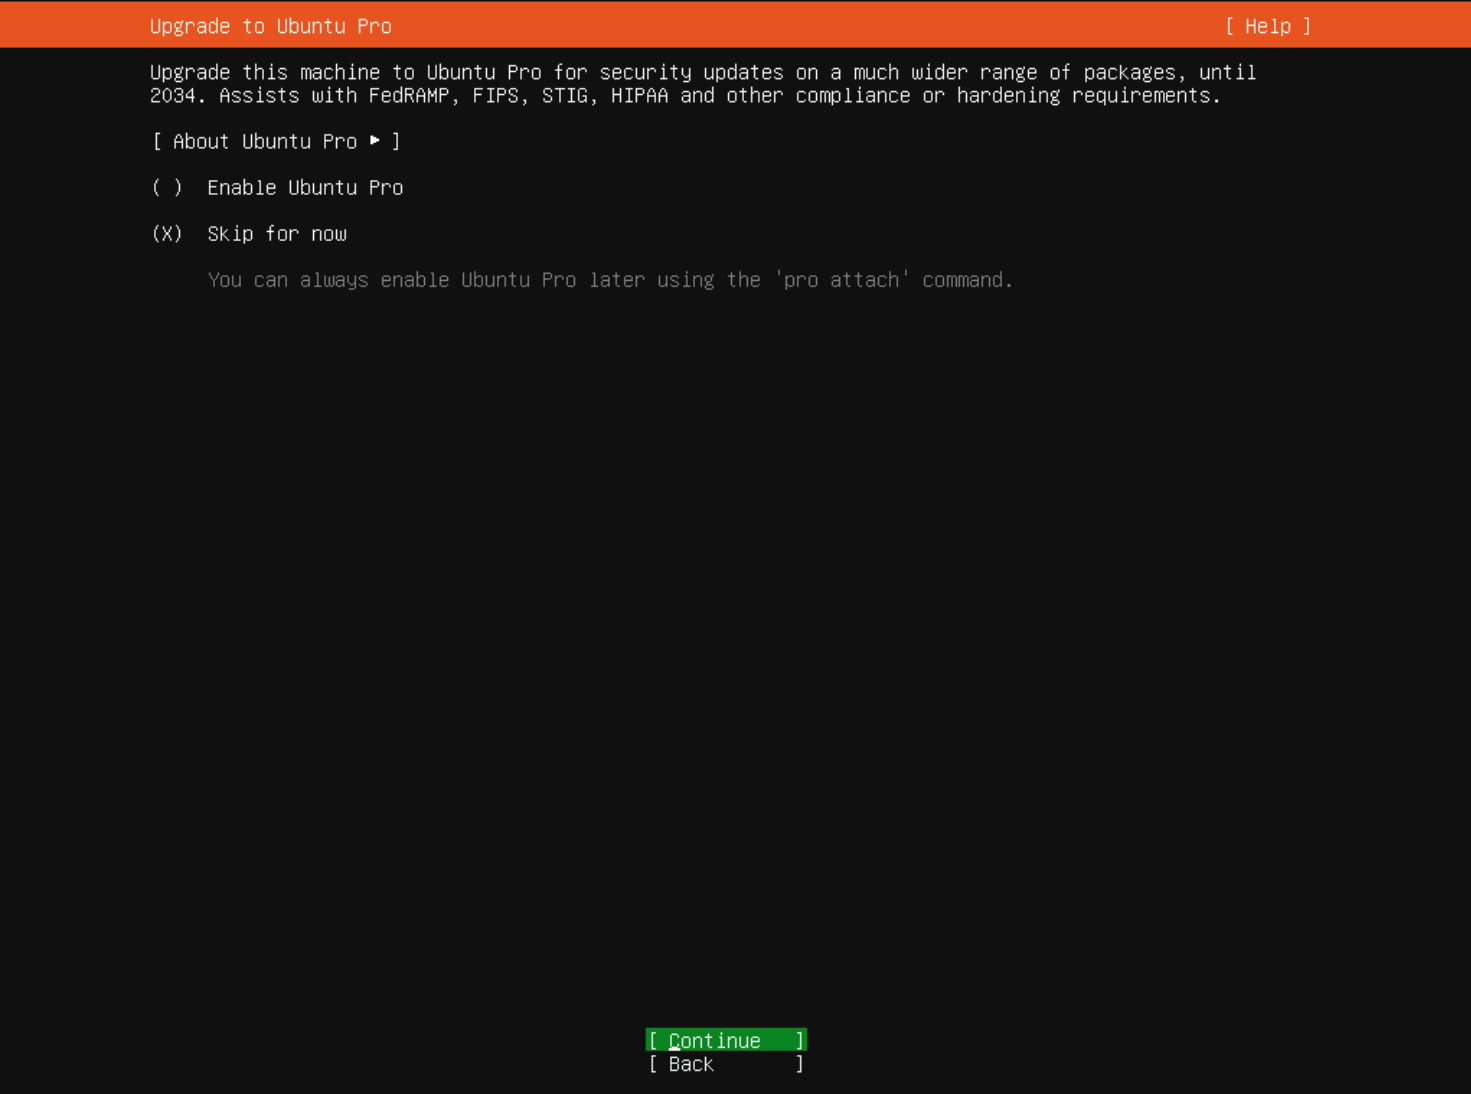
Figure 12: Ubuntu Pro optional configuration
- On the SSH configuration page, choose to Install OpenSSH server in the OS. This installs and enables the SSH service on boot to allow remote access on the first boot of the server.
- If there are preconfigured SSH keys required, its possible import them here as well by selecting Import SSH key, this is typically easier to configure post install.
Note: If the OpenSSH server is not installed here, it is required to log in directly with physical access or remotely using the iDRAC virtual console in order to log in.

Figure 13: Install OpenSSH server
- On the next page, choose to select any snap applications to have installed by default. Select any packages to install or leave them empty and select Done and press Enter.

Figure 14: Select optional snap packages to install
- The OS installation begins and shows the install log as it progresses. Once the install has completed successfully, select either, View full log, or select Reboot Now to reboot the server and boot the installed OS.

Figure 15: Once the installation is completed, select Reboot Now.
Advanced configuration options
For information about manual network configuration or manual storage configuration during the OS install see the steps below under Additional Info.
Additional Information
Advanced configuration options:
Manual Network Configuration:
The information below provides information about how to manually configure the network from the Ubuntu installer.
- Using the arrow keys, select the required NIC and press Enter to bring up a menu of options for configuration.
- From the drop-down menu, choose to configure IPv4, or IPv6 networking or add a VLAN tag.

- After selecting either IPv4 or IPv6, choose to configure the IP address automatically from DHCP or select Manual to configure a static IP address.

- When choosing the Manual configuration, provide the network Subnet, IP Address, Gateway, DNS Name Servers, and the network domain name.
- After providing the required network information, arrow down to Save and press Enter.

- After completing the configuration continue to configure additional adapters, or continue on with the current configuration.
- To configure a bond arrow down and select the option Create bond.

- When selecting to create a bond, set the name of the bond (default is bond0), the NICs to be used in the bond, and the bond mode.
- After completing the bond configuration, arrow down to Create and press Enter.

- After completing all the configuration, arrow down to Done and press Enter to return to continue the rest of the installation.
Manual Storage Partitioning:
The information below provides information about how to manually configure the storage from the Ubuntu installer.
- To start manual configuration of the storage, select the option for Custom storage layout.

- The first page seen shows the detected storage disks and the contents either showing existing partitions from previous installs or if blank disks show the free space on each.
- Start by selecting the disks free space, or choose to create software RAID or LVM volume group.
- To create standard partitions on either disk, select the disks free space and press enter to bring up the menu for partitioning options.

- On this disk, the only option is Add GPT Partition.

- Once the dialog box is opened up, there are three options seen to configure for the partition.
- Specify the size of the partition, or leave this box empty to use the full available size.
- Next configure the format which is the partition type, such as: ext4, XFS, Btrfs, Swap.
- The last option to configure is the partitions mount point. If a root (/) partition is not already created, it is the default set mount point.
- Once the configuration is set as needed, arrow down to Create and press Enter.

- To create an LVM volume group on one of the disks, arrow down to the option Create volume group (LVM) and press Enter.

- After choosing the LVM option, a dialog box to configure the new LVM volume group is shown.
- The first option to configure is the name of the volume group.
- Select the disks to add to the volume group, choose to use a single disk, or spread the volume group over multiple disks.
- The size of the volume is automatically adjusted based on the disks added as the volume group spans the entire disk selected.
- To encrypt the volume for security, select the option, Create encrypted volume.
- To encrypt the volume, set a passphrase to use for the encryption and create a recovery key.
- After completing the configuration, proceed with creating the new volume group by selecting Create and press Enter.

- After creating the volume group, it returns to the previous storage page where now the volume group is shown as a device with free space.
- Configure your logical volumes by selecting the free space on the volume group and press Enter to bring up the menu, select the option Create Logical Volume, and press Enter.

- When creating the new logical volume, start with setting the name of the volume.
- Next specify the size to make the logical volume, specify a set the size, or leave it blank to fill the entire volume group.
- In the format drop-down, specify the partition type to use for the logical volume same as for a standard disk partition.
- The last option is the mountpoint for the logical volume, similar to standard partitioning if a root (/) partition does not already exist it defaults to that mountpoint first.
- After completing configuration, select Create and press Enter.

- After creating the logical volume, it loads back to the storage page where it now shows the created logical volume partition listed under the File System Summary.
- Continue creating partitions or logical volumes as needed and when done arrow down to Done and then press Enter.

Affected Products
Ubuntu Server LTSArticle Properties
Article Number: 000333542
Article Type: How To
Last Modified: 24 Jun 2025
Version: 3
Find answers to your questions from other Dell users
Support Services
Check if your device is covered by Support Services.