PowerFlex 3.X: Backup and Restore the system using Local Share Storage
Summary: Provides exact steps using VxFM how to do Backup and do Restore operation successfully
This article applies to
This article does not apply to
This article is not tied to any specific product.
Not all product versions are identified in this article.
Instructions
Goals: VXFM- How to take Backup and Restore of the system successfully using Local Share storage.
Summary: Provides exact steps using vxfm how to do Backup and do Restore operation successfully
Solution
1. How to do Backup in VXFM.
- SSH into 3.2 VxFlex Manager with
delladminand switch user (sudo su -) and enter in the password. - Go to this folder
cd /var/nfs/ - Create a directory
mkdir backup - Give permission
chmod 777 backup - Login to VXFM UI Dashboard >> click the question mark symbol and click about to confirm the version of VXFM.
- Click setting Go to Backup and Restore.
- Click Backup tab and provide the inputs in all the boxes.
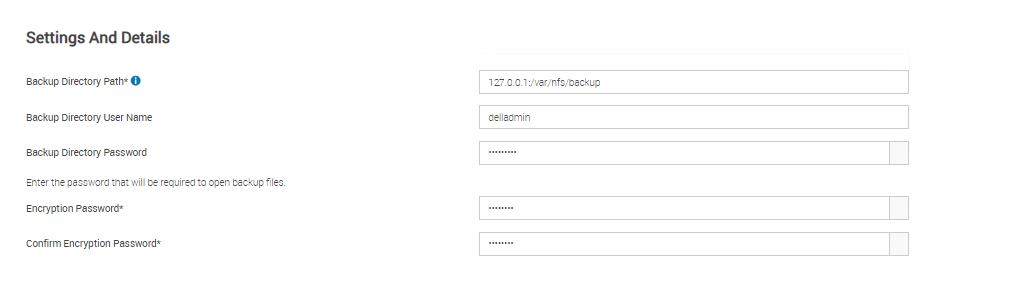
NOTE: Provide Backup Path 127.0.0.1:/var/nfs/backup.
8. Click Test Connection and it should show as "The test was successful."
9. Click Backup tab, wait until it completed and Close.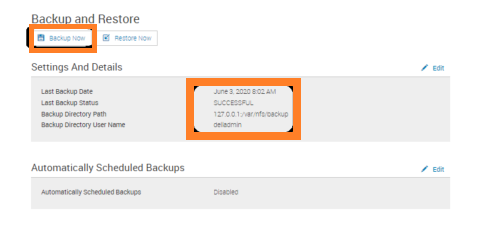
10 Using WinSCP, connect to 3.2 VxFlex Manager and copy the backup files to the jump host.

2. How to do Restore in VXFM.
- Bring online the new 3.4.1 VxFlex Manager, Do initial setup configuration confirm the IP addresses and enable SSH.
- SSH into 3.4 VxFlex Manager with delladmin and switch user (sudo su - ) and enter the password.
- Go to the folder cd /var/nfs/
- Create directory mkdir backup
- Give permission chmod 777 backup
- Use WinSCP, connect to 3.4.1 VxFlex Manager and copy the backup files to the /var/nfs/backup folder

7. Login to VXFM UI Dashboard >> click the question mark symbol and click about confirm version of VXFM.
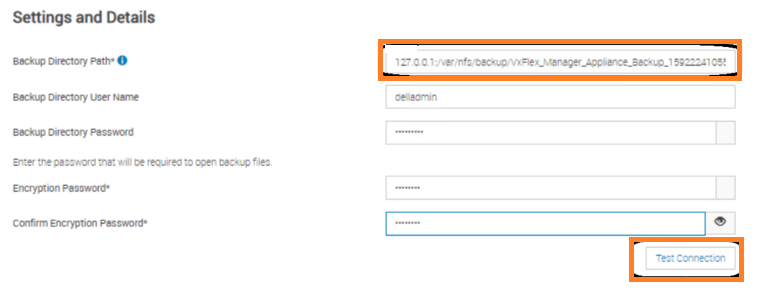
8. Click setting Navigate to Backup and Restore and click Edit.

9. Provide the inputs as specified filename respective environment and click Test connection.
10 Test connection gets success.
11 Click Save.
10 Test connection gets success.
11 Click Save.
 12 Select "Restore Now" after filling out the restore local NFS location, Click Test Connection.
13 Click Restore Now.

14 Restore has started and the system will update and reboot, it takes some time wait until it completes.
Resolution: User should be able to do Backup old VXFM and User should be able to Restore it to New VXFM.
Affected Products
VxRackArticle Properties
Article Number: 000207468
Article Type: How To
Last Modified: 20 Nov 2025
Version: 3
Find answers to your questions from other Dell users
Support Services
Check if your device is covered by Support Services.