PowerFlex 3.X: Certificate is lost when upgrading using OVA with backup and restore method
Summary: Upgrading to PowerFlex Manager 3.7 with the new OVA may cause LDAP certificate loss, leading to configuration issues.
This article applies to
This article does not apply to
This article is not tied to any specific product.
Not all product versions are identified in this article.
Symptoms
Upgrading to PowerFlex Manager 3.7 using the new OVA with a backup or restore method may result in the loss of previously generated certificates for LDAP, leading to LDAP configuration issues.
Appliance SSL Certs are used for the PowerFlex Manager Web interface. SSL Trusted Certs are used for Secure Active Directory integration.
PowerFlex Manager > Virtual Appliance Management > SSL/Trusted Certificates are present before PowerFlex Manager backup but are missing after a restore to newly deployed ova:
After a PowerFlex Manager backup or restore to newly deployed ova, SSL Trusted Certificates are gone. Appliance SSL Certificates may not be present after this process. 
Cause
PowerFlex Manager backup does not include SSL certificates when backing up PowerFlex Manager 3.6.x.
Resolution
Backup/Restore of Appliance SSL Certificates and Trusted Certificates:
Appliance SSL Certificates:
- Log in to the PFxM appliance using SSH and sudo to root (sudo SU -)
- Copy the following files to /home/delladmin/ or copy them to /tmp/ that way you do not need to do step 3 for the permissions.
-
/etc/pki/tls/certs/localhost.crt
-
/etc/pki/tls/private/localhost.key
-
- Run the following command to change the owner to delladmin on the files so you can copy them off the appliance:
-
Chown delladmin: delladmin /home/delladmin/localhost.*
-
- Copy the localhost.crt and localhost.key files off of the PFxM appliance to the jump server or another linux system for temp storage.
After OVA deployment and restore of the backup have been performed the following can be done to restore the PFxM Appliance SSL cert:
- Log in to the PFxM appliance using SSH and sudo to root (sudo SU -)
- Copy the .crt and. Key files from the jump host or file location to the new PFxM appliance in /home/delladmin/ or /tmp/
- Run the following commands to adjust the permissions to their original state, or check them as the way you copied them may have kept the right permissions. You can always run chown/chmod with no issues regardless:
-
Chown root: root /path/to/files/localhost.*
-
Chmod 755 /path/to/files/localhost.crt
-
Chmod 400 /path/to/files/localhost.key
-
- Copy the files to their default location:
-
Cp /path/to/files/localhost.crt /etc/pki/tls/certs/
-
Cp /path/to/files/localhost.key /etc/pki/tls/private/
-
- Restart the PFxM appliance.
- Upon restart, check that the certificate is showing correctly in the browser and the PFxM web UI under Settings > Virtual Appliance Management > Appliance SSL Certificate
SSL Trusted Certificates:
- From original PowerFlex Manager 3.6.x Appliance copy cacerts database to jump server or whichever destination you choose (can use WinSCP or equivalent application):
/etc/pki/java/cacerts

- Copy the cacerts file over to the newly deployed PowerFlex 3.7 appliance >> run the below command to list the contents, it should show a bunch of certs.
keytool-list -keystore /etc/pki/ca-trust/extracted/java/cacerts -storepass "changeit"
- In this example, we copied it to /home/delladmin/cacerts
- Notice it contains 140 entries in this example:

- Run the below command to check that the pfxm cert is present, in this example, you see it as _pfxm_testcert
keytool-list -keystore /home/delladmin/cacerts -storepass "changeit" |grep -i pfxm
- Take note of the file name _pfxm_testcert in this example:

- Export certificates from cacerts backup database
- Alias in this example it is _pfxm_testcert
- Changeit is the keystore password
- Trusted_LDAP_AD.pem is the filename used for cert, but you can call it whatever you want
Keytool -exportcert -rfc -keystore /home/delladmin/cacerts-alias _pfxm_testcert -storepass changeit -file Trusted_LDAP_AD.pem

- From whatever directory you ran this from, copy Trusted_LDAP_AD.pem (or whatever filename you gave it) to your jump server or whichever destination you choose using WinSCP or an equivalent application, in the screenshot above the command was run as root so it saved the file in /root/
- Upload Trusted_LDAP_AD.pem (or whatever name you used) to SSL Trusted Certificates by clicking edit in the SSL Trusted Certificates section:
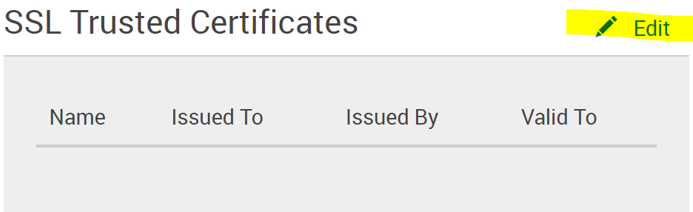
- Browse to the file that was copied (Trusted_LDAP_AD.pem in this example)

- After applying, a trusted certificate should now be in place:

Affected Products
PowerFlex ApplianceProducts
PowerFlex appliance R650, PowerFlex appliance R6525, PowerFlex appliance R660, PowerFlex appliance R6625, Powerflex appliance R750, PowerFlex appliance R760, PowerFlex appliance R7625, PowerFlex appliance R640, PowerFlex appliance R740XD
, PowerFlex appliance R7525, PowerFlex appliance R840
...
Article Properties
Article Number: 000191226
Article Type: Solution
Last Modified: 25 Nov 2025
Version: 4
Find answers to your questions from other Dell users
Support Services
Check if your device is covered by Support Services.