システムがBitLockerデバイスの自動暗号化の要件を満たしていない
Summary: Windows 10を実行しているOptiPlex 3060、5060、7060、XE3の各システムで、BitLockerにハード ドライブを手動で暗号化させる手順。
This article applies to
This article does not apply to
This article is not tied to any specific product.
Not all product versions are identified in this article.
Symptoms
BitLockerデバイスの自動暗号化の要件
Windows 10 64ビットProfessionalおよびEnterpriseエディションを実行しているOptiPlex 3060、5060、7060、XE3システムでは、BitLocker機能は自動的に有効になりません。
次の手順を使用して、BitLocker機能を検証することができます。
- Windowsキーを押して「設定」と入力します。
- [更新とセキュリティ]を選択します。
- 次の画面は、システムがBitLocker自動暗号化要件を満たしているかどうかを示しています。

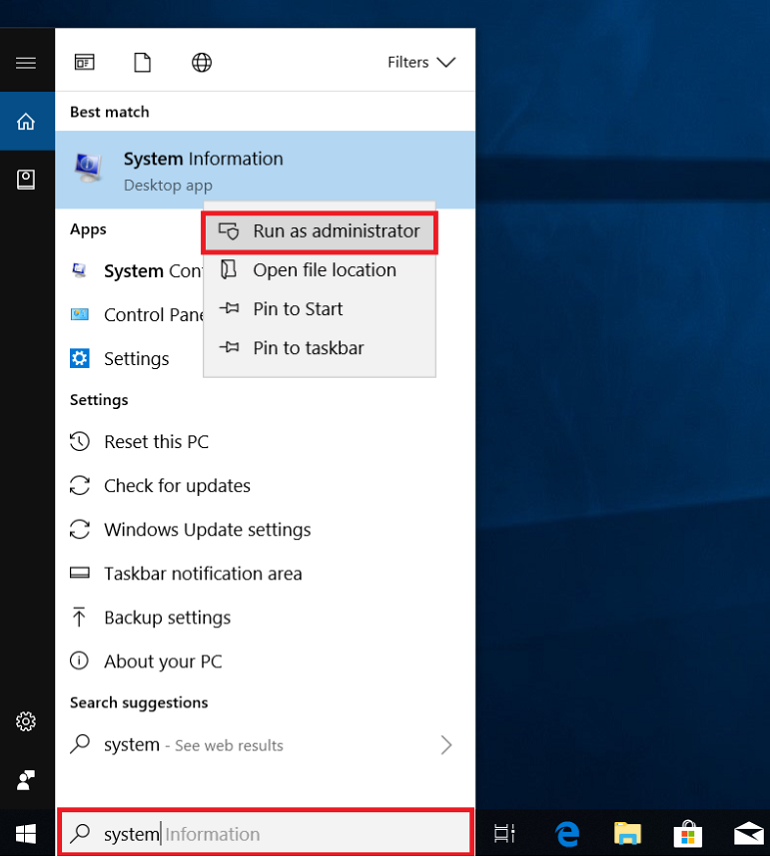
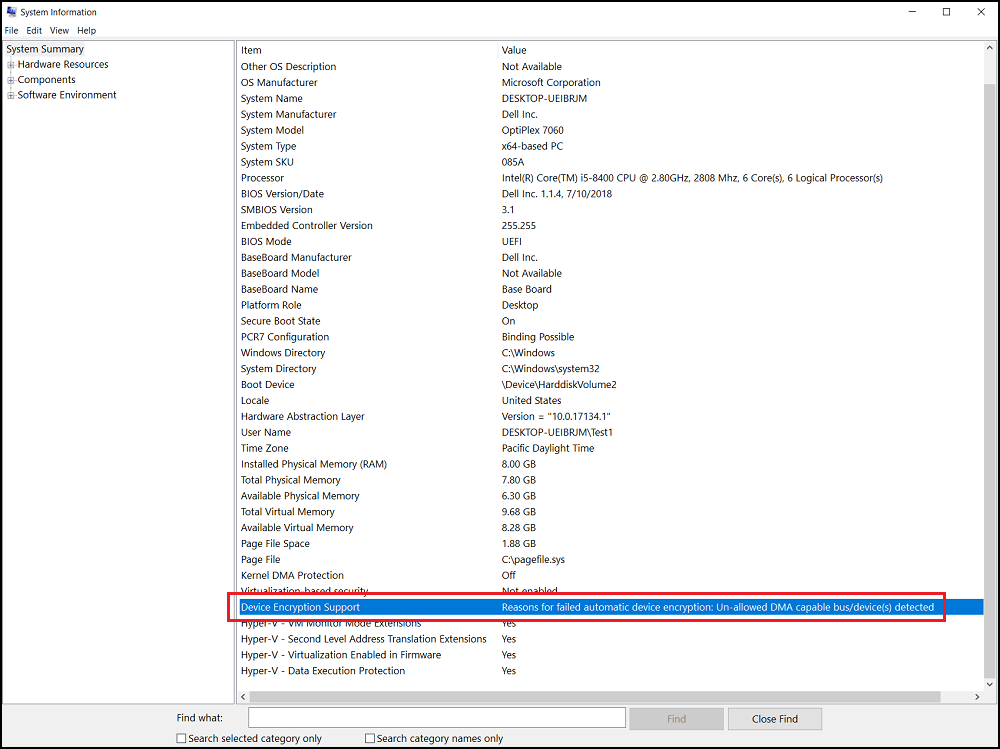
管理者として[System Information]を実行し(右クリック)、[Device Encryption Support]フィールドを確認します。「自動デバイス暗号化に失敗した理由: Unallowed DMA capable bus/device(s) detected.」
Cause
原因に関する情報はありません。
Resolution
BitLockerドライブ暗号化は、次の手順に従って手動で設定する必要があります。
Warning: 次の手順は 、上級 ユーザー向けです。ユーザーは、システム レジストリーを手動でバックアップする必要があります(Windows  でレジストリーをバックアップおよび復元する方法、またはシステムの復元ポイントを設定する方法
また、予防措置としてデータをバックアップする必要があります。
また、予防措置としてデータをバックアップする必要があります。
許可リストにバスまたはデバイスを追加する必要があります。レジストリー キーに移動します。
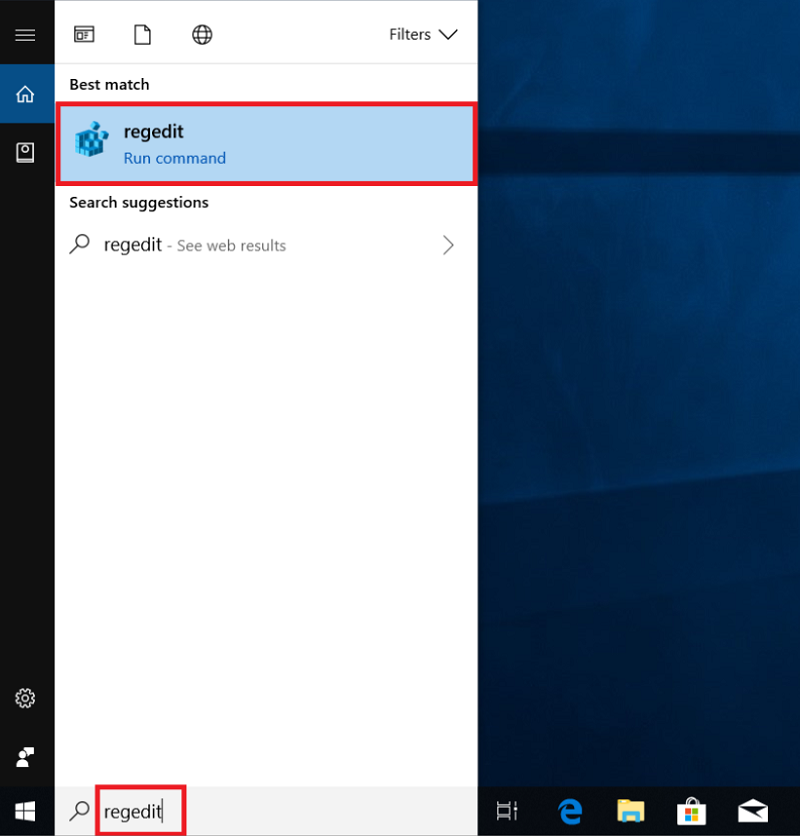
- 「regedit」を実行して、レジストリー エディターを開きます。
- 次のレジストリー キーのパスを見つけます。
[HKEY_LOCAL_MACHINE\SYSTEM\CurrentControlSet\Control\DmaSecurity\AllowedBuses]
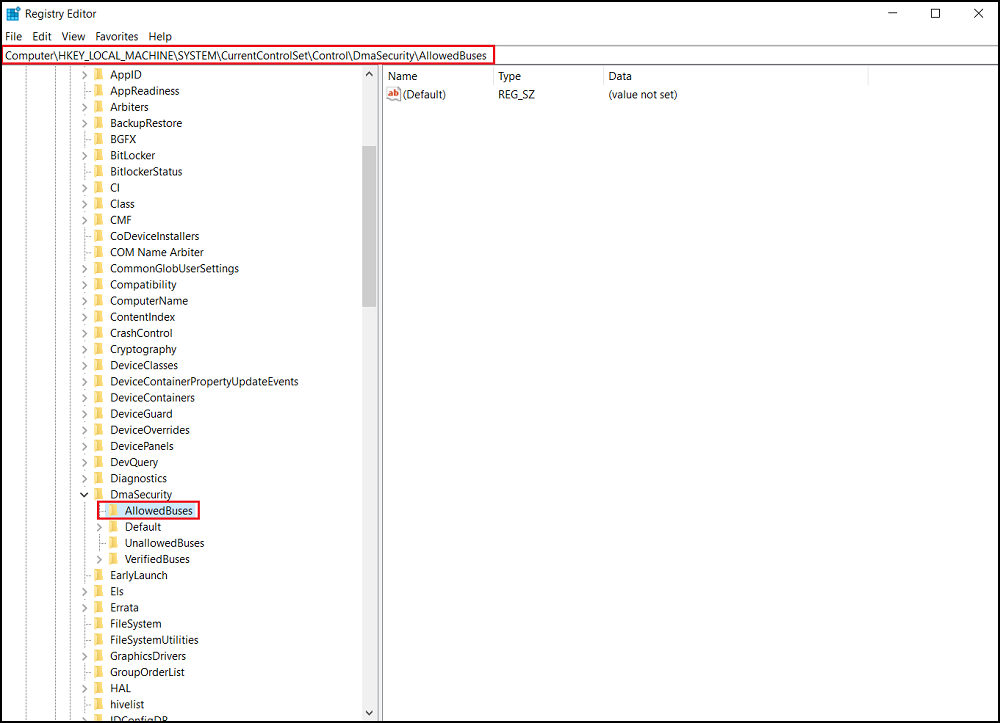
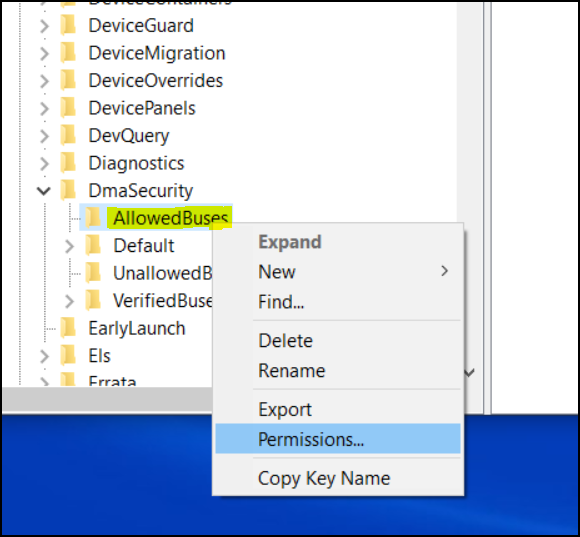
- [AllowedBuses]を右クリックし、[Permissions]を選択します。
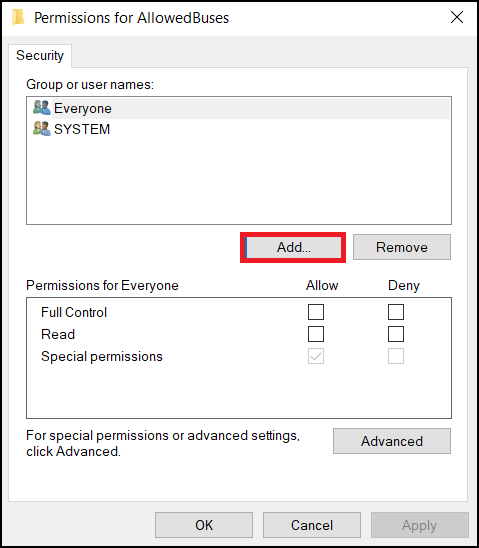
- [追加...] を選択して、[許可されたバスのアクセス許可] ウィンドウにユーザー名を追加します
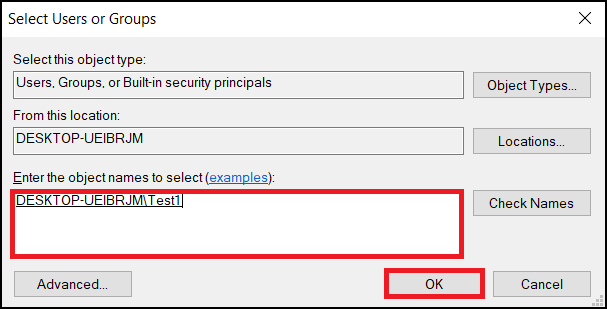
Windowsユーザー アカウント名を入力し、[OK]をクリックして終了します。
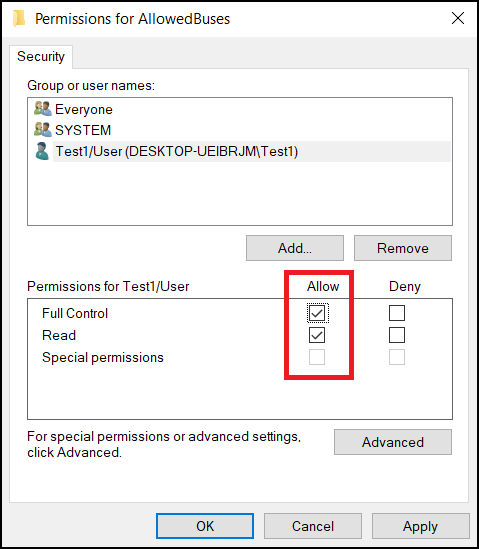
- ユーザー アカウントの[フル コントロール]と[読み取り]の[許可]にチェックを入れ、[適用]を選択して設定を保存します。
- Windowsデスクトップを右クリックし、[新規> テキスト ドキュメント]を選択します。
- 次のテキストをコピーし、名前を付けて保存します Add_AllowedBuses.reg
Windowsレジストリエディタバージョン5.00
[HKEY_LOCAL_MACHINE\SYSTEM\CurrentControlSet\Control\DmaSecurity\AllowedBuses]

 "Intel 300 Series Chipset Family LPC Controller(Q370)"="PCI\\VEN_8086&DEV_A306"

 "Intel 300 Series Chipset Family LPC Controller(H370)"="PCI\\VEN_8086&DEV_A304"

 "PCI-to-PCI Bridge#1"="PCI\\VEN_8086&DEV_1901"

 "PCI-to-PCI Bridge#2"="PCI\\VEN_104C&DEV_8240"

 "PCI Express Root Port #1"="PCI\\VEN_8086&DEV_A338"

 "PCI Express Root Port #2"="PCI\\VEN_8086&DEV_A339"

 "PCI Express Root Port #3"="PCI\\VEN_8086&DEV_A33A"

 "PCI Express Root Port #4"="PCI\\VEN_8086&DEV_A33B"

 "PCI Express Root Port #5"="PCI\\VEN_8086&DEV_A33C"

 "PCI Express Root Port #6"="PCI\\VEN_8086&DEV_A33D"

 "PCI Express Root Port #7"="PCI\\VEN_8086&DEV_A33E"

 "PCI Express Root Port #8"="PCI\\VEN_8086&DEV_A33F"

 "PCI Express Root Port #9"="PCI\\VEN_8086&DEV_A330"

 "PCI Express Root Port #10"="PCI\\VEN_8086&DEV_A331"

 "PCI Express Root Port #11"="PCI\\VEN_8086&DEV_A332"

 "PCI Express Root Port #12"="PCI\\VEN_8086&DEV_A333"

 "PCI Express Root Port #13"="PCI\\VEN_8086&DEV_A334"

 "PCI Express Root Port #14"="PCI\\VEN_8086&DEV_A335"

 "PCI Express Root Port #15"="PCI\\VEN_8086&DEV_A336"

 "PCI Express Root Port #16"="PCI\\VEN_8086&DEV_A337"

 "PCI Express Root Port #17"="PCI\\VEN_8086&DEV_A340"

 "PCI Express Root Port #18"="PCI\\VEN_8086&DEV_A341"

 "PCI Express Root Port #19"="PCI\\VEN_8086&DEV_A342"

 "PCI Express Root Port #20"="PCI\\VEN_8086&DEV_A343"

 "PCI Express Root Port #21"="PCI\\VEN_8086&DEV_A32C"

 "PCI Express Root Port #22"="PCI\\VEN_8086&DEV_A32D"

 "PCI Express Root Port #23"="PCI\\VEN_8086&DEV_A32E"

 "PCI Express Root Port #24"="PCI\\VEN_8086&DEV_A32F"
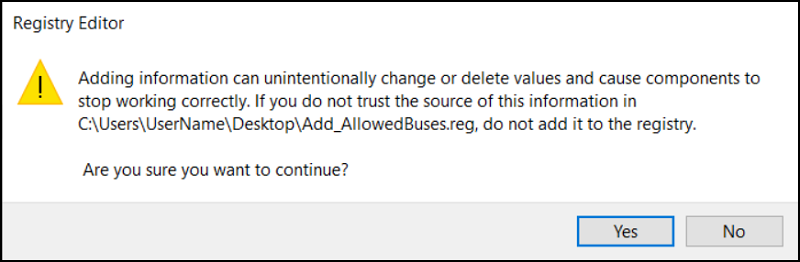
- Add_AllowedBuses regファイルをダブルクリックして、レジストリー キーを追加します。
- [Yes]を押して、レジストリー キーの追加を続行します
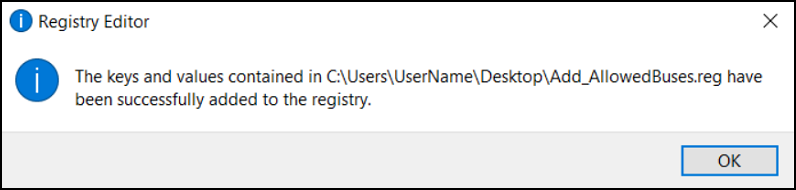
- すべての第8世代PCI Expressルート ポートのデバイスIDがシステム レジストリー キーに正常に追加されました。
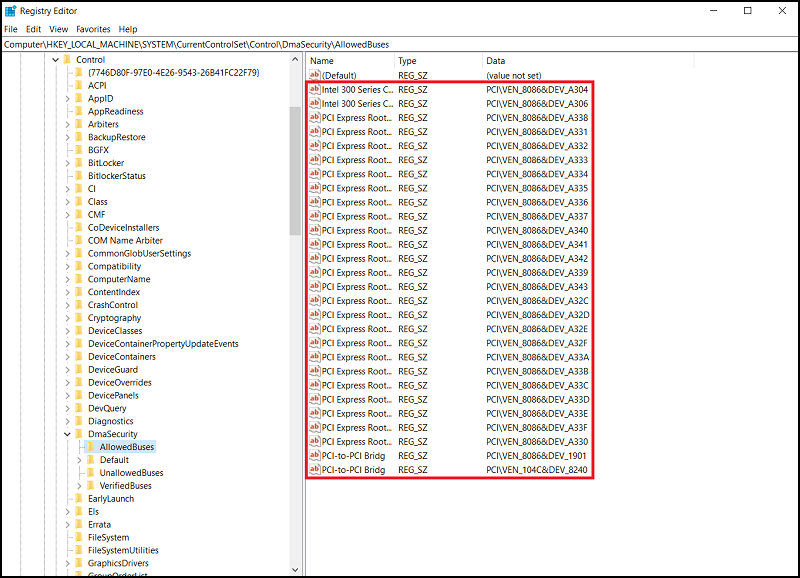
- システム レジストリー キーで次のパスを確認します。すべてのPCI Expressルート ポート デバイスIDが正常に追加されています。
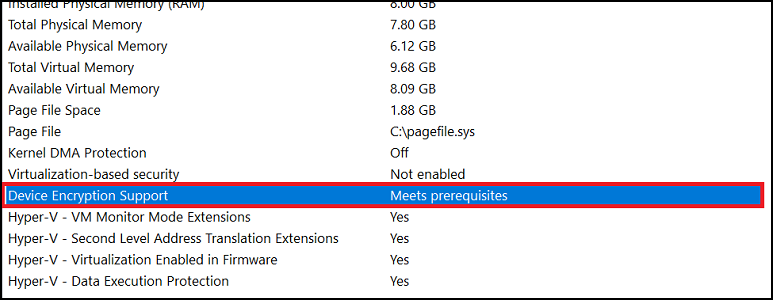
- システム情報を管理者として実行(右クリック)
[デバイス暗号化サポート] -> [前提条件を満たしている]
- これで、[オンにする]ボタンをクリックして、[設定]-> [デバイス暗号化]からデバイスの暗号化を有効にすることができます

Affected Products
Security, Software, OptiPlex 3060 Tower, OptiPlex 3060 Micro, OptiPlex 3060 Small Form Factor, OptiPlex 5060 Tower, OptiPlex 5060 Micro, OptiPlex 5060 Small Form Factor, OptiPlex 7060 Tower, OptiPlex 7060 Micro, OptiPlex 7060 Small Form Factor
, Optiplex XE3
...
Article Properties
Article Number: 000124709
Article Type: Solution
Last Modified: 19 Apr 2026
Version: 7
Find answers to your questions from other Dell users
Support Services
Check if your device is covered by Support Services.