Avamar:由于 Jetty 服务未运行,目标虚拟机主机无法访问代理
Summary: 本文介绍了为什么当目标虚拟机无法访问代理时,虚拟机 (VM) 文件级还原 (FLR) 会失败,最终在长时间执行后超时。
This article applies to
This article does not apply to
This article is not tied to any specific product.
Not all product versions are identified in this article.
Symptoms
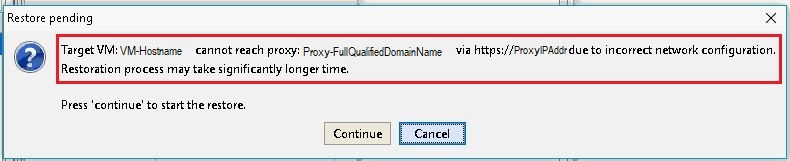
在虚拟机 FLR 期间,Avamar 管理控制台中会显示以下窗口消息:
错误消息:
Target VM: <VM-hostname> cannot reach proxy: <avamar-proxy-FQDN_or_IP_Address> via https://<proxy-hostname-IP-Address> due to incorrect network configuration.
Restoration may take significantly longer time Press "Continue" to start the restore
Cause
负责侦听代理上的端口 443 的服务未运行:
root@avamar-proxy:~/>: netstat -plnt |egrep "Proto|443"
Proto Recv-Q Send-Q Local Address Foreign Address State PID/Program name
root@avamar-proxy:~/>: service jetty status
Jetty Info: Jetty Service is not running.
Resolution
执行以下操作:
- 在重试 FLR 之前启动服务:
root@avamar-proxy:~/>: service jetty start
Shutting down vami-lighttpd:done.
Jetty Info: Jetty daemon started.
root@avamar-proxy:~/>: service jetty status
Jetty Info: Jetty Service is running.[13234]
root@avamar-proxy:~/>: netstat -plnt |egrep "Proto|443"
Proto Recv-Q Send-Q Local Address           Foreign Address         State       PID/Program name
tcp        0      0 :::443                  :::*                    LISTEN      13234/java
- 确保将服务配置为在多用户运行级别中自动启动:
root@avamar-proxy:~/>: chkconfig --list |grep jetty
jetty 0:off 1:off 2:on 3:on 4:on 5:on 6:off
- 若要确保服务在指定的运行级别自动启动,请使用以下命令更新服务配置:
root@avamar-proxy:~/>: chkconfig --level 2345 jetty on
如果上述步骤无法解决问题,请执行此额外步骤:
-
编辑
/usr/local/avamarclient/bin/config.xml文件,并将 wget 参数的值从 0 更改为 1:<enablewgetrestore>1</enablewgetrestore>
Affected Products
AvamarArticle Properties
Article Number: 000050308
Article Type: Solution
Last Modified: 17 Apr 2026
Version: 8
Find answers to your questions from other Dell users
Support Services
Check if your device is covered by Support Services.