NVP vProxy: Failed to lock Virtual Machine for backup: Another vProxy operation is active on VM
Summary: NetWorker VMware Protection (NVP) vProxy operations fail. The error returned is that it fails to local the virtual machine due to another active operation on the Virtual Machine (VM)
This article applies to
This article does not apply to
This article is not tied to any specific product.
Not all product versions are identified in this article.
Symptoms
vProxy backup failed with "Failed to lock Virtual Machine for backup: Another vProxy operation is active on VM XXX" when there is no active backup job running for the particular VM.
INFO: [@(#) Build number: ###] Another vProxy operation is active on VM vm-XXX: {Operation:Backup StartTime:2017-05-15T10:09:21Z Proxy:<vProxy>SessionId:4cf6f76c-ef6c-435d-880c-77fbaf49exxx}
ERROR: [@(#) Build number: ###] Failed to lock Virtual Machine for backup: Another vProxy operation is active on VM vm-XXX: {Operation:Backup StartTime:2017-05-15T10:09:21Z Proxy:<vProxy> SessionId:4cf6f76c-ef6c-435d-880c-77fbaf49e1xxx}. Session logs can be found on the NetWorker server under ..\nsr\logs\policy\POLICY_NAME\WORKFLOW_NAME
Cause
The VM was marked as "backup locked" due to previous backup error or interruption.
The vmconfig command can be used to verify if the VM is backup locked.
- Log in to vProxy as admin over SSH, then switch to root.
sudo su -
- Change to bin directory
cd /opt/emc/vproxy/bin
- Run below command to load library path:
source ../unit/vproxy.env
- Check if the backup is locked with 'vmconfig' tool using the MoREF value from the session log:
./vmconfig -c info -k "vm-MoRef" -l moref -v vCENTER_NAME -u "vCENTER_USERNAME" -p 'PASSWORD'
Example output
  Searching for virtual machine with MORef "vm-XXX" ...
            Querying vCenter for definition of virtual machine with MORef of "vm-XXX" ...
            Found virtual machine "VM_NAME" with MORef "vm-xxx".
            vm-145501: Name: "VM_NAME".
            vm-145501: CBT Enabled: true.
            vm-145501: Migration Enabled: false.
            vm-145501: Backup Locked: true.
Resolution
Option 1
Use the ProxyHC utility on the vProxy to cleanup: NVP-vProxy: How to use health check tool ProxyHC on vProxy appliance
The syntax required is:
./ProxyHC tasks cleanup
Option 2
- Log in vSphere client
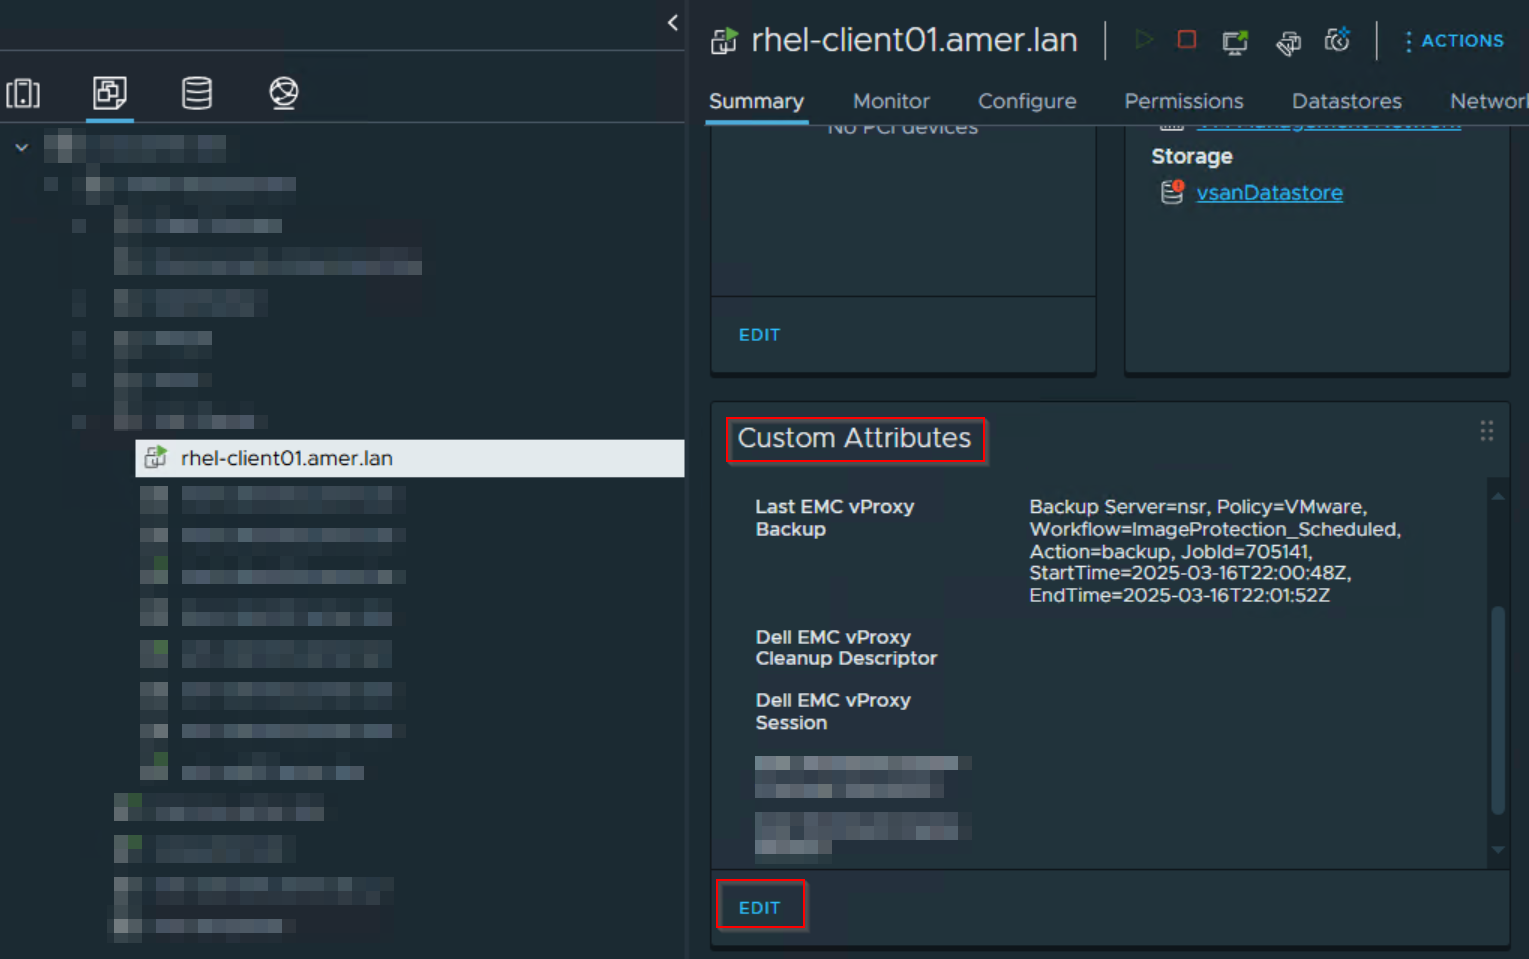
- Select the affected VM
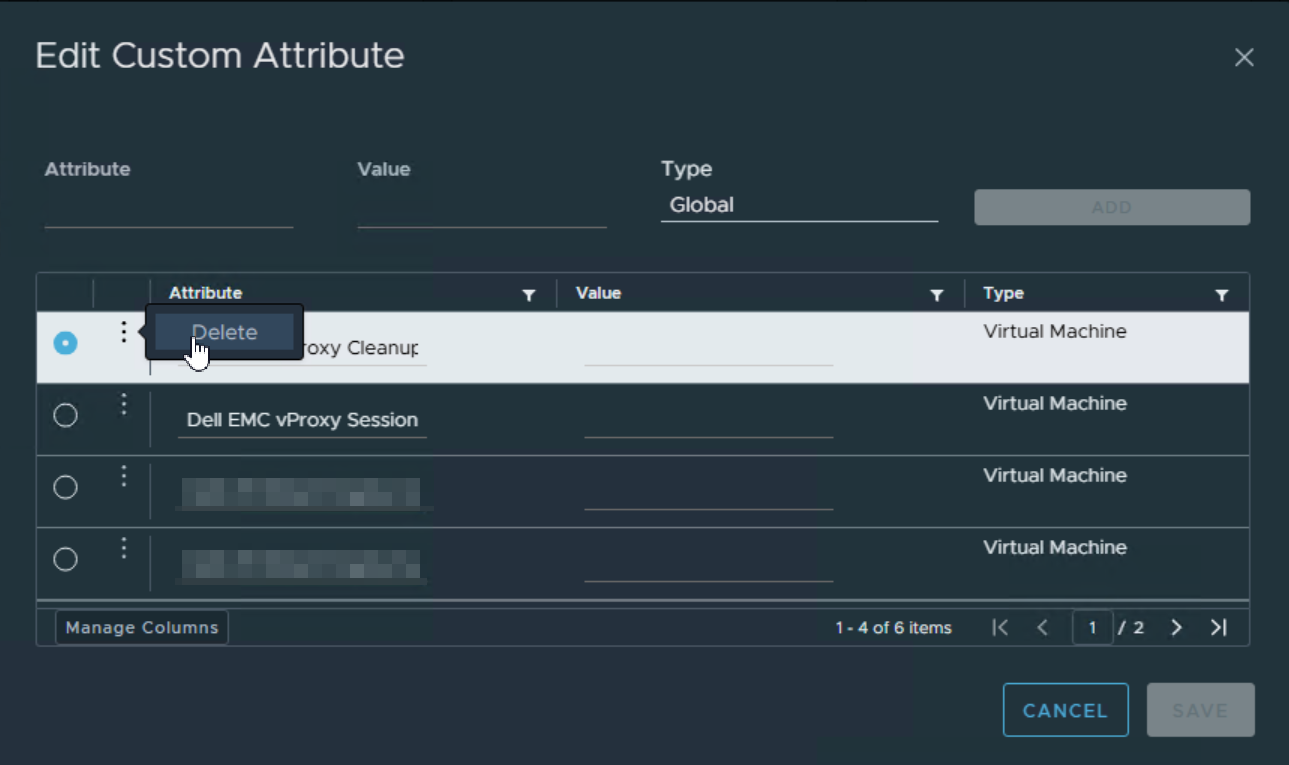
- In the General tab, go to Custom Attributes, click Edit:
- Select each custom attribute that contains "Dell EMC vProxy," and Delete it:
Affected Products
NetWorker SeriesProducts
NetWorker SeriesArticle Properties
Article Number: 000057190
Article Type: Solution
Last Modified: 17 Apr 2026
Version: 8
Find answers to your questions from other Dell users
Support Services
Check if your device is covered by Support Services.