Create an AZSHCI Cluster using Windows Admin Center and Register it in Azure.
Yhteenveto: This article and the accompanying video discuss how to create an Azure Stack HCI cluster using Windows Admin Center and then register that cluster in Azure.
Tämä artikkeli koskee tuotetta
Tämä artikkeli ei koske tuotetta
Tämä artikkeli ei liity tiettyyn tuotteeseen.
Tässä artikkelissa ei yksilöidä kaikkia tuoteversioita.
Ohjeet
Pre-Knowledge Check:
Before continuing reading, it is recommended to familiarize with the following concepts:
Practical knowledge of the following technologies is a pre-requisite:
This "how to" guide/demo utilizes four Hyper-V virtual machines with the details below:
WAC1 has both Microsoft Edge and Google Chrome browsers installed. Either can be used for following this guide. Internet Explorer has been removed in WAC1 by using the following DISM command:
AZSHCIOS-N1 and AZSHCIOS-N2 have been installed with the Azure Stack HCI OS which can be downloaded here:
https://azure.microsoft.com/en-us/contact/azure-stack-hci/
AZSHCIOS-N1 and AZSHCIOS-N2 have 2 virtual NICs each: One connected to an external Hyper-V virtual switch used for management and one connected to a private Hyper-V virtual switch used for storage/compute traffic.
AZSHCIOS-N1 and AZSHCIOS-N2 have a dedicated virtual SCSI controller with 4 VHDX drives used for Storage Spaces Direct (S2D).
Nested virtualization has been enabled on the VMs AZSHCIOS-N1 and AZSHCIOS-N2 by running the commands below on the Hyper-V server hosting the VMs:
The Hyper-V role has been added to the virtual machines AZSHCIOS-N1 and AZSHCIOS-N2 by using the DISM command below:
The Operating System on all virtual machines was fully updated to the latest available CU before starting this demo.
1. To create an Azure Stack HCI Cluster using Windows Admin Center:

2. To check the registration status of the Azure Stack HCI cluster in Azure:
3. To register the Azure Stack HCI cluster in Azure:
This demo uses a 30-day trial subscription of Azure. The subscription ID can be located by login onto the Azure portal and clicking on the “Subscriptions" icon under "Azure Services".
4. How do I know this worked?
Before continuing reading, it is recommended to familiarize with the following concepts:
- What is AZSHCI
- Why is registration of AZSHCI in Azure needed?
- What is Windows Admin Center?
- Azure Trial License


Practical knowledge of the following technologies is a pre-requisite:
- Hyper-V
- Failover Clustering
- Storage Spaces Direct
- PowerShell
- DISM
This "how to" guide/demo utilizes four Hyper-V virtual machines with the details below:
- VM1 = DC1 = Windows Server 2022 Domain Controller > 2 GB of RAM > 30 GB VHDX
- VM2 = WAC1 = Windows Server 2019 Windows Admin Center > 4 GB of RAM > 30 GB VHDX
- VM3 = AZSHCIOS-N1 = Azure Stack HCI OS > 8GB of RAM > 30 GB VHDX + 4x200GB VHDX’s (S2D)
- VM4 = AZSHCIOS-N2 = Azure Stack HCI OS > 8GB of RAM > 30 GB VHDX + 4x200GB VHDX’s (S2D)
WAC1 has both Microsoft Edge and Google Chrome browsers installed. Either can be used for following this guide. Internet Explorer has been removed in WAC1 by using the following DISM command:
dism /online /Remove-Capability /CapabilityName:Browser.InternetExplorer~~~~0.0.11.0
AZSHCIOS-N1 and AZSHCIOS-N2 have been installed with the Azure Stack HCI OS which can be downloaded here:
https://azure.microsoft.com/en-us/contact/azure-stack-hci/
AZSHCIOS-N1 and AZSHCIOS-N2 have 2 virtual NICs each: One connected to an external Hyper-V virtual switch used for management and one connected to a private Hyper-V virtual switch used for storage/compute traffic.
AZSHCIOS-N1 and AZSHCIOS-N2 have a dedicated virtual SCSI controller with 4 VHDX drives used for Storage Spaces Direct (S2D).
Nested virtualization has been enabled on the VMs AZSHCIOS-N1 and AZSHCIOS-N2 by running the commands below on the Hyper-V server hosting the VMs:
Set-VMProcessor -VMName <VMName> -ExposeVirtualizationExtensions $true
The Hyper-V role has been added to the virtual machines AZSHCIOS-N1 and AZSHCIOS-N2 by using the DISM command below:
DISM /Online /Enable-Feature /All /FeatureName:Microsoft-Hyper-V
The Operating System on all virtual machines was fully updated to the latest available CU before starting this demo.
1. To create an Azure Stack HCI Cluster using Windows Admin Center:
- On WAC1, the Windows Admin Center gateway server, open Windows Admin Center.
- On the top-left side, click Add and then under Server clusters click on Create new.
- Select Azure Stack HCI as the cluster type and then click "Create.”
- On the prerequisites screen, click Next.
- On the Add servers screen, enter the administrative credentials for connecting to the servers that will be part of the cluster (AZSHCIOS-N1 and AZSHCIOS-N2 in this demo).
- Still on the Add servers screen type the computer name of the nodes and click on Add. When the servers appear listed as "Ready", click Next.
- When the two servers are listed as ready, click Next.
- On the Join Domain screen, enter the credentials for joining the servers to the domain and click Apply changes and then Next.
- On the Install required features screen, click Install and then Next.
- On the Install updates screen, click Next.
- On the Install hardware updates screen, click Next.
- On the Restart servers screen, click Restart servers and then Next.
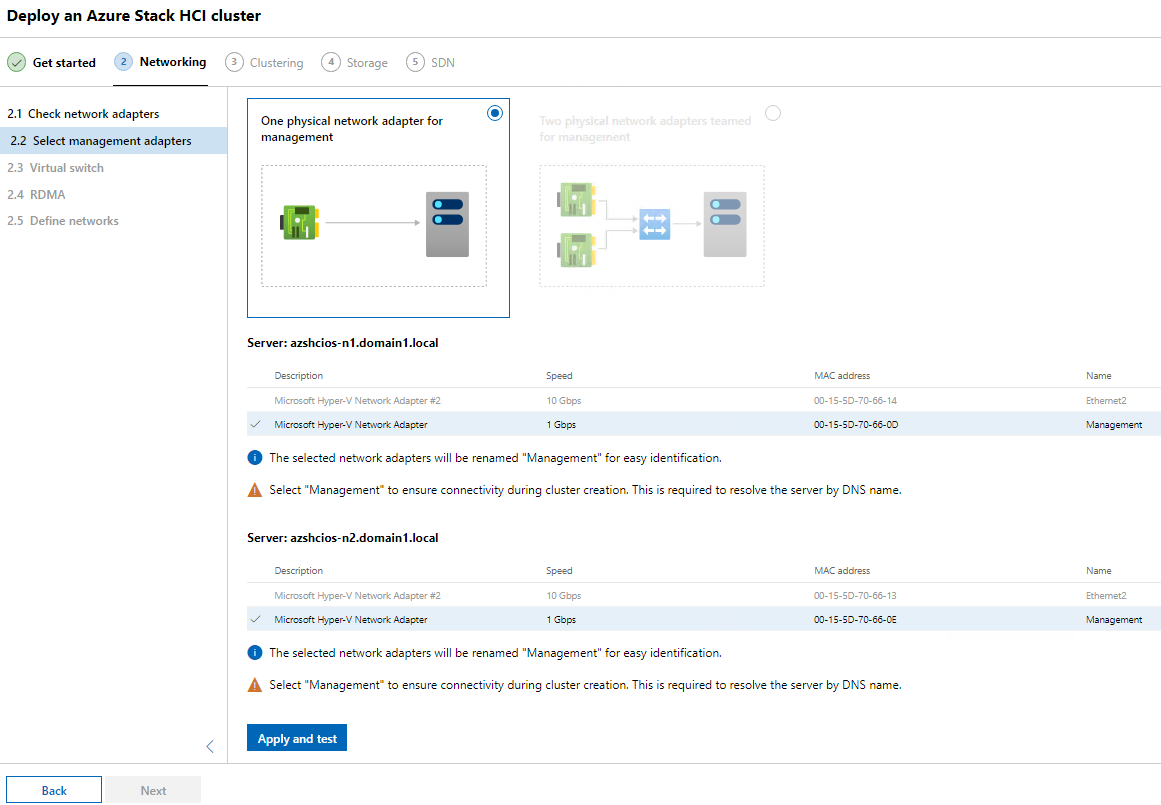
- On the Choose how to configure host networking screen, click Manually configure host networking and then click Next.
- On the Check the network adapters screen click Next.
- Click to select One physical network adapter for management and then select the management adapters on each host and click Apply and test, then click Next.
- On the Virtual switch screen, click the Skip virtual switch creation checkbox, and click Next.
- Click Next on the RDMA configuration screen (skip).
- On the Define networks screen enter a name, IP address and subnet mask for the storage adapters and then click Apply and test. Click Next: Clustering.
- On Validate the cluster screen, click Validate and wait for the validation to finish. When it does, click Next.
- On the Create the cluster screen assign a name and an IP address to the cluster and then click on Create cluster. When the cluster creation is complete, click Next: Storage.
- On the “Optionally erase all existing data” screen, click Next.
- On the Check the drives screen, click to expand and view the drives assigned to the Azure Stack HCI nodes to be used for Storage Spaces Direct (S2D) and then click Next to validate storage.
- On the Enable Storage Spaces Direct screen, click Enable to enable Storage Spaces Direct.
- When this is finished, click Next:SDN and on the Deploy the Network Controller screen click Skip.
2. To check the registration status of the Azure Stack HCI cluster in Azure:
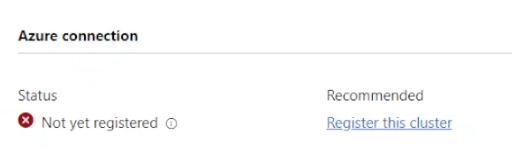
- Open Windows Admin Center and, under All connections, click the hyperlink for the newly created Azure Stack HCI cluster (Cluster1.domain1.local in this demo) to open the Dashboard for this cluster.
- On the Dashboard, under Azure connection, the status displays as "Not yet registered".
3. To register the Azure Stack HCI cluster in Azure:
- In the management computer where Windows Admin Center is installed (WAC1 in this demo), open Powershell and run the command below to download the required module and get it ready:
- Install-Module -Name Az.StackHCI
- Confirm the prompts to trust the package and to install NuGet if these appear.
- Run the command below to register the Azure Stack HCI cluster to an azure subscription:
-
Register-AzStackHCI -SubscriptionId "<Subscription ID>" -ComputerName AZSHCIOS-N1
-
This demo uses a 30-day trial subscription of Azure. The subscription ID can be located by login onto the Azure portal and clicking on the “Subscriptions" icon under "Azure Services".
4. How do I know this worked?
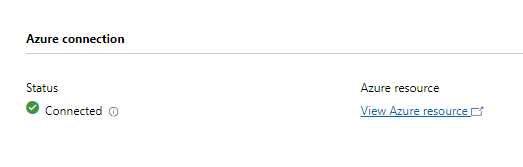
- Back in Windows Admin Center, under "All connections,” click the hyperlink for the Azure Stack HCI cluster object to open the Dashboard of Cluster1.
- In the Dashboard, under Azure connection, the newly created cluster shows as "Connected".
Tuotteet, joihin vaikutus kohdistuu
Dell EMC Cloud For Microsoft Azure StackTuotteet
Integrated System for Microsoft Azure Stack Hub 14G, Dell Hybrid Cloud System for MicrosoftArtikkelin ominaisuudet
Artikkelin numero: 000204313
Artikkelin tyyppi: How To
Viimeksi muutettu: 17 toukok. 2023
Versio: 6
Etsi vastauksia kysymyksiisi muilta Dell-käyttäjiltä
Tukipalvelut
Tarkista, kuuluuko laitteesi tukipalveluiden piiriin.