Dell Endpoint Security Suite Enterprise 和 Threat Defense 代理設定
Riepilogo: Dell Endpoint Security Suite Enterprise 或 Threat Defense 的代理設定。
Questo articolo si applica a
Questo articolo non si applica a
Questo articolo non è legato a un prodotto specifico.
Non tutte le versioni del prodotto sono identificate in questo articolo.
Sintomi
注意:
- 截至 2022 年 5 月,Dell Endpoint Security Suite Enterprise 已達到維護結束的期限。Dell 已不再更新本文。如需更多資訊,請參閱 Dell Data Security 的產品生命週期 (支援結束/壽命結束) 原則。如果您對其他文章有任何問題,請聯絡您的銷售團隊或聯絡 endpointsecurity@dell.com。
- 請參考端點安全性,以取得有關目前產品的其他資訊。
受影響的產品:
- Dell Endpoint Security Suite Enterprise
- Dell Threat Defense
受影響的版本:
- Windows - 代理程式 1290 或更新版本
- macOS - 代理程式 1300 或更高版本
- Linux - 代理程式 1430 或更新版本
目錄
Dell Endpoint Security Suite Enterprise 和 Threat Defense 支援使用者的代理組態是透過登錄檔項目進行設定。設定代理後,代理會使用 IP 位址和連接埠與 Cylance 主機進行所有連出通訊。
注意:不需要重新啟動服務,但可能需要長達四個小時,代理才會執行網路連接測試並應用在註冊表中所做的更改。需要重新開機電腦。
Causa
不適用
Risoluzione
Windows
若要在 Dell Endpoint Security Suite Enterprise 和 Threat Defense 中設定代理:
- 存取註冊表。根據代理的安裝方式(是否啟用保護模式),您必須提升許可權或取得註冊表的擁有權。
- 從 Microsoft 網站下載 psexe.exe,https://docs.microsoft.com/en-us/sysinternals/downloads/psexec
。
- 以系統管理員身分開啟 DOS 提示字元。
- 請先執行此命令:
psexec -i -s cmd.exe。
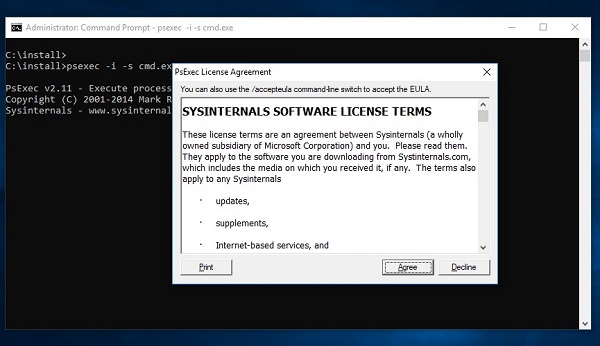
圖 1:(僅英文)同意授權條款
- 接受 EULA,然後在以下人員開啟的新視窗中執行此命令:
psexec: regedt32.exe:
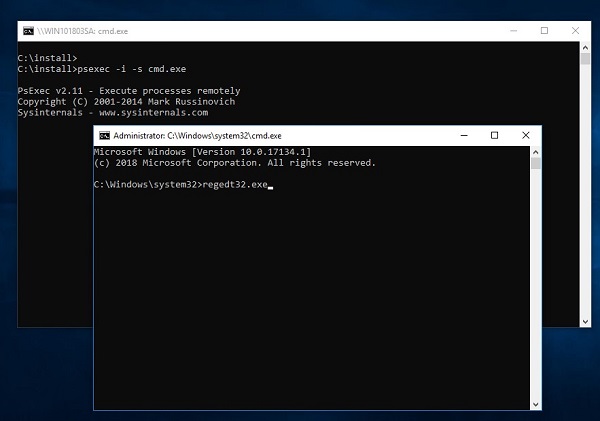
圖 2:(僅英文)輸入 regedt32.exe
警告:下一個步驟是 Windows 登錄編輯:
- 請先將登錄備份再繼續,並參閱如何在 Windows
- 編輯登錄可能會導致電腦在下次重新開機時沒有回應。
- 如果您對執行此步驟有任何疑慮,請聯絡 Dell Data Security 國際支援電話號碼以取得協助。
- 在 Registry Editor 中,前往
HKEY_LOCAL_MACHINE\SOFTWARE\Cylance\Desktop - 建立字串值 (REG_SZ):
- 值名稱 = ProxyServer
- 值資料 = 您的代理設定。
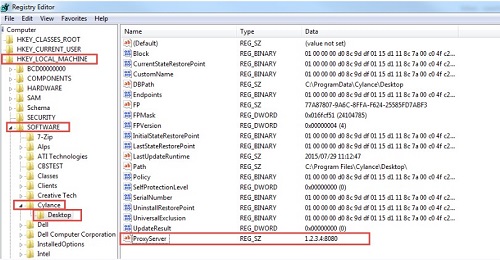
圖 3:(僅英文)登錄編輯程式
注意:這不適用於經過身份驗證的代理。若要設定經過驗證的代理:
- 設定代理並新增規則以允許所有流量至 *.cylance.com。
或
- 使用不同的代理原則,允許未經驗證的代理存取 Cylance 主機 (*.cylance.com)。
如此一來,如果沒有使用者登入,適用於 Windows 和 macOS 的 Dell Endpoint Security Suite Enterprise 代理程式就不再需要進行驗證,即可連線至雲端並與主控台通訊。
macOS
若要在 Dell Endpoint Security Suite Enterprise 和 Threat Defense 中設定代理:
修改 Cylance 資料夾中的values.xml檔案:
選項 1:若要使用命令列:
- 存取values.xml檔案。預設位置為
/Library/Application Support/Cylance/Desktop/registry/LocalMachine/Software/Cylance/Desktop/values.xml

圖 4:(僅英文)開啟values.xml
- 編輯values.xml檔並在值>元素之間<添加以下內容:
<value name="ProxyServer" type="string">PROXY IP AND PORT HERE</value>- 範例:
<value name="ProxyServer" type="string">127.0.0.1:8080</value>

圖 5:(僅英文)編輯values.xml
輸入 CTRL + X 和 Y 以儲存檔案。
保護狀態應為綠色:
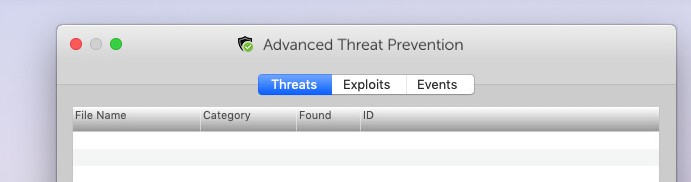
圖 6:(僅英文)進階威脅預防
選項 2:若要使用 bash 指令檔:
使用 bash 指令檔將代理金鑰向下推送至組織中的 OS X/macOS 裝置,這些裝置需要代理才能與 Cylance 主機連出通訊。
- 建立包含以下內容的檔案 (CylanceMacProxy.sh):
#!/usr/bin/bash
ADDR=1.2.3.4:8080
FILE="/Library/Application Support/Cylance/Desktop/registry/LocalMachine/Software/Cylance/Desktop/values.xml"
sed -i '' 's/.*<values>.*/&\
<value name="ProxyServer" type="string">'$ADDR'<\/value>/' "$FILE"
其中:
ADDR 表示代理伺服器IP位址和埠。
- 使用您偏好的部署機制 (Casper 等) 使用 sudo 執行 bash 指令檔。
sudo bash ./CylanceMacProxy.sh
注意:這不適用於經過身份驗證的代理。若要設定經過驗證的代理:
- 設定代理並新增規則以允許所有流量至 *.cylance.com。
或
- 使用不同的代理原則,允許未經驗證的代理存取 Cylance 主機 (*.cylance.com)。
Linux
若要在 Linux 的 Dell Endpoint Security Suite Enterprise 中設定代理,請選擇適當的作業系統:
開啟終端機視窗,並在一行中執行此命令:
echo "env http_proxy=http://proxyaddress:port" /etc/init/cylancesvc.override && systemctl stop cylancesvc && systemctl daemon-reload && systemctl start cylancesvc
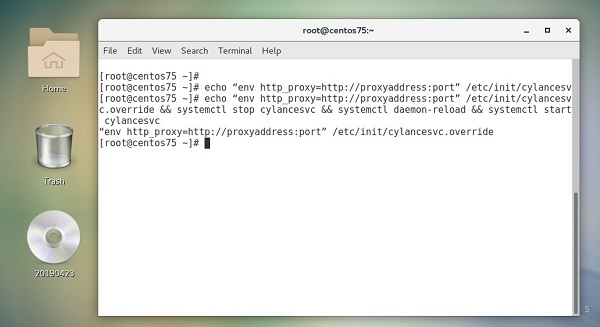
圖 7:(僅英文)在終端機中執行命令
開啟終端機視窗並執行以下命令:
echo "env https_proxy=https://proxyaddress:port" /etc/init/cylancesvc.override && systemctl stop cylancesvc && systemctl daemon-reload && systemctl start cylancesvc
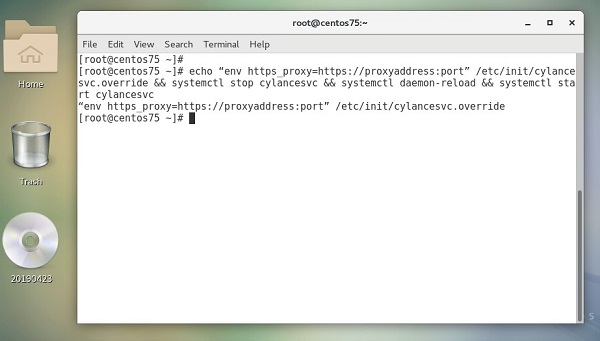
圖 8:(僅英文)在終端機中執行命令
開啟終端機視窗並執行以下命令:
mkdir /etc/systemd/system/cylancesvc.service.d && echo "[Service]" /etc/systemd/system/cylancesvc.service.d/proxy.confecho "env=http_proxy=http://proxyaddress:port" /etc/systemd/system/cylancesvc.service.d/proxy.confsystemctl stop cylancesvc && systemctl daemon-reload && systemctl start cylancesvc
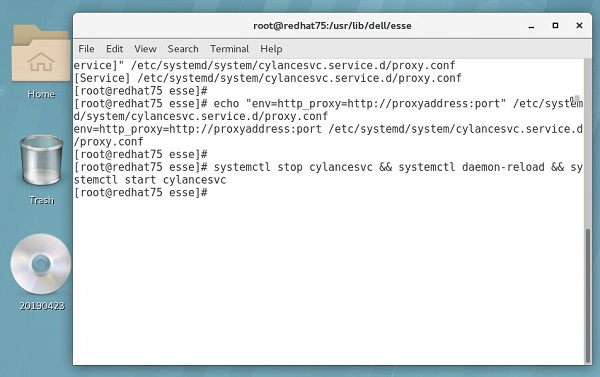
圖 9:(僅英文)在終端機中執行命令
開啟終端機視窗,並在一行中執行此命令:
mkdir /etc/systemd/system/cylancesvc.service.d && echo "[Service]" /etc/systemd/system/cylancesvc.service.d/proxy.confecho "env=https_proxy=https://proxyaddress:port" /etc/systemd/system/cylancesvc.service.d/proxy.confsystemctl stop cylancesvc && systemctl daemon-reload && systemctl start cylancesvc
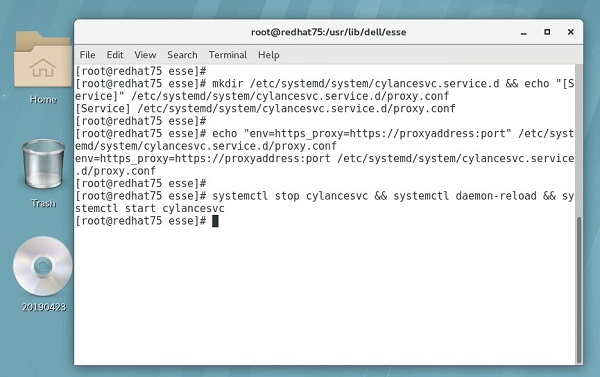
圖 10:(僅英文)在終端機中執行命令
如要聯絡支援部門,請參閱 Dell Data Security 國際支援電話號碼。
請前往 TechDirect,以線上產生技術支援要求。
如需更多深入見解與資源,請加入 Dell 安全性社群論壇。
Prodotti interessati
Dell Threat Defense, Dell Endpoint Security Suite EnterpriseProprietà dell'articolo
Numero articolo: 000130932
Tipo di articolo: Solution
Ultima modifica: 19 apr 2026
Versione: 13
Trova risposta alle tue domande dagli altri utenti Dell
Support Services
Verifica che il dispositivo sia coperto dai Servizi di supporto.