文書番号: 000124391
How to Enable Boot from CD or DVD Option with UEFI Boot Mode Enabled
概要: Learn how to enable boot from CD or DVD option in the Unified Extensible Firmware Interface (UEFI) BIOS with UEFI boot mode enabled. Follow the instructions below to add the optical drive to the boot list when your UEFI BIOS computer is unable to boot to DVD or CD. ...
文書の内容
手順
NOTE: Unified Extensible Firmware Interface (UEFI) replaces the legacy BIOS firmware interface. For more information, see Unified Extensible Firmware Interface Wiki
 .
.
This information applies to computers with the below specifications and settings:
- Windows 11, Windows 10, Windows 8.1, or Windows 8 computer with boot mode set to UEFI
- Computers with an Optical drive such as CD, DVD or Blu-ray
NOTE: For instructions to boot from USB, see the Dell knowledge-base article How to create and use the Dell Recovery and Restore USB drive.
Adding CD/DVD boot option manually in BIOS
NOTE: See the Dell knowledge-base article Access UEFI (BIOS) System Setup from Windows on your Dell Computer for another way to access the BIOS from within Windows.
NOTE: BIOS on your computer may not appear same as images shown in this article. Every Dell computer has a BIOS specific to its needs, and they are all updated regularly.
Expand the sections below according to the BIOS type of your computer.
Follow the steps provided below:
NOTE: In the File System List field, select the option that has "CD" at the end.
Example: "PciRoot (0x0)/Pci (0x1F, 0x2)/Sata(0x3, 0x0, 0x0)/CD"
Example: "PciRoot (0x0)/Pci (0x1F, 0x2)/Sata(0x3, 0x0, 0x0)/CD"
- Tap the F2 key at the Dell logo screen to enter System Setup or BIOS.
- On the left pane, click Boot Configuration.
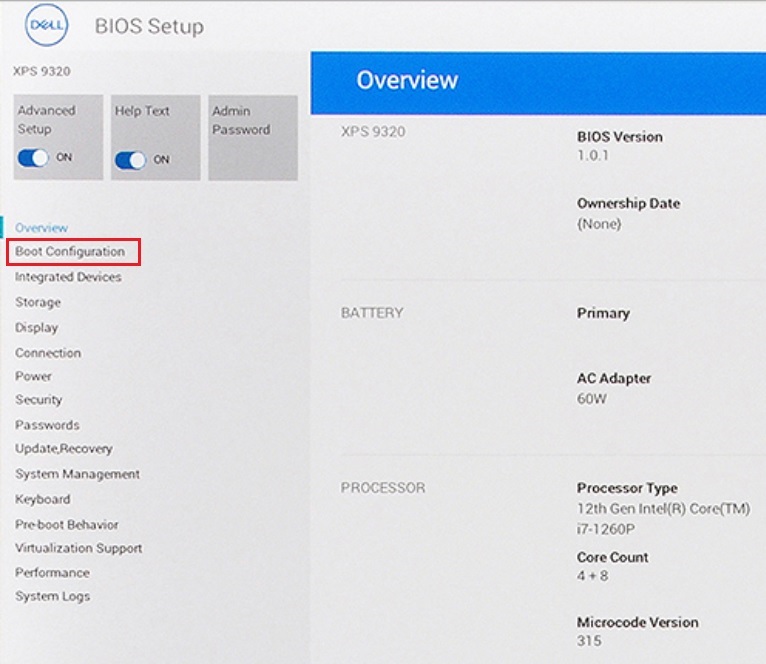
Figure 1: Boot Configuration on UEFI BIOS left pane - Scroll down to view the Secure Boot setting.
- Ensure that Secure boot is set to OFF. (See Figure 2 [English Only])
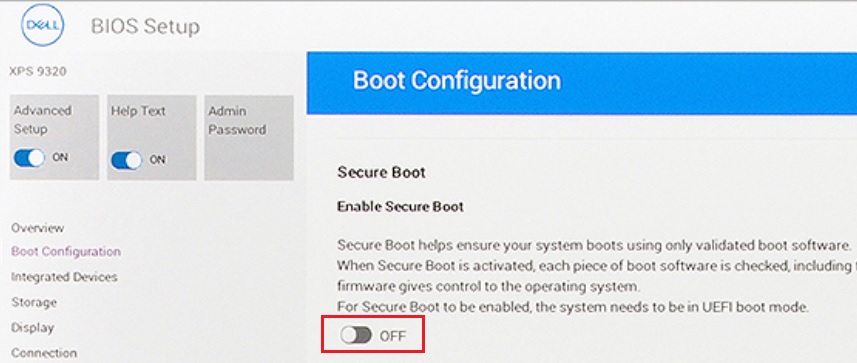
Figure 2: Secure Boot Off - Scroll up to the Boot Sequence section, and click Add Boot Option. (See Figure 3 [English Only])
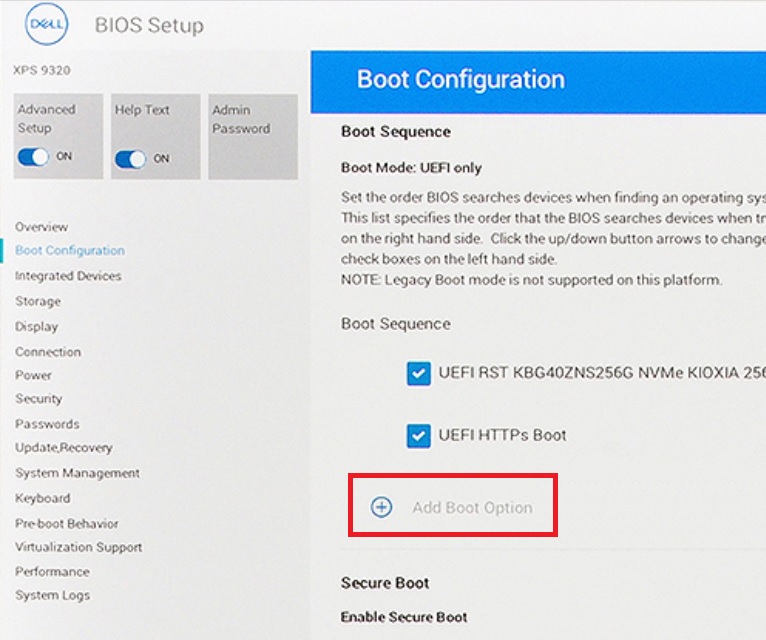
Figure 3: Add Boot Option - A new window appears with blank boot options.
- Click Browse for file.
- Select device → folder → file from the list.
- PciRoot..ESP. For example, EFI\Boot\bootx64.efi
- Click OK.
- Type CD/DVD/CD-RW Drive in the Boot Option Name field.
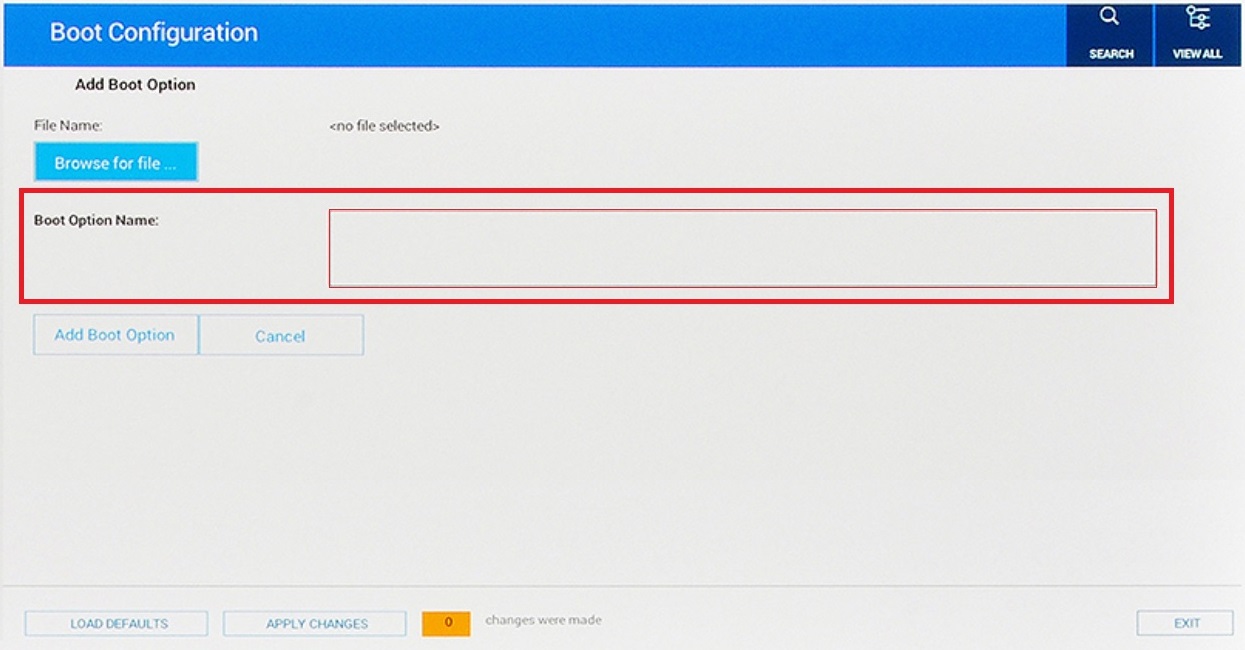
Figure 4: Add boot option name- Leave the File Name entry blank.
- Click OK.
NOTE: If the option for CD/DVD/CD-RW Drive is not present, then the computer hardware is not detecting the drive. Try physically reseating the drive where possible or swap with the drive of another computer to rule out the drive as the cause of any failure.
- Click Exit.
- The computer restarts.
NOTE: Alternatively, if you see an on-screen message to Press any key to boot from CD/DVD, press any key to proceed.
- Tap the F12 key on startup for boot menu, the DVD option is there under UEFI.
To add the DVD Boot option manually in the Dell Phoenix BIOS setup.
Follow the steps provided below:
- Boot mode should be selected as UEFI (Not Legacy).
- Secure Boot set to Off
NOTE: If the computer is not set to boot to UEFI, change it from the BIOS (F2) during startup or from the One-Time Boot (F12) menu.
- Go to the 'Boot' tab in the BIOS and select Add Boot option. (see Figure 5 [English Only])
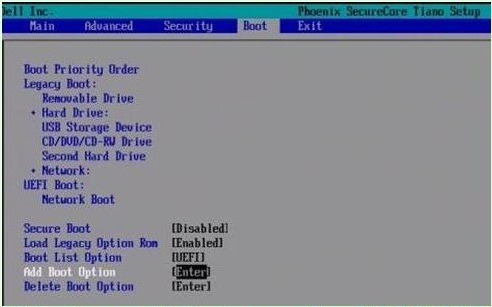
Figure 5: Add Boot Option - A new window appears with 'blank' boot option name. (see Figure 6 [English Only])
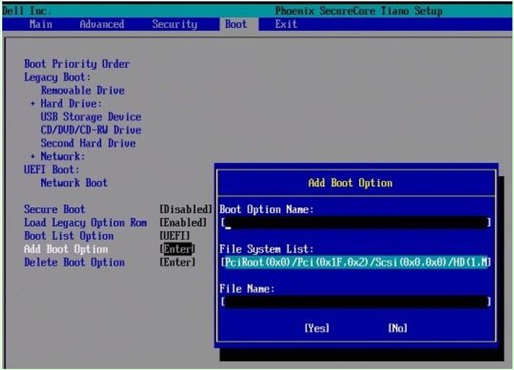
Figure 6: Add boot option fields - Name it "CD/DVD/CD-RW Drive"
NOTE: In the File System List field, select the option with "CD" at the end.
Example: "PciRoot (0x0)/Pci (0x1F, 0x2)/Sata(0x3, 0x0, 0x0)/CD"- Leave the File Name entry blank.
- Now using Tab key, select YES, and press ENTER.
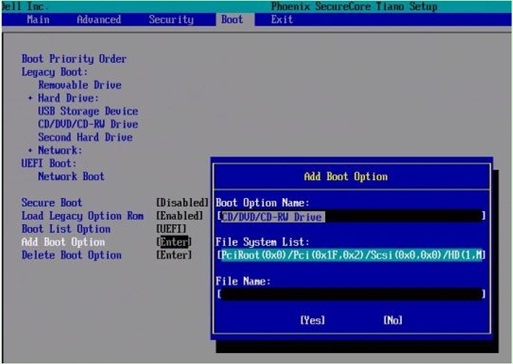
Figure 7: Add boot option fieldsNOTE: If the option for CD/DVD/CD-RW Drive is not present, then the computer hardware is not detecting the drive. Try physically reseating the drive where possible or swap with another computer drive to rule out the drive as the cause of any failure. - Press the F10 key to save settings and restart.
- The computer restarts.
-
Press the F12 key on startup for boot menu, the DVD option is there under UEFI.
NOTE: Alternatively, if you see an on-screen message to Press any key to boot from CD/DVD, press any key to proceed.
NOTE: If you are still unable to boot from the Windows reinstallation CD or DVD or if the CD or DVD is corrupt. Browse to the Dell OS Recovery Tool page to download and create a Windows recovery or reinstallation disc for your computer.
その他の情報
Recommended Articles
Here are some recommended articles related to this topic that might be of interest to you.
- How to create and use the Dell Recovery and Restore USB drive
- How Bootable Devices Work in UEFI Boot Mode
- Booting to the Advanced Startup Options Menu in Windows 11, and Windows 10
- Newer Dell Systems Unable to Boot to Internal Boot Device in Legacy Boot Mode
- Troubleshooting Optical Drive Recognition Issues in Windows
 Out of warranty? No problem Go to the Dell.com/support website and enter your Dell Service Tag and view our offers.
NOTE: Offers are only available for US, Canada, UK, France, Germany, and China computer customers. Server and Storage are not applicable.
文書のプロパティ
影響を受ける製品
Desktops & All-in-Ones, Laptops
最後に公開された日付
04 1月 2024
バージョン
15
文書の種類
How To