PowerProtect: How to Perform a SQL Table Restore
Resumo: This article explains how to perform a SQL table restore using the SMS plug-in.
Este artigo aplica-se a
Este artigo não se aplica a
Este artigo não está vinculado a nenhum produto específico.
Nem todas as versões do produto estão identificadas neste artigo.
Instruções
Connect to the SQL server where the data must be restored.
- Open SQL management studio as administrator user:

Figure 1: Open SQL management studio as administrator user
- Open SMS plug-in:

Figure 2: Open SMS plug-in
- From the Database Restore Table tab > General section, configure the restore settings:
- PowerProtect DD System: Select the DD where the backup is stored.
- SQL Server Host: Select the source SQL server where the database to be restore was protected.
- SQL Server Instance: Select an SQL server instance that contains the database to be restored.
- Database: Select the Database to be restore and backup date.
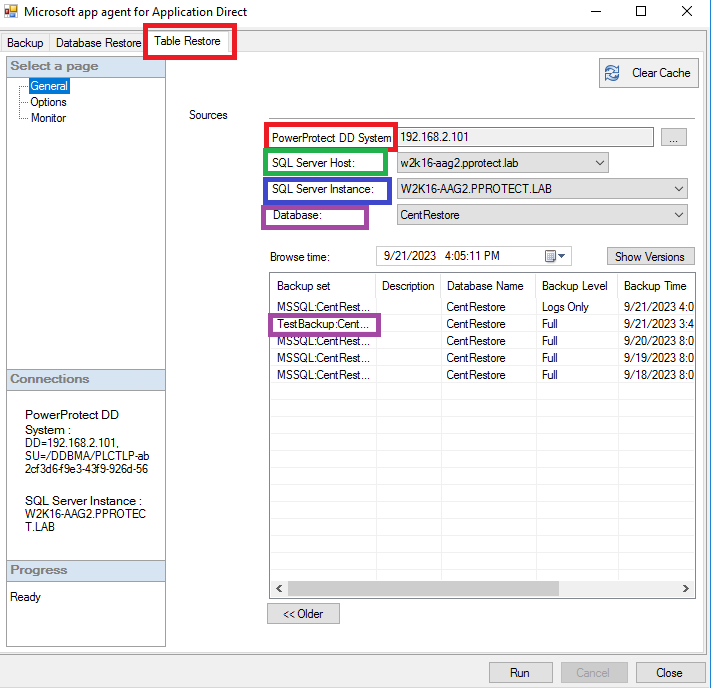
Figure 3: Configure the restore settings from the database restore table tab.
- Under the Options page, define the following settings:
- Mount folder: Path where the backup must be mounted.
- Mount Expire: Define the number of hours to keep the mount of the database active. For big DB-s, restores can take time to read all data, so it is advisable to extend the time to the maximum.
- Select a debug level: Sets the debug level for troubleshooting purposes
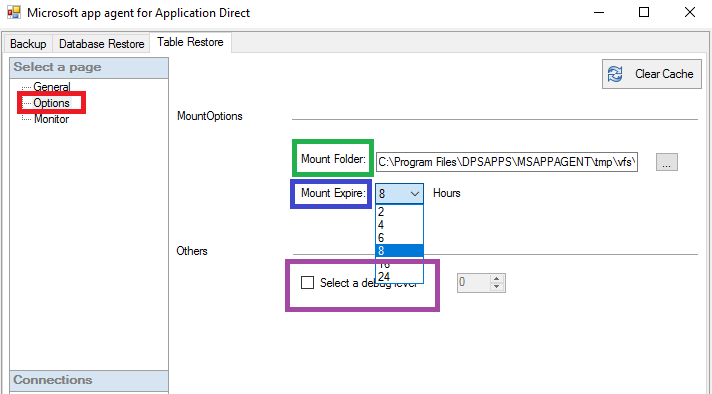
Figure 4: Define the settings in the Options page.
- Run the table restore operation and monitor the progress under Monitor page:
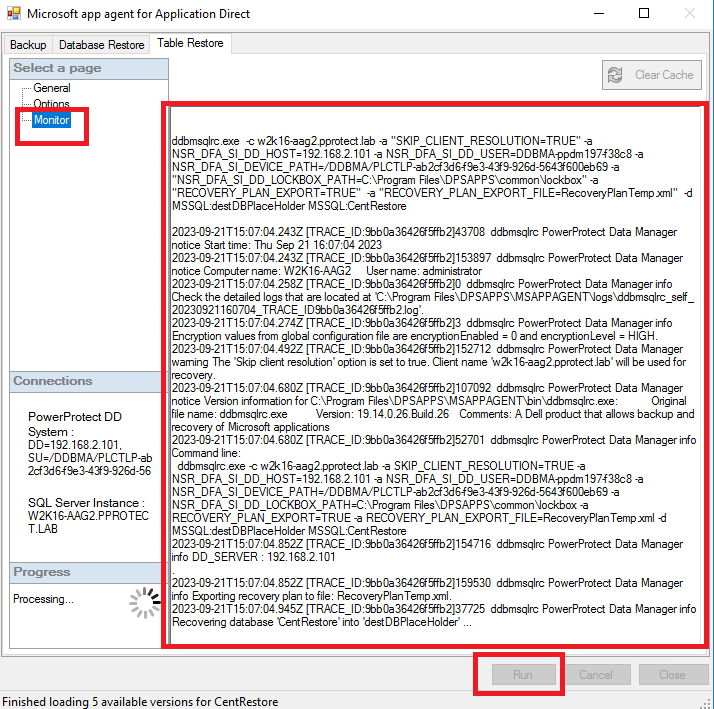
Figure 5: Monitor table restore operation progress.
- In Task Manager, confirm that the Mount service is running:

Figure 6: Confirm that Mount Service is running.
- Once the mount operation is completed, Item Point software is started. Configure the data source pointing to the mount path defined in step 4:
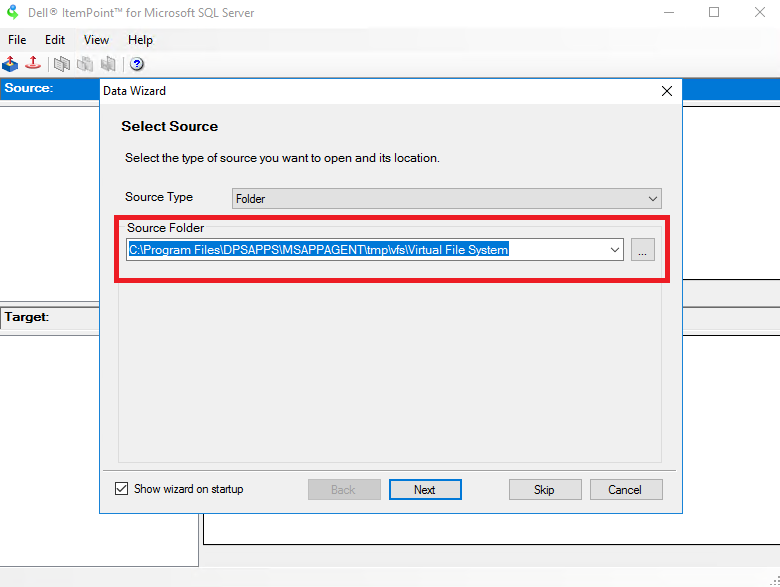
Figure 7: Configure the data source pointing to the defined mount path.
- Select the database name from which you intend to perform the Table Restore operation:
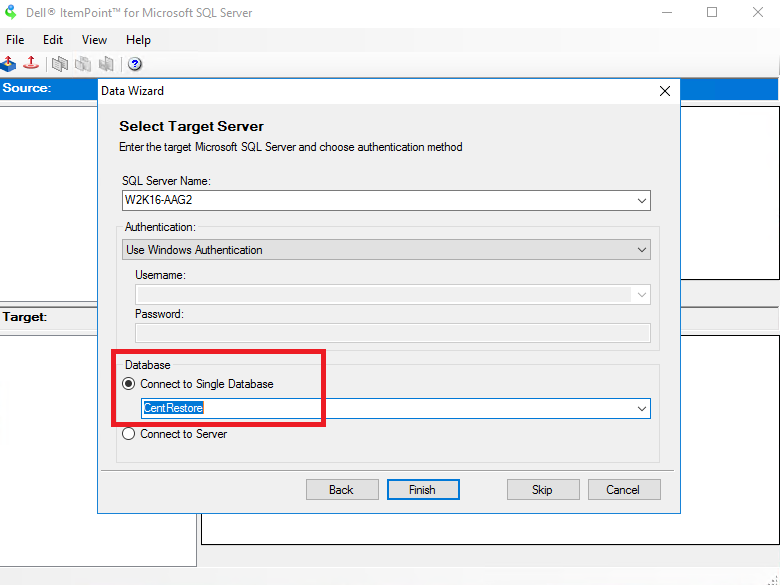
Figure 8: Select the database name to perform Table Restore operation.
- Once the database is loaded, select the corresponding table and drag and drop the required data from the top, source database mounted from the backup. Drag it to the target database which is your current database on the SQL server:
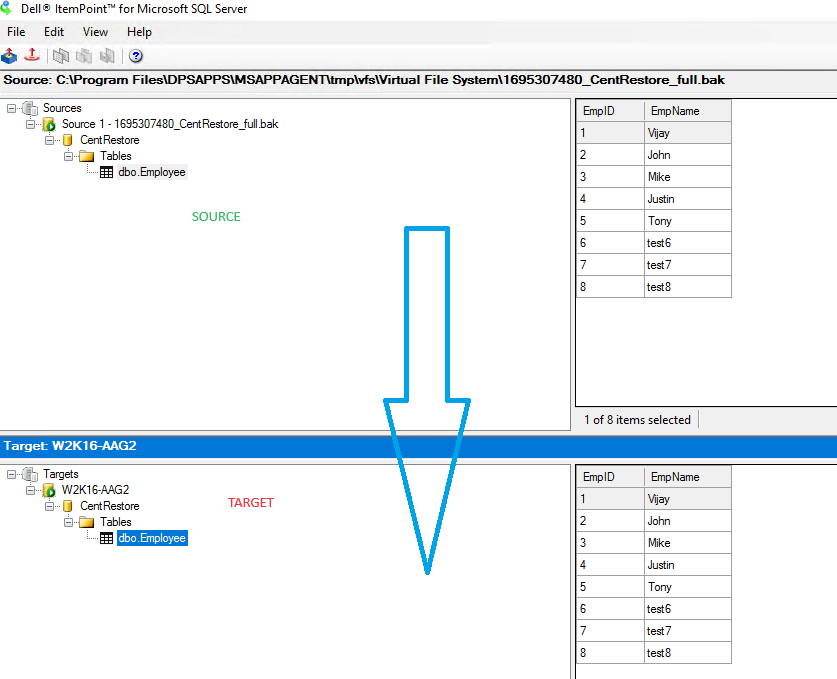
Figure 9: Drag and drop the required data from the top source database to the target database.
Mais informações
Produtos afetados
PowerProtect SoftwarePropriedades do artigo
Número do artigo: 000218439
Tipo de artigo: How To
Último modificado: 04 jan. 2024
Versão: 3
Encontre as respostas de outros usuários da Dell para suas perguntas.
Serviços de suporte
Verifique se o dispositivo está coberto pelos serviços de suporte.