Välkommen
Dells webbplatser
Dells webbplatser
Välkommen till Dell
Mitt konto
- Lägg beställningar snabbt och enkelt
- Visa beställningar och kontrollera leveransstatus
- Skapa och kom åt en lista över dina produkter
- Hantera dina webbplatser, produkter och kontakter på produktnivå från Dell EMC med hjälp av företagsadministration.
Artikelnummer: 000135385
Setting a Static IP Address on your Dell Laser Printer using the Embedded Web Server (EWS)
Sammanfattning: Use Embedded Web Server (EWS) to set static IP address on Dell printer.
Artikelns innehåll
Symptom
No symptoms information is available.
Orsak
No cause information is available.
Upplösning
Setting a Static IP Address on your Dell Laser Printer using the Embedded Web Server (EWS)
The Embedded Web Server (EWS) is an online web page which allows you to make changes to your Printer's Operating Panel using the network connection.
Use the guide below to set a Static IP Address on your Dell Laser Printer. The guide below uses the Dell 5130cn Laser Printer as an example, other printers may vary slightly.
- Print a settings page from your printer to obtain the IP address assigned to it (this may change depending on your system type, see your User Guide for information about Printing a Printer/System Settings Page).
- The IP Address is listed under 'Network' subheading (Figure 1 [English only]).
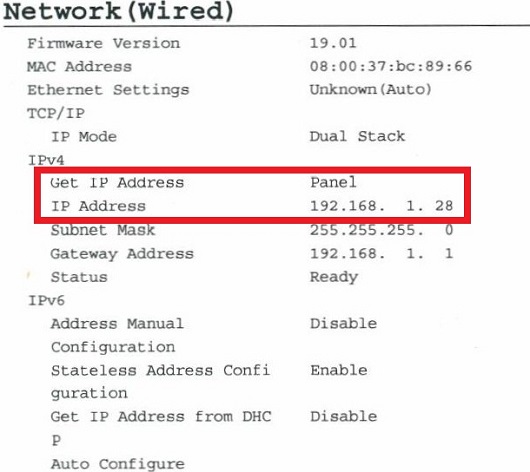
Figure 1: Network IP Address on settings page - Enter the Printers IP Address into a Web Browser and Enter.
- The EWS should now be open (Figure 2 [English only]).
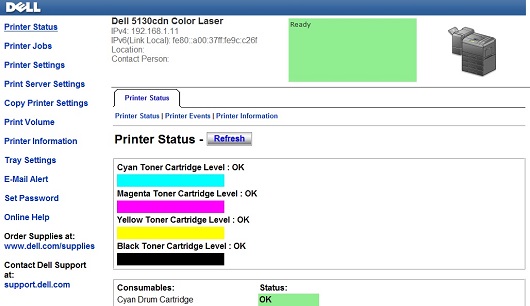
Figure 2: EWS - Click on Print Server Settings (Figure 3 [English only]).
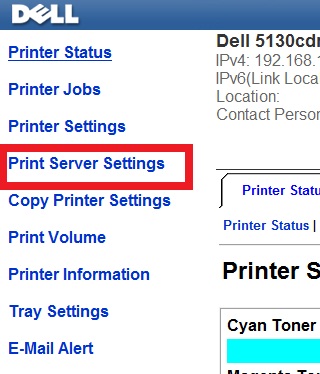
Figure 3: Click Printer Server Settings - Click on the Print Server Settings Tab (Figure 4 [English only]).
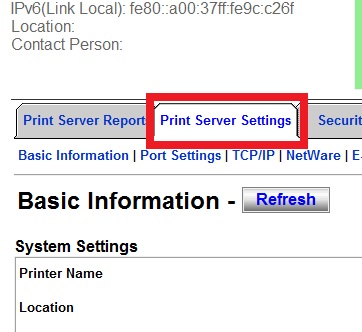
Figure 4: Printer Server Settings Tab - Click on the TCP/IP Tab (Figure 5 [English only]).
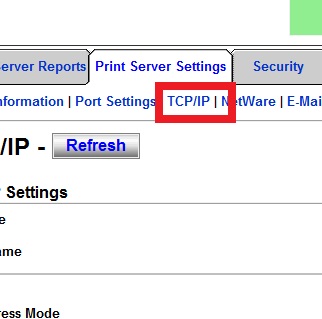
Figure 5: Click TCP/IP - In the TCP/IP Settings, use the dropdown menu to select IP Address Mode as Manually Set (Figure 6 [English only]).
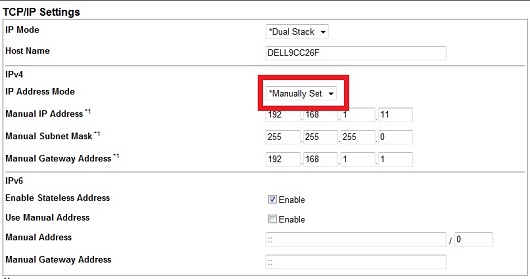
Figure 6: IP Address Mode drop down - Input the Manual IP Address, the Manual Subnet Mask, and the Manual Default Gateway (Figure 7 [English only]).
Note: In order to find your Subnet Mask and Default Gateway, use the IP Config Command as explained in the article below.
Top commands for use in Command Prompt

Figure 7: Manual input IP, Subnet Mask, and Default Gateway - Scroll down and click on Apply New Settings (Figure 8 [English only]).
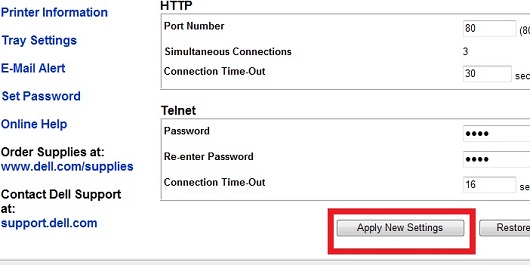
Figure 8: Apply New Settings - The Printer should restart, and the settings should now be saved and the Printer should now have the IP Address you have set.
- Print another System Settings Page to ensure the setting has been saved correctly.
If these steps do not correct the problem, contact Dell Technical Support.
Back to TopArtikelegenskaper
Produkt
Printers & Accessories, Dell Printers, MultiFunction Printers, Legacy Printers, Smart Printers
Senaste publiceringsdatum
07 apr. 2023
Version
4
Artikeltyp
Solution