How to Create New Unified Computing System Manager vNIC Templates Using New MAC Pools
摘要: This document explains how to create vNIC templates in Unified Computing System (UCS) Manager that use newly created MAC pools.
本文适用于
本文不适用于
本文并非针对某种特定的产品。
本文并非包含所有产品版本。
说明
Create vNIC templates to use new MAC pool in Unified Computing System (UCS) Manager.
Facts:
MAC
UCSM
vNIC
Template
Solution:
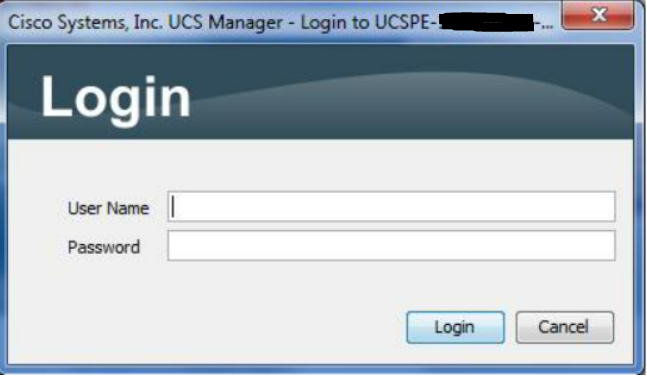
Figure 1: Login Screen
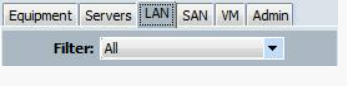
Figure 2: Select LAN Tab
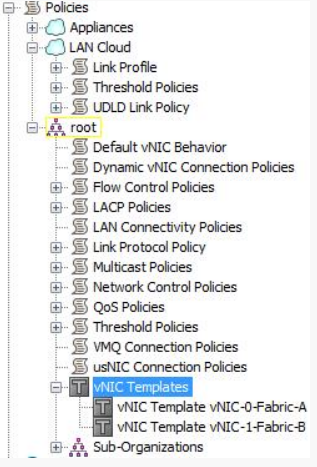
Figure 3: Select vNIC Template from Tree
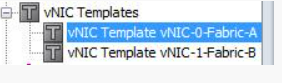
Figure 4: Choose vNIC Template
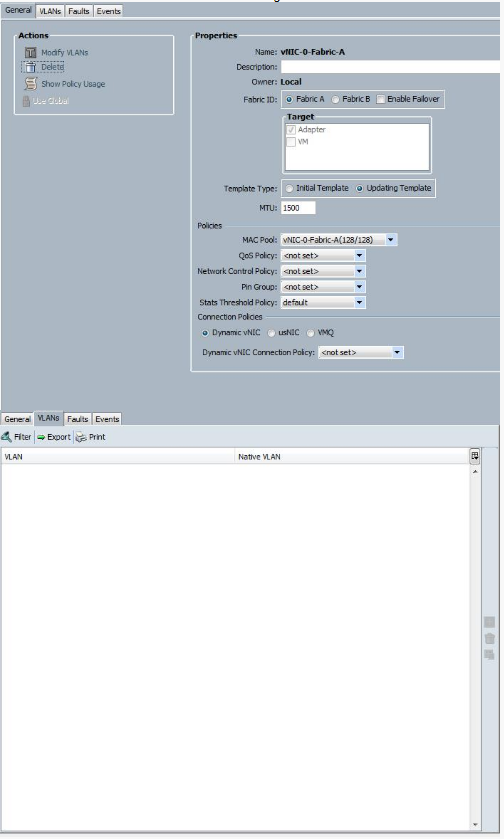
Figure 5: Record Settings on General and VLANs tabs
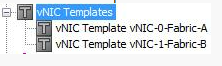
Figure 6: Select vNIC Template from Tree
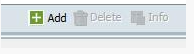
Figure 7: Click Add Button to Start Wizard

Figure 8: Use Recorded Data to Create vNIC Template
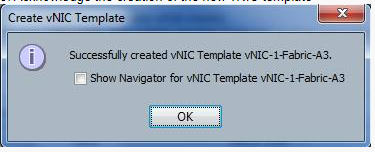
Figure 9: Acknowledgement of New Template
Facts:
MAC
UCSM
vNIC
Template
Solution:
- Log in to UCSM.
Figure 1: Login Screen
- Select LAN tab.
Figure 2: Select LAN Tab
- Select vNIC Templates on the tree.
Figure 3: Select vNIC Template from Tree
- Select one of the existing vNIC Templates.
Figure 4: Choose vNIC Template
- Take screenshots of or record all the settings on the General and VLANs tabs.
Figure 5: Record Settings on General and VLANs tabs
- Select vNIC Templates on the tree.
Figure 6: Select vNIC Template from Tree
- Click the green plus button for Add in the bottom of the UI in order to start the wizard to create a vNIC Template.
Figure 7: Click Add Button to Start Wizard
- Use the screenshots or recorded data to fill out the Create vNIC Template display. Change the name to the new name and the Mac pool to the new MAC pool associated with this vNIC Template and click the OK button.
Figure 8: Use Recorded Data to Create vNIC Template
- Acknowledge the creation of the new vNIC Template by clicking OK.
Figure 9: Acknowledgement of New Template
- Repeat steps 4-9 to create vNIC Templates using the new MAC pools for all the vNIC Templates.
受影响的产品
Switches文章属性
文章编号: 000205560
文章类型: How To
上次修改时间: 24 1月 2023
版本: 4
从其他戴尔用户那里查找问题的答案
支持服务
检查您的设备是否在支持服务涵盖的范围内。