Article Number: 000104415
How to Deploy the Dell EMC OpenManage Network Manager 6.2 Virtual Appliance
Summary: Instructions to Deploy the Dell EMC OpenManage Network Manager 6.2 Virtual Appliance
Article Content
Instructions
In this article we’ll be discussing the steps to initially deploy the Dell EMC OpenManage Network Manager (OMNM) Virtual Appliance.
 NOTE: In this example we’re using a VMware ESXi 5.5 Hypervisor to deploy the appliance. See the OMNM VM Installation Guide for a list of supported hypervisors. Also, there are a list of sizing guidelines in the OMNM User Guide which you may want to review before deploying this appliance. The default installation of this appliance is not meant for larger environments with more than 25 devices to be managed. For environments over 25 devices the VM may need to configured with more CPU, memory, and disk resources per the sizing guidelines mentioned.
For resizing the virtual disk and database size of this appliance for larger deployments you may want to see Dell EMC KB article HOW12482
1. Download the latest OMNM 6.2 appliance from your Dell EMC Software Digital Locker account or from the Support Site
2. Once you’ve downloaded the OVA file you will need to login to your ESXi vSphere or vCenter client to deploy it.
3. From the ESXi client of choice you will then need to select the option to Deploy OVF Template. In this example we have logged into our vSphere client and gone to File>Deploy OVF Template. Then in the screenshot below you can see you’ll need to browse to the OVA file you downloaded. Once the file is selected click Next.

4. On the OVF Template Details screen review the details and then click Next.

5. On the Name and Location screen you can give the VM whatever name you choose and select the inventory location. Then click Next.

6. On the Host/Cluster screen you will need to select the specific host or cluster the appliance is to be deployed on. Then click Next.

7. On the Storage screen you’ll need to select the datastore where the VM appliance will live. Then click Next.

8. On the Disk Format screen you need to choose a disk format for the virtual disk to be created. Since OMNM has a built-in MySQL database it’s generally best to choose one of the Thick Provision options here so the disk space is statically allocated. In this example we chose Thick Provision Lazy Zeroed because it takes less time to deploy than Thick Provision Eager Zeroed. Although, it’s best to check with your VM administrator on what will work best for your environment here.

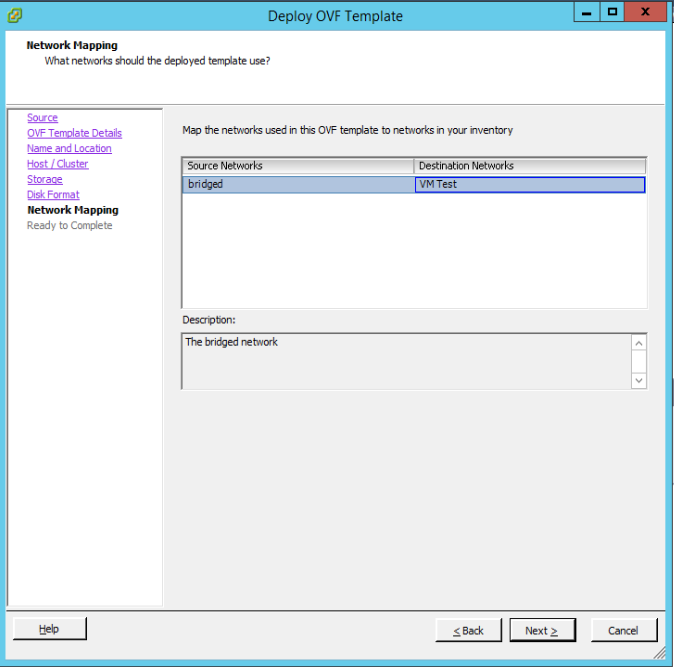
9. From the Network Mapping screen you’ll need to choose which VM network your appliance will communicate on. Then click Next.
10. Now you’re almost done with deploying the template. Just review the settings to be deployed for the appliance and make sure they’re correct. You can also choose to have the VM power on after it’s deployed, which we’ve done by checking the "Power on After Deployment" check box in the Ready to Complete screen. Click Finish when you’re ready to deploy the VM.

11. Monitor the status of the deployment and make sure it completes successfully.

12. Once the VM is deployed and powered on you’ll need to open the VM console from the vSphere or vCenter client of choice. You can do this by right-clicking on the VM and choosing Open Console. You’ll get the following screen and need to login to the VM with the default username: synergy and default password: synergyP@$$


14. Now select option 1 to configure the VM and press Enter.

15. You’ll get the prompt stating it’s initializing the system and then all running servers stopped. Press Enter here to continue.

16. You’ll get prompted to configure the network IP and gateway. Press Enter here to continue.

17. You’ll need to select the Ethernet interface to be used from the list provided. In this case we’re provided only eth0 so we type eth0 and press Enter. Then you’ll be prompted to enter the IP address, subnet mask, and gateway to be used. Enter this information and press Enter after each item. You’ll be prompted to check whether the information you entered is correct. Press Y for yes and press Enter.

18. Now, you’ll be prompted with the interface config file to check the settings once more and save them. Press Enter here to continue and it should restart the network service to update the interface settings. Then press Enter once more to continue.


19. You should get prompted that the VM configuration is complete and the appliance is ready for a reboot. Press Enter here to restart the VM.


20. At this point the OMNM application is starting up and should take about 5 minutes to fully initialize the application server. You can use the following commands to check the status of the services.


21. Once the all services are ready you can now login to OMNM from your web browser. The URL will be in the following form….

Now you’ve completed the initial installation/deployment of the OMNM 6.2 VM Appliance. You’re ready to start discovering devices and begin monitoring your network.
NOTE: In this example we’re using a VMware ESXi 5.5 Hypervisor to deploy the appliance. See the OMNM VM Installation Guide for a list of supported hypervisors. Also, there are a list of sizing guidelines in the OMNM User Guide which you may want to review before deploying this appliance. The default installation of this appliance is not meant for larger environments with more than 25 devices to be managed. For environments over 25 devices the VM may need to configured with more CPU, memory, and disk resources per the sizing guidelines mentioned.
OMNM VM Installation Guide and User Guide can be found HERE
For resizing the virtual disk and database size of this appliance for larger deployments you may want to see Dell EMC KB article HOW12482
1. Download the latest OMNM 6.2 appliance from your Dell EMC Software Digital Locker account or from the Support Site
2. Once you’ve downloaded the OVA file you will need to login to your ESXi vSphere or vCenter client to deploy it.
3. From the ESXi client of choice you will then need to select the option to Deploy OVF Template. In this example we have logged into our vSphere client and gone to File>Deploy OVF Template. Then in the screenshot below you can see you’ll need to browse to the OVA file you downloaded. Once the file is selected click Next.
5. On the Name and Location screen you can give the VM whatever name you choose and select the inventory location. Then click Next.
8. On the Disk Format screen you need to choose a disk format for the virtual disk to be created. Since OMNM has a built-in MySQL database it’s generally best to choose one of the Thick Provision options here so the disk space is statically allocated. In this example we chose Thick Provision Lazy Zeroed because it takes less time to deploy than Thick Provision Eager Zeroed. Although, it’s best to check with your VM administrator on what will work best for your environment here.
9. From the Network Mapping screen you’ll need to choose which VM network your appliance will communicate on. Then click Next.
10. Now you’re almost done with deploying the template. Just review the settings to be deployed for the appliance and make sure they’re correct. You can also choose to have the VM power on after it’s deployed, which we’ve done by checking the "Power on After Deployment" check box in the Ready to Complete screen. Click Finish when you’re ready to deploy the VM.
11. Monitor the status of the deployment and make sure it completes successfully.
12. Once the VM is deployed and powered on you’ll need to open the VM console from the vSphere or vCenter client of choice. You can do this by right-clicking on the VM and choosing Open Console. You’ll get the following screen and need to login to the VM with the default username: synergy and default password: synergyP@$$
13. From the appliance CentOS CLI type ./setup and press Enter.
The IP settings will be applied to OMNM and the base license will be installed at this point.
After the reboot you’ll need to log back into the VM with the same default credentials as before.
20. At this point the OMNM application is starting up and should take about 5 minutes to fully initialize the application server. You can use the following commands to check the status of the services.
- pmgetstatus ---to check application server status
- sudo service synergy status ---to check the web server status
- sudo service owaredb status ---to check the OMNM database (MySQL) status
- watch –n 10 pmgetstatus ---this will run the pmgetstatus command every 10 seconds so you can monitor the application server until the status becomes ready.
21. Once the all services are ready you can now login to OMNM from your web browser. The URL will be in the following form….
http://<appliance hostname or IP>:8080/
NOTE: Port 8080 is used for HTTP connections to the appliance. For setting up HTTPS (port 8443) see the OMNM User Guide

The default login screen will appear as follows. The default username is admin and the default password is admin.
Now you’ve completed the initial installation/deployment of the OMNM 6.2 VM Appliance. You’re ready to start discovering devices and begin monitoring your network.
Article Properties
Affected Product
Dell OpenManage Network Manager
Last Published Date
21 Feb 2021
Version
3
Article Type
How To