Article Number: 000124565
How to Manage Zones in Dell Threat Defense
Summary: Zones can be managed in Dell Threat Defense by following these instructions.
Article Content
Symptoms
Note:
- As of May 2022, Dell Threat Defense has reached End of Maintenance. This product and its articles are no longer updated by Dell. For more information, reference Product Life Cycle (End of Support / End of Life) Policy for Dell Data Security. If you have any questions on alternative articles, either reach out to your sales team or contact endpointsecurity@dell.com.
- Reference Endpoint Security for additional information about current products.
Zones are used to manage and organize devices in a Dell Threat Defense administration console.
Affected Products:
Dell Threat Defense
Cause
Not applicable.
Resolution
A Dell Threat Defense administrator may:
- Add Zone
- Add Zone Rule
- Remove Zone
Click the appropriate step for more details.
By default, devices are automatically added to the "unzoned" zone. It is highly recommended to create additional zones to manage device policies and product updates.
To add a zone:
- From a web browser, go to the Dell Threat Defense administration console at:
- North America: https://dellthreatdefense.cylance.com

- Europe: https://dellthreatdefense-eu.cylance.com

- Asia Pacific: https://dellthreatdefense-au.cylance.com

- North America: https://dellthreatdefense.cylance.com
- Log in to Dell Threat Defense administration console.
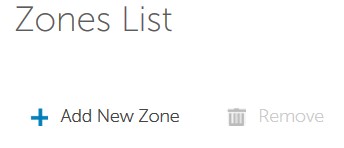
- Click the Zones tab.

- Under the Zones tab, click Add New Zone.
- Enter a Zone Name.
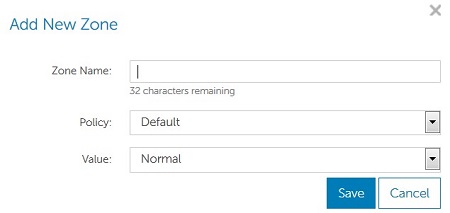
Note: The Zone Name may be a maximum of 32 characters.
- Select a Policy to be applied to the zone from the drop-down menu.
Note: The base configuration only contains the Default Policy. Reference How to Modify Policies in Dell Threat Defense to add additional policies.
- From the drop-down menu, select the Value Low, Normal, or High to indicate how threats are classified within a zone.
- Once Zone Name, Policy, and Value are selected, click Save.
Note: Zone Name, Policy, and Values can be edited at any time by clicking the Zone post creation.
By default, devices have to be manually moved into a zone by an administrator. Zone Rules automate this task.
To add a zone rule:
- From a web browser, go to the Dell Threat Defense administration console at:
- North America: https://dellthreatdefense.cylance. com

- Europe: https://dellthreatdefense-eu.cylance.com

- Asia Pacific: https://dellthreatdefense-au.cylance.com

- North America: https://dellthreatdefense.cylance. com
- Log in to Dell Threat Defense administration console.

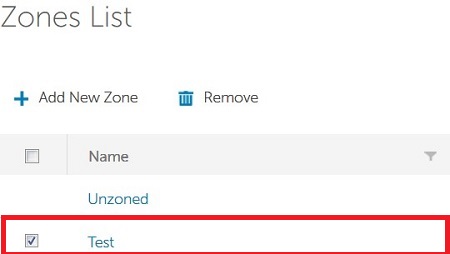
- Under the Zone tab, click the appropriate Zone to add a Zone Rule.
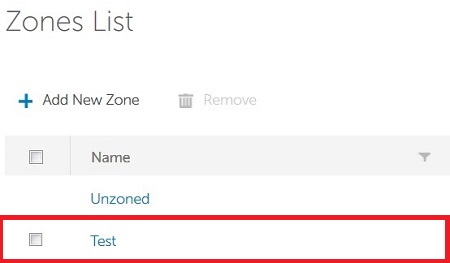
Note: The example Test zone name may differ in your environment. Reference the Add Zone section for creating additional zones.
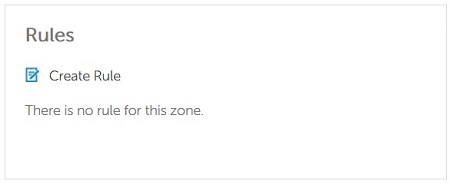
- Click Create Rule.
- New devices are automatically added to the zone if When a new device is added to the organization is checked. Choose to either leave checked or clear this value.

Note: If more than one zone would add the new device, the last modified rule wins if there is conflict.
- If any identifying attribute (such as IP, hostname, operating system, or domain) changes, devices are automatically added to a zone if When any attribute of a device has changed is checked. Choose to either leave cleared or check this value.
- Choose at least one rule from the drop-down menu:
- Device Name
- Distinguished Name (LDAP)
- Member of (LDAP)
- Domain Name
- IPv4 address in range
- Operating System

Note: More than one rule may be added by clicking the + sign.
- Populate the criteria for one or more rules that are selected from Step 6.

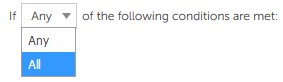
- Select either:
- If ALL of the following conditions are met - This option requires all rule criteria to be met in order for a device to automatically be added into a zone.
- If ANY of the following conditions are met - This option requires at least one to be met in order for a device to automatically be added into a zone.
- Select either do not apply or apply Zone policy for devices that are added to the zone.

- Check Apply now to all existing devices to have previously registered devices added to the zone that meet the rule criteria.

Note: Checking Apply now to all existing devices takes up to five minutes to complete. This delay depends on the number of queries being performed and the size of the environment.
Sometimes, a zone may no longer be necessary. The Dell Threat Defense tenant provides administrators the ability to remove zones.
Note: Removing a tenant does not remove the associated devices. Reference How to Remove a Device from the Dell Threat Defense Administration Console for more information.
To remove a zone:
- From a web browser, go to the Dell Threat Defense administration console at:
- North America: https://dellthreatdefense.cylanbce.com

- Europe: https://dellthreatdefense-eu.cylance.com

- Asia Pacific: https://dellthreatdefense-au.cylance.com

- North America: https://dellthreatdefense.cylanbce.com
- Log in to Dell Threat Defense administration console.

- Under the Zone tab, click the appropriate Zone to be removed.
Note:
- The example device name may differ in your environment.
- Devices are not deleted when a zone is removed.
- Click Remove.
- On confirmation, click Yes.
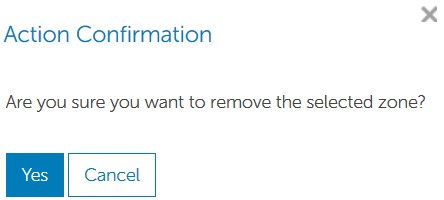
Warning: A removed zone action cannot be undone. The zone must be re-created if this action occurred by mistake.
To contact support, reference Dell Data Security International Support Phone Numbers.
Go to TechDirect to generate a technical support request online.
For additional insights and resources, join the Dell Security Community Forum.
Additional Information
Videos
Article Properties
Affected Product
Dell Threat Defense
Last Published Date
20 Dec 2022
Version
10
Article Type
Solution