Avamar:複数のADサーバーがある場合にLDAPを設定する方法
概要: この記事では、複数のActive Directoryサーバーを使用するAvamar環境でLightweight Directory Access Protocol (LDAP)設定を構成する手順について説明します。サーバーの一部はファイアウォールで制限されている場合があります。
この記事は次に適用されます:
この記事は次には適用されません:
この記事は、特定の製品に関連付けられていません。
すべての製品パージョンがこの記事に記載されているわけではありません。
手順
これらは、複数のAD(Active Directory)サーバーを使用するAvamar環境でLDAPを構成するために必要な手順です。その一部はファイアウォールで制限されている場合があります
この状態は、 ldap.properties または krb5.conf ファイルには、環境内のファイアウォールによってブロックされている標準のLDAPおよびKerberos(KRB)ポート88、389、464を備えたADサーバーが入力されます
これには、環境内でこれらのポートがブロックされていないADサーバーを選択的に検索する必要があります
次の手順では、ADサーバーを検索し、お客様の環境内で必要なポートが開いているサーバーを特定する方法について説明します。「 ldap.properties と krb5.conf ファイルは、適切なADサーバー情報で手動で更新する必要があります。
- Avamar Utility Nodeにログインし、次のコマンドを実行します。
nslookupコマンドをお客様のドメインで実行します。
nslookup <customerdomain.com> |grep Address
出力例
Address: 10.10.10.240#53
Address: 10.10.10.240
Address: 10.10.10.242
Address: 10.10.10.244
Address: 10.10.10.246
Address: 10.10.10.248
Address: 1234:5:678:aaaa:fff:cccc:dddd:eeee
- コマンドを再実行し、IPv4アドレスの出力をファイルに送信します。
nslookup |grep Address | cut -d " " -f2 |grep -v ":" > /tmp/ldaplookup
- 次の内容が
/tmp/ldaplookupIPアドレスのみを含みます。
cat /tmp/ldaplookup
出力例
10.10.10.240
10.10.10.242
10.10.10.244
10.10.10.246
10.10.10.248
- ポートが正常に動作していることを確認するために、
for iループを/tmp/ldaplookupファイル(上記で作成)をLDAPポート389に接続するまで実行します。
(使用可能なものに応じてtelnetまたはcurlを使用します)
for i in $(cat /tmp/ldaplookup) ; do timeout 30 telnet $i 389;done
または
for i in $(cat /tmp/ldaplookup); do curl -kv --max-time 30 $i:389;done
通常、ポート389に到達できる場合は、他のKRBポートにもアクセスできます
接続が確立されると、 CTRL-C を複数回繰り返すと、ループが終了します。または、リストを参照して、LDAPに最適なドメイン コントローラーの使用を決定します。
(接続できるADサーバーを書き留めます)
出力例:telnet:
Trying 10.10.10.240...
Trying 10.10.10.242...
Trying 10.10.10.244...
Connected to 10.10.10.244
Escape character is '^]'
Trying 10.10.10.246...
Trying 10.10.10.248...
または
Trying 10.10.10.240...
telnet: connect to address 10.10.10.240: Connection refused
Trying 10.10.10.242...
telnet: connect to address 10.10.10.242: Connection refused
Trying 10.10.10.244...
Connected to 10.10.10.244
Escape character is '^]'
Trying 10.10.10.246...
telnet: connect to address 10.10.10.246: Connection refused
Trying 10.10.10.248...
telnet: connect to address 10.10.10.248: Connection refused
出力例:curl:
* Rebuilt URL to: 10.10.10.240:389/
*   Trying 10.10.10.240...
* TCP_NODELAY set
* Connection timed out after 30001 milliseconds
* stopped the pause stream!
* Closing connection 0
curl: (28) Connection timed out after 30001 milliseconds
* Rebuilt URL to: 10.10.10.242:389/
*   Trying 10.10.10.242...
* TCP_NODELAY set
* connect to 10.10.10.242 port 389 failed: Connection refused
* Failed to connect to 10.10.10.242 port 389: Connection refused
* Closing connection 0
curl: (7) Failed to connect to 10.10.10.242 port 389: Connection refused
* Rebuilt URL to: 10.10.10.244:389/
*   Trying 10.10.10.244...
* TCP_NODELAY set
Connected to 10.10.10.244 (10.10.10.244) port 389 (#0)
> GET / HTTP/1.1
> Host: 10.10.10.244:389
> User-Agent: curl/7.60.0
> Accept: */*
* Rebuilt URL to: 10.10.10.246:389/
*   Trying 10.10.10.246...
* TCP_NODELAY set
* connect to 10.10.10.246 port 389 failed: Connection refused
* Failed to connect to 10.10.10.246 port 389: Connection refused
* Closing connection 0
curl: (7) Failed to connect to 10.10.10.246 port 389: Connection refused
- コマンド
nslookupコマンドを使用して、ADサーバーの完全修飾ドメイン名(FQDN)を決定します。
nslookup
コマンドと出力の例
nslookup 10.10.10.244
Server:    1.2.3.4
Address: 1.2.3.4:53

Non-authorative answer:
244.10.10.10.in-addr.apra    name=my-ad-server.customername.com
- 管理コンソール サーバー(MCS)UIを使用して、手順7-15に従います。
- Avamar MCS UIにログインします。
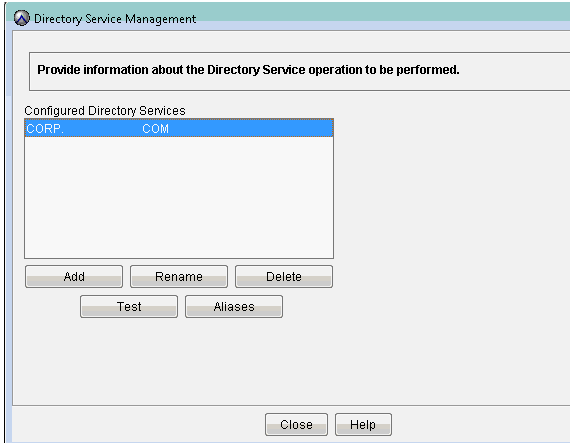
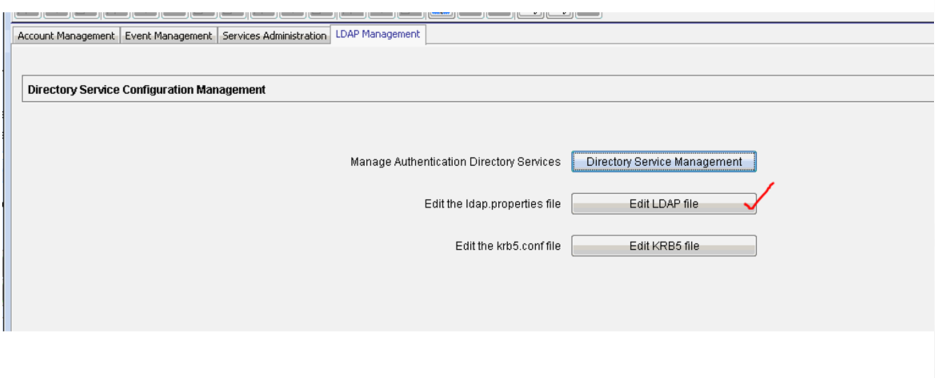
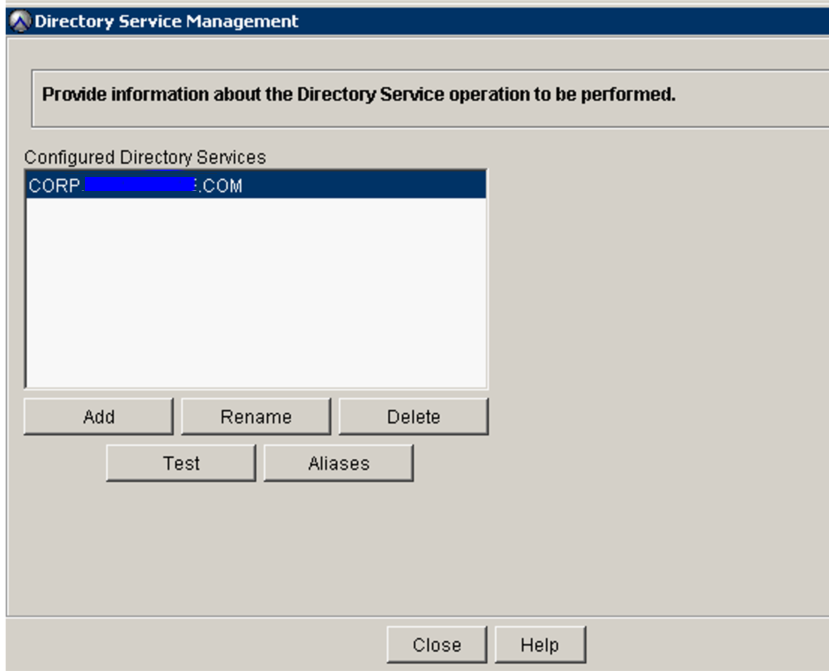
- LDAP管理([管理]、[LDAP Management])に移動します。
- ディレクトリー サービス管理画面にお客様のドメイン情報がすでに入力されていることを確認します。
- LDAPファイルの編集をクリックします。
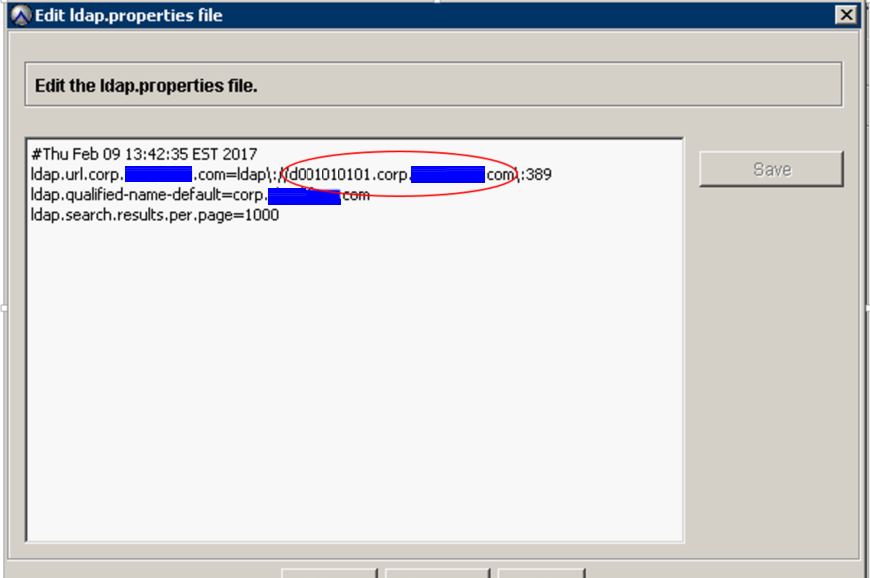
- を置き換えます
ldap.url.corp.userdomain.comを上記の検索手順の新しいホスト名に置き換えます。
Example:
ldap.url.corp.xxxxx.com=ldap\://d001010101.corp.xxx.com\:389
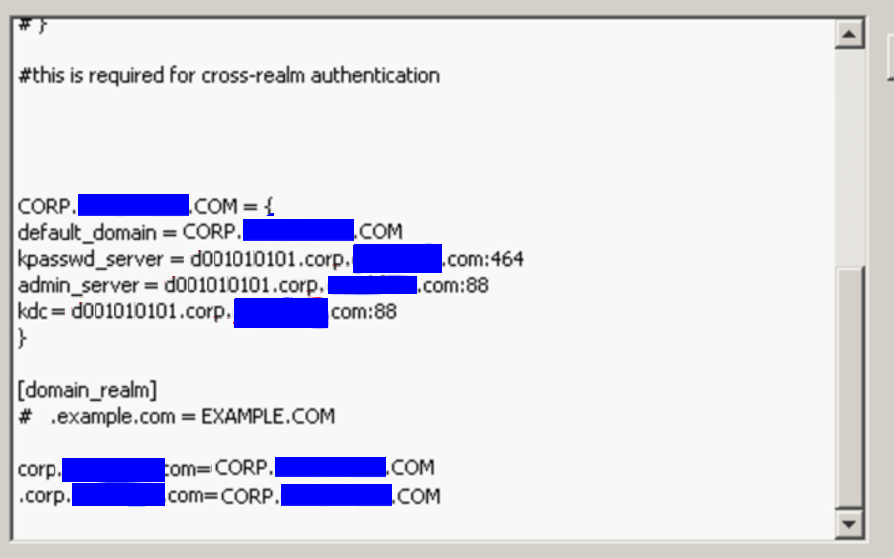
- で同じことを行います
krb5.confファイルで定義)を使用することが重要です。変更する情報は下部にあります。
- ディレクトリー サービス管理画面に移動し、有効なお客様の認証情報を使用してテストを実行します。
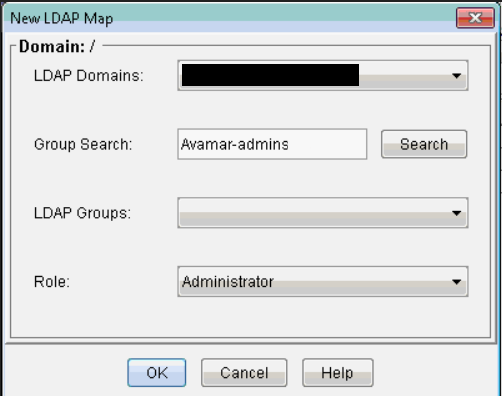
- 新しいLDAPマップ([Administration]、[Account Management]、[New LDAP Map])を追加し、必要なLDAPグループを追加します。次の例は
Avamar-admins群。
- LDAP(AD)グループが正常に追加されたら、そのLDAPグループのメンバーであるADアカウントを使用してAvamar UIにログインしてテストします。
対象製品
Avamar, Avamar Server文書のプロパティ
文書番号: 000014466
文書の種類: How To
最終更新: 21 10月 2025
バージョン: 13
質問に対する他のDellユーザーからの回答を見つける
サポート サービス
お使いのデバイスがサポート サービスの対象かどうかを確認してください。