How to Install the Dell Device Management Agent on a Host Computer
概要: This article provides information about how to install the Dell Device Management Agent (DDMA) on to a host computer.
この記事は次に適用されます:
この記事は次には適用されません:
この記事は、特定の製品に関連付けられていません。
すべての製品パージョンがこの記事に記載されているわけではありません。
手順
Affected Products:
- Dell Device Management Console
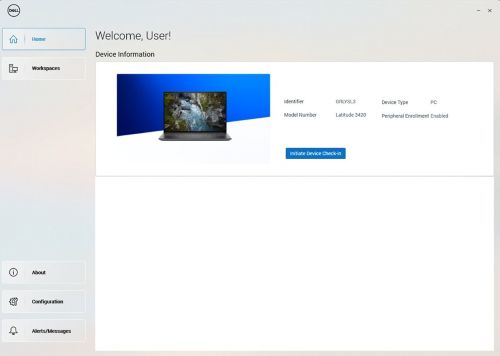
Note: After successful installation of the DDMA, when launching the agent icon in the system tray should have all the access to the host computer information.
Example of a successful Dell Device Manager Agent UI installed.
Steps to install DDMA:
- From the host computer, log in to the Dell Device Manager Console (DDMC).
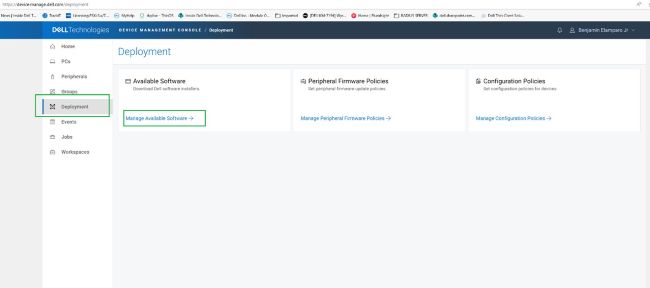
https://device.manage.dell.com/ - From the DDMC go to the Deployment Tab and select Manage Available Software.
- Download the DDMA.
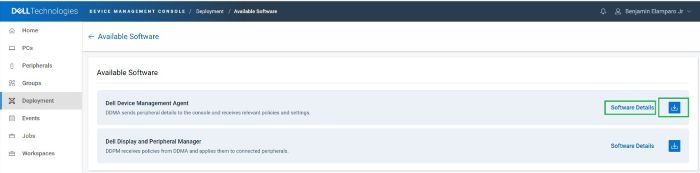
- Click Software Details and then copy the Group Token.
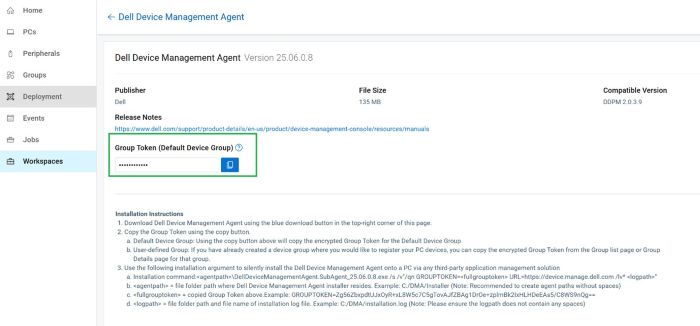
- Deploy the DDMA using the Group Token with the installation arguments for the server URL.
- Installation steps:
- Place the downloaded DDMA agent in the host at
C:\temp. - Open the command prompt with administrative privileges.
- From the command prompt, change the directory to
C:\temp. - Run the following command syntax, including the GROUPTOKEN:
DellDeviceManagementAgent.SubAgent_25.06.0.8.exe /s /v"/qn GROUPTOKEN=xxxxxxxx URL=https://device.manage.dell.com:443 /lv* c:\dma_installer.log"
Note: To ensure that the BIOS TPM is enabled.
- Place the downloaded DDMA agent in the host at
- Installation steps:
- Reboot the host computer and check the DMA agent in the system tray. It should appear as expected.
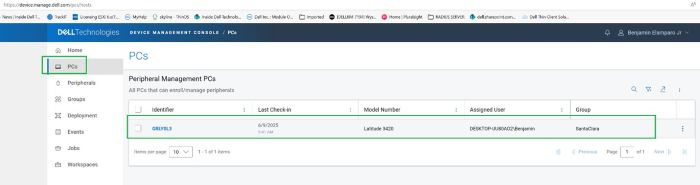
The host computer is now registered in the Dell Device Management Console.
対象製品
Dell Device Management Console | Peripheral Management, Dell Device Management Console文書のプロパティ
文書番号: 000348644
文書の種類: How To
最終更新: 30 6月 2026
バージョン: 4
質問に対する他のDellユーザーからの回答を見つける
サポート サービス
お使いのデバイスがサポート サービスの対象かどうかを確認してください。