Flashing the BIOS from the F12 One-Time Boot Menu
Summary: Learn how to update the BIOS on your computer using the BIOS executable file that is copied to a USB drive from the One Time Boot menu.
This article applies to
This article does not apply to
This article is not tied to any specific product.
Not all product versions are identified in this article.
Instructions
Table of Contents:
- BIOS Update Information
- Download the BIOS Update File and Copy the File to a USB Flash Drive
- Updating the BIOS from the One Time Boot Menu
- Updating Computers with the AgS (White Background) BIOS (2020 and Newer)
Learn how to access, navigate, and update the BIOS on a Dell computer.
If the computer does not have an operating system installed or if the computer cannot boot into the operating system, select Dell computers support flashing the BIOS, or UEFI update using the One-Time Boot Menu.
BIOS Update Information
The BIOS update can be initiated from inside Windows. If a Dell computer is unable to boot into the Operating System, the BIOS update can be initiated using the F12 One Time Boot menu. Most Dell computers manufactured after 2012 have this function and you can confirm by booting the computer to the F12 One Time Boot menu. If you see BIOS FLASH UPDATE listed as a boot option, then the Dell computer supports this method of updating the BIOS using the One Time Boot menu.
WARNING: BitLocker should be disabled before updating the BIOS or the BitLocker recovery key will be needed after the update. More information: How to Enable or Disable BitLocker with TPM in Windows
NOTE: Only Dell computers with the BIOS Flash Update option in the F12 One Time Boot menu can use this function.
How to Update the BIOS
Duration: 00:01:03 (hh:mm:ss)
When available, closed caption (subtitles) language settings can be chosen using the CC icon on this video player.
Download the BIOS Update File and Copy the File to a USB Flash Drive
- Browse to the Dell Drivers & Downloads website.
- Identify your Dell product.
- Click
Download & Install SupportAssist
to auto-detect your Dell product.
If SupportAssist is not available on your computer, follow the on-screen instructions to install Dell SupportAssist. - Or, enter the Service Tag, Express Service Code, or the Serial number of the Dell product and click Search.
- Or, click Browse all products to manually select your Dell product from the catalog.
- Click
- Select the Operating System that is installed on the Dell computer.
- Under Category, select BIOS.
- Locate the latest System BIOS.
- Click Download and save the file to your computer.
- Connect the USB flash drive to the computer.
- Open File Explorer (also known as Windows Explorer).
- Right-click the USB flash drive icon and select Format.
WARNING: Back up all important data from the USB flash drive. Formatting the USB flash drive will permanently erase the contents in the USB flash drive.
- Under the File system, select FAT32.
Note: The FAT32 option is not available when using a USB drive larger than 32 GB. A 32 GB or smaller USB drive is recommended. If a 32 GB or smaller USB drive is not available, use the following steps:
- Open the Command Prompt (Admin). The Command Prompt: What It Is and How to Use It on a Dell System
- Type: FORMAT #: /FS:FAT32 (Where #: is the drive letter of the USB drive, followed by a colon)
- The USB drive begins to format.
- Click Start.
- After the formatting process is complete, click OK.
- Browse to the location where the downloaded BIOS update file was saved.
- Copy the BIOS update installation file to the USB flash drive.
- After the file is successfully copied, go to the next step.
Updating the BIOS from the One Time Boot Menu
Use the following steps to update the BIOS from the F12 One Time Boot menu:
WARNING: Dell Technologies recommends disconnecting any devices such as external hard disk drives, printers, scanners, and so on (except keyboard and mouse) before updating the BIOS on a Dell computer.
WARNING: Dell laptops must have the battery installed and charged to at least 10% before you begin the BIOS update. Dell Technologies recommends connecting the laptop to the power adapter before proceeding with the update process.
WARNING: DO NOT TURN OFF THE COMPUTER DURING THE BIOS UPDATE PROCESS. Turning off the computer during the BIOS update causes irreparable damage to the system board (motherboard) of the computer. To learn more about updating the BIOS on a Dell computer, see the Dell knowledge base article Dell BIOS Updates.
- Turn off the computer.
- Connect the USB flash drive to the computer.
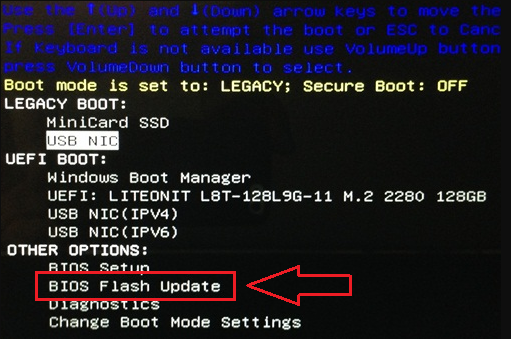
- Turn on the computer and tap the F12 key several times, until you see One Time Boot menu.
- Use the arrow keys and select BIOS Flash Update.
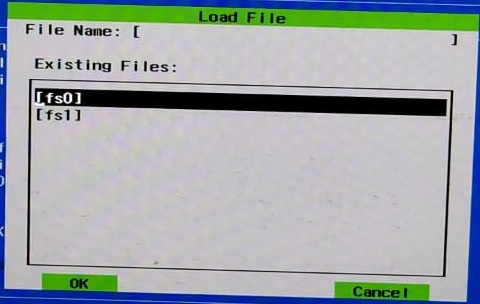
- You must select FS1 (USB flash drive file system).
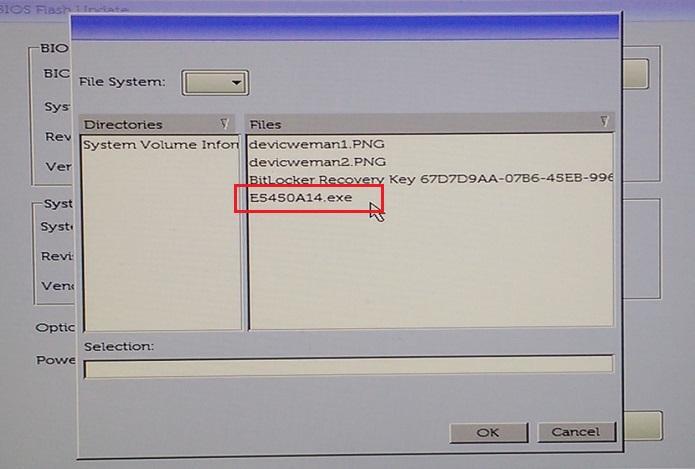
- In the BIOS flash menu, click the Browse button.

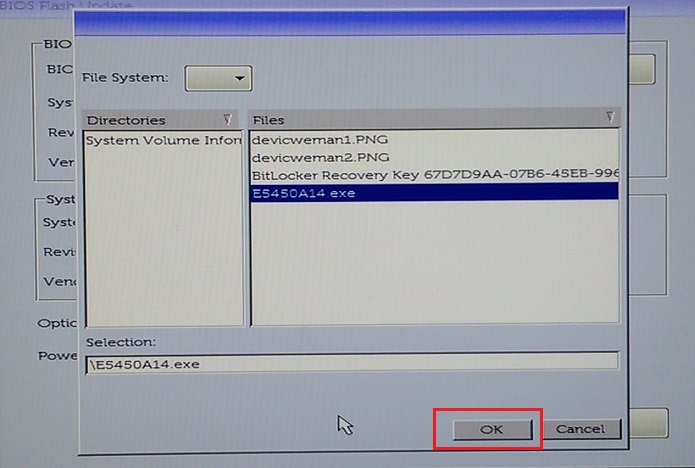
- In the open window, select the BIOS flash executable file that you copied to the USB drive. For example, E5450A14.exe. The file name varies.
- Click OK.
- Click Begin Flash Update.

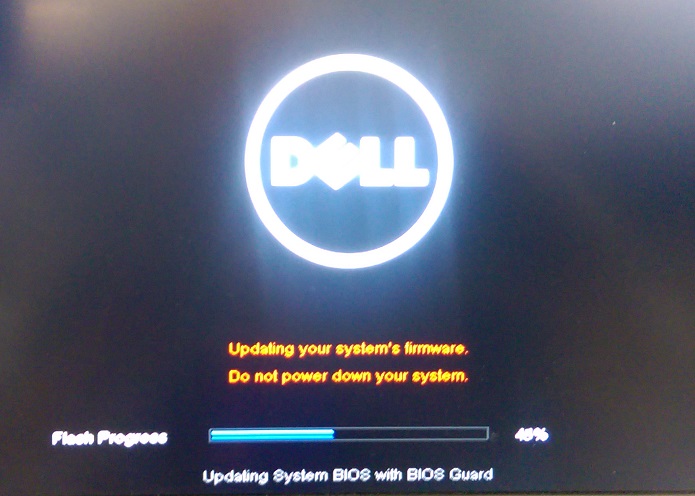
- When the warning message appears, read the message and click Yes to begin the BIOS update process.

- The progress bar may go from zero to 100 multiple times. The BIOS update process can take up to 10 minutes, but generally, this process takes two to three minutes.
- After the BIOS update is complete, restart the computer.
Updating Computers with the AgS (White Background) BIOS (2020 and Newer)
Use the following steps to update the BIOS from the F12 One Time Boot menu:
NOTE: Some USB flash drives may must be inserted into the USB port before entering the F12 One Time Boot menu.
- Turn off the computer.
- Connect the USB flash drive to the computer.
- Turn on the computer and tap the F12 key several times, until you see the One Time Boot menu.
- Click BIOS Update.

- Click Flash from file.

- From the File Explorer, select the device where the BIOS exe file is saved.

- Select the BIOS update you prepared (Example: Latitude_3410_3510.exe in and click Submit.

- You are returned to the previous Flash BIOS screen. Here you can check the version information of the BIOS that you are trying to update. If you are sure about the version, click Update BIOS.

- Click Confirm Update BIOS.
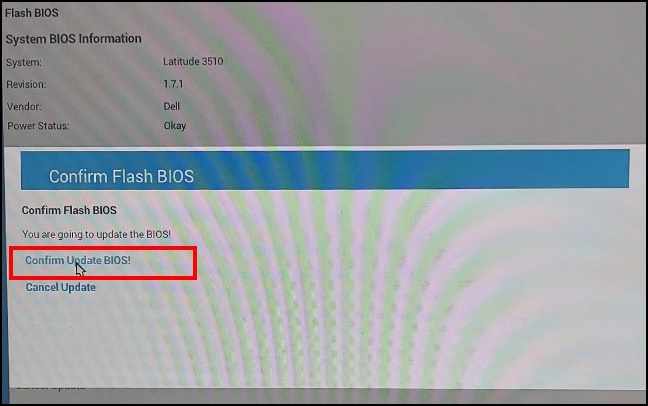
- The update will take place after the reboot. When the update is complete, the computer reboots, so do not turn off the power and wait until the update is complete.

Affected Products
Alienware, Dell All-in-One, Dell Pro All-in-One, Dell Pro Max Micro, Dell Pro Max Slim, Dell Pro Max Tower, Dell Pro Micro, Dell Pro Slim, Dell Pro Tower, Dell Slim, Dell Tower, Inspiron, OptiPlex, Vostro, XPS, G Series, G Series, Alienware
, Dell Plus, Dell Pro, Dell Pro Max, Dell Pro Plus, Dell Pro Premium, Inspiron, Latitude, Dell Pro Rugged, Vostro, XPS, Fixed Workstations, Mobile Workstations, Dell Pro Max Micro XE FCM2250, Dell Pro Max Slim XE FCS1250, Dell Pro Max Tower T2 XE FCT2250, Dell Pro Max 16 XE MC16250, Dell Pro Micro Plus XE QBM1250, Dell Pro Slim Plus XE5 QBS1250, Dell Pro Tower Plus XE5 QBT1250
...
Article Properties
Article Number: 000128928
Article Type: How To
Last Modified: 08 Sept 2025
Version: 18
Find answers to your questions from other Dell users
Support Services
Check if your device is covered by Support Services.