How to block management access through HTTPS, SSH and allow access for Telnet & Http in Dell Networking X-Series Switch
Summary: Blocking management access through HTTPS, SSH and allowing access for Telnet & Http in Dell Networking X series switches.
Instructions
This article explains the step-by-step procedure for blocking management access through HTTPS, SSH, and allows access for Telnet & Http in Dell Networking X series switches.
Procedure:
-
Log in to Dell X series switch using web browser
-
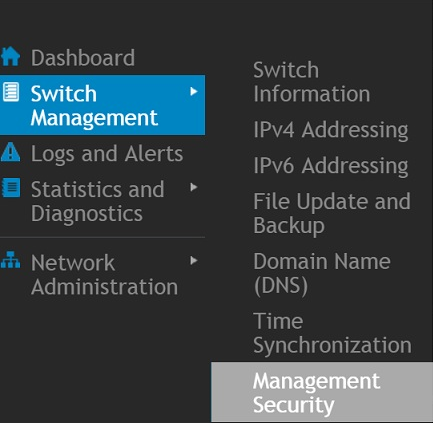
Go to Switch Management and select Management Security.
-
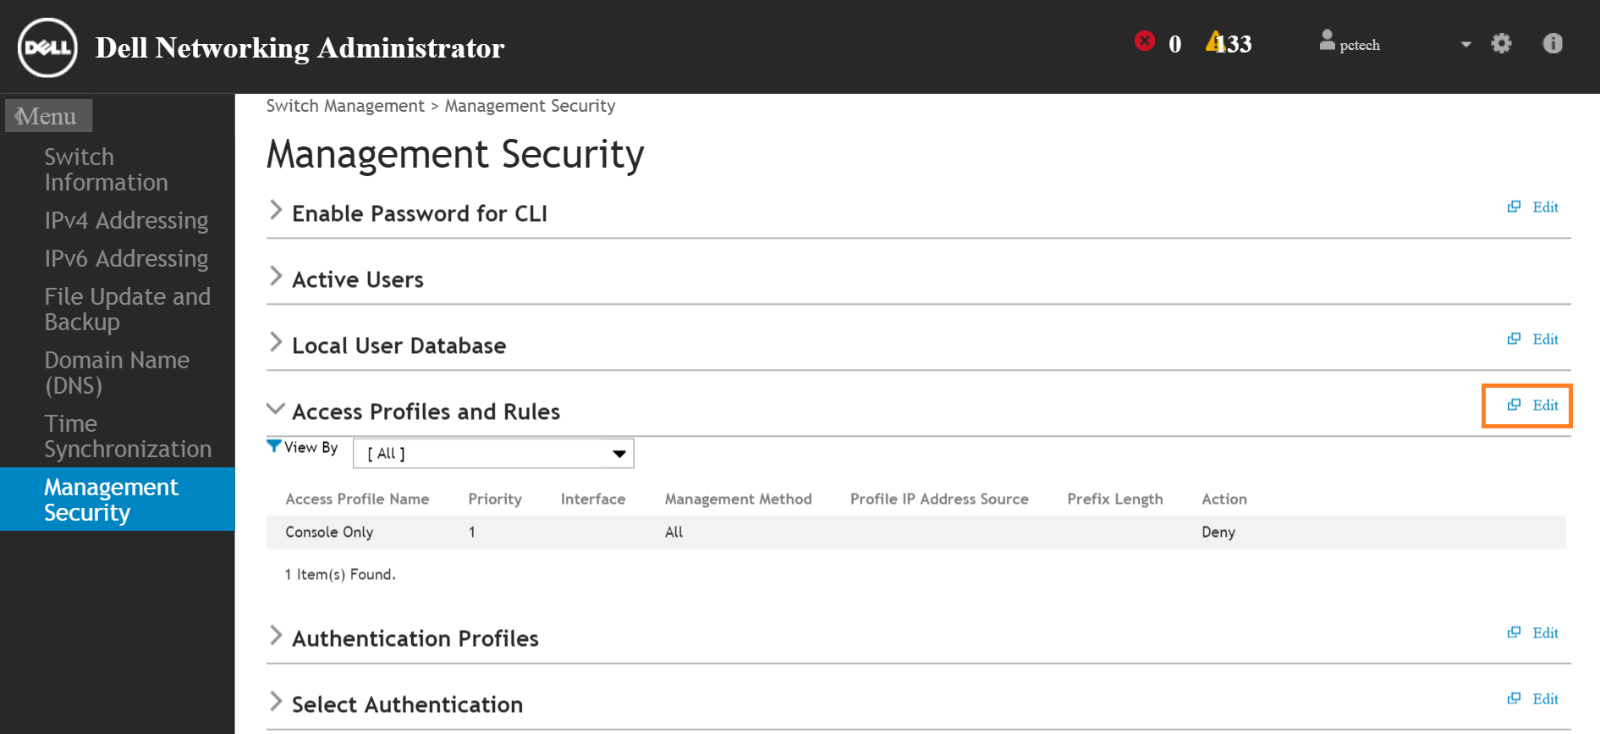
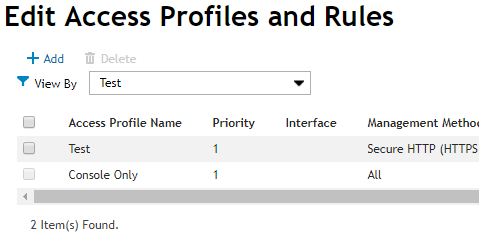
Click the Edit button located at the far right of Access profiles and Rules as shown
-
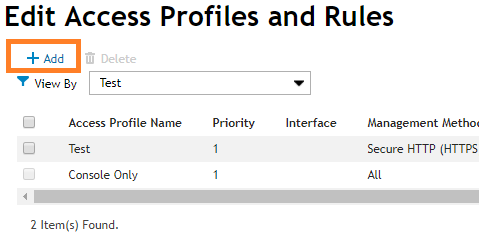
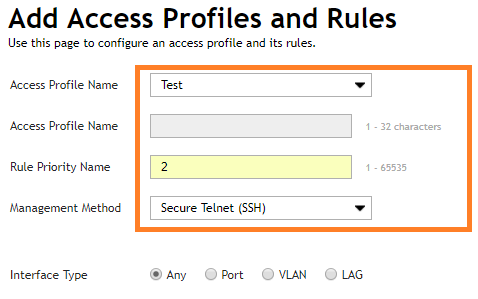
Click Add under Edit Access Profiles and Rules
-
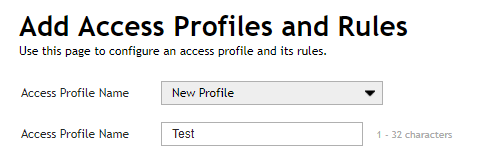
Under the Add access Profiles and Rules window, choose a profile name (Test)
In this example, we create HTTPS as the first rule
-
Type "1" in "Rule Priority Name" box
-
In the Management Method box, select "Secure HTTP (HTTPS)"
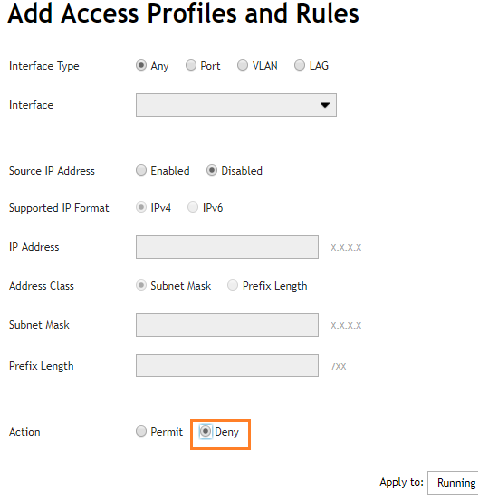
All other options can be left to default, except the "Action" -
For "Action" option, choose "Deny"
-
Select "Running Configuration in Apply to:" box and click the OK button


HTTPS rule is created with deny action. This rule is listed under the Edit Access Profiles and Rules window
-
Click the Add button again under Edit access profiles and Rules for creating the second rule (SSH)

-
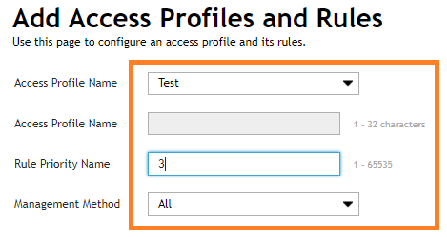
Under "Add access Profiles and Rules" window, choose the same profile name (Test)
-
Type "2" in "Rule Priority Name" box
-
In the Management Method box, select "Secure telnet (SSH)"
All other options can be left to default except the "Action" -
For "Action" option, choose "Deny"
-
Select "Running Configuration in Apply to:" box and click the OK button
SSH rule is created with deny action. This rule is listed under the Edit Access Profiles and Rules window
-
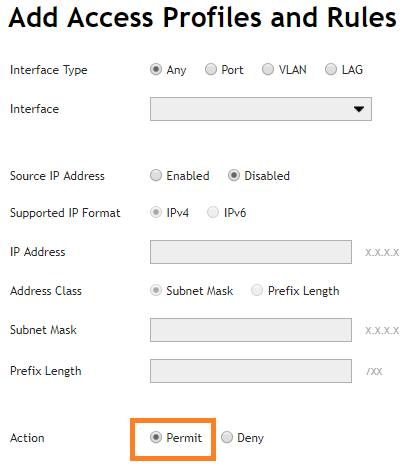
Click the Add button again under Edit access profiles and Rules for creating the third rule (Allow all)
-
Under "Add access Profiles and Rules" window, choose the same profile name (Test)
-
Type "3" in "Rule Priority Name" box
-
In the Management Method box, select "Secure telnet (All)"
-
For "Action" option, choose "Permit"
-
Select "Running Configuration in Apply to:" box and click the OK button
All three rules are listed under the Edit Access Profiles and Rules window

Now the profile and rules are created
Profile name is Test
Rules are configured to deny access through HTTPS, SSH, and permit access by other means
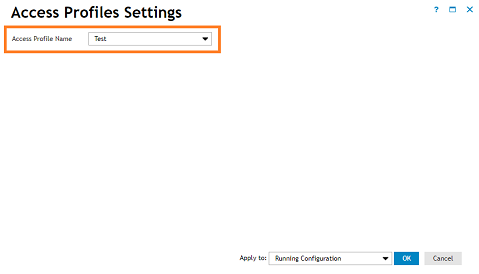
In order to activate the Access profile and rule, select Management Security and click the Edit button under Access Profiles and Rules -
Click the gear icon on the far right under Edit Access Profiles and Rules

-
Choose the created Access profile (Test) under the Access Profiles Settings window
-
Select "Running Configuration in Apply to:" box and click the OK button
A pop up with a warning message shows up. Click OK, and the Access profile is activated