IDPA: How to Manually Upgrade IDPA Internal Proxy
Summary: This procedure walks through the steps that are involved in manually upgrading the IDPA internal proxy.
This article applies to
This article does not apply to
This article is not tied to any specific product.
Not all product versions are identified in this article.
Instructions
Scenario 1
Use this procedure when an Avamar upgrade fails on IDPA DP4400/DP5000, Avamar is manually upgraded, and an IDPA AVProxy manual upgrade is needed for Avamar Sync.
Scenario 2
Use this procedure if an Avamar upgrade fails on IDPA DP4400 or DP5000, Avamar is manually upgraded, and an IDPA AVProxy manual upgrade is required for Sync.
Manual Internal AVProxy Upgrade Procedure
Verifying if the Avamar Server has been upgraded.
Note: Before proceeding with a manual proxy upgrade, verify that the Avamar Server was upgraded manually using the Avamar Installation Manager UI
https://<avamar_ip_or_FQDN>/avi
- Verify that the Avamar upgrade was completed.
- Open a browser and go to
https://<avamar_ip_or_FQDN>/avi - Go to History Page.
- Verify the Avamar upgrade, Avamar patches, and Avamar security roll-up package are all installed.
Verifying if IDPA Internal proxy "AVProxy" has a single network connection or dual network connection.
Gather the Network Details for the current IDPA proxy (AVProxy).
- Open an SSH session to the current proxy and log in as 'root'
- Run the below VAMI script to capture the network details:
/opt/vmware/share/vami/vami_config_net
- Choose Option 0 to print the Current Network Configuration.
- Verify if AVProxy has both a single nic/network or dual nic/network.
Sample Output for Single Network Configuration:
Network Configuration for eth0
IPv4 Address: x.x.x.x
Netmask: x.x.x.x
IPv6 Address:
Prefix:

Global Configuration
IPv4 Gateway: x.x.x.x
IPv6 Gateway:
Hostname: test.abc.com
DNS Servers: x.x.x.x, x.x.x.x
Domain Name:
Search Path: abc.com
Proxy Server:
Sample Output for Dual NIC Configuration:
Network Configuration for eth0
IPv4 Address: x.x.x.x
Netmask: x.x.x.x
IPv6 Address:
Prefix:

Network Configuration for eth1
IPv4 Address: y.y.y.y
Netmask: y.y.y.y
IPv6 Address:
Prefix:

Global Configuration
IPv4 Gateway: x.x.x.x
IPv6 Gateway:
Hostname: test.abc.com
DNS Servers: x.x.x.x, x.x.x.x
Domain Name:
Search Path: abc.com
Proxy Server:
Note: As seen, if both eth0 and eth1 exist, it confirms that it has a dual NIC configuration on the proxies. Follow the appropriate procedures in the next section.
- Write down the IPv4 Address, DNS Servers, Netmask, and IPv4 Gateway for single or both network interfaces depending on the configuration.
Single Network Internal Proxy Re-deploy Procedure
- Log in to the IDPA vCenter UI.
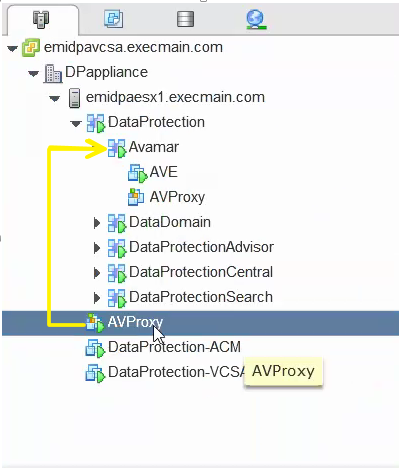
- Locate the Current Proxy in Avamar vApp.
- Select this Proxy (AVProxy) and go to Summary tab.
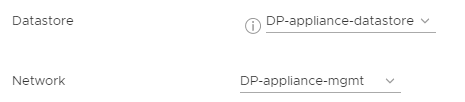
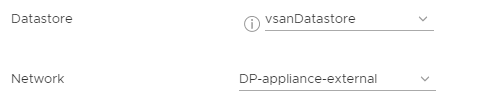
Note: Write down the Network adapter selected for this proxy (for example: DP-external, DP-management, and so forth). Also write down the Datastore for this Proxy.
DP4400:
DP5x00 and DP8x00:
- Power Off this Proxy.
Go to Actions for AVProxy and select Power Off in the power options.
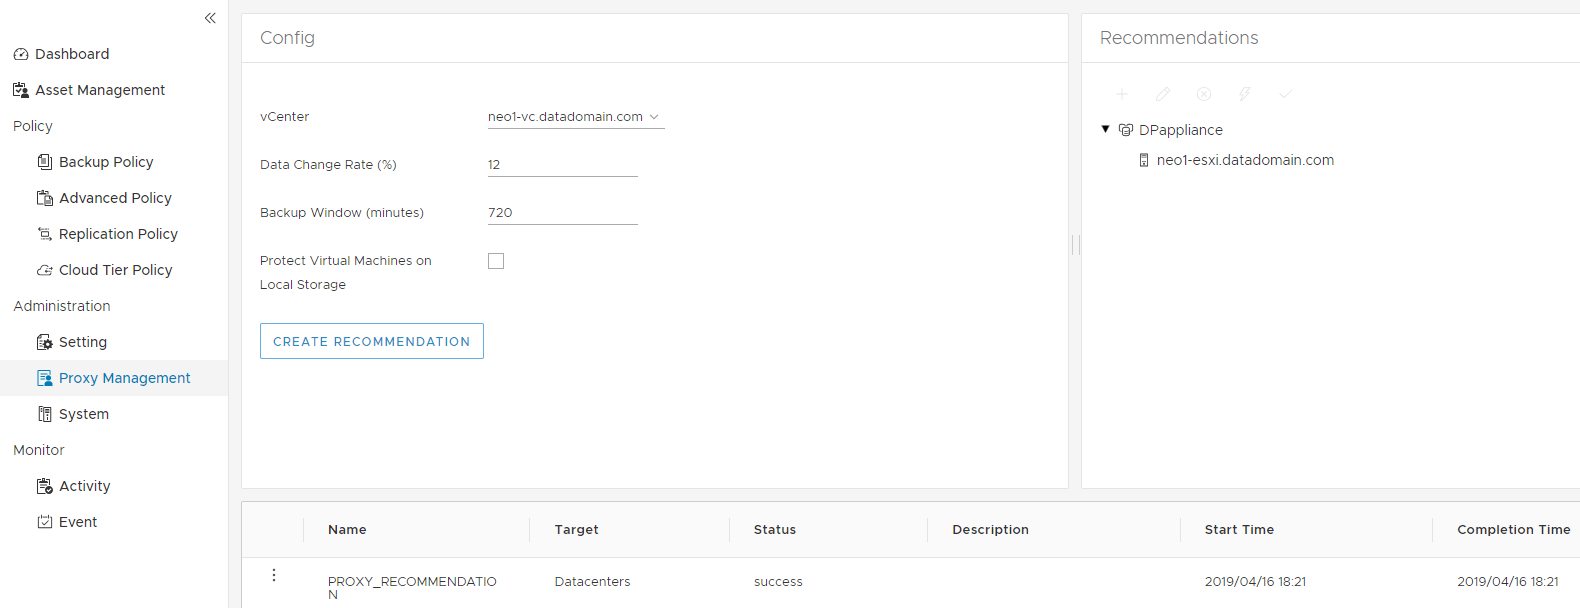
- Log in to the Avamar UI, go to Administration > Proxy Management tab or Proxy Deployment Manager.
On the left pane, select the IDPA vCenter from the drop-down. Click Create Recommendations.
-
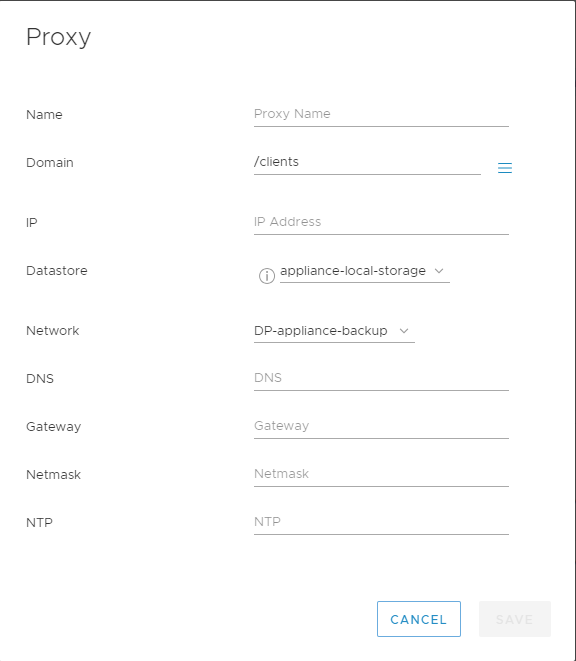
Select the ESXi Host on the right pane under DPAppliance, click '+' icon. A new Proxy window appears.

-
Enter the details captured from the old Proxy in "Verifying if IDPA Internal proxy "AVProxy" has single network connection or dual network connection" section and Step 3 of this section.
Name: AVProxy (USE EXACT NAME)
Domain: Leave default (/clients)
- Add the rest of the details as per the Step 2 and 3.
- Click Save. Select the Check option to start the deployment of Proxy.
- Once the deployment is successful, follow the below steps to perform post deployment tasks.
-
Open an SSH session to a newly deployed proxy with the same network details.
-
Note: In version 18.2 and above, proxy SSH login is only allowed for 'admin' user.
-
Switch to the root user:
su -
-
Enter the Password.
Default Password: avam@r
Note: You must change the password for this proxy to the old Proxy's password.
-
Run the below command to change the password:
passwd admin
passwd root
- Go to the vCenter UI, and delete the old AVProxy which is powered off.
Drag and drop the new proxy to Avamar vApp.
-
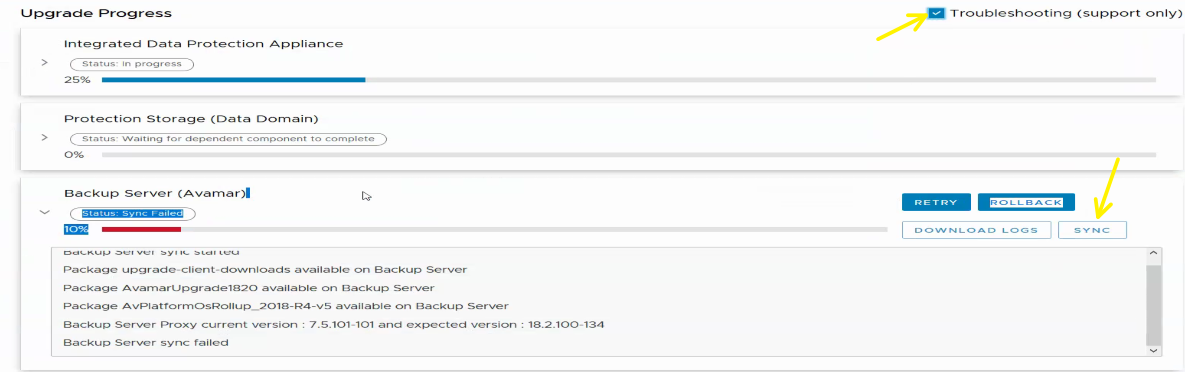
Go Back to IDPA ACM UI, click Troubleshooting options, and select SYNC option for Avamar to complete Avamar upgrade.

-
The Avamar component should be 100% complete. This concludes the procedure.

Dual Network Internal Proxy Re-deploy Procedure
- Log in to the IDPA vCenter UI.
- Locate the Current Proxy in Avamar vApp.
- Select this Proxy (AVProxy) and go to Summary tab.
Note: Write down the Network adapter selected for this proxy (for example: DP-external, DP-backup, and so forth). Also make a note of Datastore for this Proxy. Important, write down the backup network portgroup as well which is used for adding second NIC.
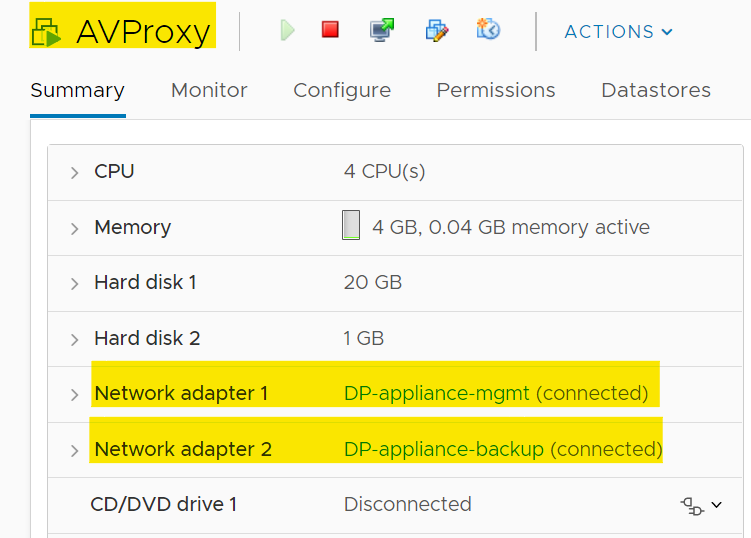
Note: In the screenshot above, DP-appliance-mgmt or DP-appliance-external is the management portgroup/network. DP-appliance-backup is the backup portgroup/network. The backup portgroup name could be different in the user's system.
- Power Off this Proxy.
Go to Actions for AVProxy and select Power Off in power options.
- Log in to the Avamar UI, go to Administration > Proxy Management tab or Proxy Deployment Manager.
- On the left pane, select the IDPA vCenter from the drop-down. Click 'Create Recommendations'.

-
Select the ESXi Host on the right pane under DPappliance, click '+' icon. A new Proxy window appears.
-
Enter the details captured from the old Proxy in "Verifying if IDPA Internal proxy "AVProxy" has single network connection or dual network connection" section and Step 3 of this section.
Name: AVProxy (USE EXACT NAME)
Domain: Leave default (/clients).
- Add the rest of the details as per the Step 2 and 3.
Note: Use the management network port group "DP-appliance-mgmt" or "DP-appliance-external" in the network section for initial deployment.
-
Click Save. Select the 'check' option to start the deployment of the Proxy.
-
Once the deployment is successful, follow the below steps to perform post deployment tasks.
-
Open an SSH session to a newly deployed proxy with the same network details.
-
Note: In version 18.2 and above, proxy SSH login is only allowed for 'admin' user.
-
Switch to the root user:
su -
-
Enter the password.
Default Password: avam@r
Note: You must change the password for this proxy to the old Proxy's password.
-
Issue the below command to change the password:
passwd admin
passwd root
- Go to the vCenter UI, and delete the old AVProxy which is powered off.
Drag and drop the new proxy to Avamar vApp.

- Add a second network adapter (NIC) to AVProxy.
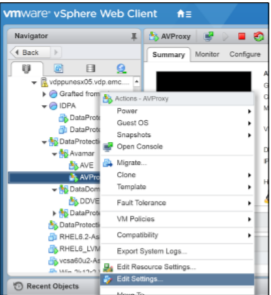
- Log in to IDPA vCenter, using root and common password of the appliance
- Right-click Avamar proxy under Avamar vAPP and click Edit Settings.
- Select a new device as Network and click Add on the Edit Setting page.

- Connect the new VMNIC to backup network port group (see details recorded in step 3 to find out the appropriate backup port group) and ensure that 'VMXNET is selected as NIC type.
- Click OK to add the new NIC.
- Log in to the Avamar Proxy with root and common appliance password, using SSH
- Use the following command to configure backup IP on the newly added
NIC: /opt/vmware/share/vami/vami_config_net
Note: Choose Option 7 from the menu to add IP Address and other details for eth1 (backup network adapter)
0) Show Current Configuration (scroll with Shift-PgUp/PgDown)
1) Exit this program
2) Default Gateway
3) Hostname
4) DNS
5) Proxy Server
6) IP Address Allocation for eth0
7) IP Address Allocation for eth1
Enter a menu number [0]: 7
- Verify that you can ping to backup IP addresses configured on the Data Domain system.
- Go Back to IDPA ACM UI, click Troubleshooting options, and select SYNC option for Avamar to complete the Avamar upgrade.
Affected Products
Integrated Data Protection Appliance Family, Integrated Data Protection Appliance SoftwareArticle Properties
Article Number: 000019136
Article Type: How To
Last Modified: 26 Mar 2025
Version: 5
Find answers to your questions from other Dell users
Support Services
Check if your device is covered by Support Services.