Data Domain: Generate a Certificate Signing Request and Use Externally Signed Certificates
Summary: Creating a certificate signing request (CSR) on a Data Domain and importing the signed certificate
This article applies to
This article does not apply to
This article is not tied to any specific product.
Not all product versions are identified in this article.
Instructions
Some users require externally signed certificates instead of the self-signed certificates, in order to avoid the security warning.
Important: You cannot reuse an old CSR which was already used for an imported cert. Each CSR is tied to the signed certificate that is imported. So a unique CSR must be generated for each import of a newly signed cert.
Certificate signing request
- The system should have a passphrase set if it does not already:
#system passphrase set
- Generate the certificate signing request:
adminaccess certificate cert-signing-request generate
                [key-strength {1024bit | 2048bit | 3072bit | 4096bit}]
                [country <country-code>] [state <state>] [city <city>]
                [org-name <organization-name>]
                [common-name <common-name>]
                [basic-constraint {CA:TRUE | CA:FALSE}]
                [key-usage {all | cRLsign | digitalSignature | keyCertSign
                                | keyEncipherment | nonRepudiation
                                | <keyUsage-list>}]
                [extended-key-usage {all | clientAuth | serverAuth
                                | <extendedKeyUsage-list>}]
                [subject-alt-name <value>]
                                       Generates a CSR
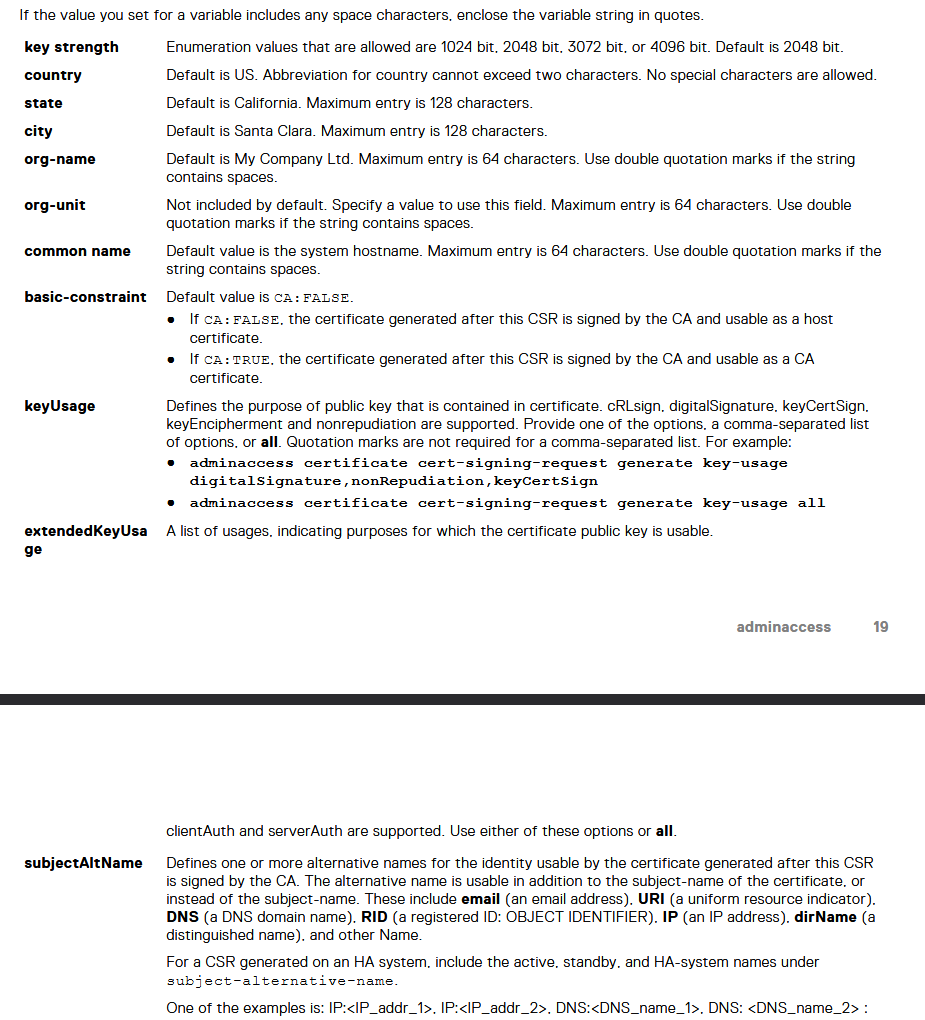
Taken from DDOS 7.13 Command Reference Guide (Log in to Dell Support is required to view this document.)
-
- 99% of certificates do not set a basic constraint and if they do, they would use
CA:FALSE keyUsageandextendedKeyUsageare rarely used but can be set based on customer's requirements.- For a CSR generated on a High Availability (HA) system, include the active, standby, and HA system names under subject-alternative-name.
- One of the examples is:
"IP:<IP address>, IP:<IP address>, DNS:example.dell.com"
- 99% of certificates do not set a basic constraint and if they do, they would use
An example CSR command:
# adminaccess certificate cert-signing-request generate key-strength 2048bit country US state Cali city "Santa Clara" org-name Dreamin common-name Beach_Boys subject-alt-name "DNS:beach.boy.com, DNS:they.singing.org, IP:10.60.36.142, IP:10.60.36.144"
Certificate signing request (CSR) successfully generated at /ddvar/certificates/CertificateSigningRequest.csr
With following parameters:
   Key Strength       : 2048
   Country            : US
   State              : Cali
   City               : Santa Clara
   Organization Name  : Dreamin
   Common Name        : Beach_Boys
   Basic Constraints  :
   Key Usage          :
   Extended Key Usage :
   Subject Alt Name   : DNS:beach.boy.com, DNS:they.singing.org, IP Address:10.60.36.142, IP Address:10.60.36.144
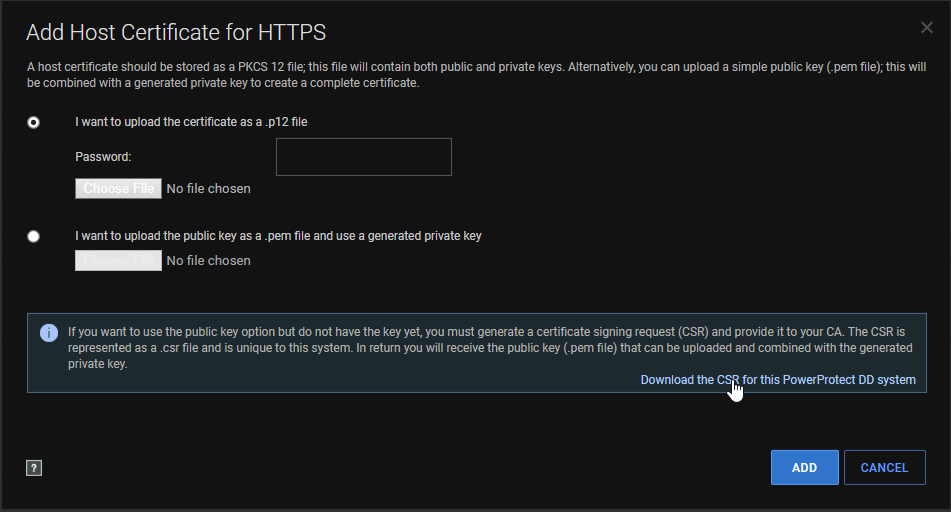
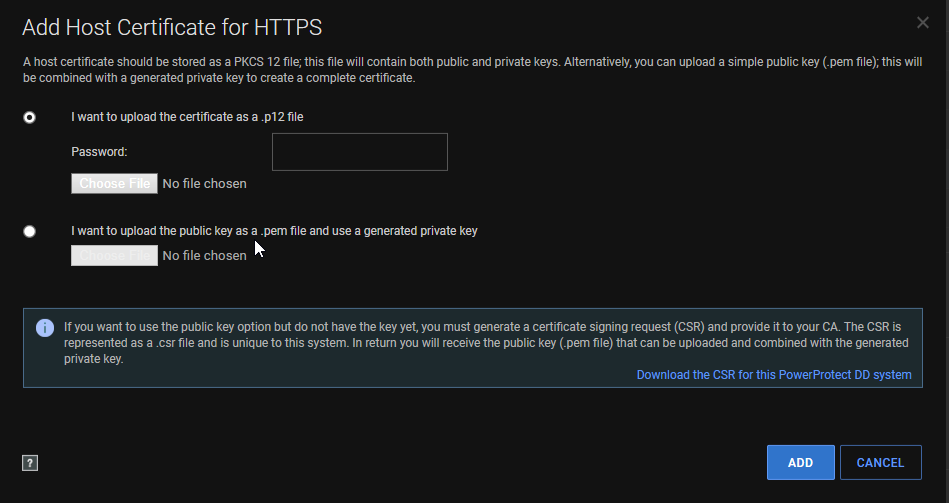
- If the UI is accessible, you can also download the CSR from the web UI like so:
- Administration > Access > HTTPS > Configure
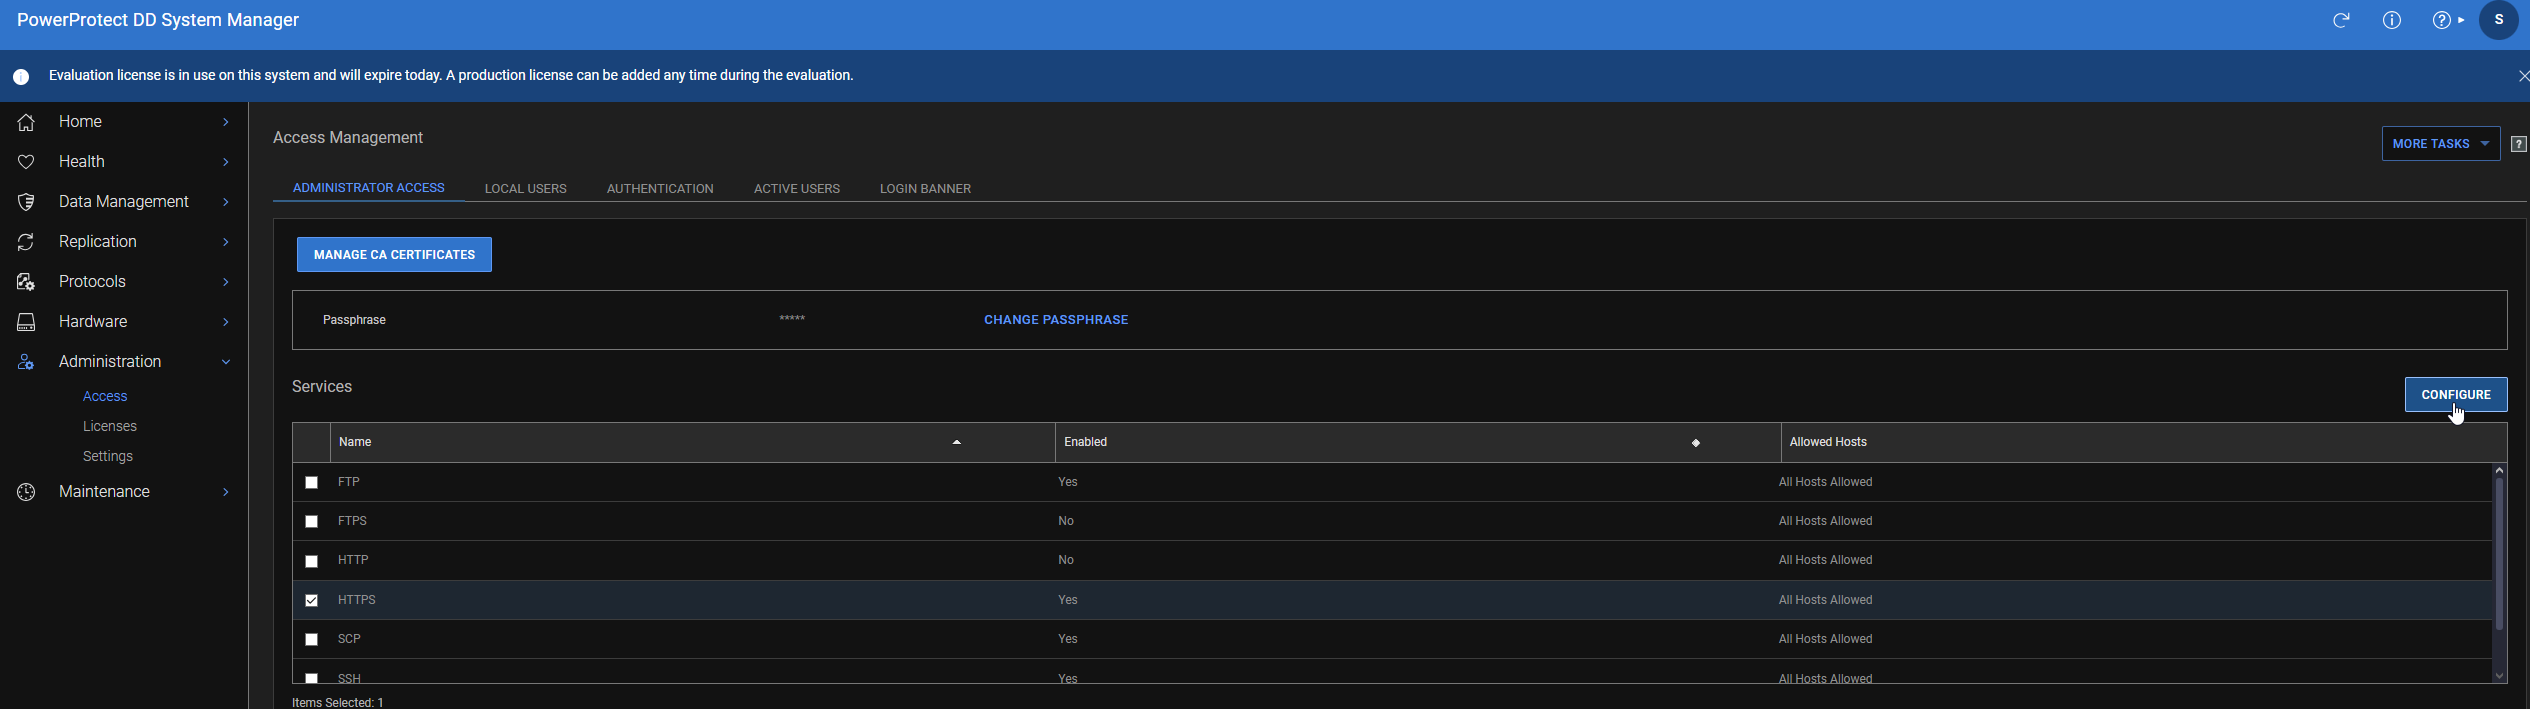
-
- Certificate > Add

-
- Download the CSR:
- If the UI is not accessible, copy the CSR request after being generated. The file is available at:
/ddvar/certificates/CertificateSigningRequest.csr- Easiest way to download is with SCP which can be used in command prompt in newer versions of Windows or in Linux terminal
# scp <dd user>@<dd hostname/ip>:/ddvar/certificates/CertificateSigningRequest.csr (the'.'says to download CSR to current working directory)
- Give the CSR to the customer's Certificate Authority for signing. The CA gives you the signed cert back. The CA can usually provide the signed cert in whatever format you want. The DD supports
PEMandPKCS#12formats. That should be requested from the CA. If the cert is in a different format, it must be converted with a program such as OpenSSL. Typically converting toPEMis the easiest. More info is found in DigiCert article How to convert a certificate into the appropriate format (External Link) - You can now upload the
PEMorPKCScert in the UI on the same page where you downloaded the CSR:
- You can also use the CLI to import with:
#adminaccess certificate import host application https
Paste in the signed cert file contents and
press ctrl + d twice to import
- If you are still having issues getting it to import, copy the signed file to
/ddvar/certificatesusing SCP such as step 4b - Import the file into the Data Domain as such:
#adminaccess certificate import host application https file <certificate.pem>
- The imported certificate restarts the HTTPS or HTTP services, the UI goes down for a minute or so.
- Once completed, open your browser and check if it passes the security warning.
- A new certificate is shown using this command:
#adminaccess certificate show
If there are still issues getting the cert imported, check the additional info section below.
Additional Information
CSR Validation
The CSR can be validated after it has been generated and off the Data Domain. One such method is to use Windows certutil.
Save the CSR on a Windows system and using Command Prompt run certutil -dump <CSR with path>
Example:
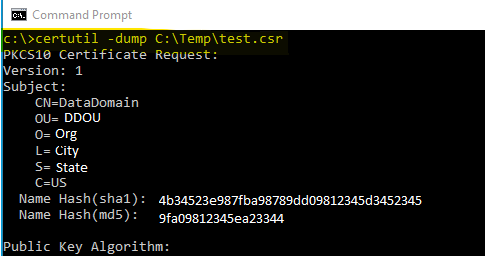
This is the start of the command output, and all data in the CSR is displayed.
You can run the same command against the signed certificate. You should know if the signed cert is valid for the CSR if the public keys for both match:
Public Key: UnusedBits = 0
    0000  30 82 01 0a 02 82 01 01  00 d9 0b 01 f3 33 b5 39
    0010  9e 52 92 86 6f 40 2e 8f  29 94 95 89 1d 9d 10 a6
    0020  9b f4 b6 f2 3f 4e aa cf  24 96 94 b9 db 62 41 24
    0030  3f 9a 64 22 7d 04 92 5d  2d 57 60 1c 52 40 20 88
    0040  08 2c 2e 43 54 c2 0c 0d  bf 0c e3 bb 1e 30 ab 66
    0050  91 7e 3e 3d a9 b2 fe 89  1d 36 c8 5b c1 e5 ea a2
    0060  74 e1 e8 8b 8d a8 3a 6b  72 c8 47 a4 e2 b8 76 ec
    0070  c0 37 f0 64 85 1f f2 c8  d6 fb 9a aa 0e 49 b4 05
    0080  c4 73 4e 47 3f 61 0b ed  9c d7 fe 69 97 b2 1d 37
    0090  f2 06 1d d8 33 de e1 63  10 de 43 d3 29 47 7d b7
    00a0  aa 2b a2 60 58 88 ae 27  7a 28 35 9c cd 87 63 02
    00b0  ab b5 b4 d2 c0 8e f7 8c  89 b2 fc a3 20 18 6b 41
    00c0  bd 46 cb 6e 78 aa a8 3b  fb cd 08 4d 18 b3 bd a6
    00d0  d9 e3 6a 34 cb ef d4 b0  64 88 a7 6c ec f3 db 1d
    00e0  8e 25 10 d8 0a 03 a1 d7  11 69 e1 6c f2 70 78 62
    00f0  66 27 d8 05 52 53 38 1a  57 2b 13 66 cf 76 4d 4e
    0100  20 90 89 ee ac aa c0 97  6d 02 03 01 00 01
Affected Products
DD OSProducts
DD OS 6.2, DD OS, DD OS 6.0, DD OS 6.1, DD OS 7.0, DD OS 7.1, DD OS 7.2Article Properties
Article Number: 000021466
Article Type: How To
Last Modified: 05 Jun 2026
Version: 12
Find answers to your questions from other Dell users
Support Services
Check if your device is covered by Support Services.