PowerFlex: How to reconfigure DAS Cache when an HDD that was accelerated by DAS Cache is replaced?
Summary: ScaleIO: How to reconfigure DAS Cache when an HDD that was accelerated by DAS Cache is replaced?
This article applies to
This article does not apply to
This article is not tied to any specific product.
Not all product versions are identified in this article.
Instructions
Follow the procedure for Disk Replacement as per the document generated by Solve Desktop. Here is a high-level view of the steps to be performed for DAS cache reconfiguration:
1. Check in the backend in the UI after expanding the SDS that the device names show as /dev/fio-X to verify that the customer is using DAS Cache. Device names /dev/fio-X are assigned in the case that the devices are accelerated using DAS Cache.
2. Check the status in the perccli command output and check the status of the disk using the following command:
perccli64 /c0 show all
3. In case the Disk is replaced, the newly added disk shows as UGood. That means a VD has to be created on the physical disk.
4. For DAS cache, create a VD that can be accelerated using the DAS Cache utility using the following command:
perccli64 /c0 add vd type=raid0 drives=<EID>:<slt> direct wt ra pdcache=off
Example:
perccli64 /c0 add vd type=raid0 drives=23:21 direct wt ra pdcache=off
5. After the VD is created, the disk should appear as shown in the figure below. Note the DG id of the disk on which the VD was created. Example it is 21 in the below figure:
6. Run the command ls -l /dev/disk/by-path/. Locate the disk with the same DG id in the 3rd column after scsi. And note the device name for it. In the given example it is sdw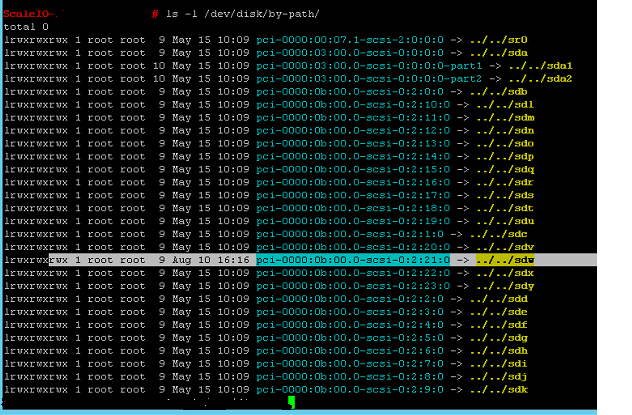
7. Run the below command and note the scsi id of the disk as noted above:
ls -l /dev/disk/by-id/ | grep sdw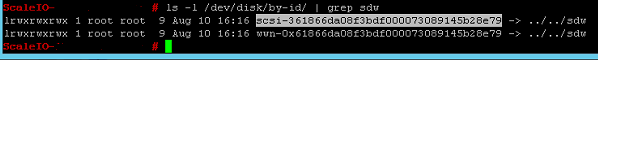
8. Note the volume # in the output of fscli -l and identify the disk that had the error FAILED: VOLUME OFFLINE in case it was not already destroyed. Also copy the Cache tag of the old volume. In the example, it looks like this: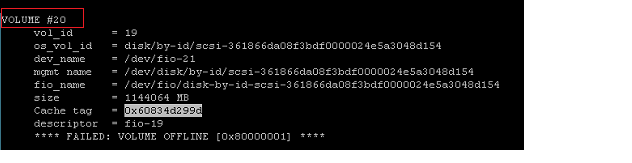
9. Destroy the volume from the DAS Cache using the following command:
fscli --destroy-volume 20
In case it is not already destroyed, we need to destroy it.
10 Add the scsi id in the DAS Cache identified in step 7 above using the below command:
fscli -a /dev/disk/by-id/scsi-xxxxxxxxxxxxxx
fscli -l | grep sdw
In the above command note the new fio name of the device. In the below example its /dev/fio-21
11. Add the device to SDS in the ScaleIO UI in backend using the new fio name i.e. /dev/fio-21.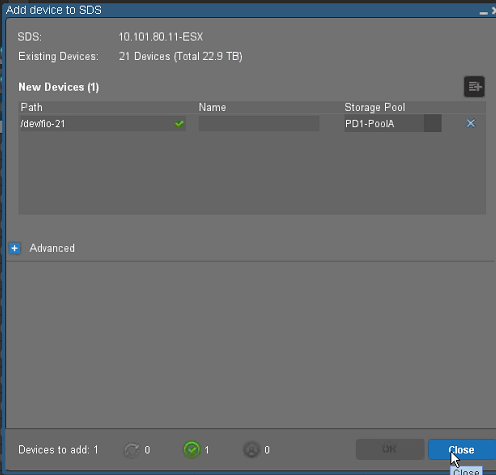
12. Run the command fscli -l and note the newly added disk. It should show as NOT ACCELERATED.

13. Enable acceleration on the device using the same cache tag as noted in step 8 above using the command
fscli --enable-accel /dev/disk/by-id/scsi-xxxxxxxxxxx cache-tag XXXXXX
14 Run the fscli -l command and verify that the device now shows ACCELERATED: WRITE BACK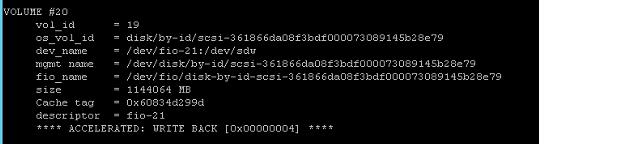
Affected Products
PowerFlex rack, ScaleIOArticle Properties
Article Number: 000022363
Article Type: How To
Last Modified: 15 Sep 2025
Version: 7
Find answers to your questions from other Dell users
Support Services
Check if your device is covered by Support Services.