How to Disable a Wireless Network Connection When a Wired Connection is Detected
Summary: Steps for making your wireless network connection turn off when you connected a wired network connection.
This article applies to
This article does not apply to
This article is not tied to any specific product.
Not all product versions are identified in this article.
Instructions
Disabling Wireless (Wi-Fi Only) When Connected to Wired Connections
Note: The following information has not been verified for virtual networks. There is no current ETA for testing with virtual networks and this solution.
Windows 10 users may want to have their system wireless network connection to turn off when a wired network connection is available. (When a laptop system is docked.)
Many find this is desirable as many WLAN network connections are slower data performance.
The instructions below show how to configure Windows Task Scheduler to disable the wireless network connection when a wired connection is detected.
Configuration
Follow the steps listed below to configure the Windows Task Scheduler your system to automatically switch to the wired network connection when detected.
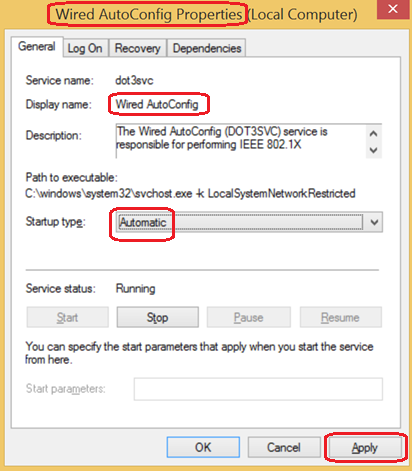
- In the Search Box type: Services.msc This should open the Services Window depicting all the Local Services running on the system. Enable Wired-Autoconfig Service (change to Automatic):
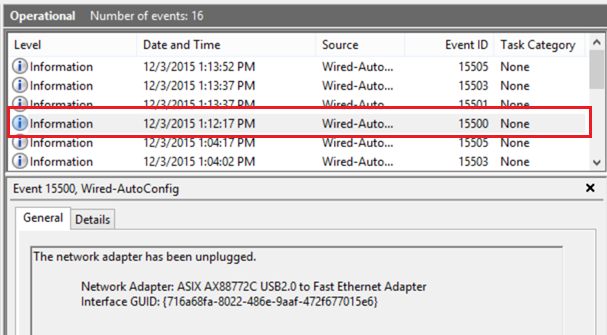
- Open Event Viewer (Right-click the Start button, select Event Viewer from the menu) and in system events: Event 15500 shows that the network cable has been unplugged from the dock:
 Note: The following items involve editing events in the Task Scheduler. See https://technet.microsoft.com/en-us/library/cc766442.aspx
for more information about editing tasks.
- Event 15500 runs PowerShell to Enable Wi-Fi (WiFi On Properties):
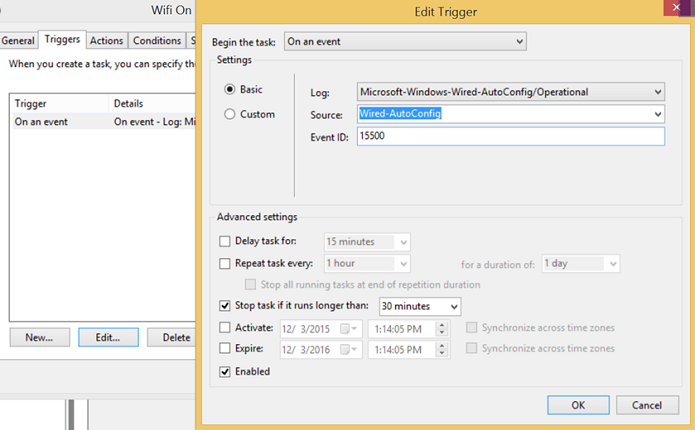
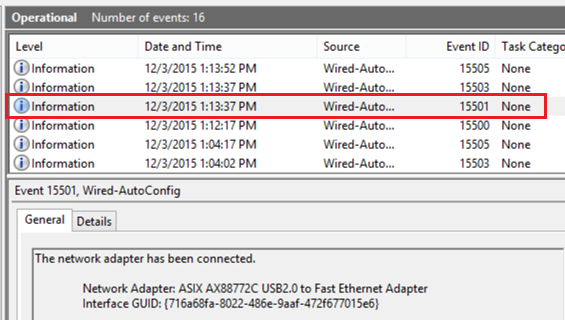
"Enable-NetAdapter –Name ‘Wi-Fi’ –confirm:$False - Event 15501 shows that the network adapter has been plugged in:
- Event 15501 runs PowerShell to disable Wi-Fi.
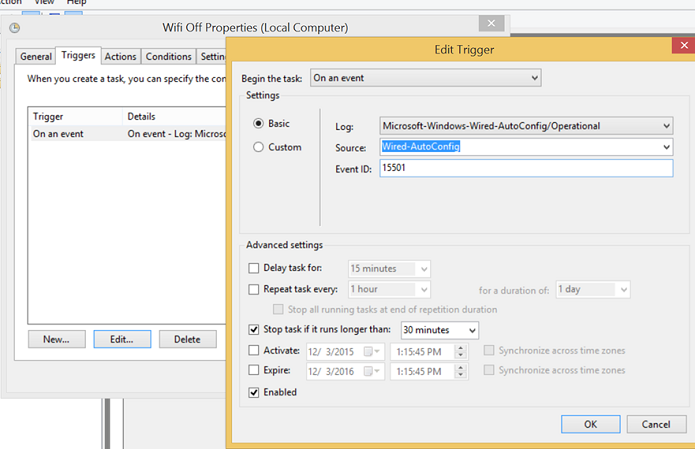
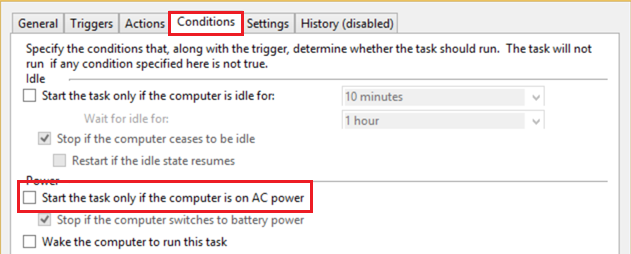
"Disable-NetAdapter –Name ‘Wi-Fi’ –confirm:$False - On on the CONDITIONS TAB editing both events be sure to uncheck AC power:
- The following examples show how to make Network Switching work in Windows on a Latitude xx50 system using PowerShell:
A. Wi-Fi Enable upon Ethernet disconnect: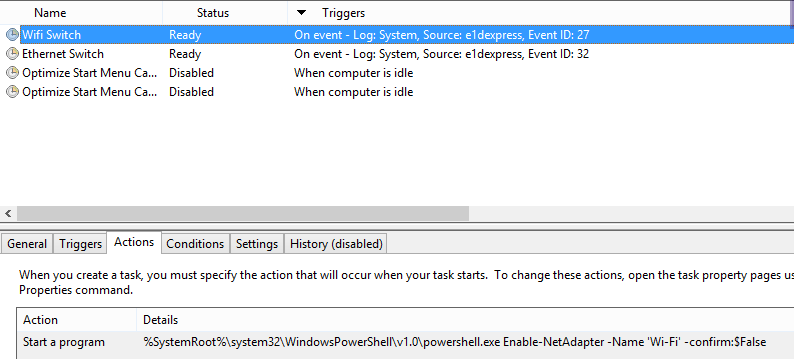
B. Wi-Fi Disable upon Ethernet connect: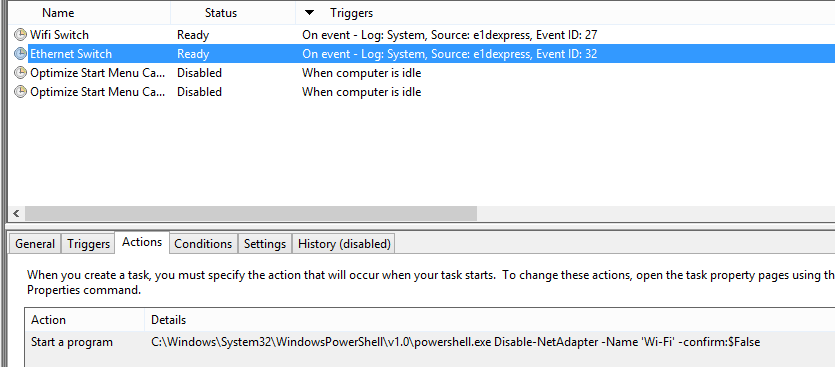
- Minor adjustments required due to the docking and undocking nature of the system:
- "Wi-fi off" should be triggered by event 15510 (Device was added to the system, not plugged in)
- "Wi-fi on" should be triggered by event 15513 (Device was removed from system, not unplugged)
- There should be four Tasks that are scheduled:
- Undock Tablet (Adapter removed) 15513 Enable Wi-fi
- Unplug Ethernet (Cable unplugged) 15500 Enable Wi-fi
- Dock Tablet (Adapter added) 15510 Disable Wi-fi
- Plug In Ethernet (Cable plugged in) 15501 Disable Wi-fi
Affected Products
G Series, Alienware, Dell Laptops, Dell Plus, Dell Pro, Dell Pro Max, Dell Pro Plus, Dell Pro Premium, Inspiron, Latitude, Dell Pro Rugged, Vostro, XPS, Mobile Workstations, Dell Pro Max 16 XE MC16250Article Properties
Article Number: 000111968
Article Type: How To
Last Modified: 22 Jul 2025
Version: 5
Find answers to your questions from other Dell users
Support Services
Check if your device is covered by Support Services.