BitLocker Prompting for Recovery Key after Motherboard Replacement
Summary: BitLocker prompting for a recovery key after a motherboard replacement? Follow this guide to fix the issue, including suspending BitLocker and adjusting TPM settings.
This article applies to
This article does not apply to
This article is not tied to any specific product.
Not all product versions are identified in this article.
Symptoms
After your Dell computer's motherboard has been replaced, Windows is asking you to enter a BitLocker recovery key when you start your computer. You can't get past this screen to access your files and programs.
Cause
This happens because BitLocker is a security feature that protects your data by "locking" it to your specific hardware. When the motherboard is replaced, BitLocker detects that your computer's hardware has changed and asks for the recovery key to make sure an authorized person is accessing the data.
This is normal security behavior and doesn't mean anything is wrong with your computer.
Resolution
Follow these steps to get back into your computer and prevent this from happening again.
Step 1: Enter your BitLocker recovery key
- At the blue BitLocker screen, enter your 48-digit recovery key.
- Where to find your recovery key: Check your Microsoft account online, a USB drive you saved it to, a printout you may have stored, or your company's IT department if this is a work computer.
- Don't have your recovery key? See our guide on how to get your BitLocker recovery key.
- Press Enter to sign in to Windows.
Step 2: Turn off BitLocker temporarily
- Select Start > Settings.
- Select Privacy & security > Device encryption.
- Select BitLocker drive encryption.
- Next to your system drive (usually C:), select Turn off BitLocker.
- Select Turn off BitLocker again to confirm.
- Wait for BitLocker to finish decrypting your drive. This may take several minutes.

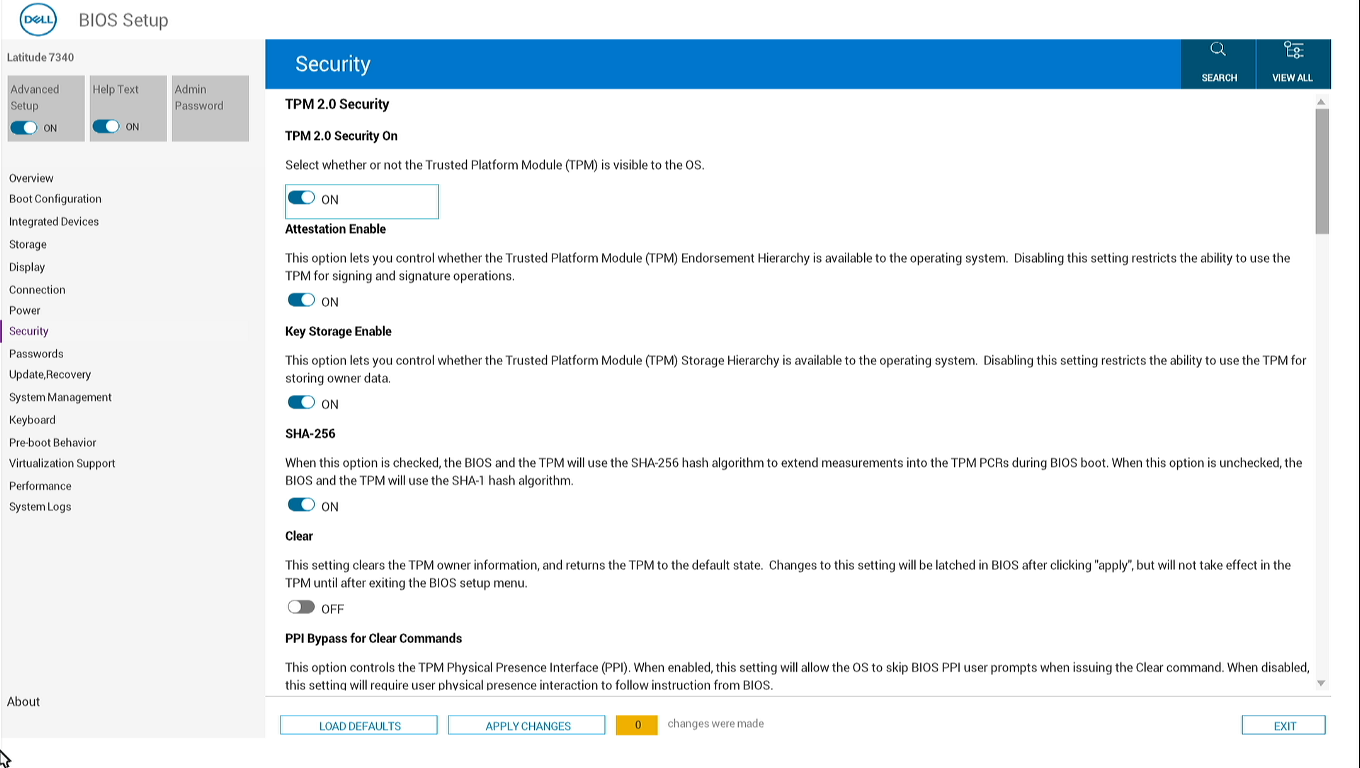
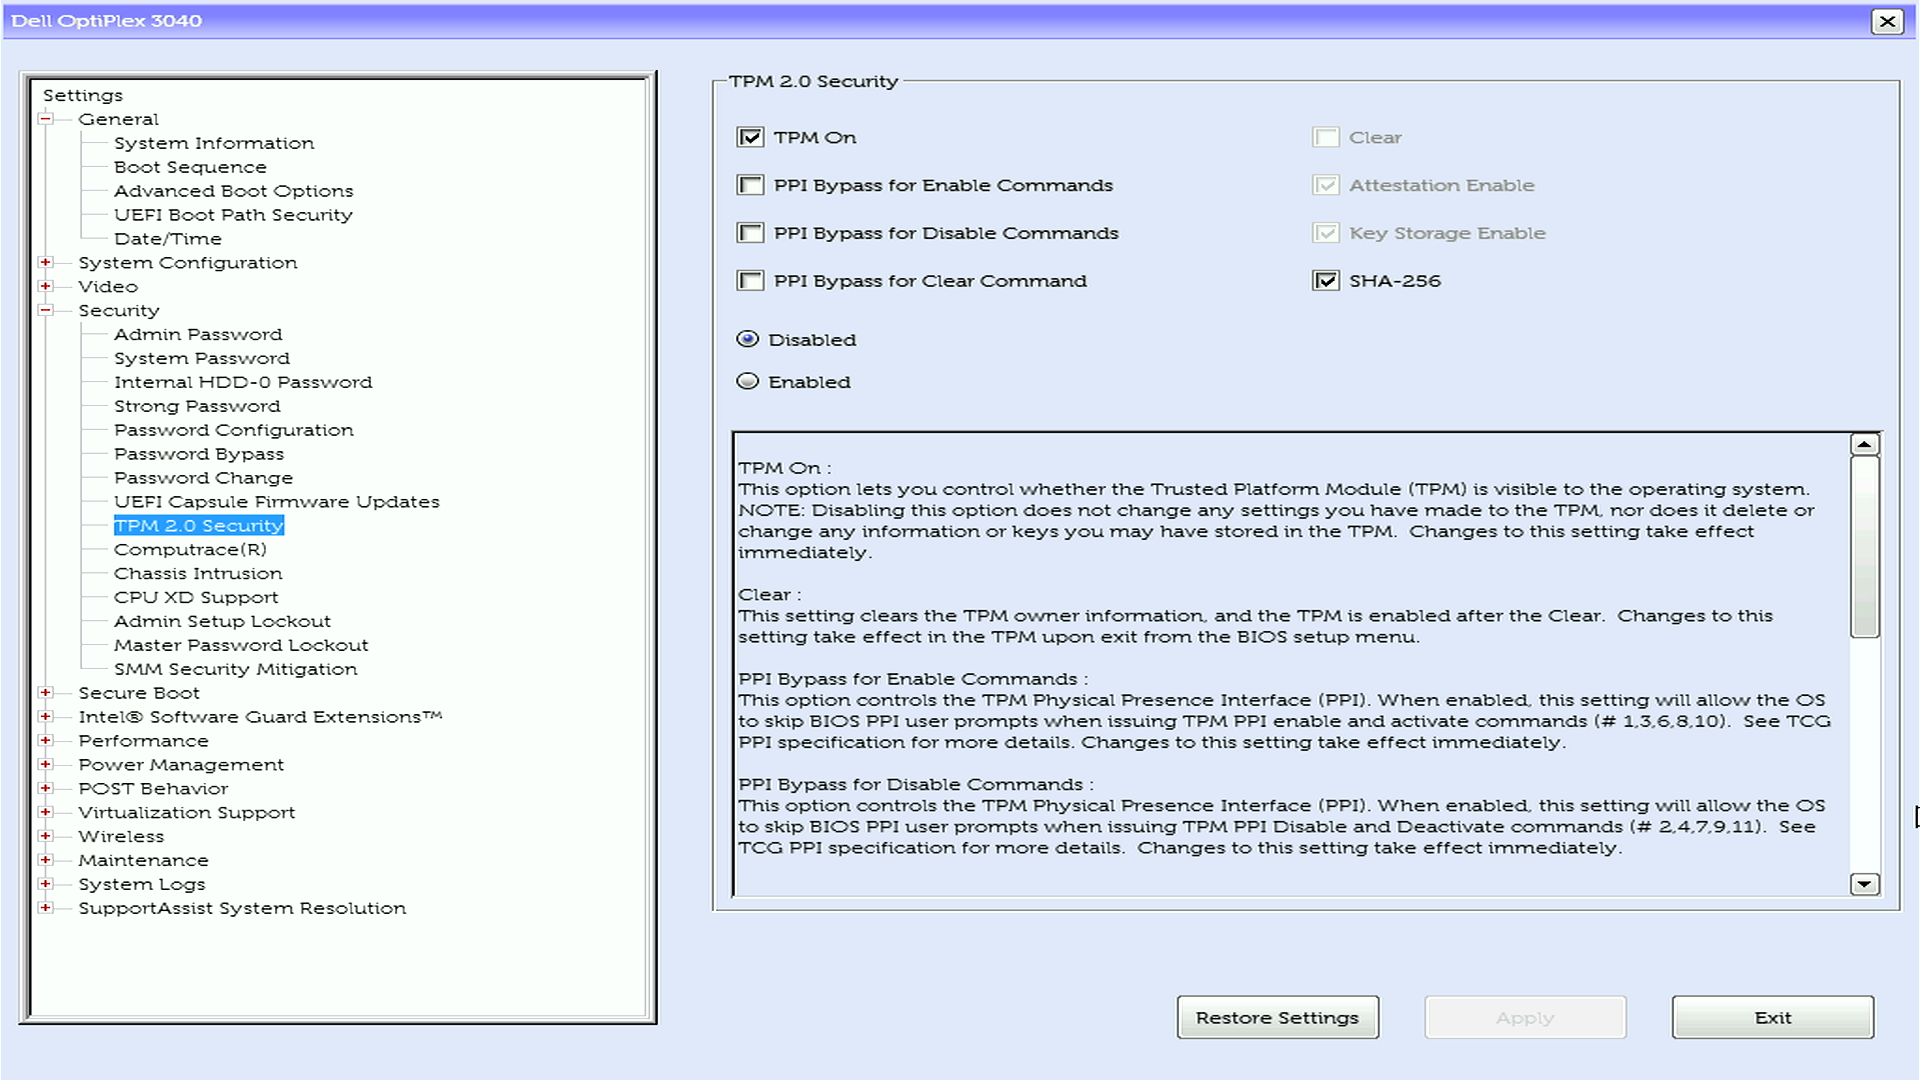
Step 3: Enable TPM in your computer's BIOS
Your computer has a security chip called TPM (Trusted Platform Module) that works with BitLocker. After a motherboard replacement, this needs to be turned on.
- Restart your computer.
- When the Dell logo appears, press F2 repeatedly to enter BIOS setup.
- Find the TPM or Security settings:
- Look for Security > TPM Security or TPM 2.0 Security.
- The exact location depends on your computer model.
- Set TPM to Enabled or On.
- If you see an option to Activate or Clear TPM, select Activate.
- Save changes and exit.
- Your computer will restart.
Step 4: Turn BitLocker back on
- Sign in to Windows (you may be asked for your recovery key one more time).
- Select Start > Settings.
- Select Privacy & security > Device encryption.
- Select BitLocker drive encryption.
- Next to your system drive, select Turn on BitLocker.
- Follow the prompts to save your new recovery key in a safe place.
- Complete the BitLocker setup.
Your computer is now protected again, and you shouldn't see the recovery key prompt unless there's another hardware change.
Preventing this issue before motherboard replacement
If you know your motherboard will be replaced and your computer still turns on, you can avoid this issue:
- Save your recovery key before the repair. Go to Settings > Privacy & security > Device encryption > BitLocker drive encryption and back up your key.
- Turn off BitLocker before the repair using the steps in Step 2 above. You can turn it back on after your computer is repaired.

Affected Products
Alienware, Dell All-in-One, Dell Pro All-in-One, Dell Pro Max Micro, Dell Pro Max Slim, Dell Pro Max Tower, Dell Pro Micro, Dell Pro Slim, Dell Pro Tower, Dell Slim, Dell Tower, Inspiron, Legacy Desktop Models, OptiPlex, Vostro, XPS, G Series
, G Series, Alienware, Dell Plus, Dell Pro, Dell Pro Max, Dell Pro Plus, Dell Pro Premium, Inspiron, Latitude, Dell Pro Rugged, Vostro, XPS, Legacy Laptop Models, Fixed Workstations, Mobile Workstations, Dell Pro Max Micro XE FCM2250, Dell Pro Max Slim XE FCS1250, Dell Pro Max Tower T2 XE FCT2250, Dell Pro Max 16 XE MC16250, Dell Pro Micro Plus XE QBM1250, Dell Pro Slim Plus XE5 QBS1250, Dell Pro Tower Plus XE5 QBT1250
...
Article Properties
Article Number: 000131541
Article Type: Solution
Last Modified: 19 Nov 2025
Version: 19
Find answers to your questions from other Dell users
Support Services
Check if your device is covered by Support Services.