Management and Configuration of RAID Arrays with UEFI LSI MegaRAID
Summary: This article describes the steps required to manage your Intel Virtual RAID on LSI MegaRAID Controllers in the Unified Extensible Firmware Interface (UEFI) configuration of your Dell computer. ...
This article applies to
This article does not apply to
This article is not tied to any specific product.
Not all product versions are identified in this article.
Instructions
Note: This article applies to Dell Precision Workstation and OptiPlex computers. Neither LSI cards or Intel Virtual RAID on CPU (VROC) solutions are supported in PowerEdge server environments.
Note: Intel VROC has specific environmental requirements. For additional information regarding eligible hardware and configurations, see Intel VROC Configuration PDF
 .
.
Accessing the RAID Controller
Note: The storage devices connected to Intel Virtual RAID on CPU (Intel VROC) RAID Controllers in the Unified Extensible Firmware Interface (UEFI) configuration are detectable and testable using the ePSA diagnostics of the Dell computer where the controller is installed.
When you start your computer, slowly tap the F12 key until you see the message "Entering the one-time boot configuration" in the upper right corner of the screen. Use the arrow keys to select the "Device Configuration" option, then press the Enter key. This opens the system setup UEFI configuration options for your LSI MegaRAID RAID controller.
When you start your computer, slowly tap the F12 key until you see the message "Entering the one-time boot configuration" in the upper right corner of the screen. Use the arrow keys to select the "Device Configuration" option, then press the Enter key. This opens the system setup UEFI configuration options for your LSI MegaRAID RAID controller.

Creating a RAID Volume
Note: For this example, two SATA 10tb drives were used to create a RAID 0. You only see RAID options that are on par for the amount of drives you have installed.
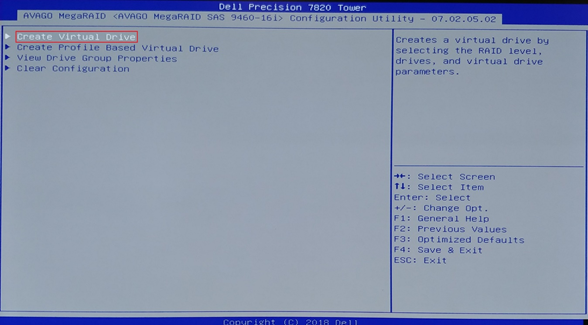
- The menu to configure the RAID array is hidden. Use the left arrow and click one time to reach the following menu (you can also use the right arrow, but it requires more clicks to reach the same menu). Then use the up or down arrow and select the menu option "Configure." Press the Enter key to continue.

- The "Create Virtual Drive" option is already highlighted. Press the Enter key to continue.
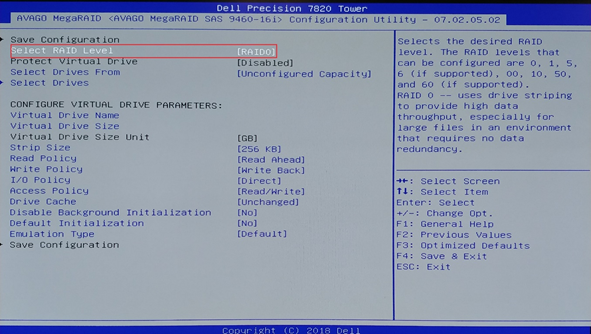
- Select the RAID level. RAID 0 is selected by default and is what this example describes. Press the Enter key to select a different RAID type as needed. Press the Enter key again to return to this menu.
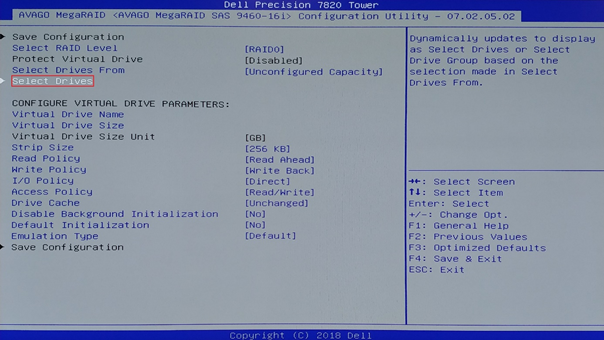
- Add the physical drives for the RAID array. Use the up or down arrow and highlight the menu "Select Drives". Press the Enter key to continue.
- The next operation is a multi-step action:
- Use the up or down arrow and select the first drive.
- Press the Enter key, and a pop-up menu shows up.
- Use the up or down arrow and select "Enabled".
- Press the Enter key to return to the previous menu.
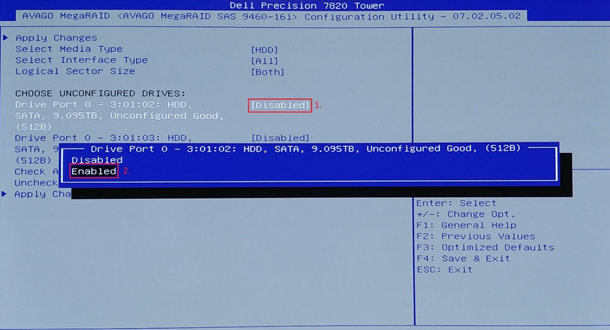
- Repeat the process using the up or down arrow to add additional physical hard drives to the RAID array.

- Once all drives are added, use the up or down arrows and highlight the "Apply Changes" menu option. Press Enter to continue.

- A dialog box confirming the process completed successfully is displayed. "Ok" is highlighted bye default. Press the Enter key to continue.
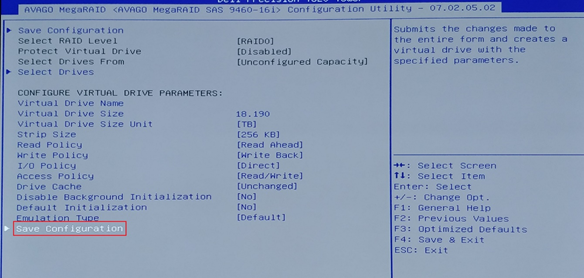
- Use the up or down arrows and highlight the menu "Save Configuration". Press the Enter key to continue.
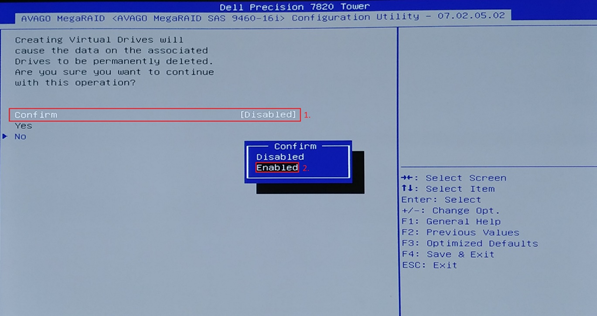
- To confirm the configuration and to apply, it requires a multi-step process:
- First click the Enter key for the option "Confirm" and then a pop-up menu appears.
- Use the up or down arrows and select the "Enabled" option.
- Press the Enter key to return to the previous menu.
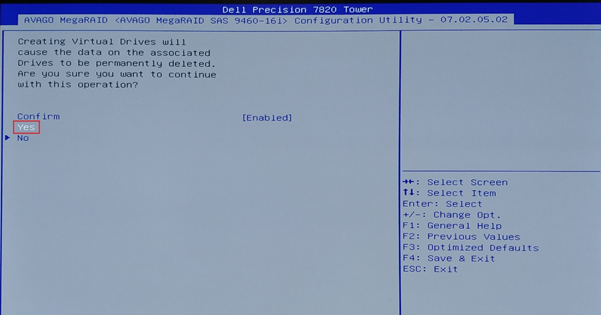
- Use the up or down arrows and highlight the option "Yes". Press the Enter key to continue.
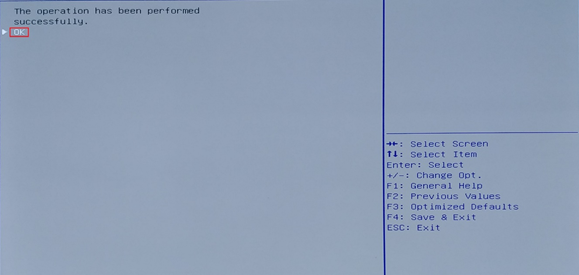
- A dialog box confirming the process completed successfully is displayed. "Ok" is highlighted by default. Press the Enter key to continue.

- In this example, there are no other drives available to configure so a dialog box confirming the creation of the array was successful and all free space has been used.

Delete a Single RAID Volume
Note: This is used when you want to delete one RAID configuration but leave the rest untouched.
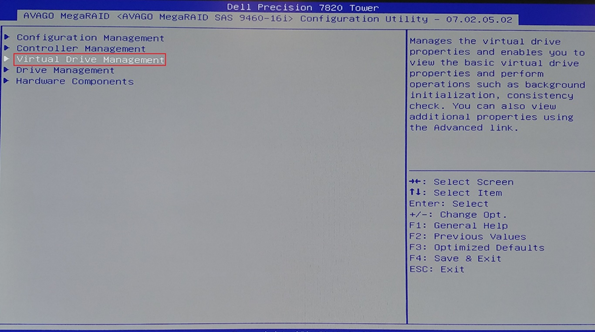
- The menu to configure the RAID array is hidden. Use the left arrow and click one time to reach the following menu (you can also use the right arrow, but it requires more clicks to reach the same menu). Use the up or down arrows and select the menu option "Main Menu" and press the Enter key to continue.

- In the next menu, use the up or down arrows and highlight the menu option "Virtual Drive Management" and press the Enter key to continue.
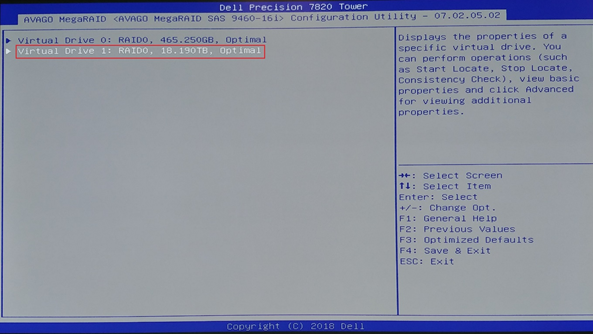
- In this menu, the configured RAID arrays are displayed. For our example, we are deleting the RAID 0 18 TB array. Use the up or down arrows and highlight "Virtual Drive 1". Press the Enter key to continue.
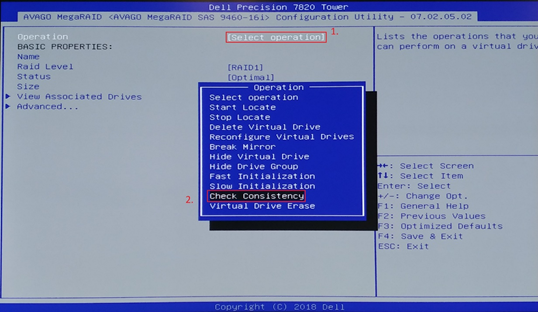
- Press enter for the 1st option "Select Operation", and it opens a pop-up menu. Use the up or down arrows on the keyboard and select "Delete Virtual Drive" and press the Enter key.

- Next use the up or down arrows on the keyboard and highlight the option "Go" and press the Enter key to proceed.

- To confirm the configuration and to apply, it requires a multi-step process:
- First click the Enter key for the option "Confirm" and then a pop-up menu appears.
- Use the up or down arrows and select the "Enabled" option.
- Press the Enter key to return to the previous menu.

- Use the up or down arrows and highlight the option "Yes", press the Enter key to continue.

- A dialog box confirming the process completed successfully is displayed. "Ok" is highlighted by default. Press the Enter key to continue.

Perform a RAID Consistency Check
This is used when you have a RAID 1, 10, or 5 where there is mirroring or parity bits are being used. This is useful to check and attempt to recover bad blocks on the array. This process syncs a RAID 1 array containing the operating system and returns it to a boot state.
Note: This process may require several hours to complete.
- The menu to configure the RAID array is hidden. Use the left arrow on the keyboard and click one time to access the following menu (you can also use the right arrow, but it requires more clicks to reach the same menu). Use the up or down arrow and select the menu option "Main Menu" and press the Enter key to continue
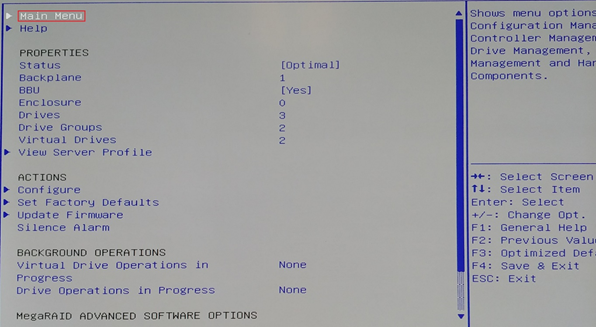
- In the next menu, use the up or down arrows and highlight the menu option "Virtual Drive Management" and press the Enter key to continue

- In this menu, you see your configured RAID arrays. For our example, we are deleting the RAID 0 18 TB array. Use the up or down arrows on the keyboard and highlight "Virtual Drive 1" and press the Enter key to continue.

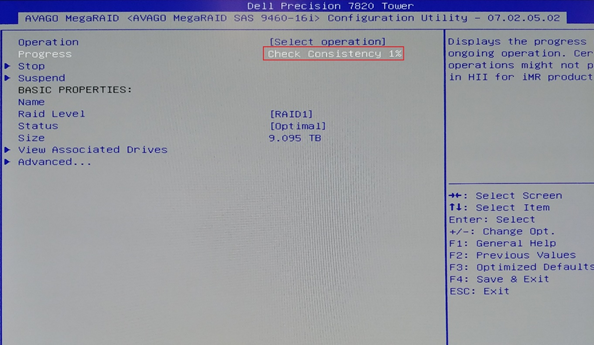
- Press Enter for the first option "Select Operation", and it opens a pop-up menu. Use the up or down arrows and select "Check Consistency" and press the Enter key.
- Next, use the up or down arrows and highlight the option "Go" and press the Enter key to proceed.

- Confirming the configuration and applying it requires a multi-step process:
- First, click the Enter key for the option "Confirm" and then a pop-up menu appears.
- Use the up or down arrows and select the "Enabled" option.
- Press the Enter key to return to the previous menu.

- Use the up or down arrows and highlight the "Yes" option, then press the Enter key to continue.

- A dialog box confirming the operation has been started successfully should be displayed. "Ok" is highlighted by default. Press the Enter key to continue.

- The previous menu is displayed with a Consistency Check progress bar. When the process completes, press the F4 button to save and exit.
Affected Products
OptiPlex, WorkstationsArticle Properties
Article Number: 000133414
Article Type: How To
Last Modified: 14 Jan 2025
Version: 10
Find answers to your questions from other Dell users
Support Services
Check if your device is covered by Support Services.