Alienware 13 R2、15 R2 和 17 R3:系統未開機
Summary: Alienware 13 R2、15 R2 和 17 R3 可能會在關機後停止開啟電源。以下是如何透過橋接 CLRP1 插腳來解決問題。
This article applies to
This article does not apply to
This article is not tied to any specific product.
Not all product versions are identified in this article.
Symptoms
Alienware 13 R2 在關機後可能無法再開啟電源。此問題可能會突然發生,而且在發生問題之前沒有任何特定行為。
- Alienware 13 R2
- Alienware 15 R2
- Alienware 17 R3
Cause
沒有可用的原因資訊。
Resolution
Alienware 15 R2 和 17 R3
-
關閉電腦。
-
卸下底蓋。
-
拔下電池纜線。
-
卸下記憶體。觀看 本影片
,瞭解如何卸下記憶體。
-
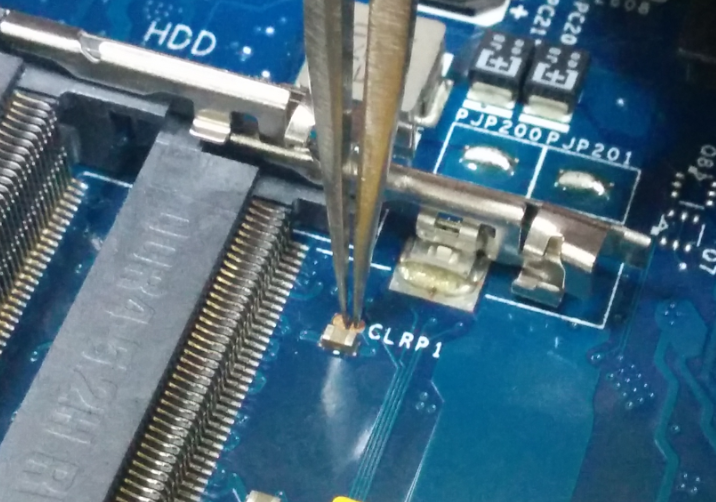
找到 CLRP1 插腳。
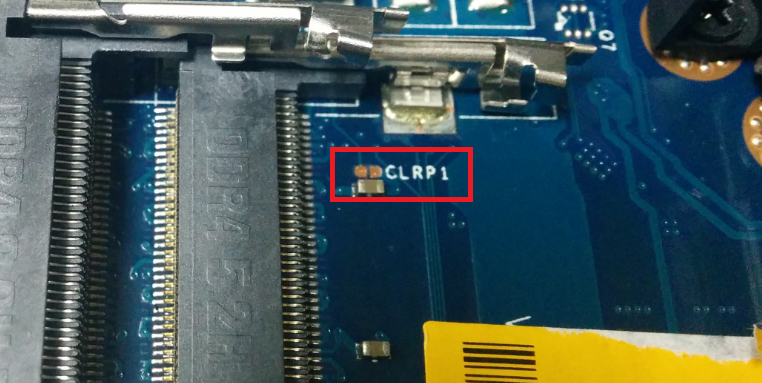
-
使用鉗子或平頭螺絲起子,請同時觸碰兩個插腳。
-
將所有項目連接回來,然後再試一次。如果您的電腦載入 Windows,請從驅動程式頁面將您的電腦 BIOS 更新至 1.2.15 版或更新版本。
Alienware 13 R2
-
關閉電腦。
-
卸下底蓋。
-
拔下電池纜線。
-
卸下記憶體。觀看這部影片
-
找到 CLRP2 插腳。
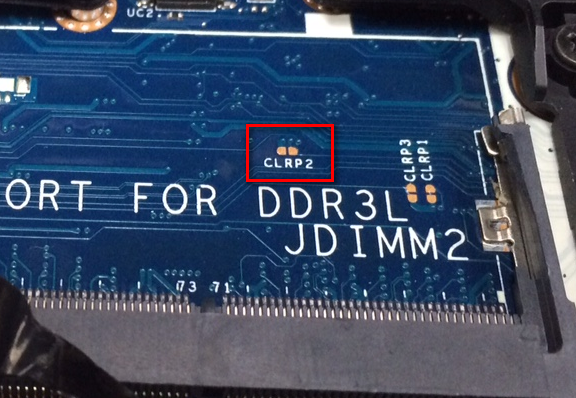
-
使用鉗子或平頭螺絲起子,請同時觸碰兩個插腳。

-
將所有項目連接回來,然後再試一次。如果您的電腦載入 Windows,請從驅動程式頁面將您的電腦 BIOS 更新至 1.2.15 版或更新版本。
如果上述步驟無法解決問題,您可以嘗試我們文章 Alienware 電腦無法開啟或進入 Windows 中的其他步驟。
Additional Information
Affected Products
Alienware 13 R2, Alienware 15 R2, Alienware 17 R3Article Properties
Article Number: 000143135
Article Type: Solution
Last Modified: 13 May 2025
Version: 12
Find answers to your questions from other Dell users
Support Services
Check if your device is covered by Support Services.