PowerEdge: How to Create a Virtual Disk on a Dell RAID Controller through System Setup
Summary: This article explains how to create a Virtual Disk using the System Settings menu.
This article applies to
This article does not apply to
This article is not tied to any specific product.
Not all product versions are identified in this article.
Instructions
Steps:
-
Enter the System Setup by pressing F2 during system start.
-
Click Device Settings.

Figure 1: System Setup Main Menu -
Click the appropriate RAID controller device.
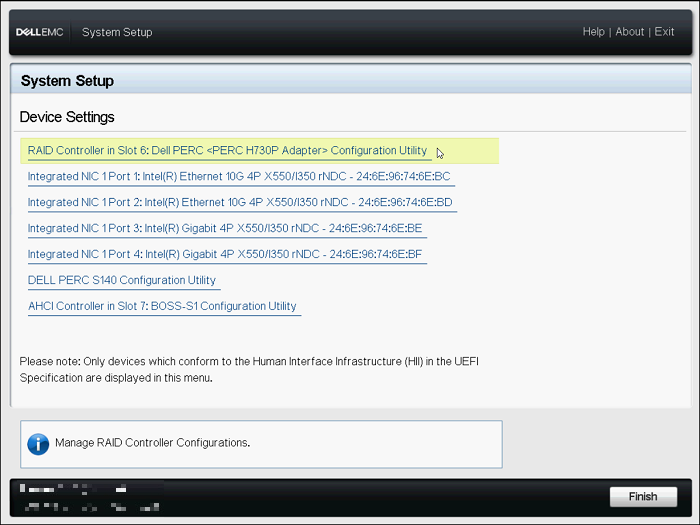
Figure 2: System Setup Device Settings -
Click Main Menu.

Figure 3: Dashboard View Menu -
Click Configuration Management.
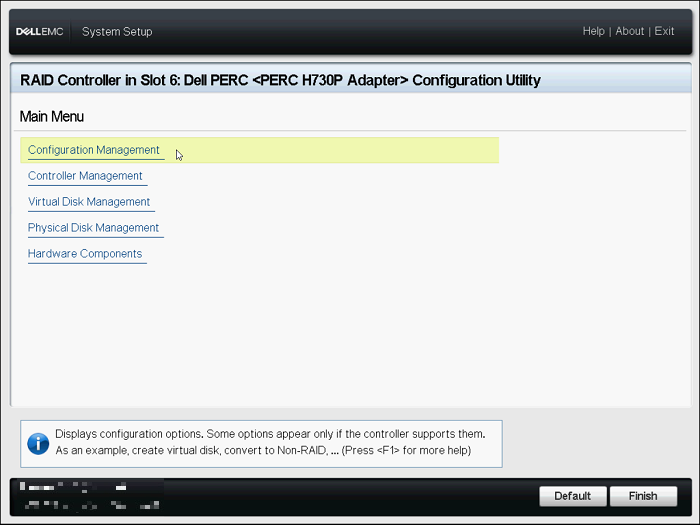
Figure 4: Configuration Utility Main Menu -
Click Create Virtual Disk
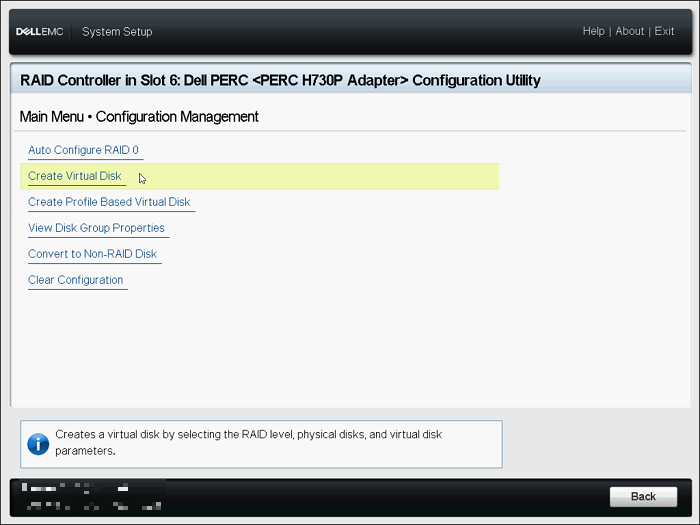
Figure 5: Configuration Management Menu -
The following list of options are now displayed to define the Virtual Disk parameters:
- Select RAID level - allows you to choose the RAID level of your choice.
- Secure Virtual Disk - If you want to create a secured virtual disk, select Secure Virtual Disk.
The Secure Virtual Disk option is enabled and selected by default, only if the security key has been configured. Only SED physical disks are listed.
- Select Physical Disks From - allows you to select one of the physical disk capacities:
- Unconfigured Capacity: Creates a virtual disk on unconfigured physical disks
- Free Capacity: Utilizes unused physical disk capacity that is already part of a virtual disk
- Select Physical Disks - If you want to select the physical disks from which the virtual disks are being created, click Select Physical Disks. This option is displayed if you select Unconfigured Capacity as your physical disk capacity.
- Select Disk Groups - If you want to select the disk groups from which the virtual disks are being created, click Select Disk Group. This option is displayed if you select Free Capacity as your physical disk capacity.
- Configure Virtual Disk Parameters - allows you to set the virtual disk parameters when creating the virtual disk.
-
Click Select Physical Disks.
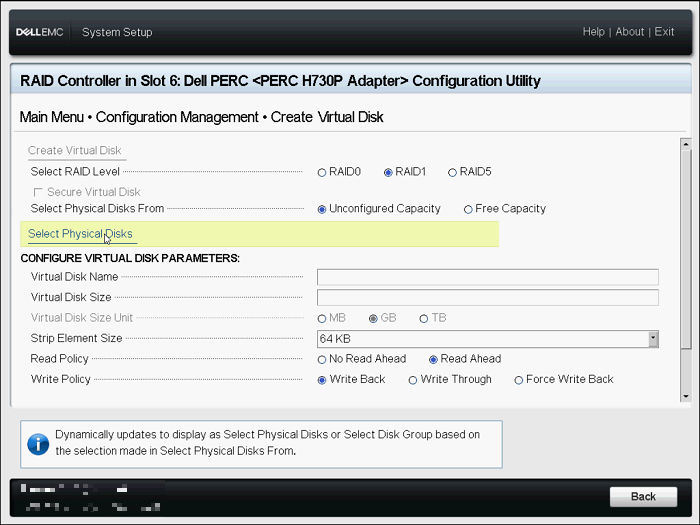
Figure 6: Create Virtual Disk Menu -
Choose the appropriate drives and click Apply Changes.
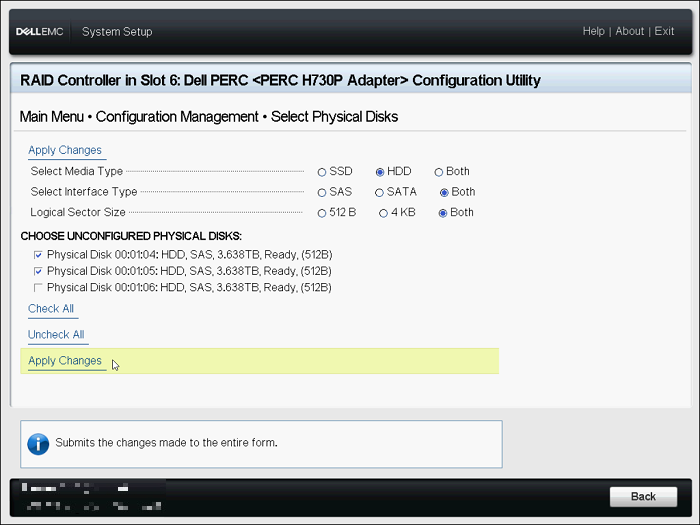
Figure 7: Drive Selection -
When the action was performed successfully, click OK.
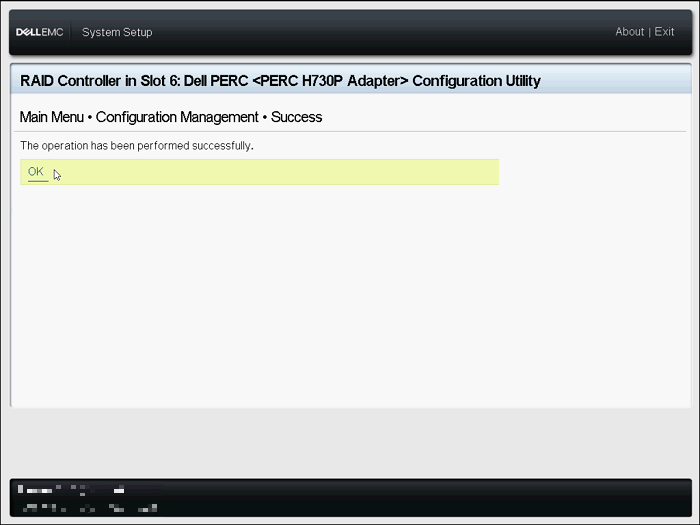
Figure 8: Success Confirmation -
Name the new Virtual Disk and choose the appropriate settings.
-
Click Create Virtual Disk.
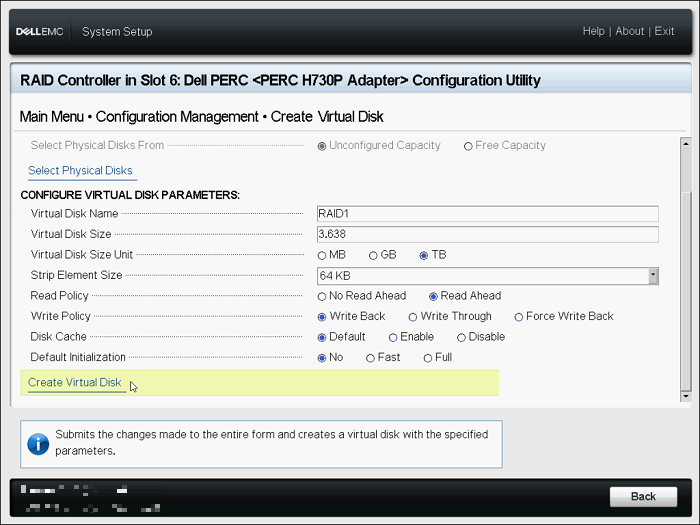
Figure 9: Create Virtual Disk -
Check Confirm and click Yes.
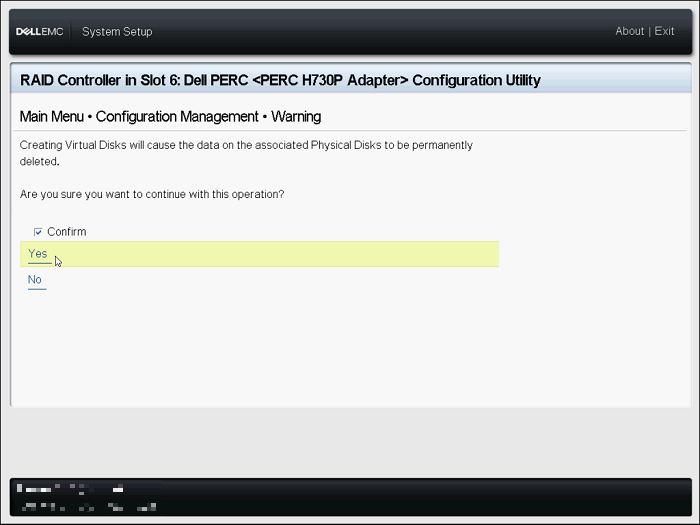
Figure 10: Confirm Virtual Disk Creation -
The Virtual Disk is created successfully. Click Ok.
Verify or Change the RAID Configuration
- Click Virtual Disk Management on the Main Menu.
- Verify the virtual disk summary such as name, size, and status. To verify or change each virtual disk configuration, click any virtual disk.
- Verify each item. The name can be changed on this screen. To verify or change configuration details, click Advanced.
- Some of the items can be changed on this screen. Click Apply Changes after changing items.
PowerEdge: How to Configure RAID with Device Settings (LifeCycle Controller)
Duration: 00:02:45 (hh:mm:ss)
When available, closed caption (subtitles) language settings can be chosen using the CC icon on this video player.
Alternatively, the Virtual Disk can also be created from the integrated Dell Remote Access Controller (iDRAC) web interface.
For more information, reference Dell PowerEdge: How to Create a Virtual Disk Using iDRAC9.
Affected Products
PowerEdge RAID Controller H345, PowerEdge RAID Controller H350 Adapter SAS, PowerEdge RAID Controller H355 Front SAS, PowerEdge RAID Controller H355 Adapter SAS, PowerEdge RAID Controller H745, PowerEdge RAID Controller H745P MX
, PowerEdge RAID Controller H755 Adapter, PowerEdge RAID Controller H755 MX Adapter, PowerEdge RAID Controller H755N Front NVMe, PowerEdge RAID Controller H755 Front SAS, PowerEdge RAID Controller H965i Adapter, PowerEdge RAID Controller H965i Front, PowerEdge RAID Controller H965i MX, PowerEdge RAID Controller H730P, PowerEdge RAID Controller H740P, PowerEdge RAID Controller H840
...
Products
C Series, HS Series, Modular Infrastructure, Rack Servers, Tower Servers, XE Servers, XR Servers, OEM Server SolutionsArticle Properties
Article Number: 000178269
Article Type: How To
Last Modified: 01 Dec 2025
Version: 15
Find answers to your questions from other Dell users
Support Services
Check if your device is covered by Support Services.