14G servers install Windows Server 2016 through F11
Summary: 14G servers install Windows Server 2016 through F11
This article applies to
This article does not apply to
This article is not tied to any specific product.
Not all product versions are identified in this article.
Symptoms
1. First, insert a USB flash drive or CD-ROM disk, turn on POST, and press [F11] to enter [Boot Manager] settings according to the prompts in the upper right corner of
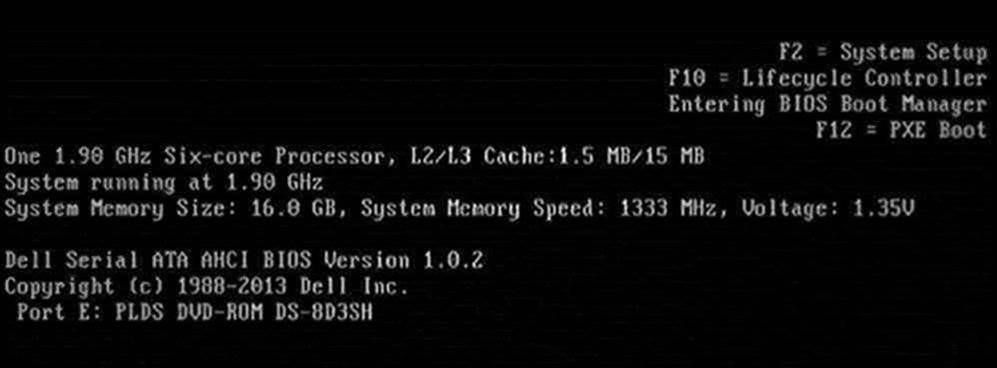
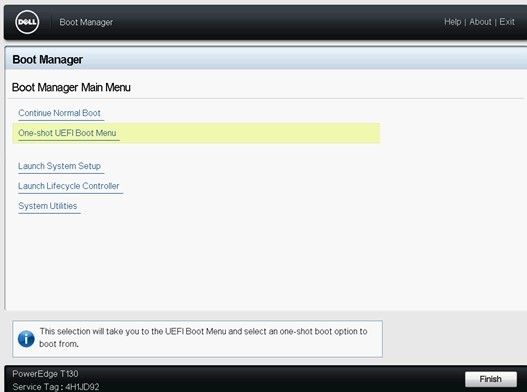
the screen2. Select [BIOS Boot Menu] in the setup screen, select [One-shot UEFI Boot Menu] or [One-shot BIOS Boot Menu]
3. Select the corresponding boot mode according to your system media type, select DVD boot if it is an operating system CD, or USB boot
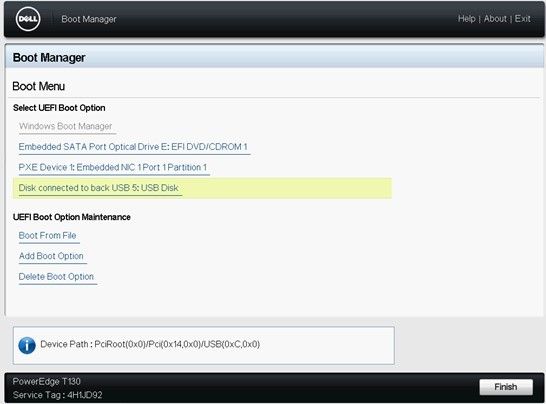
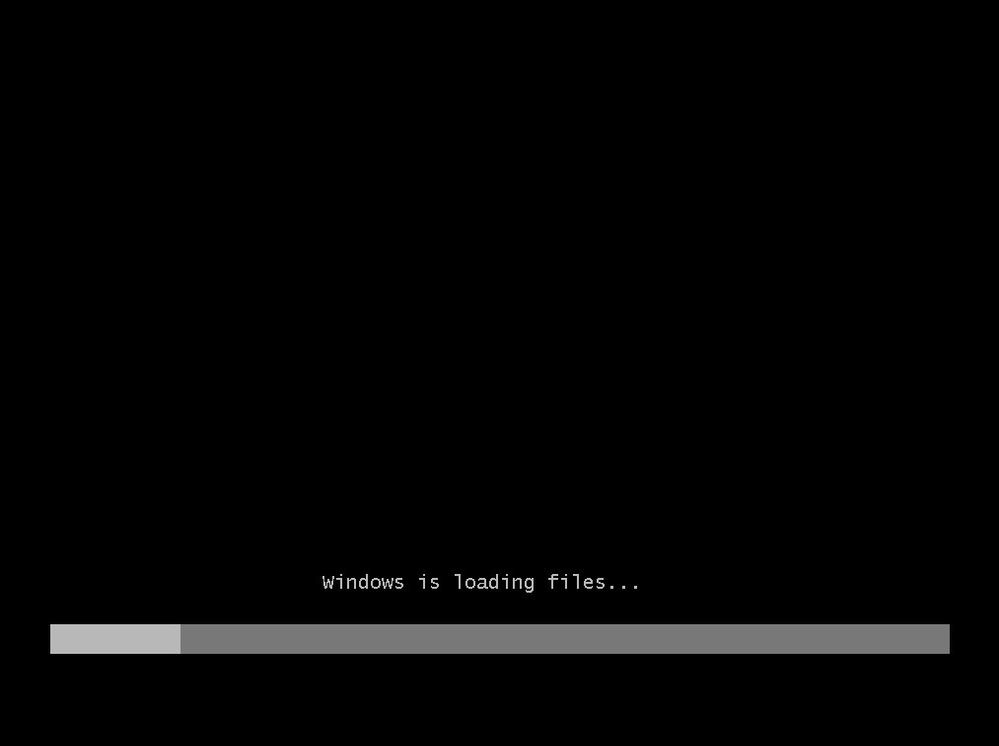
if it is a USB flash drive4. After selecting the corresponding boot item, the server will automatically restart and start the installation of the operating system. The Windows file loading process takes 5-10 minutes, please wait patiently.
Note: If you already have an old system on your server, the monitor will display "Press any key to boot from CD/DVD rom" during the restart process, please press any to continue, otherwise you will enter the old system. If the server does not have a system, you can start the installation directly from the current optical drive.

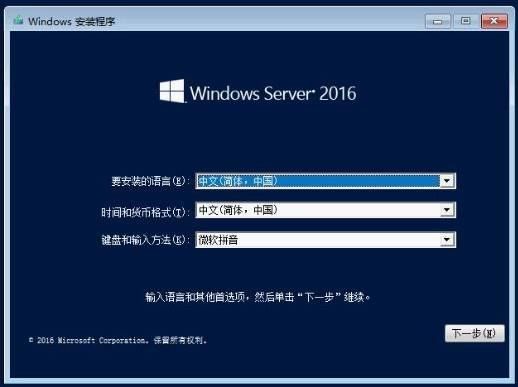
5. The file is loaded, confirm the language information, and click [Next]
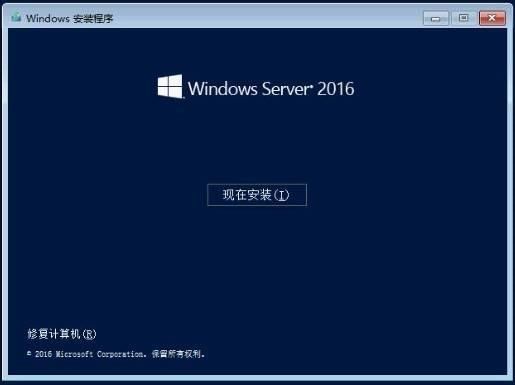
 6. Click [Install Now] to continue7
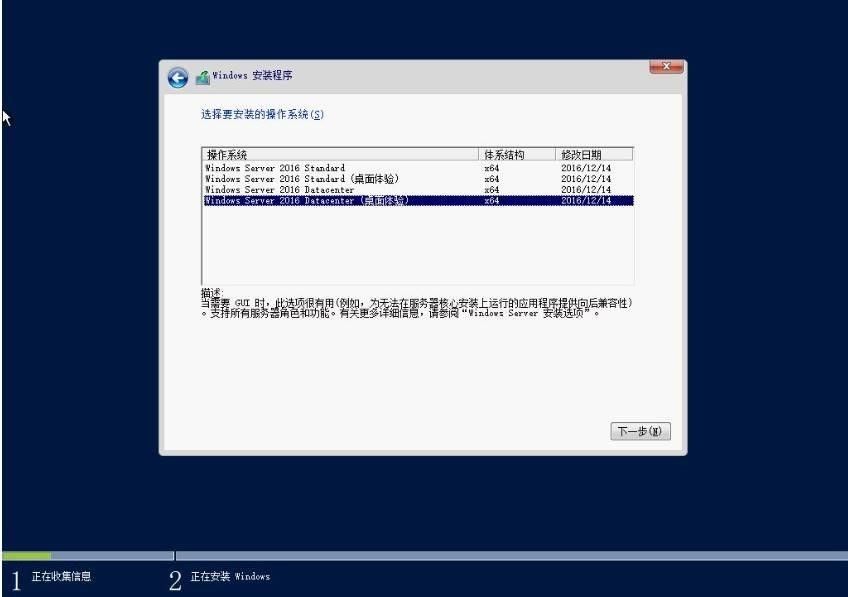
 . Select the operating system you want to install, select the operating system version with "Desktop Experience" to install and click [Next]
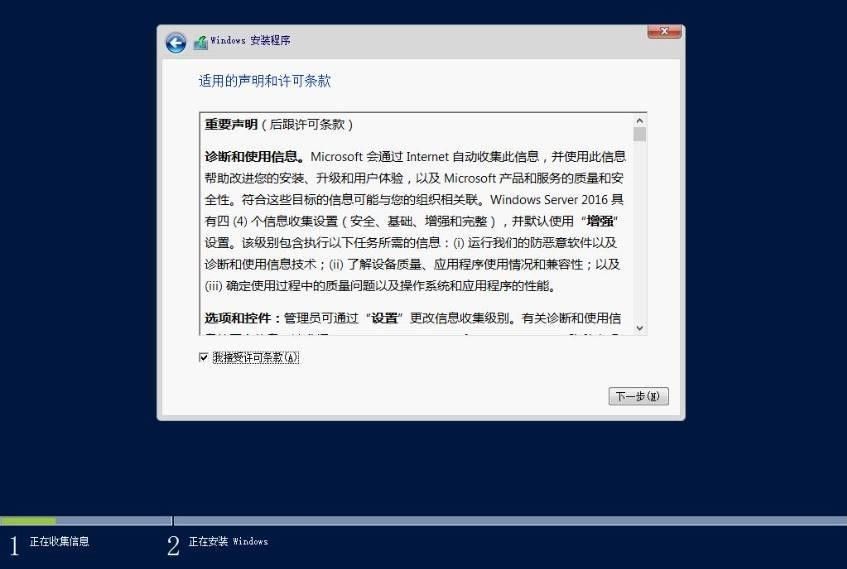
8. Read the license agreement and check "I accept the license terms" and click [Next] Continue 9
 . Select the installation type as [Custom Installation]
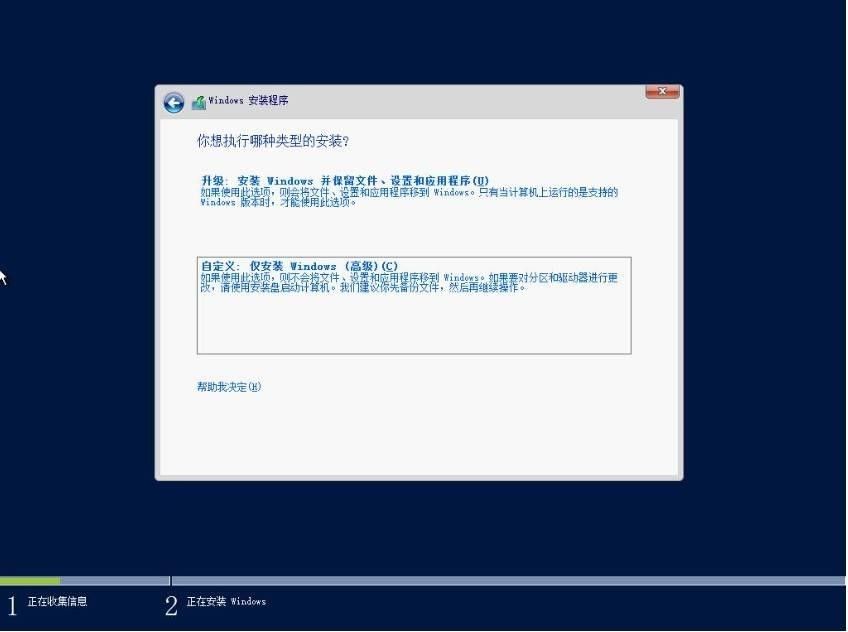
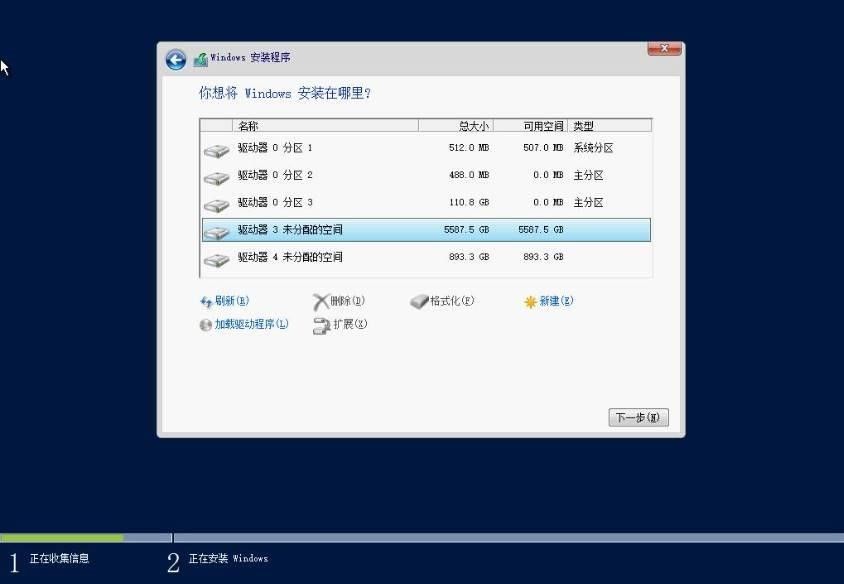
10. Click "Drive Options (Advanced)" to partition it, select the partition where you want to install the operating system, and click [Next] to continue.
Note: If this step does not identify the hard drive, it is due to a missing array card driver and requires manual loading. The array card driver needs to be downloaded in advance, and the downloaded driver file should be double-clicked and pressurized, and put it in the root directory of the USB flash drive. Click [Load Driver], then select [Browse] to find the corresponding array card driver and select Load.
11. Wait for the system installation to complete. This process will take 15-30 minutes, please be patient.

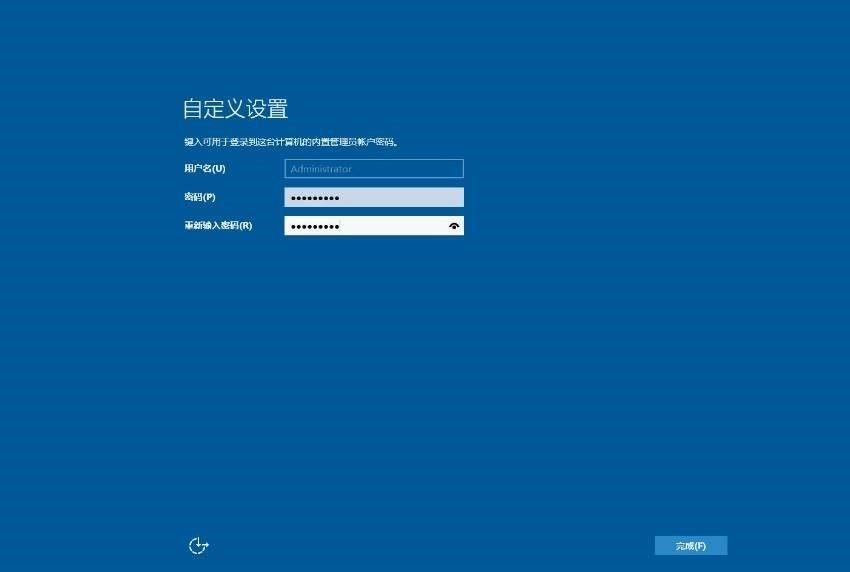
12. After the system is installed, it will automatically restart and enter the system setup interface.
Note: The operating system password setting needs to comply with the password specification: at least three character types are required, including uppercase and lowercase English, numbers, and special characters. The password length requires a minimum of 6 characters.
the screen2. Select [BIOS Boot Menu] in the setup screen, select [One-shot UEFI Boot Menu] or [One-shot BIOS Boot Menu]
3. Select the corresponding boot mode according to your system media type, select DVD boot if it is an operating system CD, or USB boot
if it is a USB flash drive4. After selecting the corresponding boot item, the server will automatically restart and start the installation of the operating system. The Windows file loading process takes 5-10 minutes, please wait patiently.
Note: If you already have an old system on your server, the monitor will display "Press any key to boot from CD/DVD rom" during the restart process, please press any to continue, otherwise you will enter the old system. If the server does not have a system, you can start the installation directly from the current optical drive.
5. The file is loaded, confirm the language information, and click [Next]
6. Click [Install Now] to continue7
. Select the operating system you want to install, select the operating system version with "Desktop Experience" to install and click [Next]
8. Read the license agreement and check "I accept the license terms" and click [Next] Continue 9
. Select the installation type as [Custom Installation]
10. Click "Drive Options (Advanced)" to partition it, select the partition where you want to install the operating system, and click [Next] to continue.
Note: If this step does not identify the hard drive, it is due to a missing array card driver and requires manual loading. The array card driver needs to be downloaded in advance, and the downloaded driver file should be double-clicked and pressurized, and put it in the root directory of the USB flash drive. Click [Load Driver], then select [Browse] to find the corresponding array card driver and select Load.
11. Wait for the system installation to complete. This process will take 15-30 minutes, please be patient.
12. After the system is installed, it will automatically restart and enter the system setup interface.
Note: The operating system password setting needs to comply with the password specification: at least three character types are required, including uppercase and lowercase English, numbers, and special characters. The password length requires a minimum of 6 characters.
Cause
NA
Resolution
NA
Affected Products
ServersArticle Properties
Article Number: 000181478
Article Type: Solution
Last Modified: 07 Jan 2026
Version: 6
Find answers to your questions from other Dell users
Support Services
Check if your device is covered by Support Services.