PowerProtect Backup Service: Phoenix Cloud에 대한 NAS 프록시 백업 설정
Summary: NAS 공유를 백업하도록 Phoenix 에이전트를 설정하는 단계
This article applies to
This article does not apply to
This article is not tied to any specific product.
Not all product versions are identified in this article.
Instructions
- 하이브리드 워크로드 대시보드에서 조직 드롭다운을 클릭하고 NAS 프록시에 대해 조직을 선택합니다.
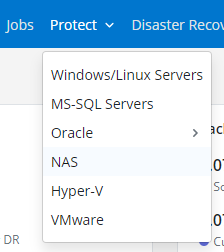
- Protect 드롭다운을 클릭하고 NAS를 선택합니다.
-

- 왼쪽에서 모든 프록시를 클릭합니다.
- 오른쪽 상단에서 프록시 추가를 클릭합니다.
- 프록시 호스트의 운영 체제에 적합한 에이전트를 다운로드하여 설치합니다.
- 유효한 활성화 토큰을 선택하거나 Phoenix Management Console에서 새 토큰을 생성합니다.
- Windows 또는 Linux용으로 사전 생성된 활성화 명령을 복사하고 프록시 호스트에서 실행합니다.
활성화는 NAS 프록시가 Phoenix Cloud와 통신하고 NAS 공유에서 백업 및 복원 작업을 처리할 수 있는 권한을 부여합니다.
- Phoenix Console의 왼쪽에서 모든 장치를 클릭합니다.
- 오른쪽 상단 모서리에서 Add NAS Device를 클릭합니다.
- Device Details(디바이스 세부 정보)를 입력하고 백업을 실행할 NAS Proxy(NAS 프록시)를 선택합니다.
- 자격 증명을 아직 입력하지 않은 경우 해당 드롭다운에서 + 새 자격 증명을 선택합니다.
- Save를 클릭합니다.
Affected Products
PowerProtect Backup ServicesArticle Properties
Article Number: 000190871
Article Type: How To
Last Modified: 24 Aug 2021
Version: 1
Find answers to your questions from other Dell users
Support Services
Check if your device is covered by Support Services.