Avamar - VMware Image Restore fails on Snapshot Reversion task.
Summary: Avamar - VMware Image Restore fails on Snapshot Reversion task with " avvcbimage Error <44020>: Snapshot reversion for VM '[] .vmx' task creation encountered a problem".
This article applies to
This article does not apply to
This article is not tied to any specific product.
Not all product versions are identified in this article.
Symptoms
The following error is reported in the avvcbimage logs and is shown in vSphere interface.

 avvcbimage Error <44035>: vSphere Task failed: 'A general system error occurred: vDS host error: see faultCause'.
 avvcbimage Error <44020>: Snapshot reversion for VM '[<datastorename>] <vmname>.vmx' task creation encountered a problem
The errors are also displayed in vSphere, and correspond with the restore log.
Cause
vCenter was unable to assign the configured dvs.portId from the backed-up VMs .vmx file.
This occurs when restoring from one vCenter to another, when source and destination vCenters use sduplicate Virtual Distributed Switch names (dvs).
This occurs when restoring from one vCenter to another, when source and destination vCenters use sduplicate Virtual Distributed Switch names (dvs).
Resolution
Create a script that removes the network information from the restored VMs .vmx file.
1. Select an Avamar proxy and create the following script.
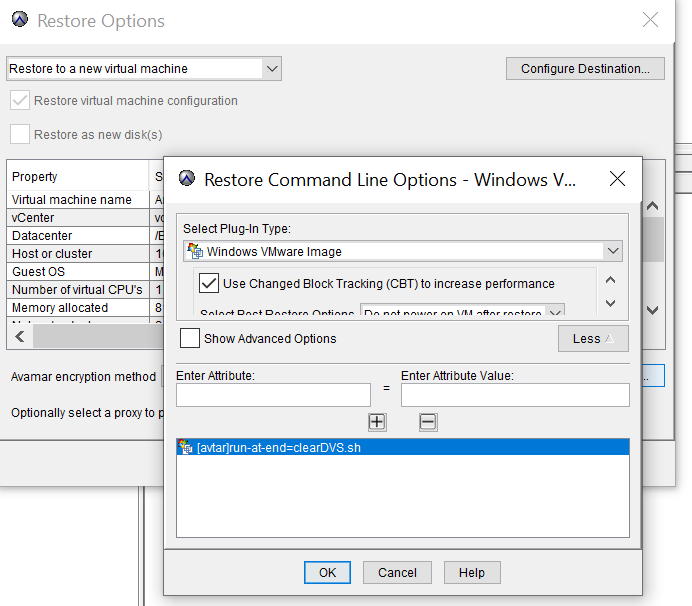
In the Avamar MC UI, during the restore, select the proxy where clearDVS.sh is installed. Pass the advance flags to execute it during the restore job.
Enter Attribute: [avtar]run-at-end=clearDVS.sh
Enter Attribute Value: clearDVS.sh
5. Start the restore. Point at the proxy where the changes were made.
6. Wait for the restore to complete. You should now be able to edit network settings and power on the VM.
1. Select an Avamar proxy and create the following script.
/usr/local/avamarclient/etc/scripts/clearDVS.sh 2. Edit the script and add the following lines:
#!/bin/bash
find /usr/local/avamarclient/var/vmware/ -name vm.vmx -exec sed -i '/.dvs.switchId/d;/.dvs.portId/d;/.dvs.portgroupId/d;/.dvs.connectionId/d' {} \;
3. Set execute permissions on the file using the chmod command:
chmod 755 /usr/local/avamarclient/etc/scripts/clearDVS.sh 4. This can be ran by adding the following line to /usr/local/avamarclient/var/avtar.cmd.
--run-at-end=clearDVS.sh Alternatively, the same behavior can be accomplished from the MCGUI.
In the Avamar MC UI, during the restore, select the proxy where clearDVS.sh is installed. Pass the advance flags to execute it during the restore job.
Enter Attribute: [avtar]run-at-end=clearDVS.sh
Enter Attribute Value: clearDVS.sh
5. Start the restore. Point at the proxy where the changes were made.
6. Wait for the restore to complete. You should now be able to edit network settings and power on the VM.
Article Properties
Article Number: 000205737
Article Type: Solution
Last Modified: 21 Jul 2023
Version: 2
Find answers to your questions from other Dell users
Support Services
Check if your device is covered by Support Services.