如何在VEP4600上使用 USB 进行 Versa 的全新安装
Summary: 本文记录了使用 USB Pendrive 在VEP4600上执行 Versa 21.2.3 全新安装的详细步骤。
This article applies to
This article does not apply to
This article is not tied to any specific product.
Not all product versions are identified in this article.
Instructions
-
登录 到 Versa 链接下方,然后在“General Tab”下选择“Software Download”。

- 下载 正确的 Versa ISO 版本(我选择 Versa 21.2.3)

- 使用 Rufus 准备可引导 USB。选择 ISO 映像并确保“分区方案”设置为 GPT,然后单击 开始 。

- 在 下一个屏幕中选择“Write in DD Image mode”,然后单击 OK!

- 状态显示“就绪”后, 单击 “关闭”。请勿再次启动 该过程。

- 将 手写笔驱动器插入 VEP 框中, 重新启动 包装箱,然后 按 DEL 键进入 BIOS。
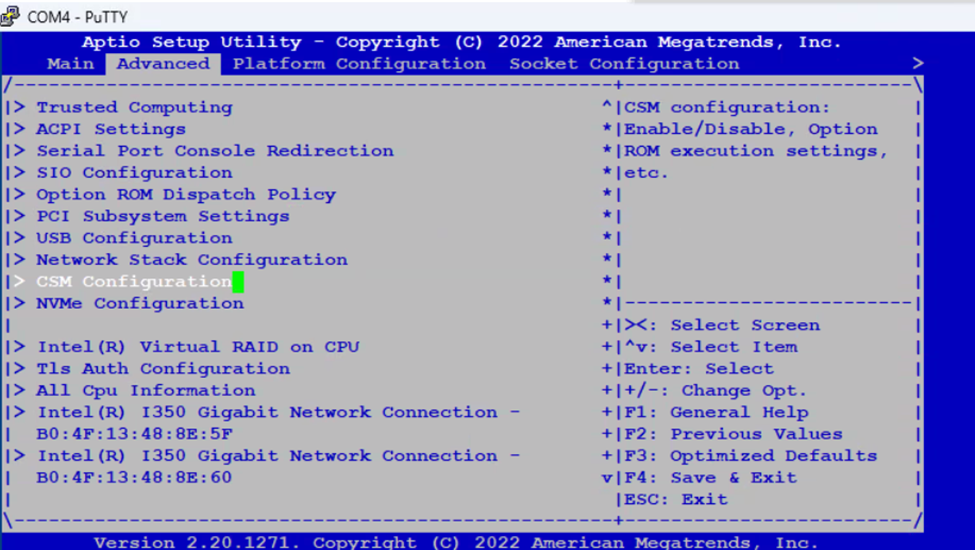
- 导航 至 高级 选项卡并 选择 CSM 配置 。
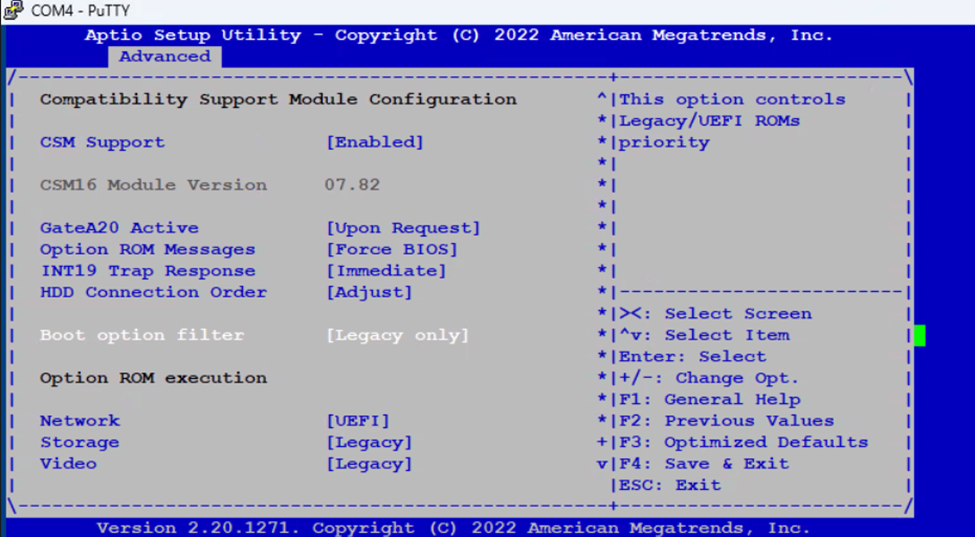
- 将 “Boot Filter Option”(引导筛选器选项)设置为“Legacy only”(仅限传统), 然后按 ESC 键进入主菜单
- 导航 至 Boot (引导), 然后选择 Boot Option Priorities(引导选项优先级),然后 选择 您插入的 USB 手写笔驱动器。

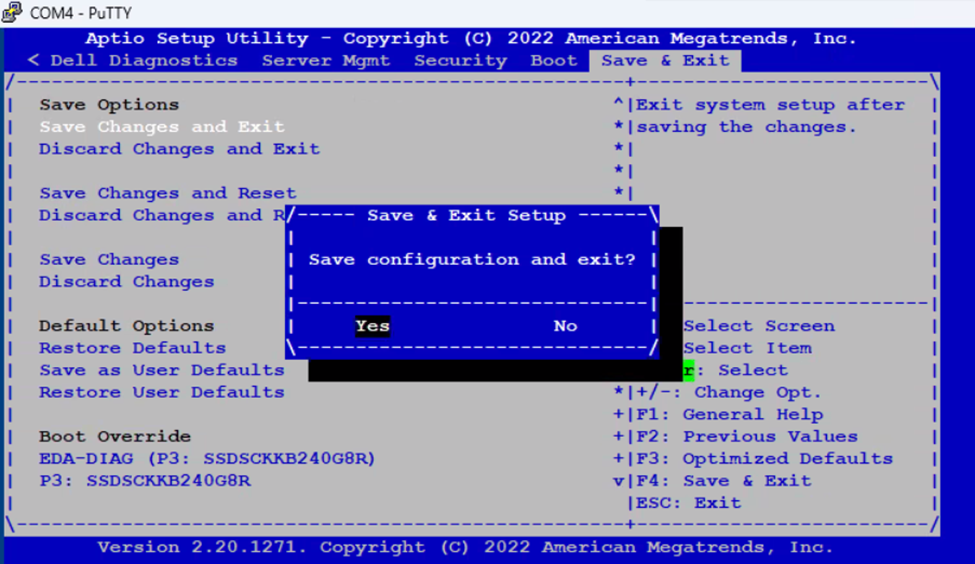
- 导航 至“Save & Exit”。选择 “Save Changes and Exit”, 然后选择 “Yes”。请勿按 F4 键。它不会在某些 BIOS 版本中有时保存更改。
-
它将从 USB 启动,并引发错误“Error setting up gfxboot”。
Type “versa-branch-usb” and Press Enter twice to see the Video modes available.

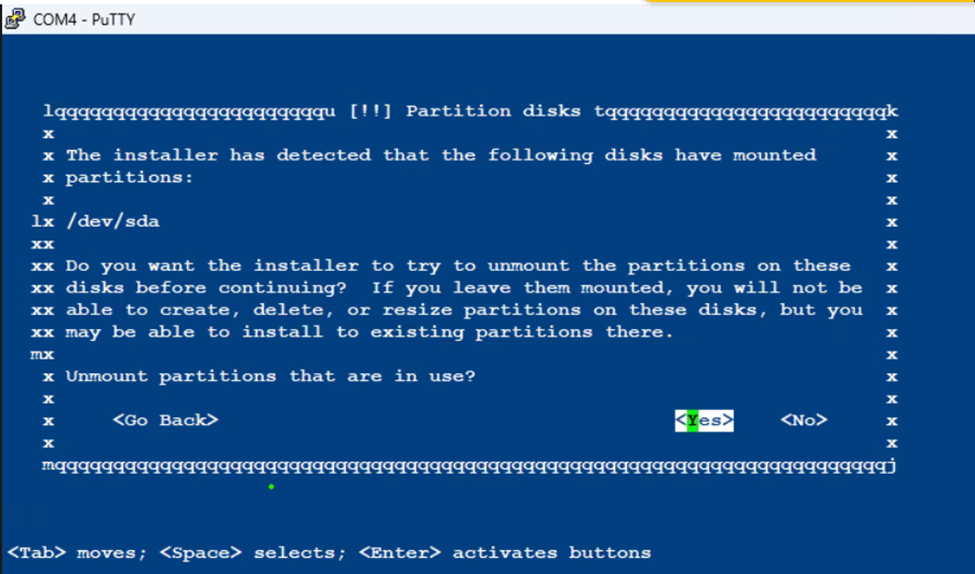
- 使用 Tab 键在下面的屏幕中选择“Cancel”,然后 按 Enter 键。

- 选择 “是”以卸载正在使用的分区。
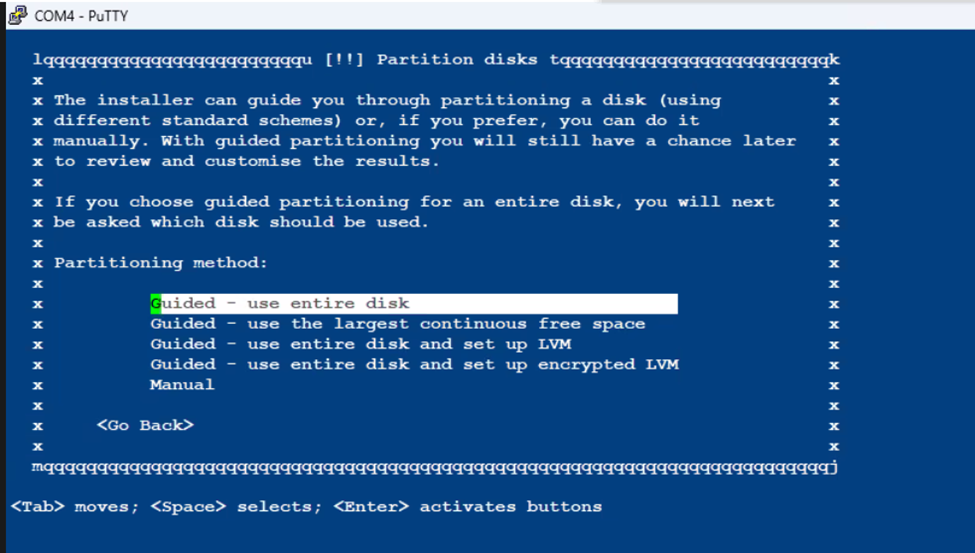
- 选择 第一个选项,然后 按 Enter 键。
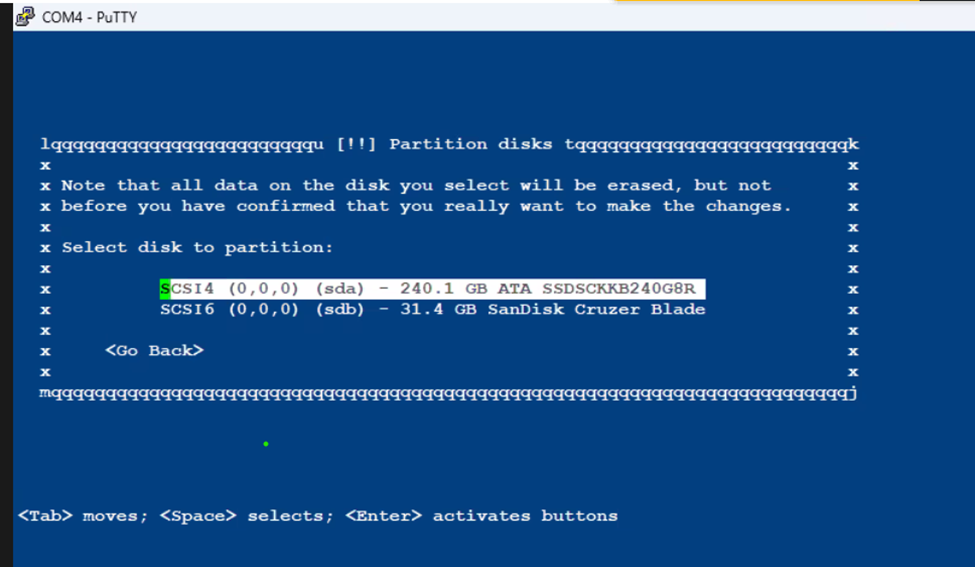
- 选择 内部 SSD 驱动器以安装 Versa OS
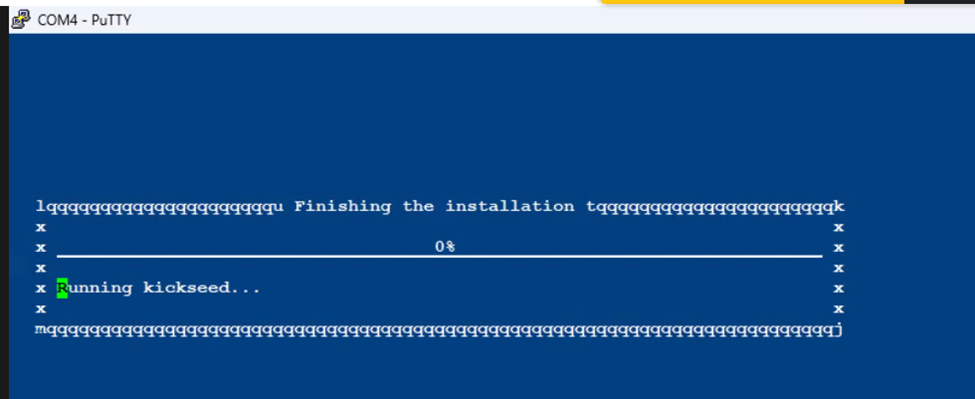
- 安装将需要一些时间,并且将停滞在运行 Kickseed 的 0% 处。这是正常情况,请勿中止该过程
- 安装完成后,VEP Box 将自动重新启动并引导至 VERSA OS

-
Login using default credentials, admin/versa123

- 键 入“cli”以进入命令行模式
show system details to validate the Version of Versa Installed

Additional Information
Affected Products
DELL NETWORKING VEP4600 16-CORE, Dell Networking VEP4600 4-CORE, DELL NETWORKING VEP4600 8-COREArticle Properties
Article Number: 000218067
Article Type: How To
Last Modified: 10 Nov 2023
Version: 2
Find answers to your questions from other Dell users
Support Services
Check if your device is covered by Support Services.