Live Optics | RVTools | How to upload the Excel output to create a project
Summary: This article outlines how to upload multiple RVTools Excel sheets to create one Live Optics project and download the AIR PPT output.
This article applies to
This article does not apply to
This article is not tied to any specific product.
Not all product versions are identified in this article.
Instructions
Uploading RVTools Excel
1. From the Live Optics Portal Dashboard, click the Upload SIOKIT and Files

2. Then click Upload RVTools Excel.

3. Enter the Project name then either click Browse or drag and drop the RVTools Excel sheets.
Notes
-
The maximum number of uploaded Excel files is 5
-
The maximum allowed file size is 10 MB
-
Only RVTools Excel files are supported; CSV is not supported
-
Supported RVTools version start from 4.1.3 (from April 11, 2021)
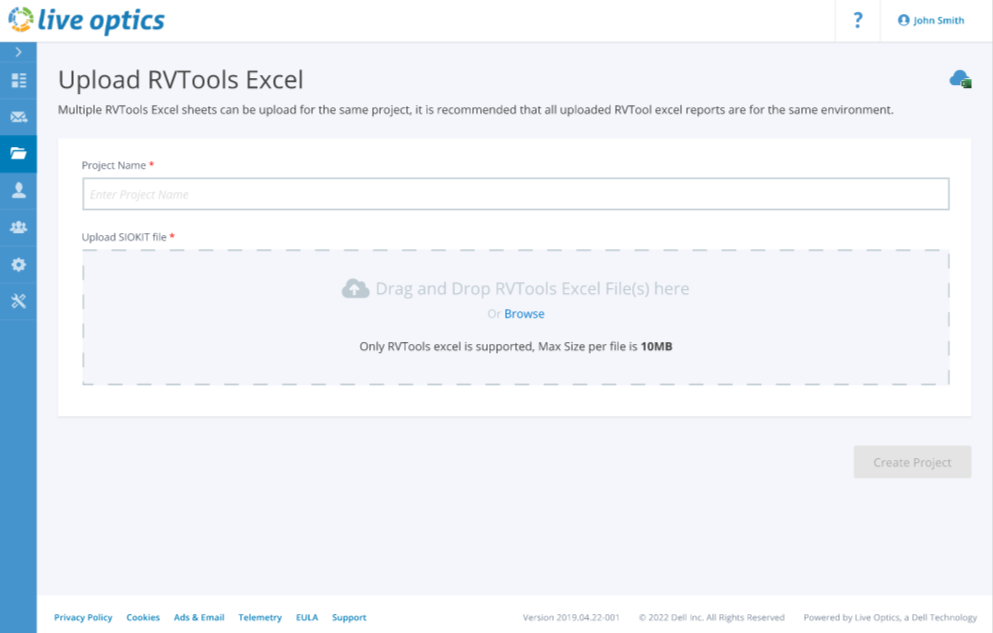
4. After all files are uploaded, click the Create Project button to create a Live Optics Project.

1. Once the project has been created, the RVTools project will appear on your dashboard. Click the Dashboard to view the new RVTools Project.


2. You can also access the project from the Project search under RVTools.

3. Once you click the project, you get the summary screen, where you must select a Region to download the AIR Slide.
Note: The region input is required to get the Cloud Pricing output in the AIR slides.

4. Click the Download button to download the AIR slides.

Additional Information
If you have any questions, please reach out to Live Optics Support at liveoptics.support@dell.com.
Affected Products
LiveOpticsArticle Properties
Article Number: 000297407
Article Type: How To
Last Modified: 14 Apr 2025
Version: 2
Find answers to your questions from other Dell users
Support Services
Check if your device is covered by Support Services.