Dell AX Solution: Upgrade to Windows Server 2025 Storage Spaces Direct (S2D)
Summary: This guide gives an overview of upgrading Windows Server Datacenter from version 2022 to 2025 on Dell AX Storage Spaces Direct solution(S2D) Solution. It provides guidance on two different methods, In-Place OS upgrade and Rolling OS Upgrade (Clean Install) ...
This article applies to
This article does not apply to
This article is not tied to any specific product.
Not all product versions are identified in this article.
Instructions
Introduction
An operating system upgrade refers to the process of transitioning to a newer version of the operating system on the same physical hardware. This approach is commonly used by customers to take advantage of the enhanced features and improvements available in the latest supported release.
You can upgrade the cluster operating system version one at a time. To upgrade across multiple versions, such as from Windows Server 2019 to Windows Server 2025, run the upgrade sequentially.
Windows Server 2019 --> Windows Server 2022 --> Windows Server 2025
This article talks about upgrading Windows Server 2019/2022 Storage Spaces Direct Cluster to Windows Server 2025 using the following methods:
- In-Place OS Upgrade
- Rolling OS Upgrade (Clean-Install)
Prerequisites and best practices
- Keep a backup copy of data, virtual machines, network configuration, cluster configuration database.
- All the hardware components, drivers , and firmware should be updated per the Dell AX support matrix. The latest catalog and the support matrix are published on the Dell downloads website.
- Ensure that the operating system is fully patched before you proceed with the upgrade.
- The cluster should be healthy and free from any errors/critical warnings.
- Ensure sufficient space is available in the Storage pool (always keep the space within the threshold limit in case of thin provisioned volumes).
- Before suspending a node for an upgrade, ensure that the remaining cluster nodes have sufficient CPU and memory resources to handle the redistributed workloads. This helps prevent performance degradation or service disruption while the upgraded node is temporarily unavailable.
- Ensure availability and accessibility of a Witness for two-node cluster.
- Download the Windows Server 2025 GA (general availability) ISO build from the Microsoft website and keep it ready. Ensure that you have purchased a valid product key to activate the operating system.
- Check the running applications to ensure they are supported on the newer operating system version.
- Language change is not permitted while performing an in-place operating system upgrade, whereas it is allowed during a rolling operating system upgrade.
Method 1: In-place operating System upgrade
An in-place ISO operating system upgrade is a process where you upgrade your operating system to a newer version while keeping your existing applications, settings, and user data intact. This method is typically faster and less disruptive than a clean installation, as it does not require formatting the system drive or manually reinstalling applications and configurations. Dell Technologies recommends this method for upgrading to the newer operating system version.
-
Scenario - 1
WS2019 to WS2022 operating system upgrade process
- If you are using a Windows Server 2019 operating system S2D cluster, then you must upgrade the cluster to Windows Server 2022 by doing an In-place operating system upgrade.
- The WS2019 to WS2022 in-place operating system upgrade for the S2D cluster is available on the Dell support site.
- For additional information on operating system upgrade from WS2019 to WS2022, see Dell EMC Solutions for Microsoft Azure Stack HCI – In-Place Upgrade from Windows Server 2019 Storage Spaces Direct Cluster to Windows Server 2022 Reference Guide | Dell US.
-
Scenario - 2
WS2022 to WS2025 operating system upgrade process
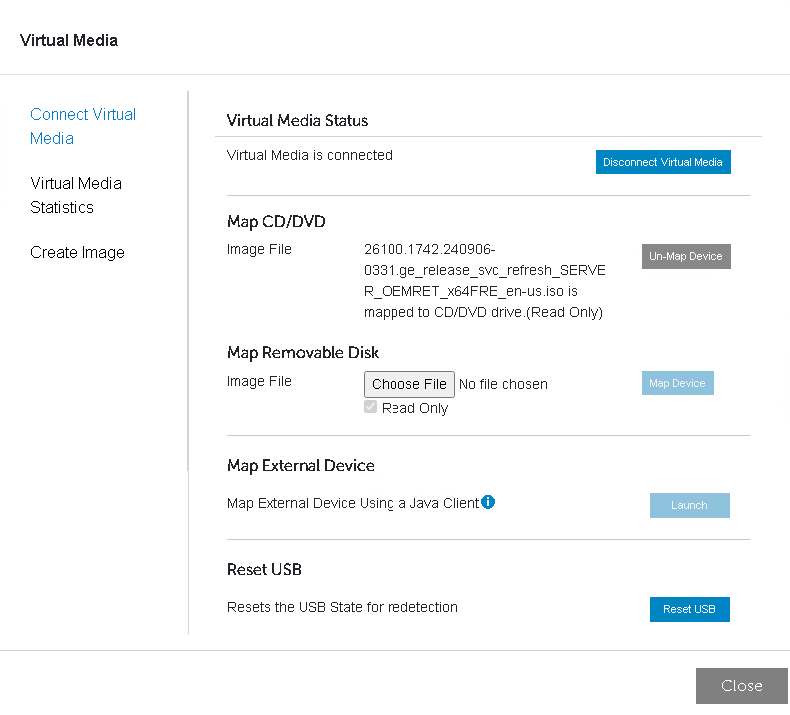
- Log in to the iDRAC of the node
, launch the iDRAC Virtual Console, then go to Virtual Media and mount the Windows Server 2025 GA ISO image file to perform the upgrade.
- Place the target node into Maintenance Mode (Paused State) and ensure that all the roles/VMs are moved to other cluster nodes, and they are Online. Also, verify the physical disks associated with the said node are in storage maintenance mode.
Suspend-ClusterNode -Drain -ForceDrain -Wait
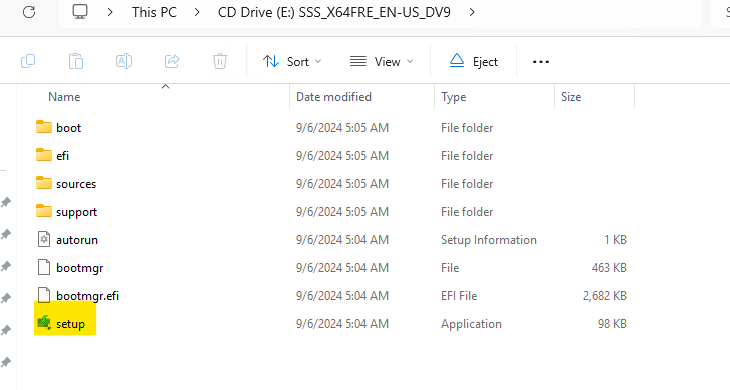
- Once the ISO is mounted, run the setup.exe file from the CD drive.
- Select Yes to start the setup process. For internet-connected devices, select the Download updates, drivers and optional features (recommended) option, and then select Next.
- Setup checks your device configuration ; you must wait for it to finish, and then select Next.
- Provide the activation or product key that you have already purchased to Continue.
- Review the licensing and software terms and Accept them to proceed further.
- Select Keep personal files and apps to do an in-place operating system upgrade.
- After Setup analyzes your device, you will be prompted to proceed with the operating system upgrade by selecting Install.
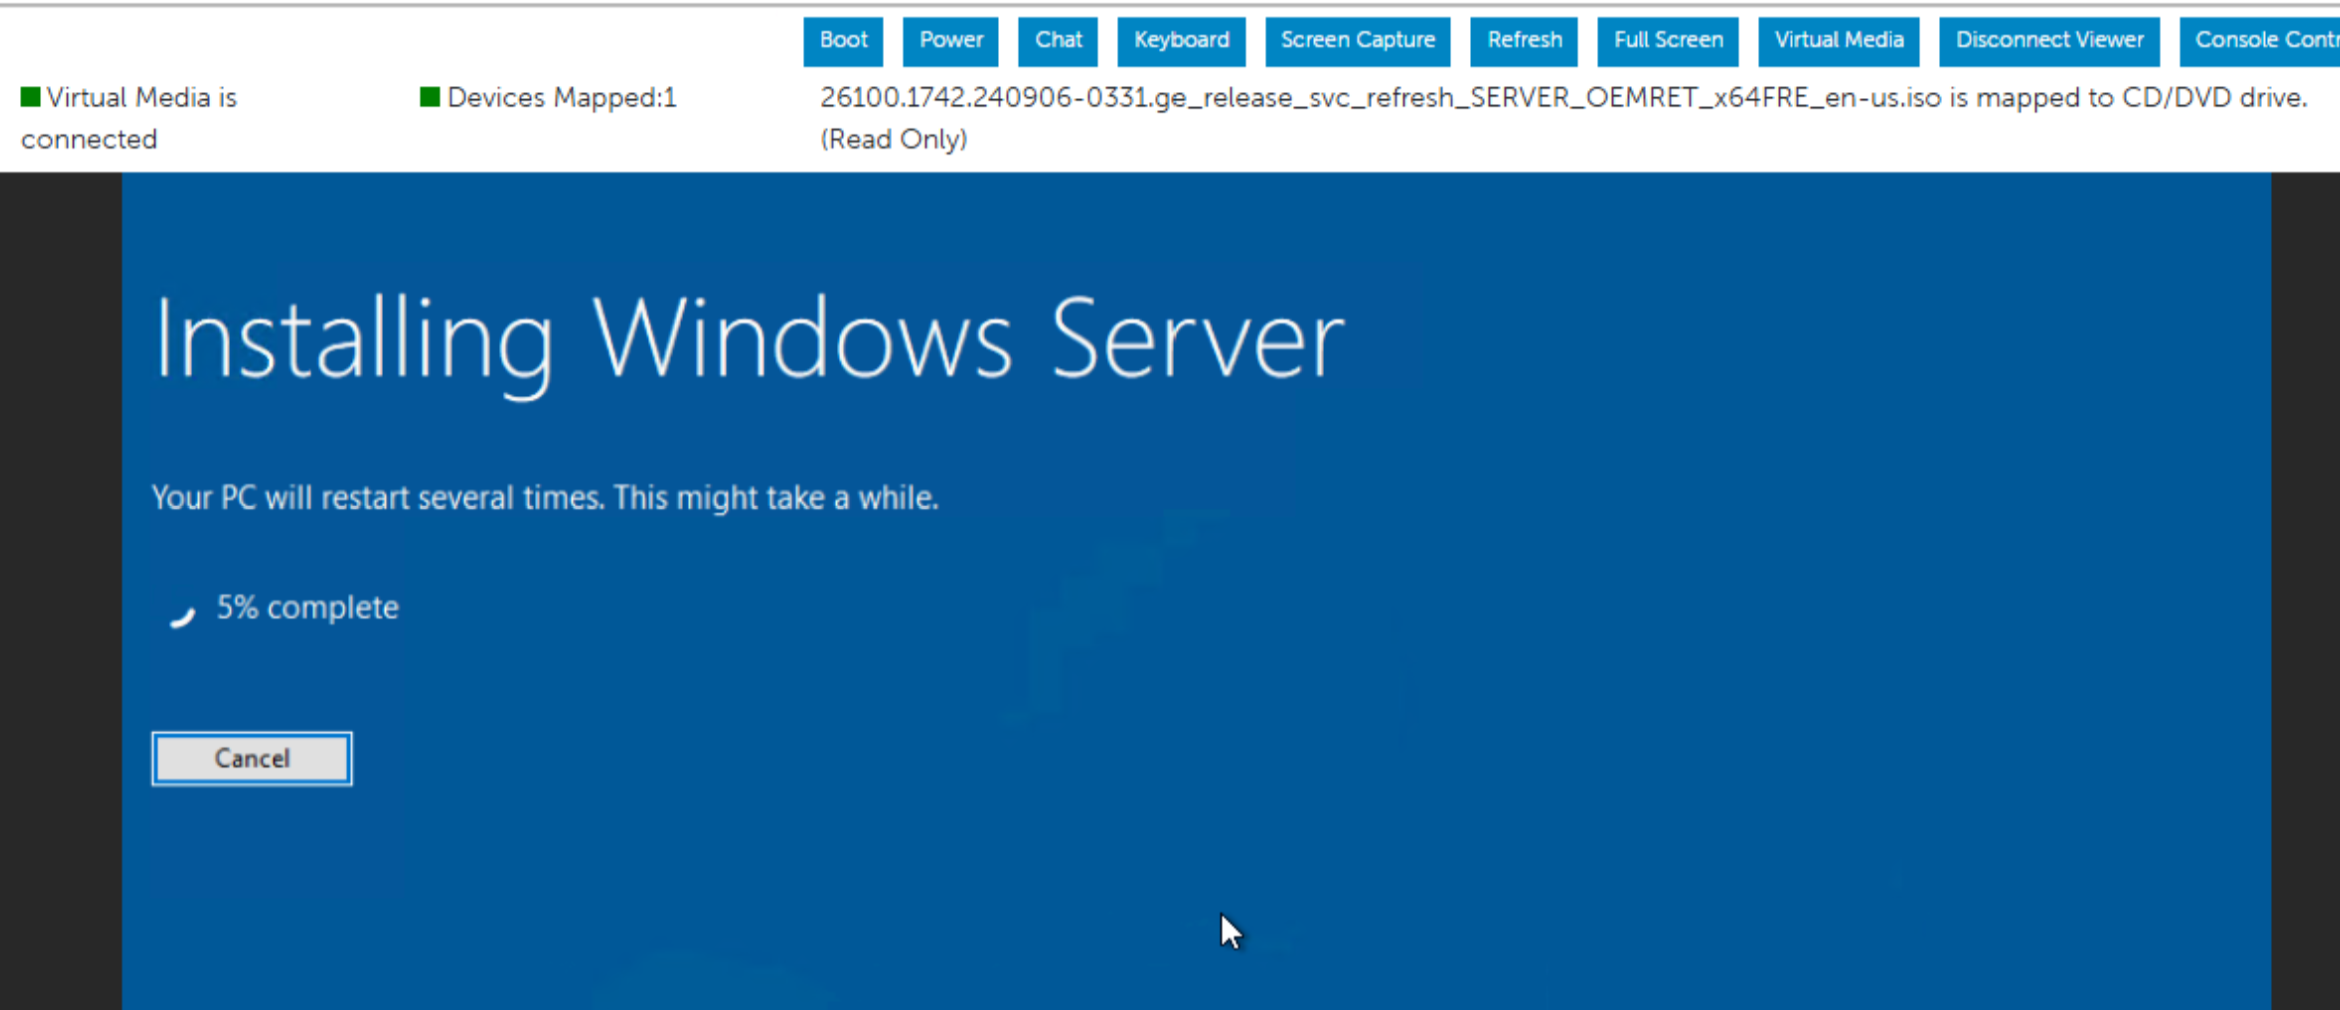
- Monitor the operating system upgrade status from iDRAC’s virtual console until completion.
- Run the following cmdlet to verify that the upgrade was successful on the first cluster node:
Get-ComputerInfo -Property WindowsProductName
- After the successful operating system upgrade, Resume the first cluster node and failback the roles.
Resume-ClusterNode -Failback Immediate
- Repeat steps 1-12 on the remaining nodes in the cluster one at a time to upgrade the operating system.
Microsoft reference link - Perform an in-place Upgrade of Windows Server | Microsoft Learn
Observation
- The operating system upgrade process will take approximately an hour per node to complete. However, note that repair times will vary depending upon workload and storage configuration.
- The iDRAC-USB NIC Passthrough Adapter/Remote NDIS Adapter (Ethernet) is renamed to Ethernet 2 post the operating system upgrade to Windows Server 2025 on all nodes. You can either rename it back to the previous adapter name by removing the #2 or add this name to the cluster exclusion list.
Set-ItemProperty -Path HKLM:\system\currentcontrolset\services\clussvc\parameters -Name ExcludeAdaptersByDescription -Value "Remote NDIS Compatible Device,Remote NDIS Compatible Device #2"

Method-2: Rolling operating System upgrade (Clean-install)
The rolling operating system upgrade clean-install process involves installing the newer version of Windows Server on the same server by wiping the boot drive of the existing operating system. Before you do a clean install, you must back up your data, network configuration, and the cluster database, and plan how to reinstall your existing applications once the operating system upgrade is complete.
Note: This method involves a high level of risk, as each upgraded server in the cluster must be configured manually, which can lead to unexpected downtime or performance issues.
i) Scenario - 1
WS2019 to WS2022 rolling operating system process
- Stop the CAU role to prevent any nodes from being paused and drained automatically during the upgrade process.
Disable-CauClusterRole
- Migrate the workloads off the node by suspending the cluster service (one node at a time) by running the cmdlet:
Suspend-ClusterNode -Drain -ForceDrain -Wait
Ensure all roles are moved to other nodes in the cluster.
- Evict the suspended node from the cluster by using
Remove-ClusterNode -Name <Node1>
- Mount WS2022 ISO on the evicted node by mapping the ISO image using iDRAC Virtual Media and install by booting the image via ‘Virtual CD/DVD/ISO’ option.
- Choose language, time zone settings, keyboard language of your choice.
- Select setup option à Install Windows Server, select I agree everything will be deleted including files, apps, and settings.
- Provide the product key and choose the Windows Server Datacenter Edition.
- Review and accept the licensing and software terms.
- Format the BOSS drive and install the operating system on it.
- After the successful installation of the operating system, set a password of your choice for the Administrator user account.
- For more detailed instructions on how to deploy an operating system from a CD/DVD/USB, see Install Windows Server from installation media | Microsoft Learn.
- Install required roles and features
Install-WindowsFeature -Name Hyper-V, Failover-Clustering, Data-Center-Bridging, BitLocker, FS-FileServer, RSAT-Clustering-PowerShell -IncludeAllSubFeature -IncludeManagementTools -verbose- Rename the server to match its original hostname and join it to Active Directory domain.
Rename-Computer -NewName <Node1> -restart

$credential = Get-Credential
Add-Computer -DomainName <ADdomain> -Credential $credential -restart
- Install the latest operating system updates via SConfig or WAC along with the latest available firmware and drivers from the support matrix or catalog.
- Configure the network settings depending upon the topology used by creating virtual network adapter and VMSwitch for management, storage and VM traffic including IP addresses, DNS, VLAN/NIC teaming settings using PS Cmdlet New-VMSwitch & Add-VMNetworkAdapter.
- Verify that the network and storage connectivity settings (network adapters, names, MTU size
, etc
.) are consistent with other nodes in the cluster. - Create virtual switches for Hyper-V workloads using Add-VMSwitch that matches the rest of the cluster nodes.
- Add the node back to the cluster using
Add-ClusterNode -Name <Node1>
- Run cluster validation report by running
and fix any errors/warnings if reported.Test-Cluster -Node <Node1>,<Node2> -Include 'Inventory', 'Network', 'System Configuration'
- Ignore the warning messages related to mixed operating system till all the nodes are with latest operating system version.
- Check the storage jobs if any by running Get-StorageJob and ensure no storage jobs are in progress before proceeding.
- Migrate the VMs and check the VM’s status and its accessibility. It can be done via PowerShell, WAC, and Failover Cluster Manager. Ensure you move your non-production VMs first to check for stability and then move production workloads.
Move-ClusterVirtualMachineRole -Name <VM1> -Node <node1>
- Repeat steps 2-11 on each of the remaining nodes, one at a time.
Microsoft reference link - Upgrade the OS of a Windows Server failover cluster by performing a cluster OS rolling upgrade | Microsoft Learn
ii) Scenario - 2
WS2022 to WS2025 Rolling upgrade process
- Follow the steps outlined in the “WS2019 to WS2022 rolling operating system” process to upgrade the windows server operating system from version WS2022 to WS2025.
Microsoft reference link - Upgrade the OS of a Windows Server failover cluster by performing a cluster OS rolling upgrade | Microsoft Learn
Known issues
- File share configured as witness is considered as ‘Available Storage’ by the cluster after operating system upgrade to next higher version and will be in ‘Failed’ state.
Work around is to remove the current quorum settings and reconfigure it with a new file share as a witness.
Post operating system upgrade tasks
Once all the cluster nodes’ operating system upgrades are completed, initiate the post operating system upgrade tasks such as Updating the Cluster Functional level and Storage Pool version and the VM Configuration version. The cmdlets are provided below:
-
- Cluster Function Level (Update-ClusterFunctionalLevel)
- Storage Pool Version (Update-StoragePool)
- VM Configuration Version (Update-VMVersion) – optional but recommended.
Note – To update the VM configuration version, the VMs must be offline. It is recommended to perform this activity under a planned maintenance window.
- Apply Windows Server 2025 OS patches on each cluster node.
- Ensure all drivers and firmware are at WS2025 supported levels.See support matrix.
- Ensure that all the cluster nodes, resources, disks, storage pool are online and healthy.
- Check if any errors are logged in the event viewer [for example: any service failed or suspended] and take the required remediation steps.
- Check for any yellow bangs or device failure on Device Manager.
- Validate the cluster and ensure it is healthy, and there are no errors or warnings.
Microsoft reference link - Upgrade the OS of a Windows Server failover cluster by performing a cluster OS rolling upgrade | Microsoft Learn
Network ATC deployment
- Windows Server 2025 supports Network ATC feature, though it’s customer choice to migrate or deploy it in their environment.
For more information, see
Deploy host networking with Network ATC - Azure Local | Microsoft Learn
Additional Information
Videos
Affected Products
AX-4510C, AX-4520C, ax-650, AX-6515, AX-660, AX-750, AX-7525, AX-760Article Properties
Article Number: 000352673
Article Type: How To
Last Modified: 04 Aug 2025
Version: 3
Find answers to your questions from other Dell users
Support Services
Check if your device is covered by Support Services.