Dell Nutanix: How to initialize a Nutanix Node using the Phoenix ISO on the 14th generation Nutanix
概要: This article introduces how to initialize the Dell Nutanix Node with Phoenix ISO.
この記事は次に適用されます:
この記事は次には適用されません:
この記事は、特定の製品に関連付けられていません。
すべての製品パージョンがこの記事に記載されているわけではありません。
手順
Article Summary
This article provides on how to initialize the Nutanix Node of the 14th generation Nutanix products using a Phoenix ISO.
Before initializing the Node with the steps in this article, please refer to the article Dell Nutanix: How to create Phoenix ISO Image for node initialization to create an ISO Image.
Following the steps in this article causes losing all the data on the existing Nutanix Cluster. Do not use this step for any purpose other than the Node initialization or cluster initialization.
If necessary, back up the virtual machine in advance, create a new virtual machine after initialization and restore from the backup.
If necessary, back up the virtual machine in advance, create a new virtual machine after initialization and restore from the backup.
Nutanix Initialization Using an ISO Image
-
Log in to the iDRAC Web console.

-
Select the Configuration tab, then click Virtual Console, and click Start the Virtual Console (If you have multiple nodes, repeat this step for each server).

-
Mount the ISO image created in advance.
Select Virtual Media.
Select Connect Virtual Media.
Select Choose File under Map CD/DVD and select the Phoenix ISO Image, then select Map Device.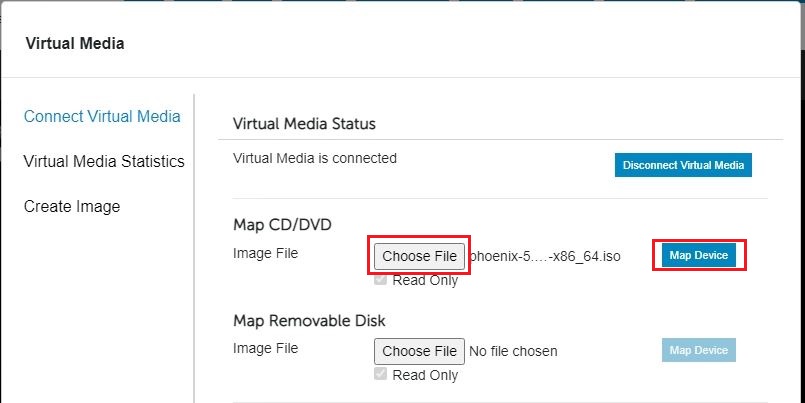
Click Close.
-
Specify the virtual CD/DVD as a boot device.
Select Boot.
Select Virtual CD/DVD/ISO in the list.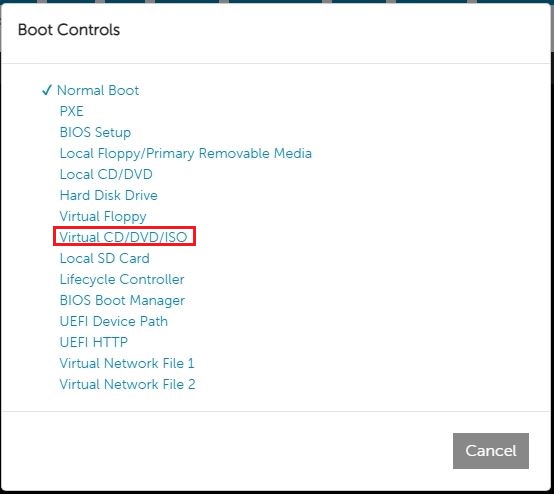
Read the pop-up message and click Yes to connect the ISO.
-
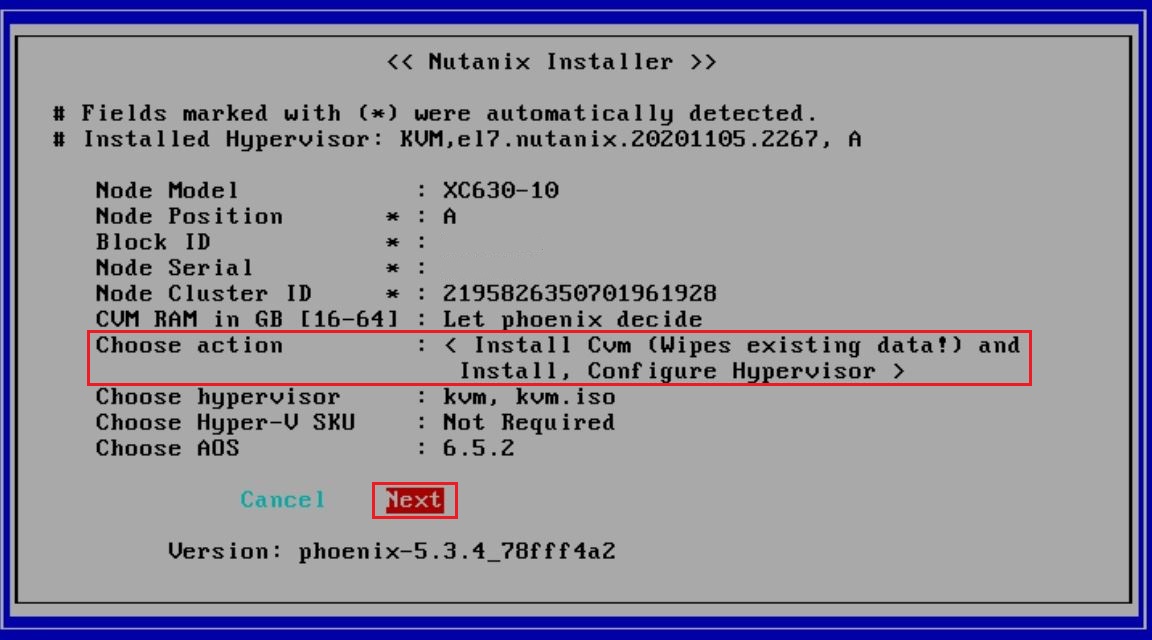
Reboot the node and wait until the Nutanix Installer menu appears.
-
Select Install Cvm (Wipes existing data!) and Install, Configure Hypervisor from the Choose action field, then highlight Next and press Enter key.
-
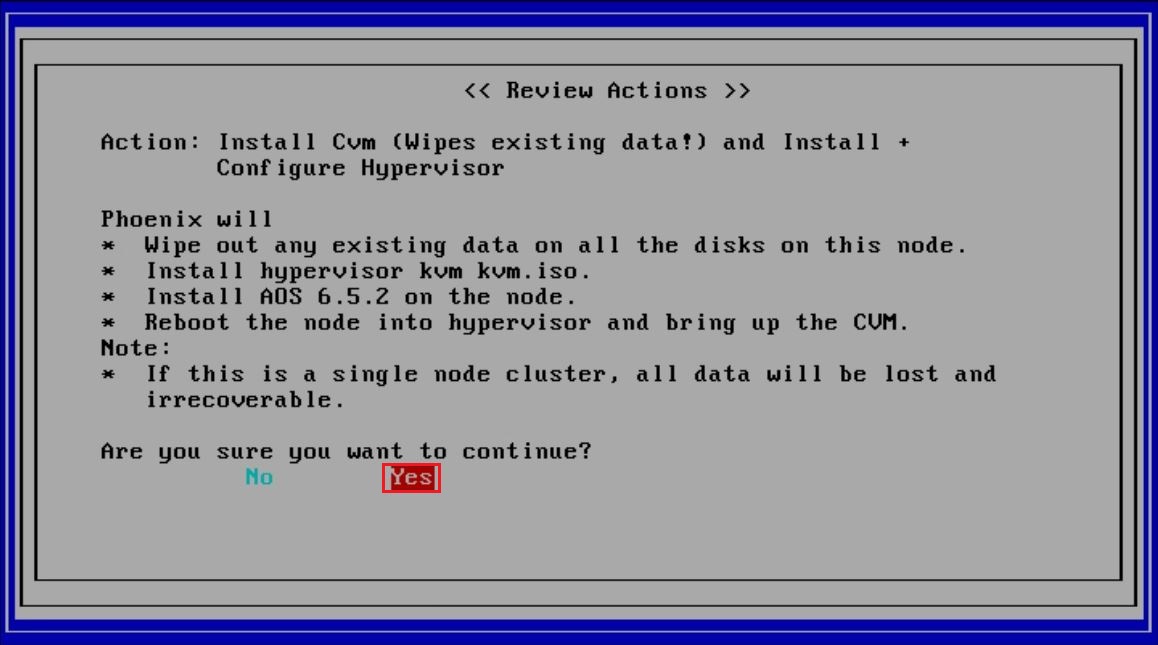
Highlight Yes and press Enter key to proceed.
-
When displaying such a message on the console, disconnect the virtual media.

Select Virtual Media.
Select Disconnect Virtual Media.
Read the pop-up message and click Yes to disconnect the ISO. Then, click Close.
- Press Y key and Enter key. The node will reboot.
Scripts to install AOS and/or configure Hypervisor are executed at the initial boot.
It may take up to an hour for the installation to complete.
The node may reboot a few times automatically during the installation.
Do not shut down and/or restart the host OS (AHV/ESXi/HYPER-V) by user operation until the installation is completed.
If it is shut down manually during operation, the script may stop and the initial configuration may fail.
The installation is considered complete when the following conditions are reached.
・AHV
Log in to the AHV host as a root user. The password is nutanix/4u.
Confirm the network interface "br0" exists by executing the command.
(It obtains IP address if the node is connected to the network that is enabled DHCP.)
# ifconfig -a br0
・ESXi
The connection address is "http://NTNX-ServiceTAG-A/" and the management IP address is obtained by DHCP.
(If not connected to the network, a message appears indicating that DHCP has failed to obtain a management IP address.)
対象製品
XC Core Systems, XC Series Appliances文書のプロパティ
文書番号: 000122117
文書の種類: How To
最終更新: 30 7月 2025
バージョン: 6
質問に対する他のDellユーザーからの回答を見つける
サポート サービス
お使いのデバイスがサポート サービスの対象かどうかを確認してください。