如何在Windows 10中配置Windows Hello以用于生物识别扫描仪
概要: 了解如何在带有指纹读取器的戴尔个人计算机上配置 Windows Hello。
この記事は次に適用されます:
この記事は次には適用されません:
この記事は、特定の製品に関連付けられていません。
すべての製品パージョンがこの記事に記載されているわけではありません。
手順
本文介绍如何在 Windows 10 中配置用于生物识别登录的 Windows Hello。
Windows 10中的指纹读取器驱动程序安装
作为其构建的一部分附带指纹读取器的戴尔系统可能需要固件/驱动程序更新才能在 Windows 10 中使用生物识别设备。
运行 Windows 10 的系统不限于使用 Dell Data Protection - 安全工具才能使用生物识别设备。用户可以选择使用称为“Windows Hello”的本机 Microsoft 软件解决方案来访问指纹设备。
提醒:不能同时为生物识别技术配置 Dell Data Protection Security Tools 和 Windows Hello。只能配置其中一个。如果在 Dell Data Protection Security Tools 和 Windows Hello 中注册了指纹,生物识别登录将失败。从 Dell Data Protection Security Tools 或 Windows Hello 中删除指纹后,登录应该可以正常工作。
提醒:要配置和注册指纹,系统必须有权访问 TPM。 关于启用和配置TPM的相关信息,可访问特定于系统的文档。要配置Windows Hello,系统必须满足硬件和软件要求。Windows Hello支持的系统可在此处找到。

成功的指纹读取器设置示例
如何设置 Windows 10 指纹读取器
- 从戴尔驱动程序和下载中找到适用系统类型的驱动程序
提醒:确保驱动程序与应用它的系统匹配。驱动程序将创建以与特定的硬件接口配合工作。安装不正确的驱动程序可能会使用户遇到问题。提醒:指纹读取器设置的驱动程序和固件位于网站上的安全下拉列表下。下载驱动程序和固件。

- 找到下载的驱动程序,然后为 ControlVault 驱动程序选择 Install。

- 选择 Next。

- 此时将显示 Modify、Repair 或 Remove 选项。选择从系统 中删除 软件的选项。选择 Next。

- 选择 Remove选项时,系统将显示一个屏幕,确保必须删除驱动程序。选择 “删除”。

- 在向导删除驱动程序后,将填充一个屏幕以验证它不再安装。选择 完成。

- 关闭显示安装程序已成功删除驱动程序的窗口。
- 再次找到下载的驱动程序。双击以启动安装程序。该窗口将提示您选择语言。

- 系统将提示安装 ControlVault 主机组件安装程序的组件。选择 Next。

- 系统将提示输入所需的安装类型。选择 完成。

- 选择 安装。

- 安装程序将开始安装软件包。这可能需要片刻时间。

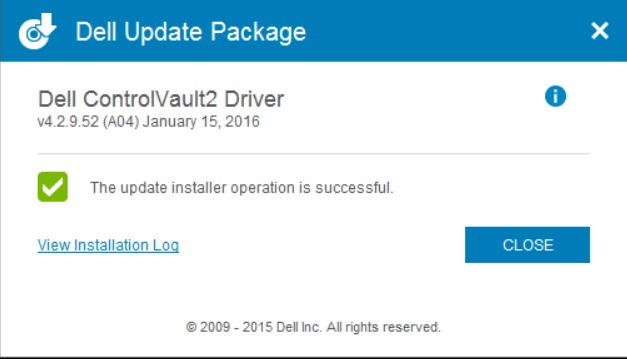
- 完成后,将显示一个窗口,说明安装成功。选择 完成。

- 关闭Update Package窗口。

- 选择从戴尔网站安装的 ControlVault 固件 。双击此固件。此时将显示一个安装程序窗口,通知您将在系统上安装的固件版本。选择 Continue。

- 选择用于解压固件文件的位置。选择“OK(确定)”。

- 如果还没有固件文件夹,系统会提示创建一个文件夹。选择是。

- 如果成功完成,将提示通知。选择“OK(确定)”。

- 系统将打开文件成功移动到的文件夹。选择标有“firmware”的文件夹以打开其内容。

- 浏览内容,直到显示带有 Broadcom 徽标的项目“ushupgrade”。双击该文件。

- 此时将显示一个窗口,其中包含有关固件更新的信息。此过程开始后,请勿中断安装。选择 “开始”。

- ControlVault 固件将完成安装过程。这可能需要几分钟才能完成。

- 完成后,窗口将显示重新启动选项。重新启动计算机。

- 系统重新启动时,登录Windows。导航到 “设置 ”,然后导航到 “登录选项”。

- 为了使 Windows Hello 确认指纹读取器,必须设置 PIN 。选择 设置 PIN。然后,Windows将要求进行密码验证。

- 验证密码后,为系统创建 PIN 码。必须输入两次。选择确定以完成 PIN 注册。

- PIN此时应显示为“established”(已建立)。

- 选择 Windows Hello 下的设置选项,以在系统上注册指纹。

- 此时将显示“欢迎使用 Windows Hello”屏幕。选择开始。

- 系统将提示输入 PIN 。

- 开始扫描所需的手指以为系统建立有效的指纹。这需要几次滑动。


- 在系统获得指纹注册所需的数据后,将显示一个窗口,提示您扫描另一根手指。对于第二个手指,重复此过程。

- “Settings”(设置)屏幕现在应该已经带有用于使用指纹读取器登录的选项。

- 系统重新启动或锁定时,登录选项位于密码选项下面。选择 登录选项。

- 选择 指纹读取器图标。

- 使用指纹读取器登录。

対象製品
G Series, Alienware, Dell Plus, Dell Pro, Dell Pro Max, Dell Pro Plus, Dell Pro Premium, Inspiron, Latitude, Dell Pro Rugged, Vostro, XPS, Legacy Laptop Models, Mobile Workstations文書のプロパティ
文書番号: 000142015
文書の種類: How To
最終更新: 01 5月 2025
バージョン: 10
質問に対する他のDellユーザーからの回答を見つける
サポート サービス
お使いのデバイスがサポート サービスの対象かどうかを確認してください。