Avamar: How to apply an Avamar package (.avp) using the Avamar Installer (AVI)
Summary: This procedure describes how to install packages on an Avamar grid.
This article applies to
This article does not apply to
This article is not tied to any specific product.
Not all product versions are identified in this article.
Instructions
The steps for applying the hotfix are consistent for all Avamar Server versions, however, the screenshots used in this article are for reference only. What is seen during specific installations may have a slightly different appearance.
Avamar uses a workflow package (AVP) that automates the software steps required to complete package installations.
While this is an automated process, monitoring progress and responding to prompts or errors during the installation is required.
Requirements:
-
A valid license installed on the Avamar Server
-
A healthy grid
-
No activities running (backups, restores, replication, or maintenance)
-
A web browser (Internet Explorer, Firefox, or Chrome)
Procedure:
1. Copy the Installation package to the Avamar Server.
Before software installation, the Avamar package (AVP file) must be downloaded and copied to the Avamar Server.
See the "Additional Info" section for information about how to find, download, and copy packages.
2. Run the Installation Workflow Package (AVP):
In the web browser URL address box, type:
https://<AvamarServer>:7543/avi/
Where "<AvamarServer>" is the hostname or IP address of the Avamar Utility Node (or single node)
The Avamar Installation Manager login page appears:
Note: If a security warning is received from the browser, an exception may be required prior to reaching the login screen.
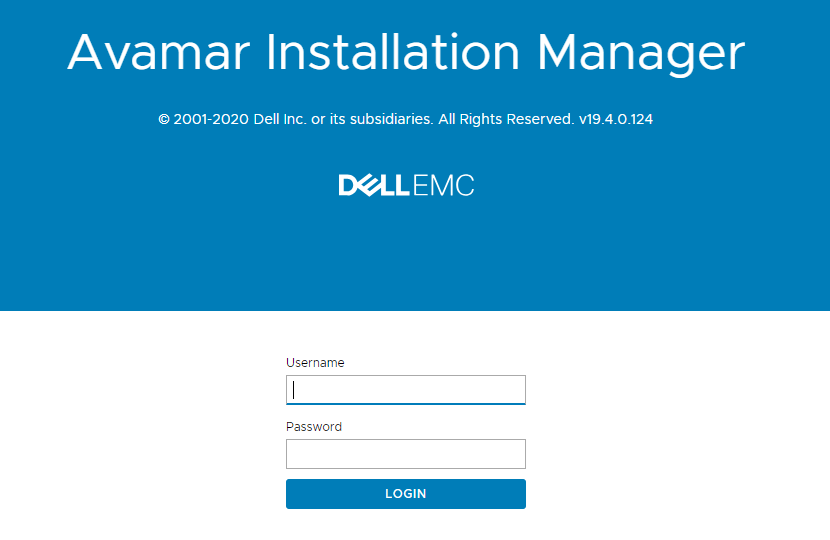
3. Enter the root login credentials and click Login.
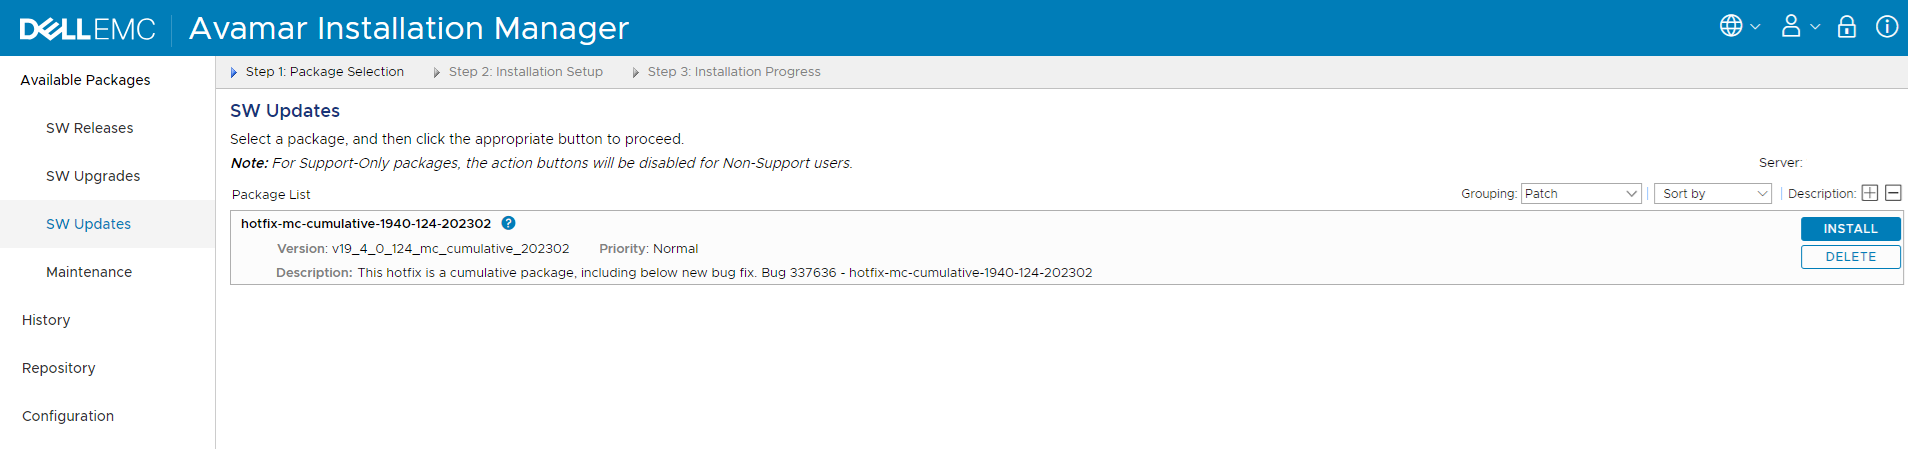
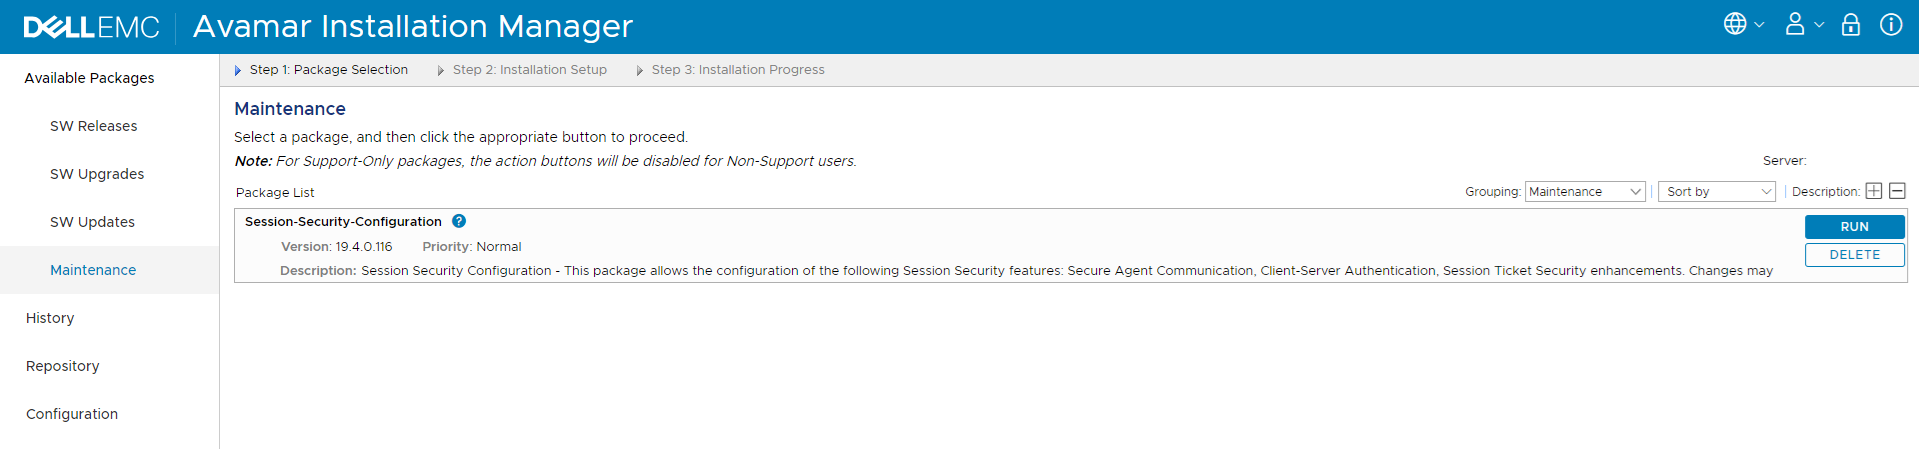
The Avamar Installation Manager page appears:
Locate the package within "Available Packages" (SW Releases, SW Upgrades, SW Updates, or Maintenance) to be installed.
Notes:
* It may also take several minutes (15) for the package to appear (click the refresh button on the upper right if required).
* If the package is not visible in the UI within 15 minutes, verify that the package was copied to the correct location.
* Any other packages should be ignored.
* It may also take several minutes (15) for the package to appear (click the refresh button on the upper right if required).
* If the package is not visible in the UI within 15 minutes, verify that the package was copied to the correct location.
* Any other packages should be ignored.
4. Click Run or Install (depending on the option available) to begin the workflow.
Note: If the Install button is unavailable, it indicates that a previous package update is incomplete. Create a Service Request for assistance.
After a few moments, the package installation should start to initialize:

If there are no settings to configure, the following displays:
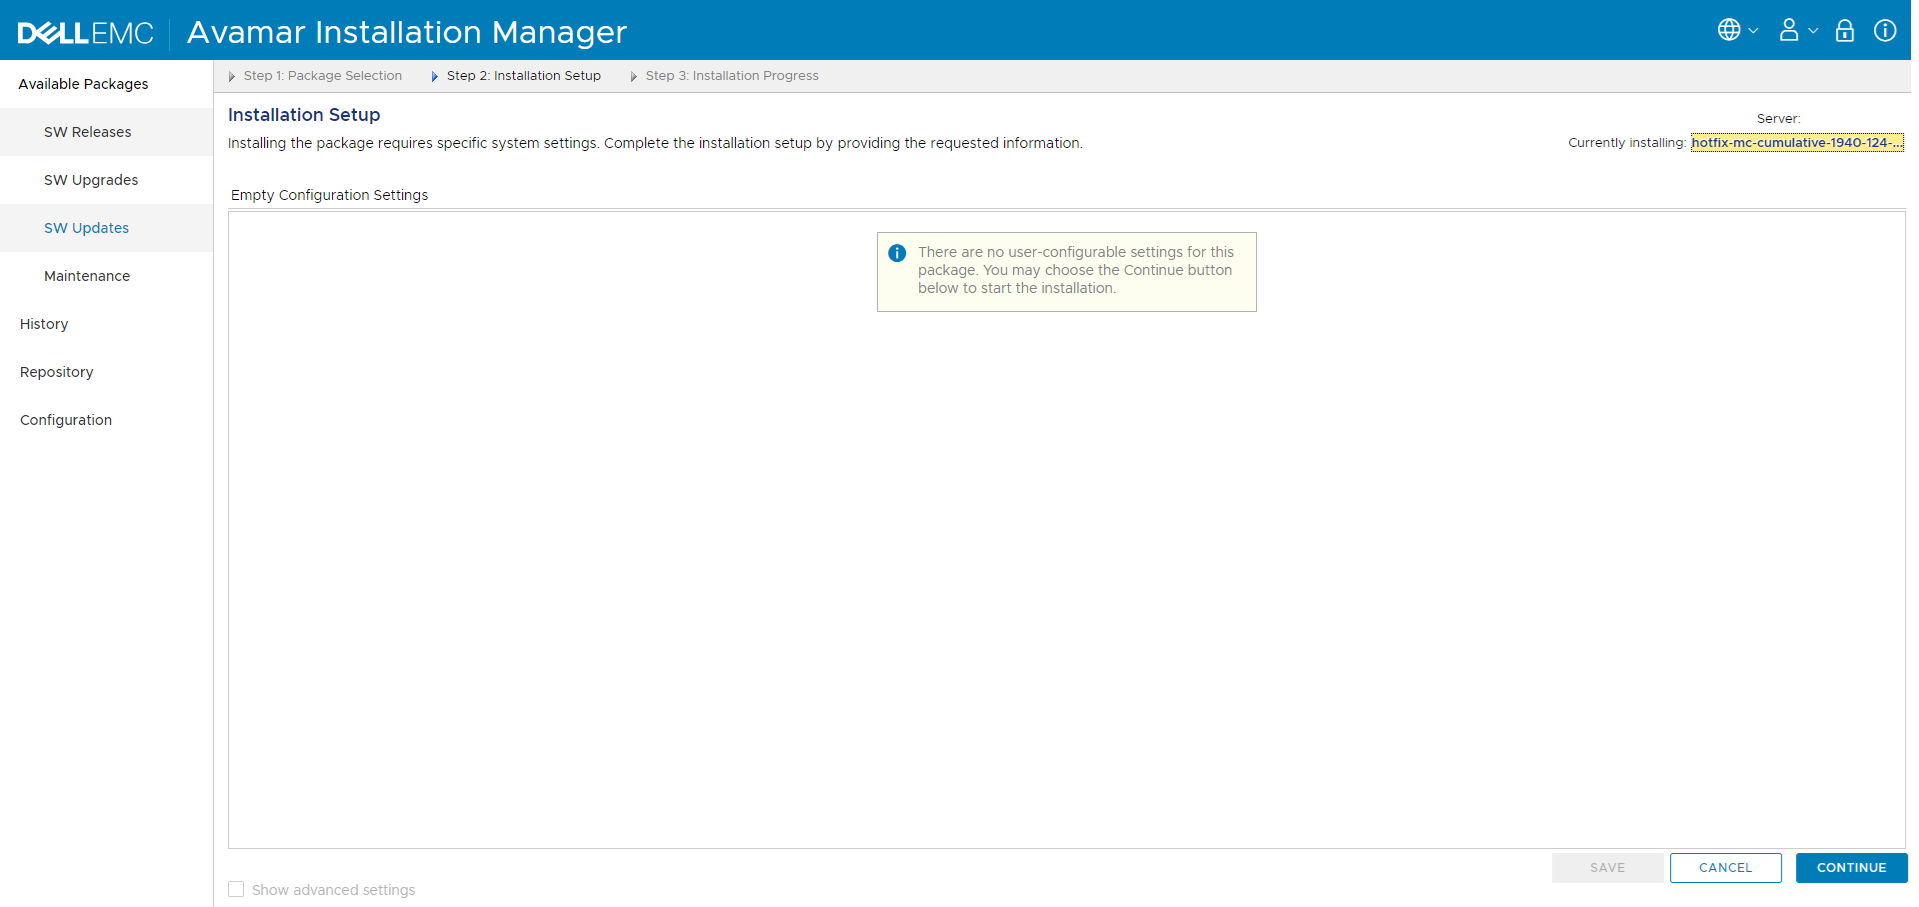
Some packages require additional information (for example, a security update reboots nodes, so the OS root password is required).
If additional information is requested, enter the required information, and save.
5. Click Continue, and the workflow begins.
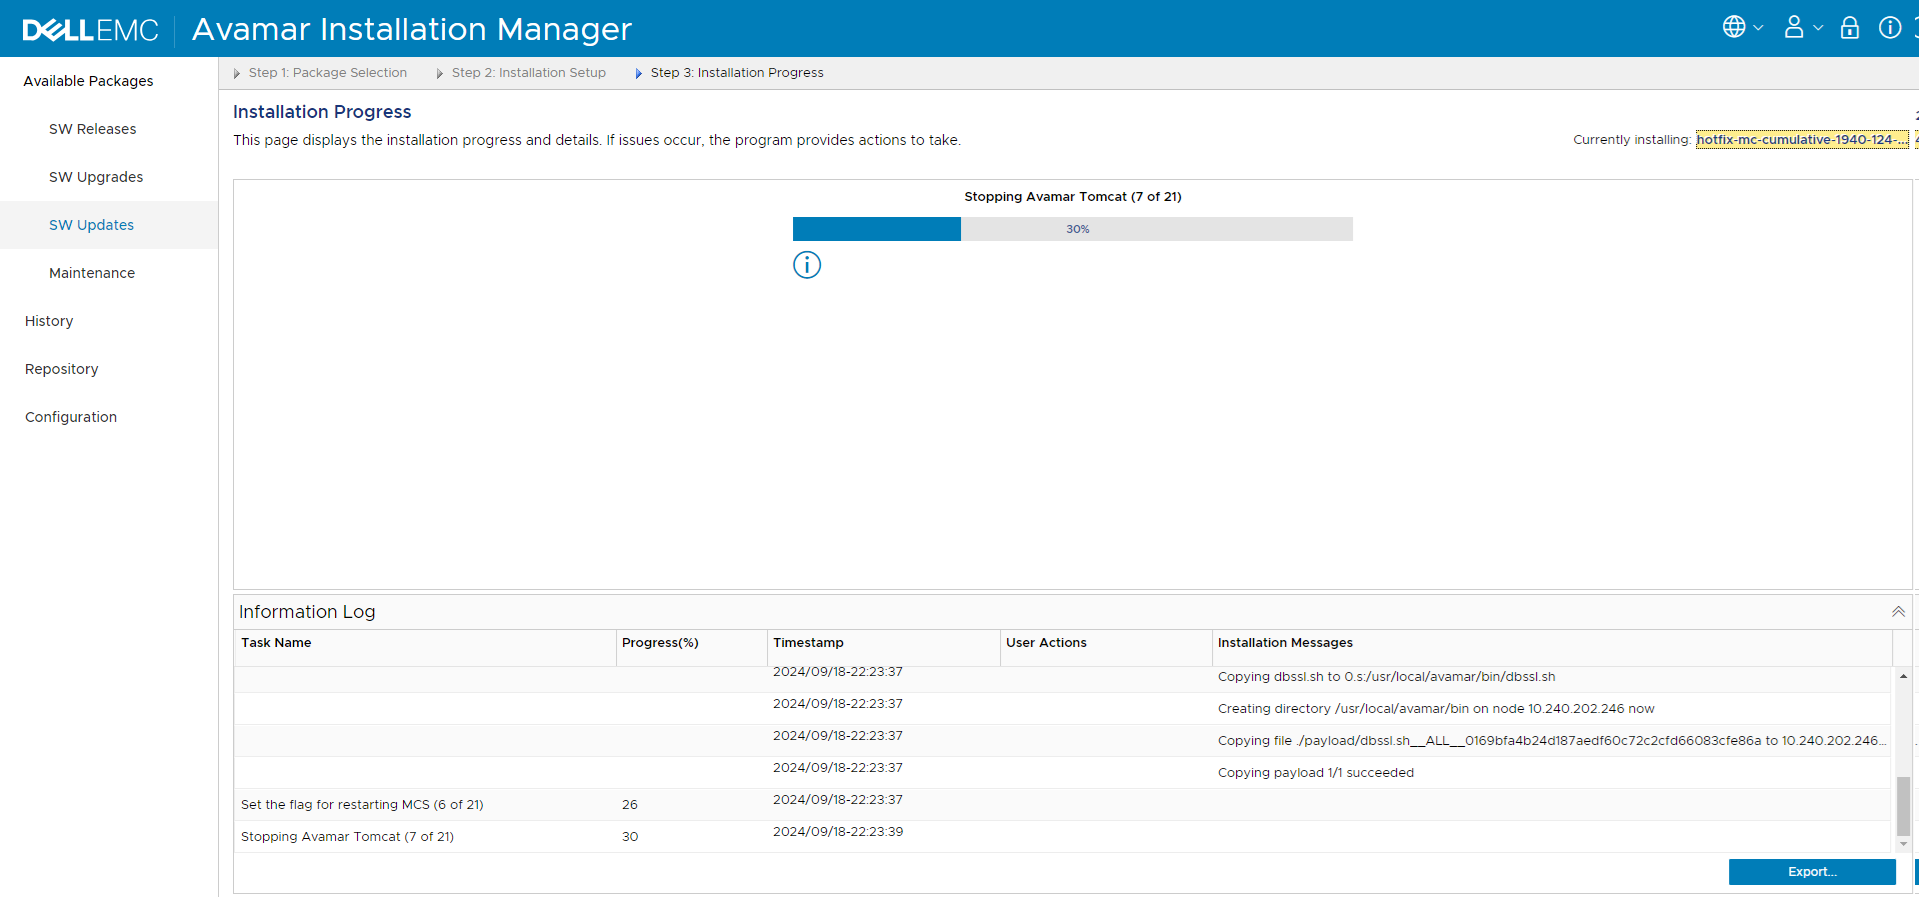
As the installation runs, the progress is shown:
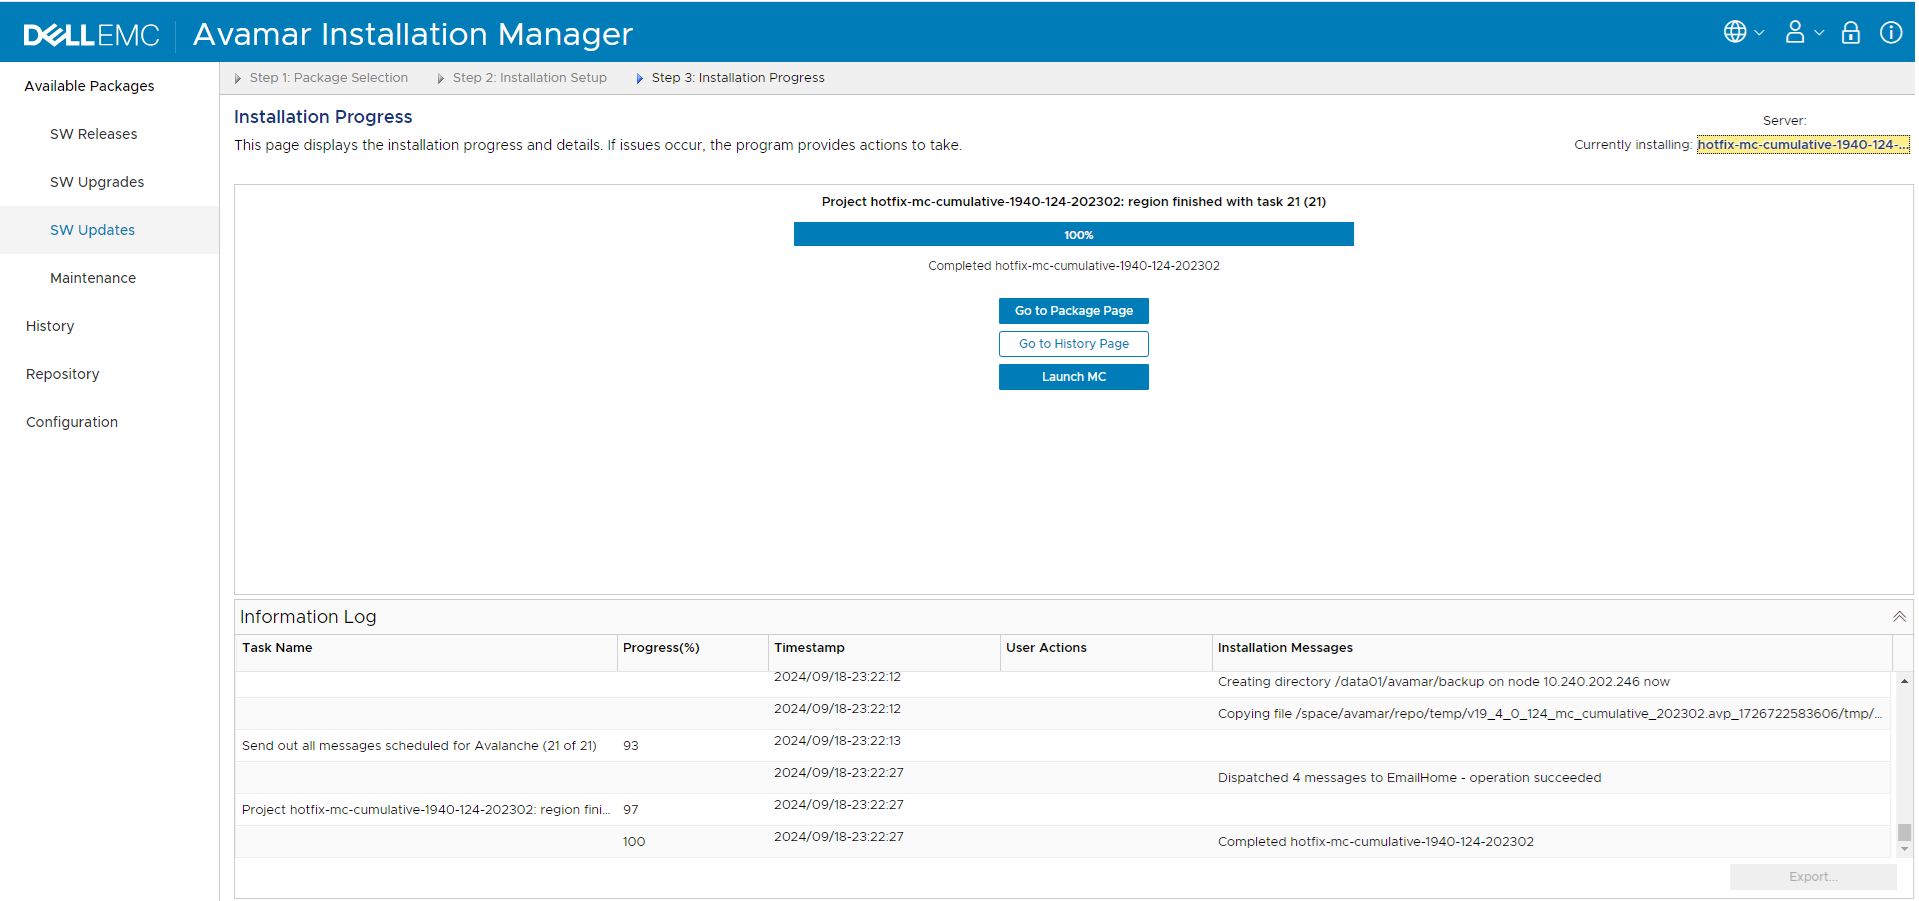
6. Once complete, a screen similar to the following displays showing the successful completion:
7. Exit or log out of the Installation manager.
For questions, or issues with this procedure, see the support pages, or open a Service Request with one of Dell Technologies Customer Support team.
Additional Information
Finding and Downloading packages:
Download the required AVP file from the support site or link provided.
If a download location has not been provided, see Avamar: How to find and download a product hotfix, patch, install or upgrade package from the Dell Support website.
Copying Avamar Packages to the Avamar grid:
There are many ways that the package files can be uploaded to the grid:
-
The repository within the Avamar Installer
-
Using PuTTY Secure Copy (PSCP), or equivalent
-
Using WinSCP UI (or equivalent)
Avamar Installer Repository Example:
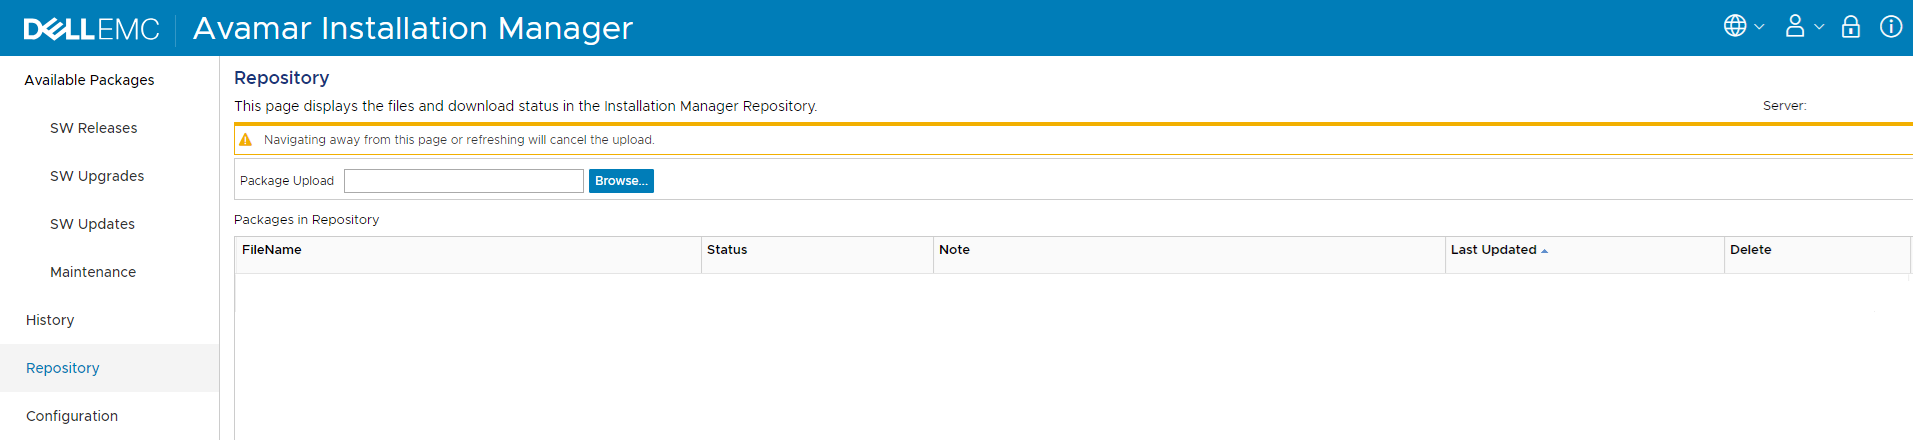
1. Click "Repository":
2. Click Browse, locate the required package (.avp) file), and click open.
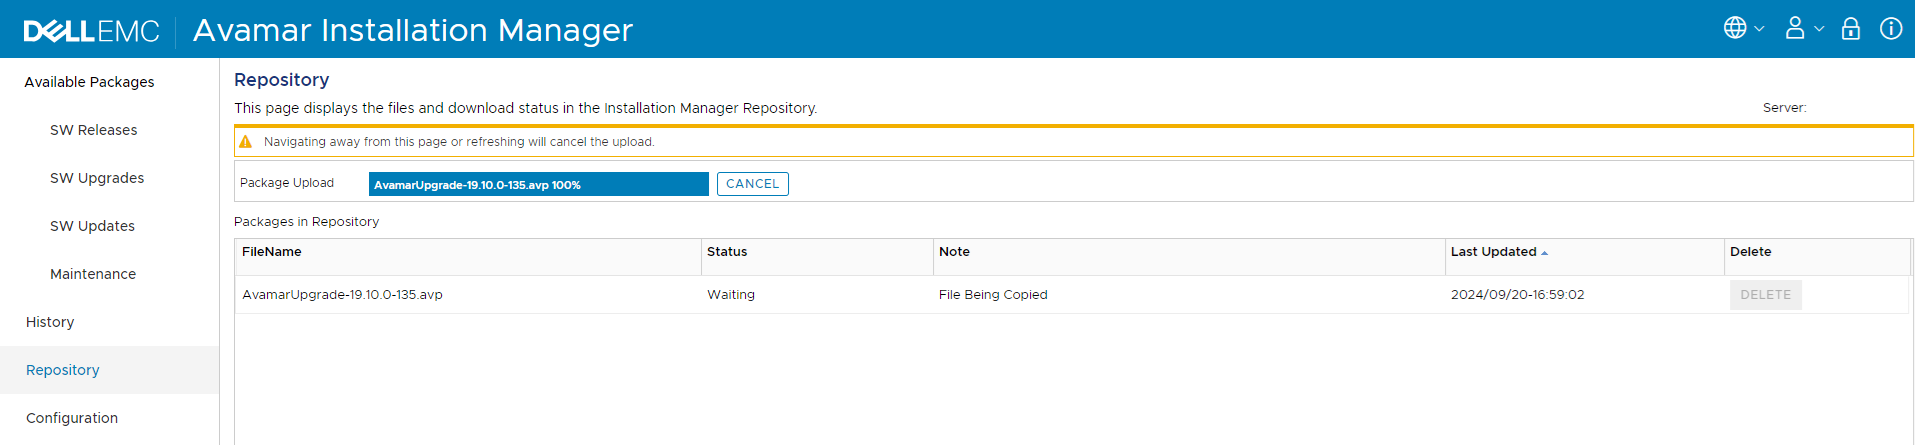
3. The package begins to upload:
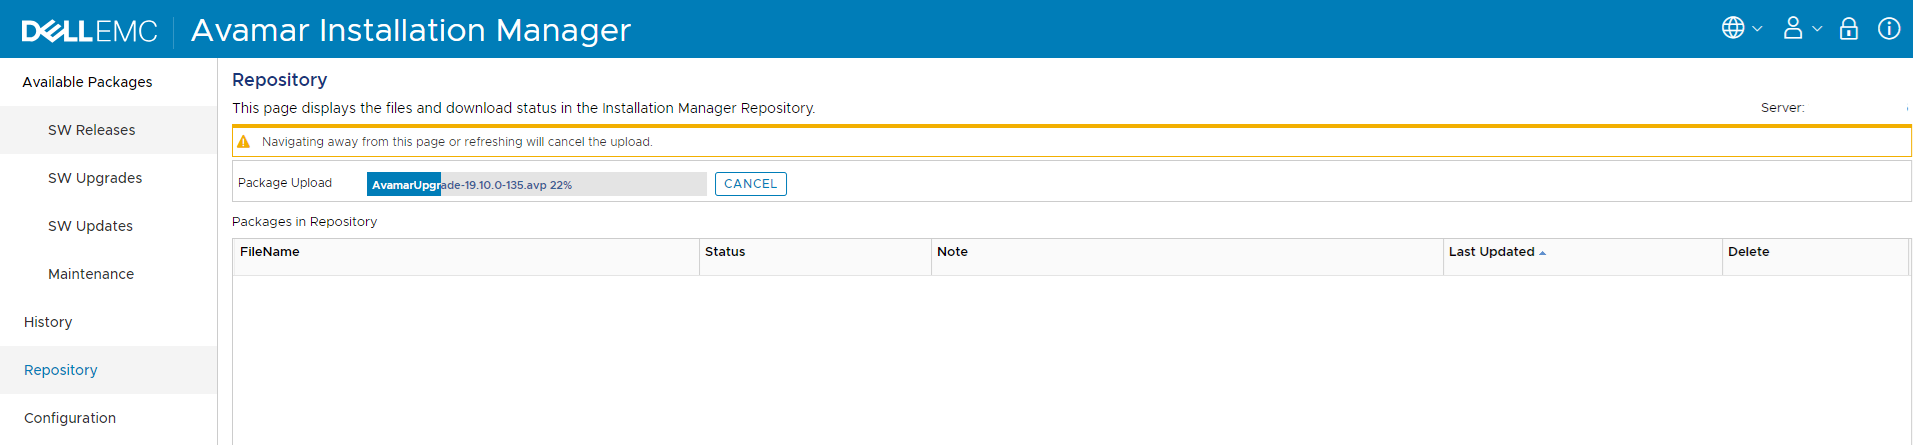
Pay close attention to the following warning:

4. Once 100% uploaded, the status and notes change several times:


5. When the following is seen, the package is available for installation:
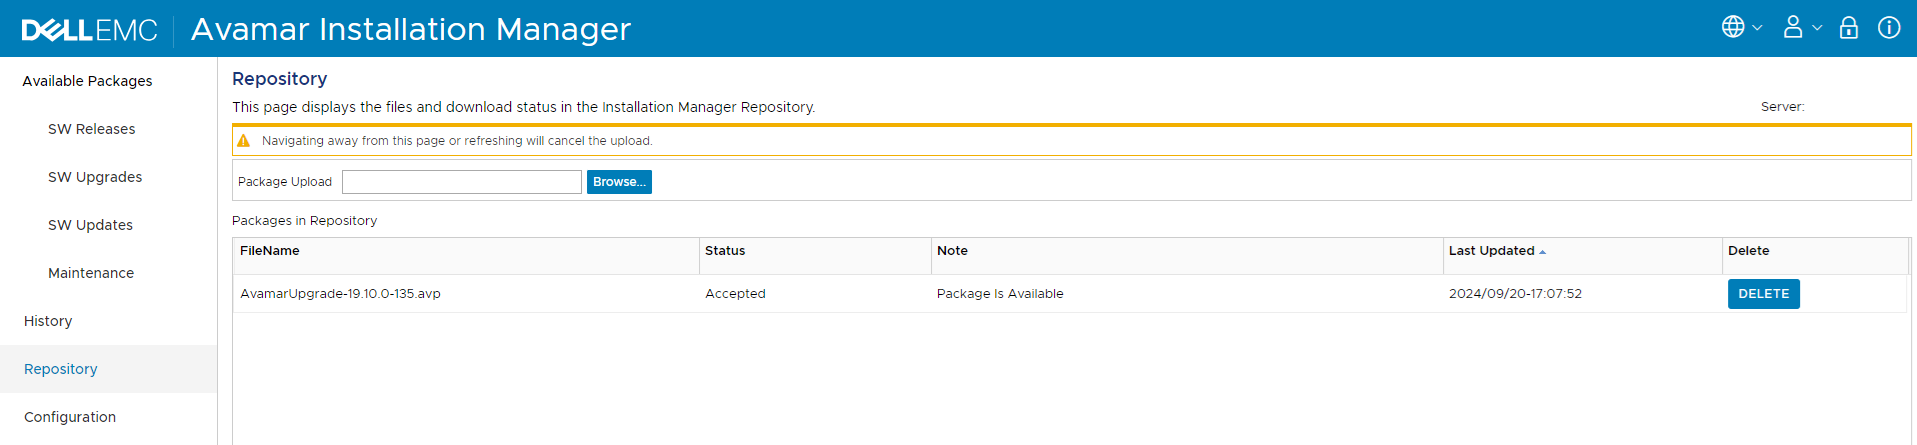
6. Return to the Procedure in the Instructions section above.
PSCP example:
1. Run the following command to upload the avp file:
pscp -pw <Password> <filename> admin@<IP_address>:<Path>
Where:
- <Password> is the admin password of the Avamar Utility Node (or single node)
- <filename> is the absolute pathname of the
avpfile on the local server.- Example: C:\downloads\v7_x_x_HF_xxxxxxx.avp
- <IP_address> is the IP address of the Avamar Utility Node (or single node)
- <Path> is the directory to upload location on the Avamar Utility Node (or single node).
- Example:
/usr/local/avamar/src - Do not upload directly to
/data01.avamar/repo/packages/
- Example:
2. Log in to the Avamar Utility Node (or single node) as admin.
3. Switch to root:
su -
4. Move the avp file from the uploaded location to the packages directory:
mv /usr/local/avamar/src/AvamarUpgrade-xxxxxx.avp /data01/avamar/repo/packages/
Note: The
AVP file must be moved (not copied) into the packages directory. This is to prevent the installer from detecting and starting to process an incomplete copy.
5. Verify that the avp file is in the proper location:
ls -al /data01/avamar/repo/packages/
6. Once verified, return to the Procedure in the Instructions section above.
WinSCP example:
1. Using the WinSCP interface, upload the avp package from the pathname of the avp file on the local server to a directory on the Avamar grid (for example /usr/local/avamar/src). Do not upload the package directly to /data01.avamar/repo/packages/.
2. Log in to the Avamar Utility Node (or single node) as admin.
3. Switch to root:
su -
4. Move the avp file from the uploaded location to the packages directory:
mv /usr/local/avamar/src/AvamarUpgrade-xxxxxx.avp /data01/avamar/repo/packages/
Note: The
AVP file must be moved (not copied) into the packages directory. This is to prevent the installer from detecting and starting to process an incomplete copy.
5. Verify that the avp file is in the proper location:
ls -al /data01/avamar/repo/packages/
6. Once verified, return to the Procedure in the Instructions section above.
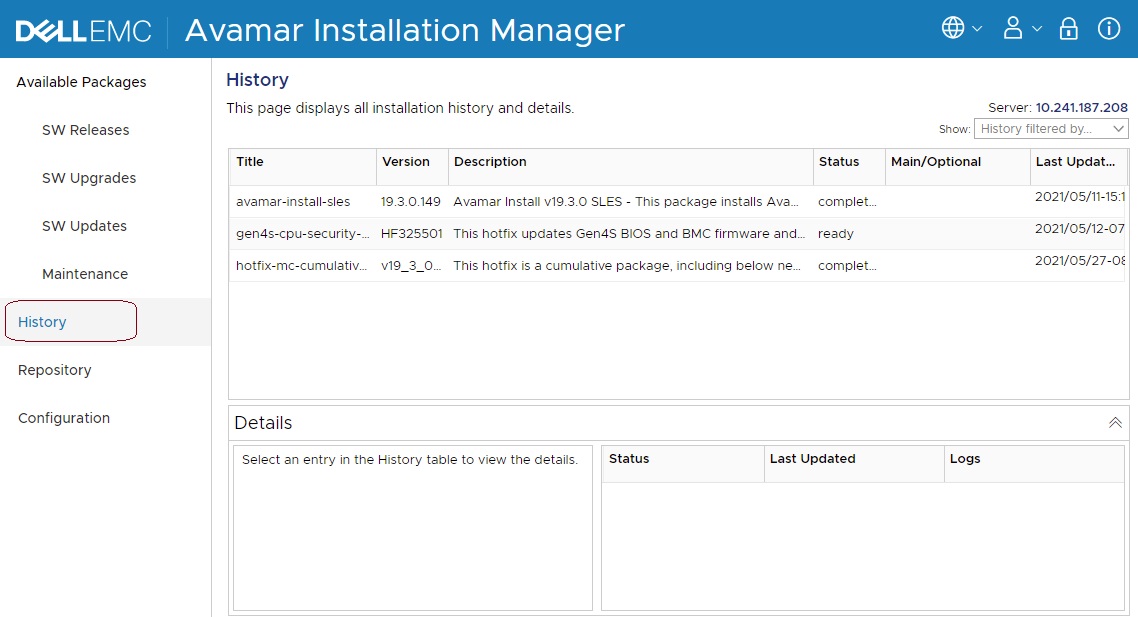
Package History:
To check for previously installed packages:
1. Log in to the Avamar installation Manager.
2. Go to the History tab, and the previously installed packages are displayed:
Affected Products
Avamar, Avamar Client, Avamar Data Store, Avamar Desktop/Laptop Option, Avamar Server, Avamar Virtual EditionArticle Properties
Article Number: 000069982
Article Type: How To
Last Modified: 03 Oct 2025
Version: 9
Find answers to your questions from other Dell users
Support Services
Check if your device is covered by Support Services.