Verify Your Domain
Summary: This article serves as a guide to setup domain in Office 365.
Instructions
Get Started
A TXT (text) record is a prescribed resource record in the Domain Name System (DNS) used to hold some readable text information about a particular host provided to sources outside your domain. The DNS TXT record is used to verify that you own your domain; it does not affect anything else, is not visible to the public and can be removed at a later date if desired.
Verifying your domain consists of three steps:
- Find the TXT record value for verifying domain ownership to Office 365
- Create the TXT record
- Verify the TXT record
Find the TXT record value for verifying domain ownership to Office 365
- Sign in to the Microsoft Online Portal.
- Go to the Domains page.
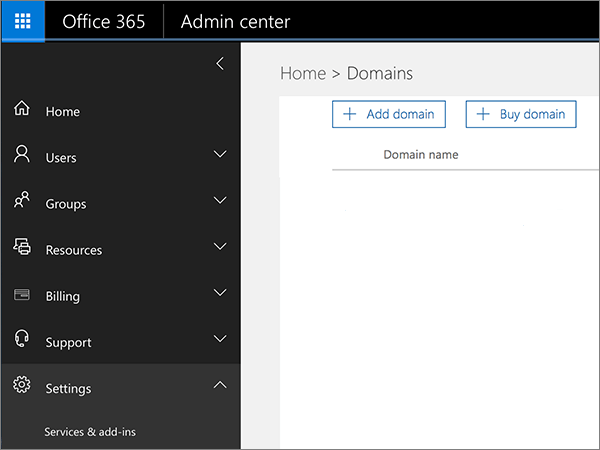
- On the Domains page, click your domain.
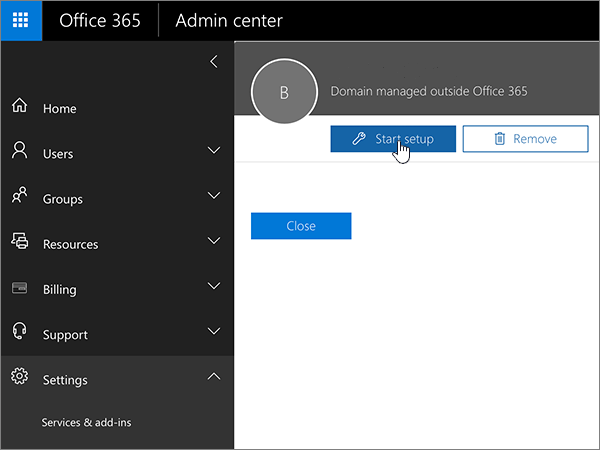
- Click Start setup. You'll go back to the domains setup wizard to see the specific value you need to add.
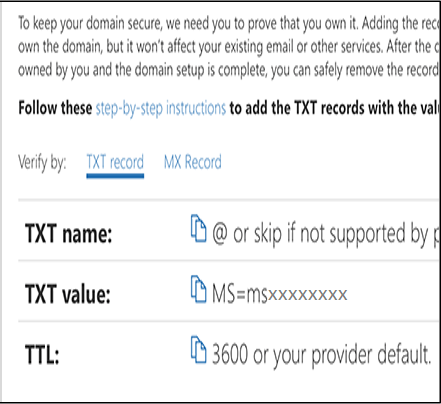
- Copy the MS=msXXXXXXXX value (including the MS= part) shown next to TXT value.
Create the TXT record
You can follow the general instructions below for creating DNS records for Office 365.
Steps:
- Find the area on your DNS hosting provider’s website where you can create a new record.
- Sign in to your DNS hosting provider’s website.
- Choose your domain.
- Find the page where you can edit DNS records for your domain.
- Create the record.
- Depending on whether you are creating a TXT record or an MX record, do one of the following.
- If you create a TXT record, use these values.
Record Type Alias or Host Name Value TTL TXT Do one of the following: Type @ or leave the field empty or type your domain name. Note: Different DNS hosts have different requirements for this field.MS=msXXXXXXXX Note: This is an example. Use your specific Destination or Points to Address value here.Set this value to 1 hour or to the equivalent in minutes (60), seconds (3600), etc. - If you create an MX record, use these values:
Record Type Alias or Host Name Value Priority TTL MX Type either @ or your domain name. MS=msXXXXXXXX Note: This is an example. Use your specific Destination or Points to Address value here.About MX Priorities (YH)
For Priority, to avoid conflicts with the MX record used for mail flow, use a lower priority than the priority for any existing MX records.Set this value to 1 hour or to the equivalent in minutes (60), seconds (3600), etc.
- If you create a TXT record, use these values.
- Save the record.
Verify the TXT record
Now that you have added the record to your domain registrar's site, return to Microsoft Online Portal and request it to look for the record.
Did you log out of Microsoft Online Portal? Log back in and follow the Verify your TXT or MX record process to get back to the Wizard and repeat the steps. Then on the Verify domain page, click Verify.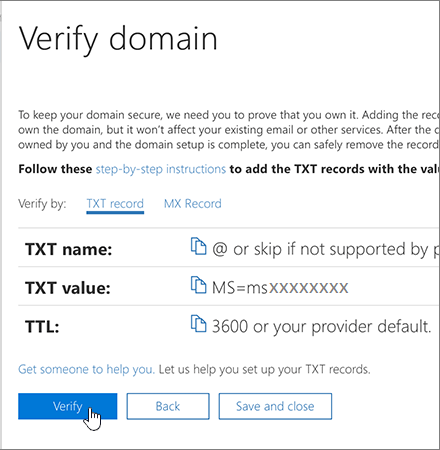
When Office finds the correct TXT record, your domain is verified.