Dell Encryption Enterprise is Missing the Locally Cached MSI Error Occurs During Upgrade
Summary: During an upgrade of Dell Encryption Enterprise (Formerly Dell Data Protection | Enterprise Edition), you may receive the error "The currently installed Dell Encryption is missing the Locally Cached MSI" or "The currently installed Dell Data Protection | Encryption is missing the Locally Cached MSI." ...
This article applies to
This article does not apply to
This article is not tied to any specific product.
Not all product versions are identified in this article.
Symptoms
Affected Products:
- Dell Encryption Enterprise
- Dell Data Protection | Enterprise Edition
Affected Versions:
- v8.0.0 and Later
Cause
Not Applicable
Resolution
The resolution differs depending on whether the error references Dell Encryption or Dell Data Protection | Encryption. Click the referenced product name for more information.
To replace the MSI:
- Contact Dell Data Security ProSupport to request the
DDPE_[bitdepth]_setup.exe

Figure 1: (English Only) Dell Encryption Upgrade Error
Note:
- For contact information, reference Dell Data Security International Support Phone Numbers.
[bitdepth]represents the operating system processor bit.- In this example image, the .exe installer is for version 8.18.0.
- The version and filename may differ from the example image.
- Run
DDPE_[bitdepth]_setup.exeto load the Welcome to the Install Wizard screen, but do not press Next.

Figure 2: (English Only) Dell Encryption 64-bit setup
- Right-click the Windows Start menu and then click Run.

Figure 3: (English Only) Run
- In the Run UI, type
%temp%and then press OK. This opens the user’s temp directory.

Figure 4: (English Only) %temp%
- From Windows Explorer:
- Sort by Date modified.

Figure 5: (English Only) Sort by Date modified
- Identify the date and timeframe that
DDPE_[bitdepth]_setup.exe - Locate the [DELL ENCRYPTION] file with a timestamp close to step 2.

Figure 6: (English Only) Dell Encryption 64-bit.msi
Note:
- [DELL ENCRYPTION] =
- x86 = Dell Encryption.msi
- x64 = Dell Encryption 64-bit.msi
- [DELL ENCRYPTION] may be contained within another folder inside the Temp folder.
- Copy [DELL ENCRYPTION] (step 5c) to C:\Windows\Installer.
- Rename [DELL ENCRYPTION] (step 5c) to match the filename of the .msi receiving an error (step 1).

Figure 7: (English Only) Rename file
Note: The example error image (step 1) needs the file that is renamed to 37969bd7.msi. This filename may differ in your environment.
- Close the installation wizard.
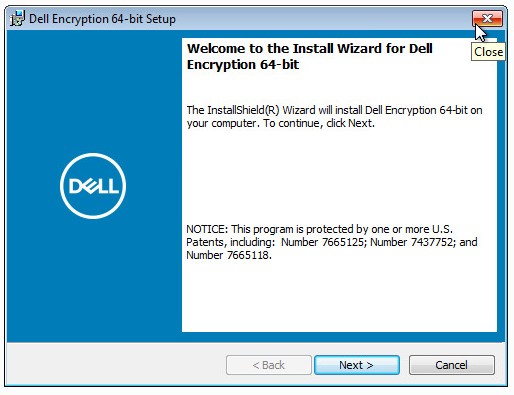
Figure 8: (English Only) Dell Encryption 64-bit setup
- Retry the upgrade.
To replace the MSI:
- Contact Dell Data Security ProSupport to request the
DDPE_[bitdepth]_setup.exe

Figure 9: (English Only) Dell Data Protection | Encryption Upgrade Error
Note:
- For contact information, reference Dell Data Security International Support Phone Numbers.
[bitdepth]represents the operating system processor bit.- In this example image, the .exe installer is for version 8.9.1.
- The version and filename may differ from the example image.
- Run
DDPE_[bitdepth]_setup.exeto load the Welcome to the Install Wizard screen, but do not press Next.

Figure 10: (English Only) Dell Data Protection | Encryption 64-bit Setup
- Right-click the Windows Start menu and then click Run.

Figure 11: (English Only) Run
- In the Run UI, type
%temp%and then press OK. This opens the user’s temp directory.
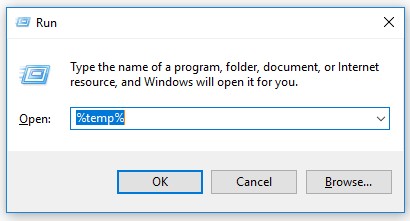
Figure 12: (English Only) %temp%
- From Windows Explorer:
- Sort by Date modified.

Figure 13: (English Only) Sort by Date modified
- Identify the date and timeframe that
DDPE_[bitdepth]_setup.exe - Locate the [DELL DATA PROTECTION] file with a timestamp close to step 2.
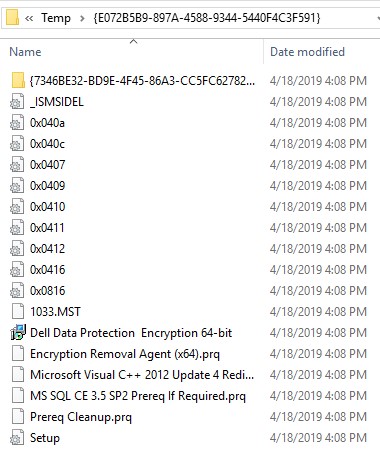
Figure 14: (English Only) Dell Data Protection Encryption 64-bit
Note:
- [DELL DATA PROTECTION] =
- x86 = Dell Data Protection Encryption.msi
- x64 = Dell Data Protection Encryption 64-bit.msi
- [DELL DATA PROTECTION] may be contained within another folder inside the Temp folder.
- Copy [DELL DATA PROTECTION] (step 5c) to C:\Windows\Installer.
- Rename [DELL DATA PROTECTION] (step 5c) to match the filename of the .msi receiving an error (step 1).

Figure 15: (English Only) rename file
Note: The example error image (step 1) needs the file that is renamed to 7b6a7e.msi. This filename may differ in your environment.
- Close the installation wizard.

Figure 16: (English Only) Dell Data Protection | Encryption 64-bit setup
- Retry the upgrade.
To contact support, reference Dell Data Security International Support Phone Numbers.
Go to TechDirect to generate a technical support request online.
For additional insights and resources, join the Dell Security Community Forum.
Affected Products
Dell EncryptionArticle Properties
Article Number: 000124941
Article Type: Solution
Last Modified: 11 Apr 2024
Version: 8
Find answers to your questions from other Dell users
Support Services
Check if your device is covered by Support Services.