How to Enable and Disable BitLocker with TPM in Windows
Summary: Windows BitLocker has become a solution for people using Windows to encrypt and secure your data. The following is how to enable and disable BitLocker using the standard methods. We do not discuss the utilization of a USB as a Trusted Platform Module (TPM) replacement and do not discuss Group Policy changes for advanced features. Domain level Group Policy changes and network-managed BitLocker setups are Best Effort and are out of the scope of support. Supported configurations are limited to single computers and locally managed BitLocker setups. ...
This article applies to
This article does not apply to
This article is not tied to any specific product.
Not all product versions are identified in this article.
Instructions
Table of Contents:
- Enabling the TPM
- Enabling BitLocker in the operating system
- Checking BitLocker status (Manage BitLocker Console)
- Checking BitLocker Status (Command Line)
- Suspending BitLocker
- Disabling BitLocker
- BitLocker Encryption Videos
Enabling and Disabling BitLocker in Windows 10 and Windows 11
Windows BitLocker has become a solution for securing your data. The following is how to enable and disable BitLocker using the standard methods.
This article does not discuss the utilization of a USB as a TPM replacement and does not discuss Group Policy changes for advanced features. Domain level Group Policy changes and network-managed BitLocker setups are Best Effort and are out of the scope of support. Supported configurations are limited to single computers and locally managed BitLocker setups.
Note: Products with Skylake chipsets need a specific setup in order for BitLocker to work correctly. If a Skylake computer is prompting for the recovery key even with the following settings, ENSURE that the BIOS is up to date.
- All Operating Systems that are configured in Legacy Boot Mode must use TPM 1.2. It is recommended that the BIOS be updated to the latest revision.
- All Operating Systems that are configured in UEFI Boot Mode can use either TPM 1.2, or TPM 2.0. It is recommended that the BIOS be updated to the latest revision.
- Exceptions to this are the Latitude 5175 and Latitude 7275, both of which only have TPM 2.0 and cannot downgrade to 1.2.
Note: For full, up-to-date requirements, see Microsoft's BitLocker requirements 
Enabling the TPM
Note: Ensure that the TPM is Activated or Enabled after switching it on, if the option is present. Switching the TPM on does not automatically enable it to communicate with the operating system. Enabling the TPM is necessary for the operating system to take ownership of the TPM chip to store encryption keys.
- Turn the computer on.
- As the computer performs POST, press the hotkey (usually F2, or Delete) to enter the BIOS.
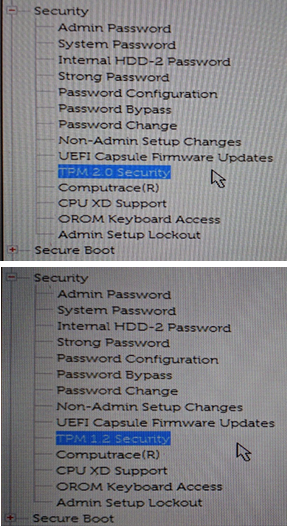
- Once in the BIOS, locate the section that configures Security.
- In the Security section, locate the TPM option.
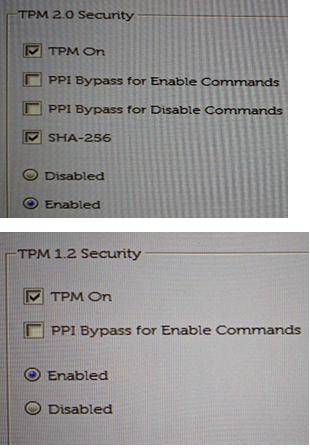
- Select the TPM 2.0 or 1.2 section on the left.
- Check the TPM box on the right to turn on the TPM.
- After switching the TPM on, select the option to Activate or Enable the TPM
-
After the TPM has been activated and enabled, click Save changes and Exit the BIOS.
Enabling BitLocker in the operating system
Windows BitLocker How to Enable and Disable.
Watch this video to learn how to enable or disable BitLocker in Windows.
Duration: 01:39
When available, closed caption (subtitles) language settings can be chosen using the Settings or CC icon on this video player.
- Turn the computer on.
- Sign into the operating system as normal.
- Get to the BitLocker management section in one of the following ways:
Windows 10 and Windows 11
- Start Menu path.
- Click the Windows Start Menu button.
- In the search box type:
Manage BitLocker - Press Enter or click the Manage BitLocker icon in the list.
- Control Panel path
- Click the Windows Start Menu button.
- Click the Control Panel.
- Click System and Security.
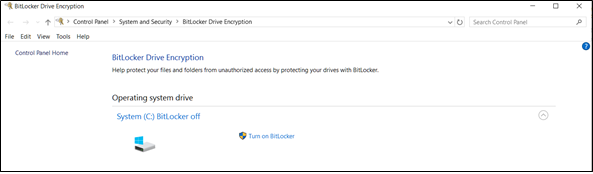
- Click any option under BitLocker Drive Encryption.
- Hard drive path
- Open Computer or My Computer
- Alternatively, click the File Explorer icon and select your computer.
- Select the Encryption:\ (or Windows computer) drive.
- Right-click the drive that you selected.
- Click Turn on BitLocker.
Note: This skips the initial BitLocker screen.
- Open Computer or My Computer
- App Screen path
- Click the Windows Start Menu button.
- Open the search box
Manage BitLocker. - Press Enter or click the Manage BitLocker icon in the list.
- Control Panel path
- Click the Windows Start Menu button.
- Open the search box, type
Control Panel. - Click System and Security or search BitLocker in the Control Panel window.
- Click any option under BitLocker Drive Encryption.
- Hard drive path
- Open Computer or My Computer
- Alternatively, click the File Explorer icon and select your computer.
- Select the C:\ (or Windows computer) drive.
- Right-click the drive that you selected.
- Click Turn on BitLocker.
Note: This skips the initial BitLocker screen.
- Open Computer or My Computer
- Start Menu path.
- Click the Windows Start Menu button.
- Windows 10: In the search box type:
Manage BitLocker
Windows 11: In the search box type:Device Encryption - Press Enter or click the Manage BitLocker icon in the list.
- Control Panel path
- Right-Click on the Windows Start Menu button.
- Click the Control Panel.
- Click System and Security.
- Click any option under BitLocker Drive Encryption.
- Settings path
- Click the Windows Start Menu button.
- Click the Settings icon.
- In the search box type:
Manage BitLocker - Press Enter or click the Manage BitLocker icon in the list.
- Hard drive path
- Open Computer or My Computer
- Select the C:\ (or Windows computer) drive.
- Right-click the drive that you selected.
- Click Turn on BitLocker.
Note: This skips the initial BitLocker screen.
- Start Menu path.
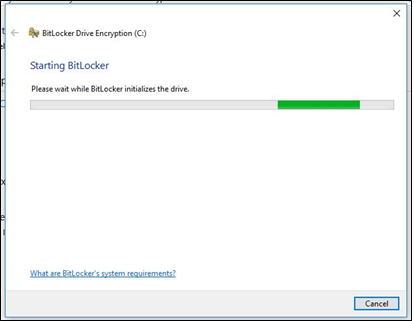
- In the BitLocker Management screen, click Turn on BitLocker.
BitLocker goes through a short initialization process.
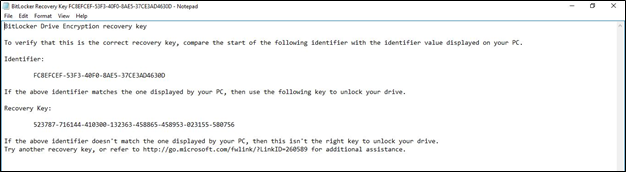
Choose one of three options for saving the recovery key.
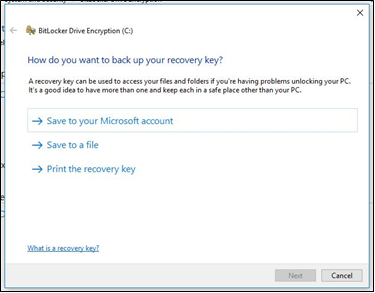
Caution: This key must be saved in a safe location. If access to the drive is ever needed, this is the recovery key that is used to access the drive. If the key is lost, there is no option for recovering data from a locked drive, and the operating system must be reinstalled. This key is unique for each computer and only works on the computer that it was created for.
- After saving the password file, click Next.
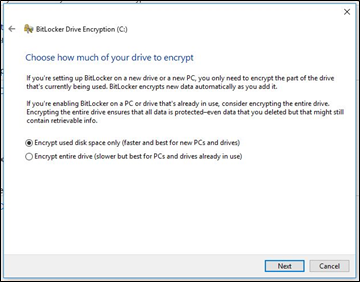
- Select one of the volume encryption options.
- Encrypt the entire hard drive.
- This encrypts all space on the hard drive regardless of whether it is used. This takes longer to process the encryption.
- Encrypt on used space.
- This only encrypts space on the hard drive as it is filled with data and leave free space unencrypted. This is preferred for basic encryption as it is faster.
- This only encrypts space on the hard drive as it is filled with data and leave free space unencrypted. This is preferred for basic encryption as it is faster.
- Encrypt the entire hard drive.
- After selecting encryption option, click Next.
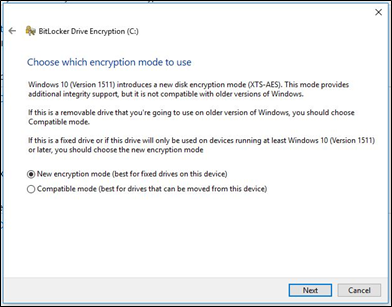
- Choose the type of encryption to use if you get the encryption type selection.
- New mode is the preferred method of encryption for new computers.
- New mode is the preferred method of encryption for new computers.
- Click Next
- Check that the box labeled "Run BitLocker system check."
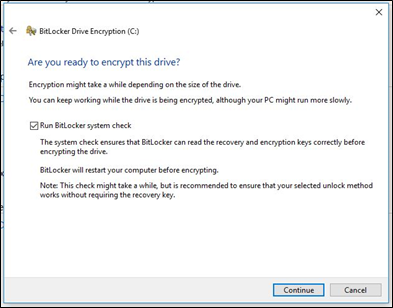
- Click Continue
- Restart the computer after verifying the settings to begin the encryption.
Note: Encryption can take anywhere from 20 minutes to a couple hours depending on the amount of data that has been encrypted, the speed of the computer, and whether the computer being turned off or going to sleep interrupts the process. The BitLocker encryption does not start until the computer is restarted. If work must be completed, it is safe to complete work and save it before restarting.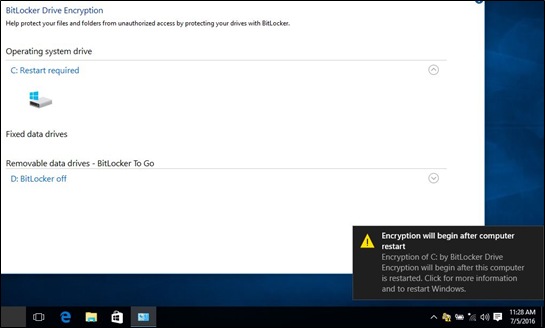
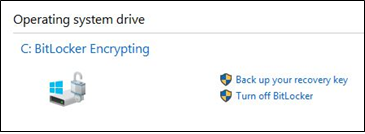
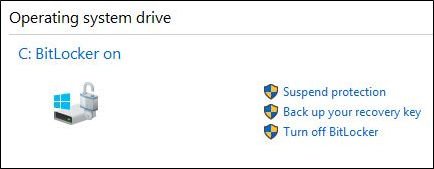
Checking BitLocker status (Manage BitLocker Console)
- Open the Manage BitLocker console with one of the methods previously described.
- View the status that is reported in the console.
- If encrypting, the status shows that BitLocker is encrypting.
- If encrypted, the status shows that BitLocker is on and show a lock icon.
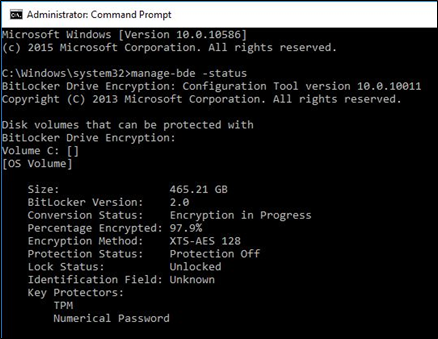
Checking BitLocker Status (Command Line)
- Open a command prompt window.
- Click the Windows Start button, type
cmdand press Enter. - Press and hold the Windows button on the keyboard and R, type
cmdand press Enter. - Right-click Command Prompt and select "Run as Administrator."
- In the command prompt, type
manage-bde -statusand press Enter. - View the status of BitLocker on the drives in the computer.
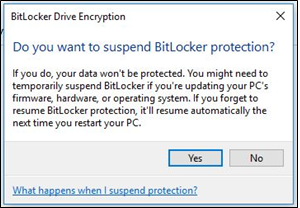
Suspending BitLocker
Note: Suspending BitLocker temporarily may be required for certain computer maintenance and updates. When updating the BIOS, ALWAYS suspend BitLocker prior to running the update. If BitLocker is active during the update, all stored keys on the TPM are LOST.
- Start the computer.
- Boot into the Windows operating system.
- Open the Manage BitLocker windows with one of the above methods.
- Click Suspend Protection for the wanted drive.
- Review the warning prompt and click Yes to suspend BitLocker.
- Return to the Manage BitLocker window to Resume Protection.

Disabling BitLocker
Note: Decryption can take anywhere from 20 minutes to a couple of hours. The time depends on the amount of data that has been encrypted, the speed of the computer, and whether the process is interrupted. Interruptions include the computer being turned off or going to sleep. Progress can be checked at any time using one of the previous methods for checking BitLocker status.
- Start the computer.
- Boot into the Windows operating system
- Open the Manage BitLocker windows with one of the above methods.
- Click Turn off BitLocker.

- Confirm the decision to turn off BitLocker.
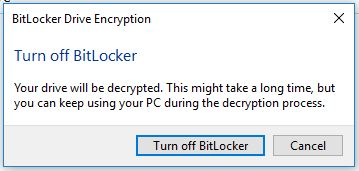
- Allow the computer to decrypt.
BitLocker Encryption Videos
Encrypt Your Drive With BitLocker.
Watch this video to learn how to encrypt your device with BitLocker.
Duration: 02:57
When available, closed caption (subtitles) language settings can be chosen using the Settings or CC icon on this video player.
Resolve BitLocker Recovery Key Prompts.
Watch this video to learn how to fix issues with BitLocker prompting for recovery key.
Duration: 01:07
When available, closed caption (subtitles) language settings can be chosen using the Settings or CC icon on this video player.
Additional Information

More information and support for your Windows operating systems can be found on our Windows Support webpage.
 Out of warranty? That is Not a problem. Browse to the Dell.com/support website and enter your Dell Service Tag and view our offers.
Note: Offers are only available for the US, Canada, UK, France, Germany, China, and Japan consumer and client computer customers. Server and Storage products are not applicable.
Affected Products
Alienware, Dell All-in-One, Dell Pro All-in-One, Dell Pro Max Micro, Dell Pro Max Slim, Dell Pro Max Tower, Dell Pro Micro, Dell Pro Slim, Dell Pro Tower, Dell Slim, Dell Tower, Inspiron, OptiPlex, Vostro, XPS, G Series, Projectors & Accessories
, G Series, Alienware, Dell Plus, Dell Pro, Dell Pro Max, Dell Pro Plus, Dell Pro Premium, Inspiron, Latitude, Dell Pro Rugged, Vostro, XPS, Fixed Workstations, Mobile Workstations, Dell Pro Max Micro XE FCM2250
...
Article Properties
Article Number: 000125409
Article Type: How To
Last Modified: 30 Jul 2025
Version: 25
Find answers to your questions from other Dell users
Support Services
Check if your device is covered by Support Services.