ITDT-SE for Windows: Use of ITDT to Update Tape Drives and Run Diagnostics
Summary: This article explains how to use ITDT-SE (CLI) to upgrade firmware, perform diagnostics, and pull logs for Dell Support.
This article applies to
This article does not apply to
This article is not tied to any specific product.
Not all product versions are identified in this article.
Symptoms
This article provides information about ITDT-SE for Windows. ITDT-SE is used to pull log files (drive dumps) and perform other various functions such as eject media, run tape drive diagnostics, update firmware, and so forth.
Note: ITDT-DCR is end of life. The DCR version does not support LTO7 or newer generation tape drives.
Cause
Not required
Resolution
Index:
- Installing ITDT-SE (CLI)
- Tape Drive Log (Drive Dump)
- Tape Drive Diagnostics
- Tape Drive Firmware Update
- Eject Tape media
- Tape Usage
Note: Backup software services may interfere with firmware updates, drive detection, and diagnostics. It is best to set the backup service to "disabled" then reboot the host and tape drive or library. This clears any reservations on the library or tape drives.
Installing ITDT-SE (CLI)
ITDT-SE does not have an installer, the installation is extracting files on to the user's machine. The extractor creates input, license, output, and script folders along with the ITDT executable, a readme, and two other files. No reboot is required.
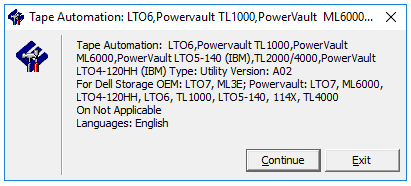
ITDT-SE (CLI) can be found on Dell Support. Choose the PowerVault tape drive, auto loader, or library you are working with. ITDT-SE (CLI) is found in the Tape Automation Category.
- Once downloaded, right click to run as administrator
- The default location is C:\\Dell\Drivers\….

- Two files are extracted

- In this instance, a Windows host is used. Right-click the Windows version and run as administrator
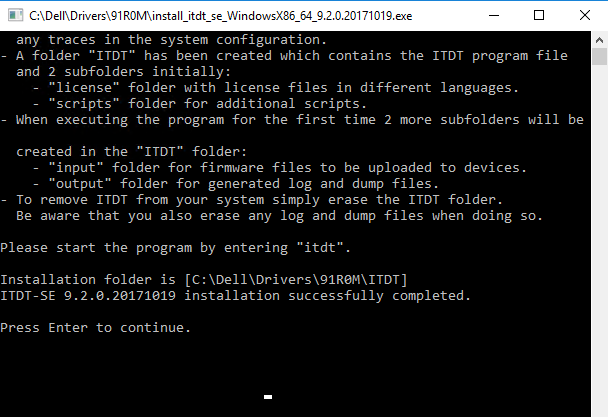
- Go to the ITDT folder that is created. To start ITDT, right click the ITDT application and run as administrator
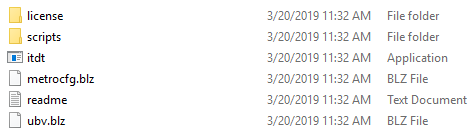
Note: When first extracted, the output and input folder may not be created. The two folders are created once the ITDT application is run.
Tape Drive Log
If a tape drive is failing during backups or while running diagnostics, gathering a drive dump from the tape drive helps determine if the drive must be replaced. If media is suspect, it is beneficial to gather drive dumps from all tape drives in a tape library. When the drive dump is generated, three files are created in the "output" folder. The files are "A," "B" and "BLZ." All three files can be useful in determining drive issues.- Start the ITDT-SE application by right clicking ITDT found in the ITDT folder
- The first time ITDT-SE is run, the License information is presented
- Press I on the last page to agree
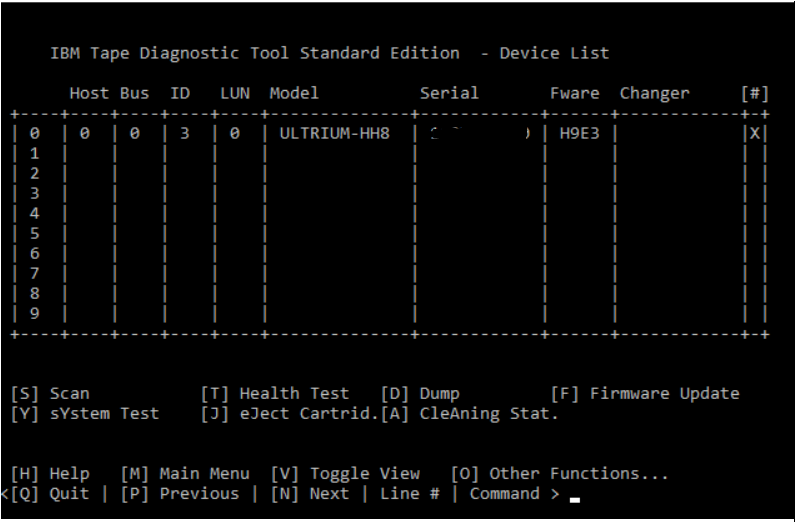
- This brings up the Main Menu page
- Press [S] to scan for devices

- Select the drive that you want to gather the Dump
- Press [D] to generate the Dump files


- Once complete, Dump files are located in the Output folder where ITDT was extracted
- Press [R] to return to the device list. Select the next tape drive or Press [Q] to quit

- Dump files are generated. Zip all three files for Dell Support to review.

Tape Drive Diagnostics
There are several different diagnostics that can be performed using ITDT-SE, ensure you run the appropriate diagnostic.- If the tape drive does not start writing to the media, a system test would be useful. The system test is a short diagnostic test.
- When trying to determine if that tape drive is having an issue with a read or write head vs media, one of the best ways to help is to run a full write test with a brand-new tape.
- The full write test exercises all write heads, and is a longer diagnostic test. Once diagnostics are completed, it generates a drive dump from the drive, for whichever diagnostic test is run.
- A stand Alone tape drive requires a tape inserted into the drive to run tests. Tape Libraries require a tape in the I/O station.
Note: Use a blank or scratch tape when running diagnostics as some tests overwrite the data.
- Open ITDT-SE (CLI)
- Select the drive to be tested
- Select the diagnostic option

- Select [O] for other functions

- Select [W] for Full Write test
- Select the block size

- Choose what type of data to test. Incompressible data runs at the Native speed of the tape drive.


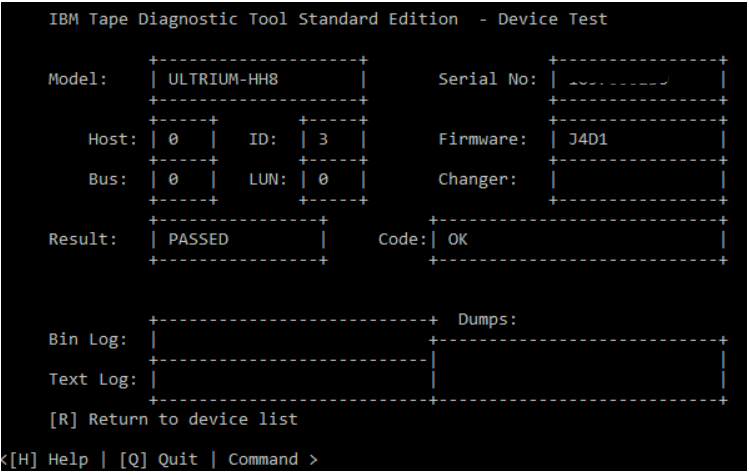
- Once the diagnostic is complete, ITDT-SE either Passes or Fails
- Logs are generated in the Output folder where ITDT-SE was extracted
Tape Drive Firmware Update
After updating the firmware on a tape drive, the host must be rebooted before running diagnostics or backup jobs.
- Download the appropriate firmware for the tape drive that is being updated from Dell Support Site
- Extract the firmware, the default location is C:\Dell\Drivers\.... Write down the folder location when files are extracted
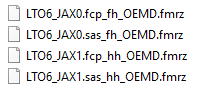
- Copy the firmware file to the Input folder where ITDT-SE was extracted
Note: There may be separate firmware files for Full Height and Half Height drives as well as SAS and FC drives.
- Open ITDT-SE (CLI)
- Select tape drive to be upgraded
- Press [F] for firmware update
- Select the firmware file then Press [C] to continue
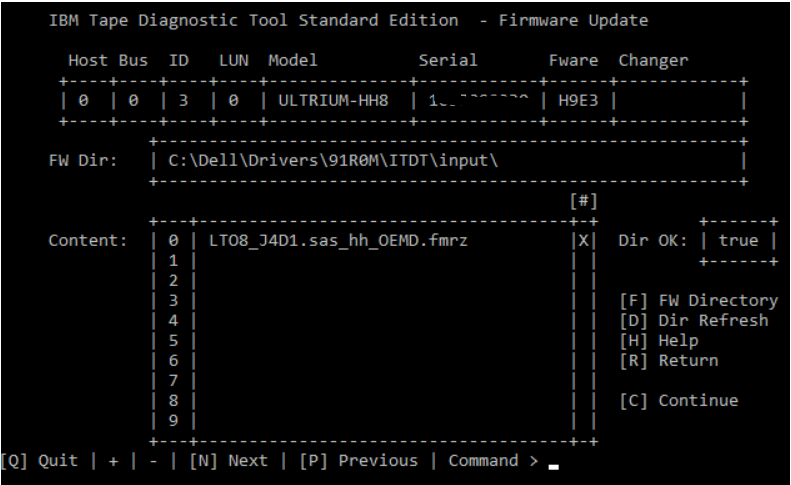
- The Directory and Firmware file is listed. Press [S] to start firmware update
![Press [S] to start firmware update](https://supportkb.dell.com/img/ka06P000000oqlBQAQ/ka06P000000oqlBQAQ_en_US_8.png)
- Once complete, the Status should be Passed
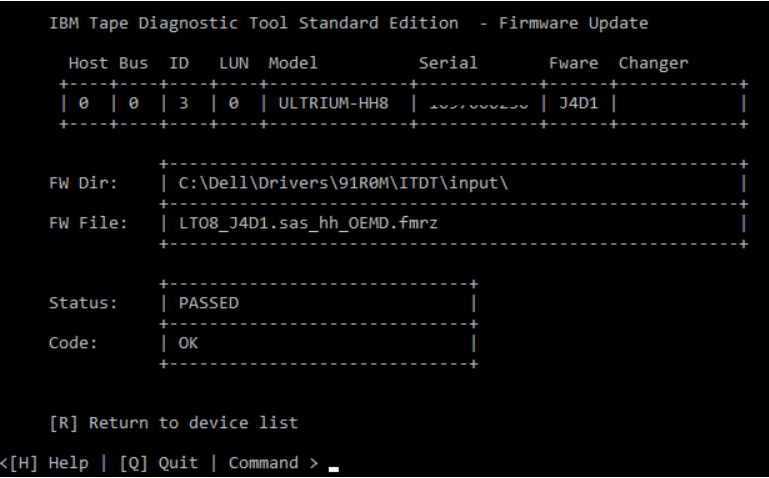
- Press [R] to return and select next drive to be update
- Once all drives are complete, the server must be rebooted before testing or running backup jobs
Eject Tape Media
The Eject Tape Media function in ITDT-SE may be used if a tape does not eject using the backup software. To clear any reservation on the tape drive by the backup software, set all backup services to disable, reboot server, and tape device.
Note: Mid-tape recovery could take up to 10 minutes to complete. During the recovery, the Single Character Display (SCD) flashes one segment at a time to complete one figure-eight motion, then flashes the number 9, then flashes one segment at a time to complete one figure-eight motion, then flashes the number 8. This continues until the number 1 flashes and the drive completes recovery. You can eject the tape cartridge once the count down has ended by pressing the eject button.
Note: The normal eject process can take 5 minutes or longer depending on the amount of tape spooled into the drive. The activity LED on the tape drive stops flashing once activity has stopped.
- Open ITDT-SE
- Select the drive that has media loaded
- Select [J] to eject media
- Result is Passed if the tape ejected
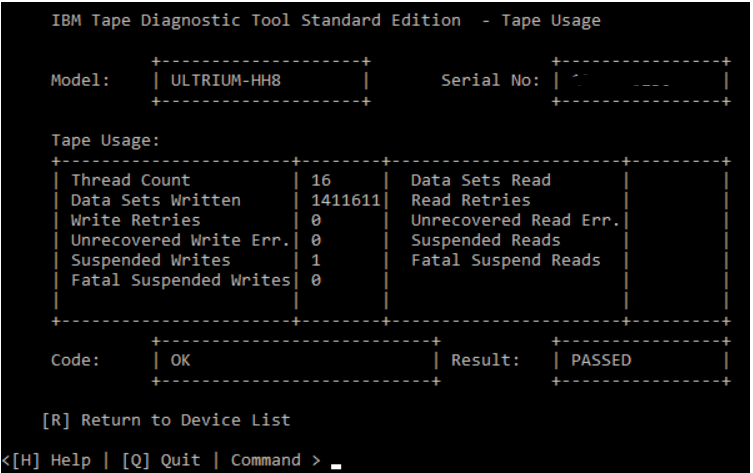
Tape Usage
The Tape Usage function retrieves statistical data and error counters from a tape cartridge.
Note: Tape Usage does not create a log file.
- Open ITDT-SE
- Select a drive that has media loaded
- Select [O] for other options
- Select [U] for Tape Usage
Affected Products
Dell EMC ML3, PowerVault 136T LTO/SDLT (Tape Library), PowerVault LTO4-120HH, PowerVault LTO5-140, Powervault LTO6, PowerVault LTO7, PowerVault LTO8Article Properties
Article Number: 000145038
Article Type: Solution
Last Modified: 06 Feb 2025
Version: 7
Find answers to your questions from other Dell users
Support Services
Check if your device is covered by Support Services.