How to create a RAID with Intel, PERC and LSI Controllers
Summary: How to create a RAID with Intel Rapid Storage controller, PERC and LSI MegaRAID Controllers.
This article applies to
This article does not apply to
This article is not tied to any specific product.
Not all product versions are identified in this article.
Instructions
Table of Contents
Caution: Keep in mind that a RAID is not a Backup! Dell is NOT responsible for any data loss which can occur on the configuration process of a RAID. Ensure that a backup is available before you create a new RAID or reconfigure an existing one.
How to create a RAID.
RAID controllers which are available on Dell computers are not only different in performance and available connectors, but also in how to configure them. Because of that, we explain the process of setting up a new RAID for all three kinds of controllers separately.
LSI MegaRAID
Before you can use the LSI MegaRAID Controller, you have to deactivate the onboard Controller in the System Setup.

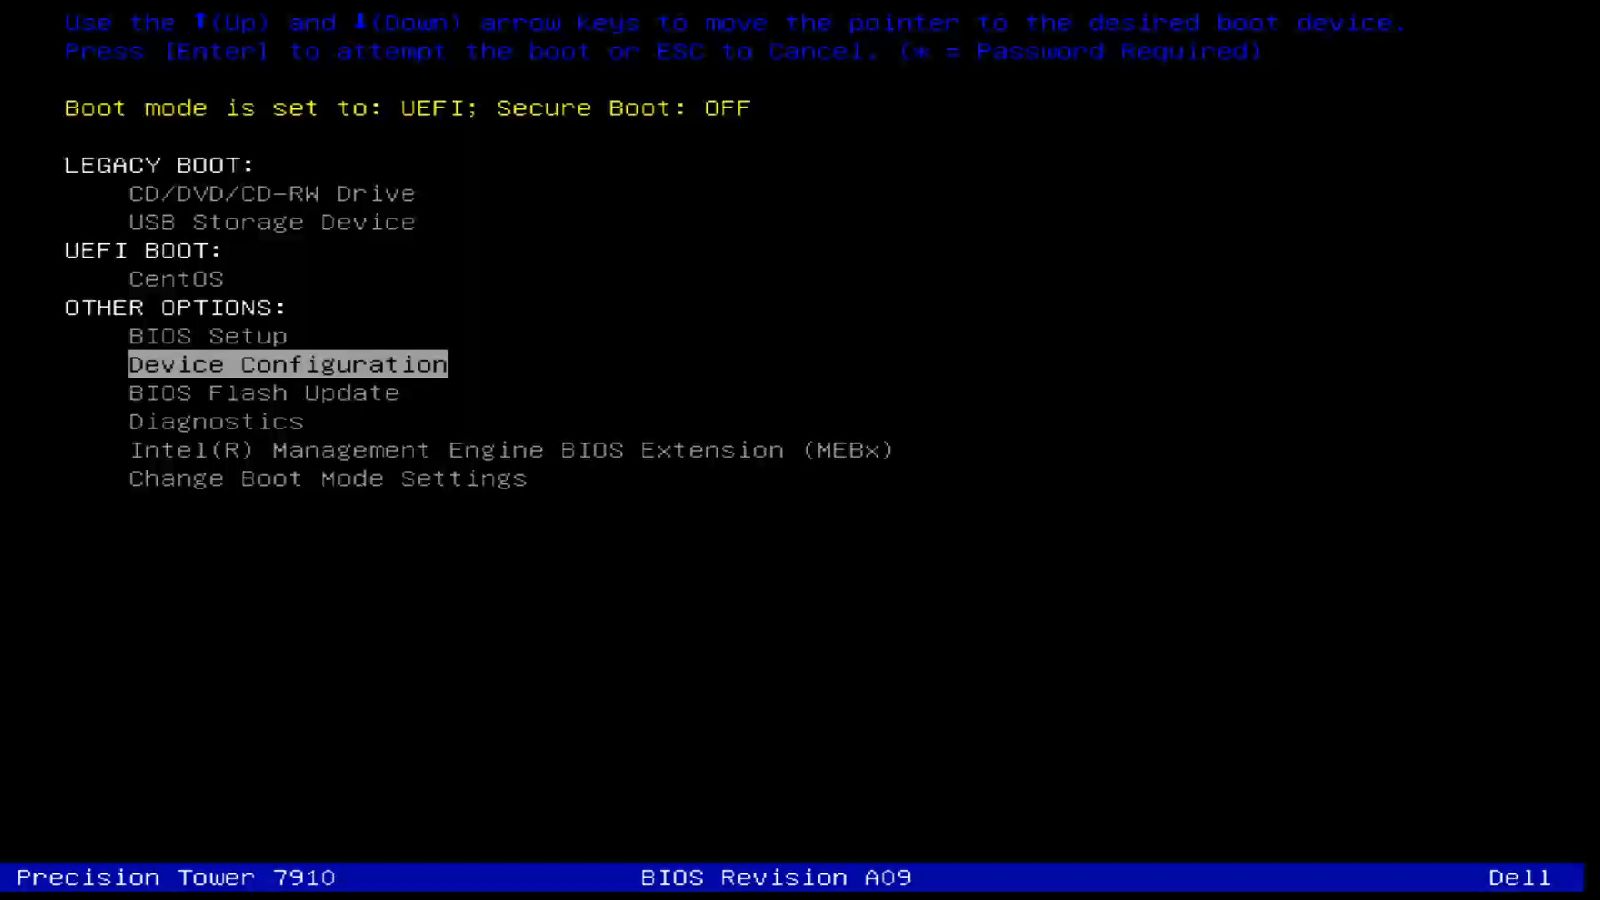
After that you can enter the controller in the boot menu. Select the Device Configuration option.
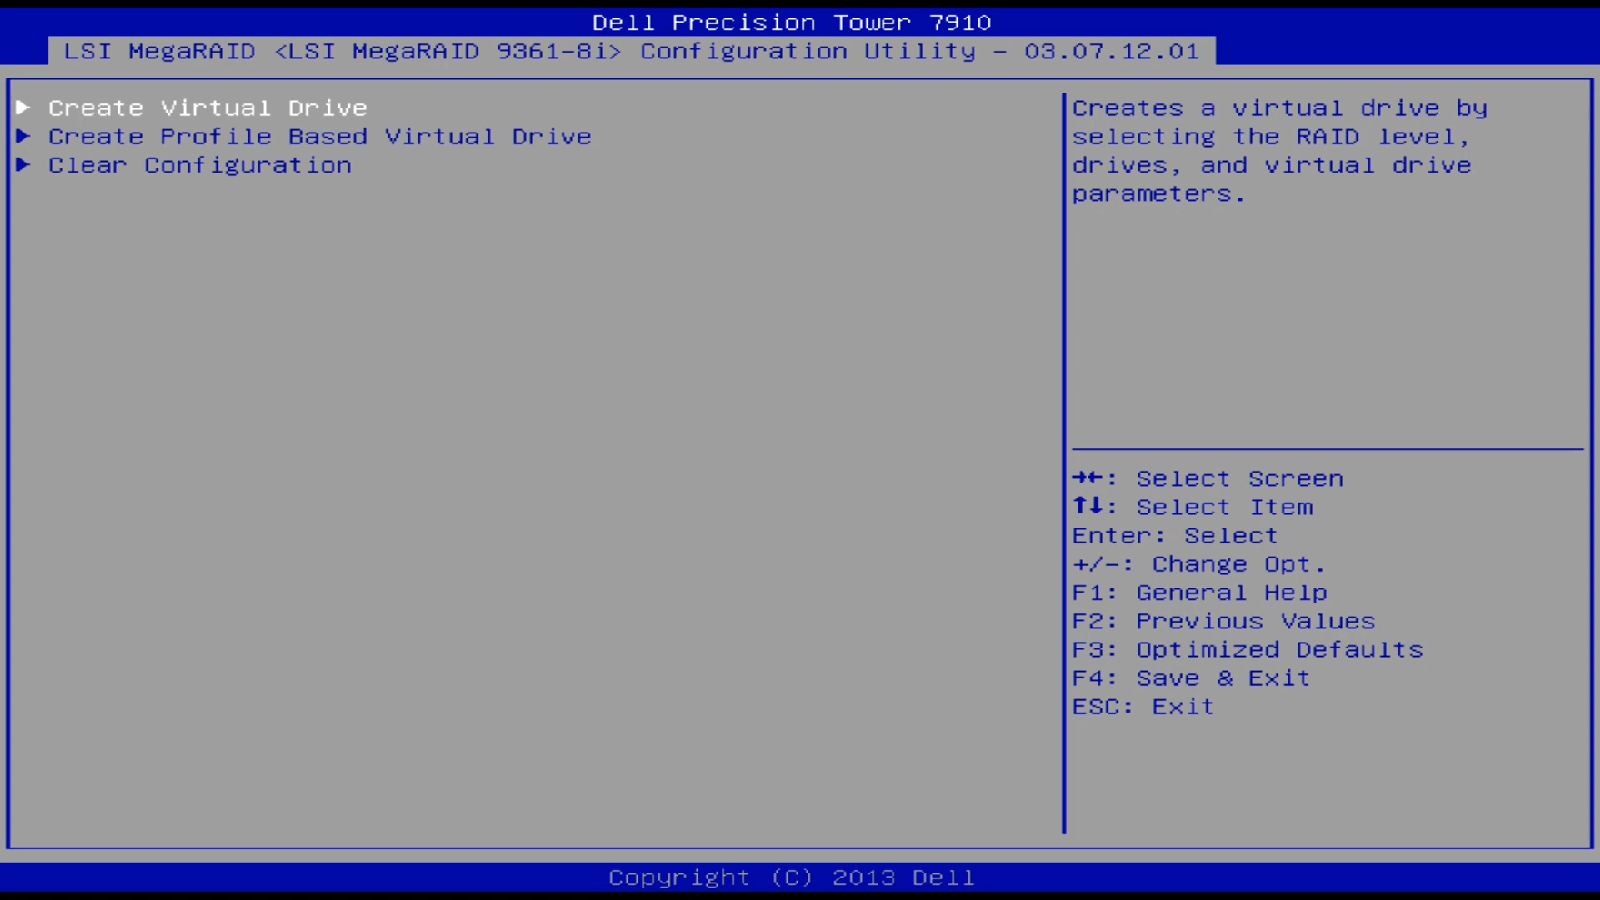
Select the Configuration Management.

Now you can select Create Virtual Drive.
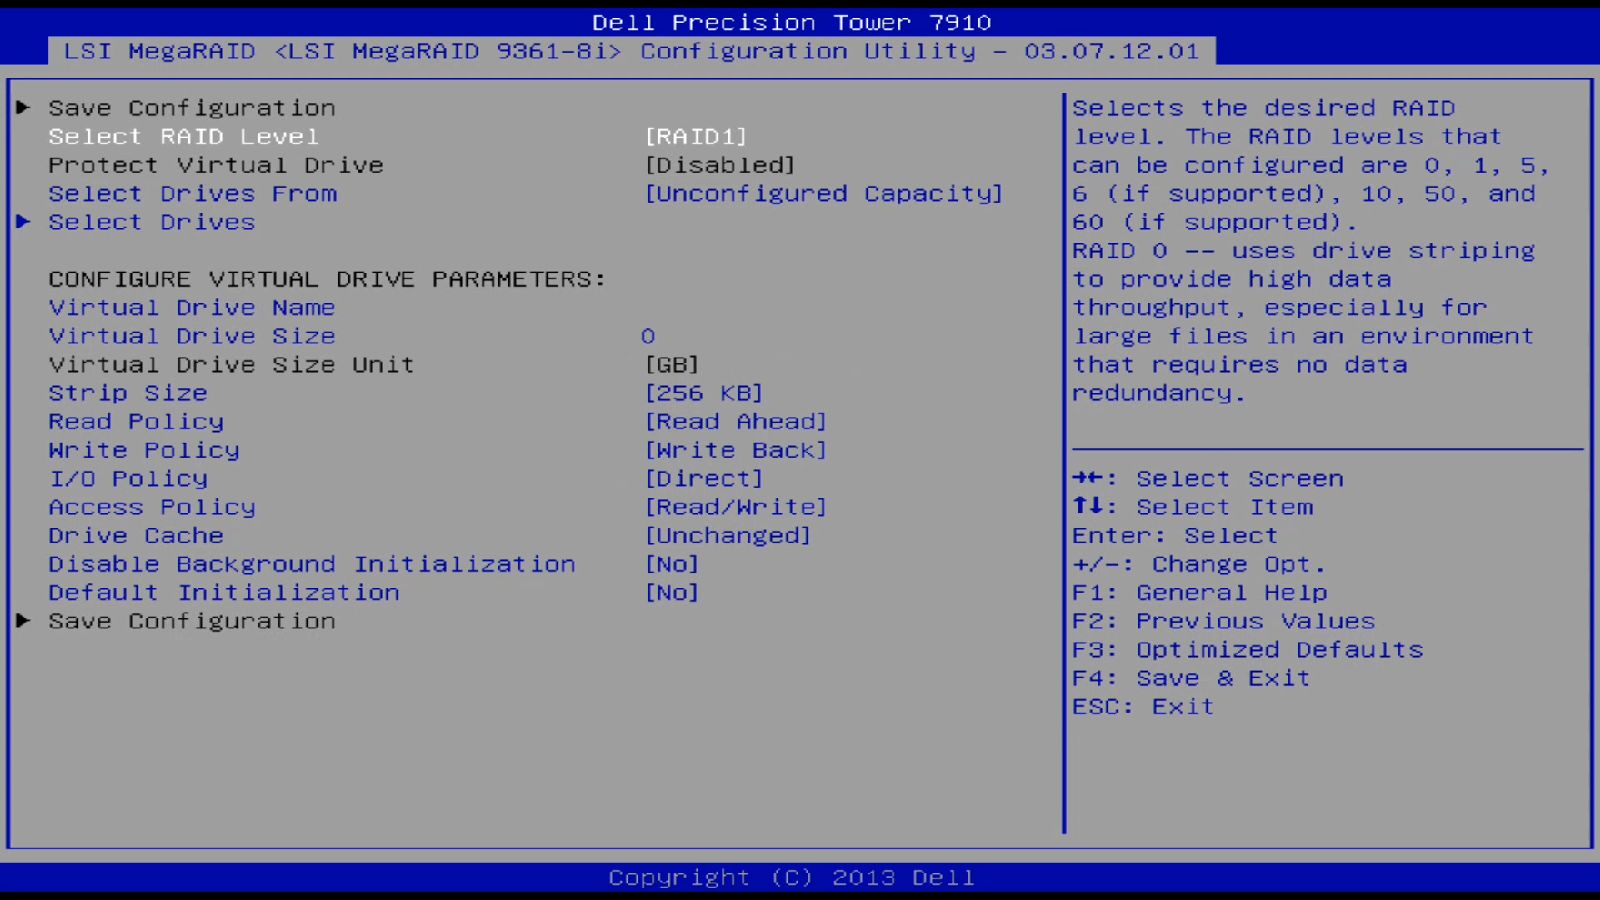
Here you can set the RAID-Level and choose the Hard Drives you want to use for the RAID in the Select Drives option.
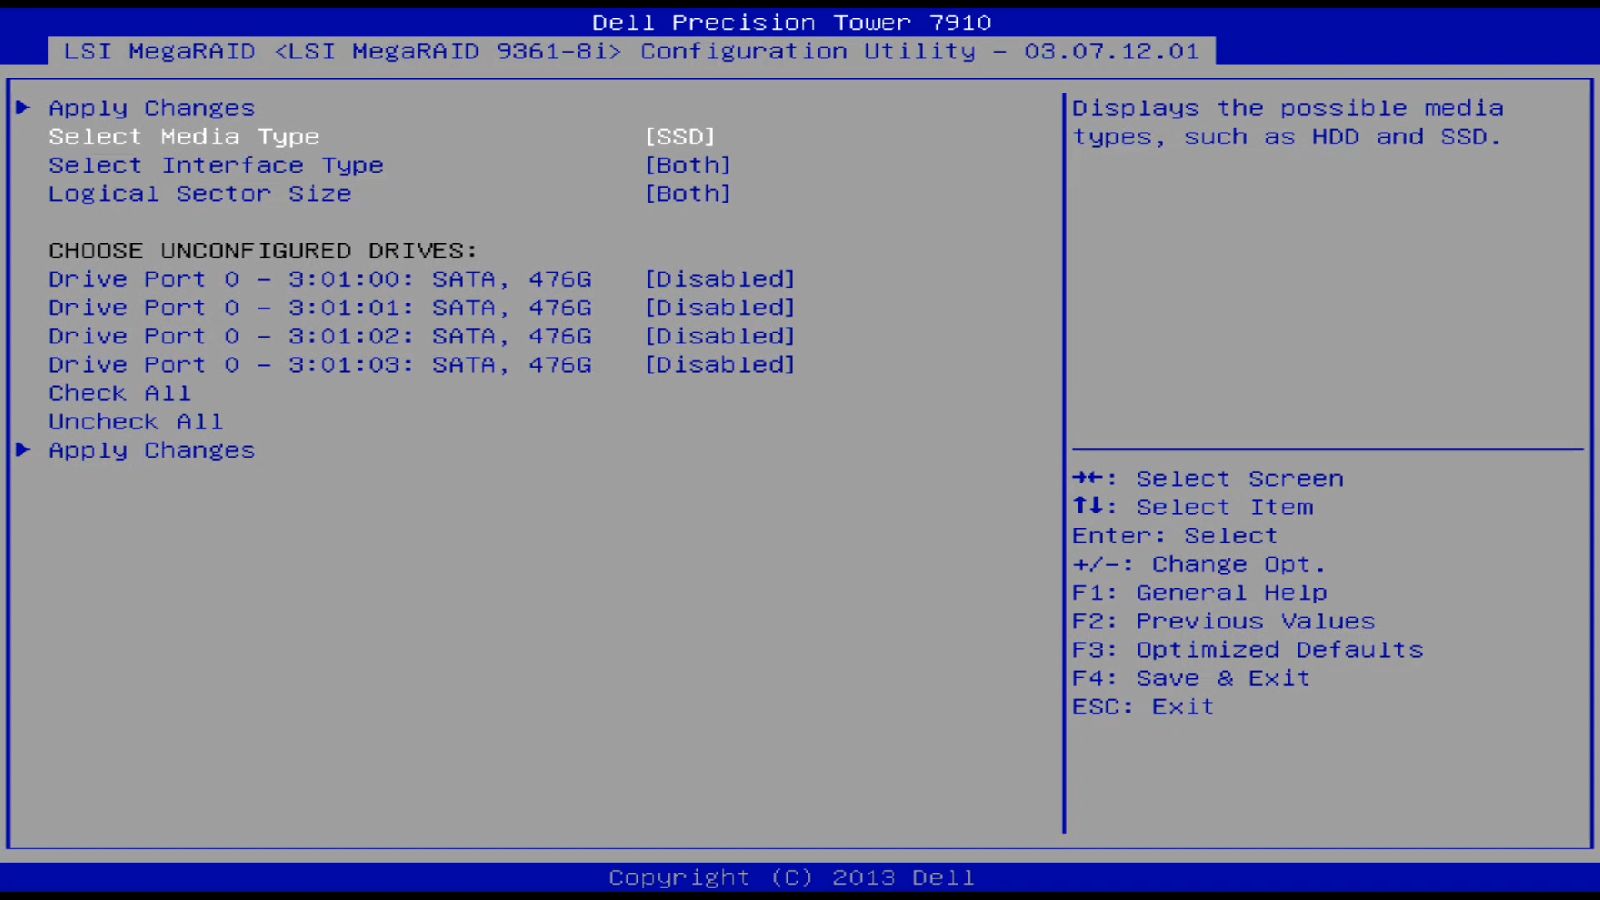
At the Select Drives menu, set which drive types should be shown to select in the Select Media Type option. After that, you can select the drives, you want to use from the list below.
In the last step, you choose a name for the RAID Volume, the size of the RAID and set the Read/Write Policies. Then you choose if the Volume should be initialized in the background while using the controller setup.
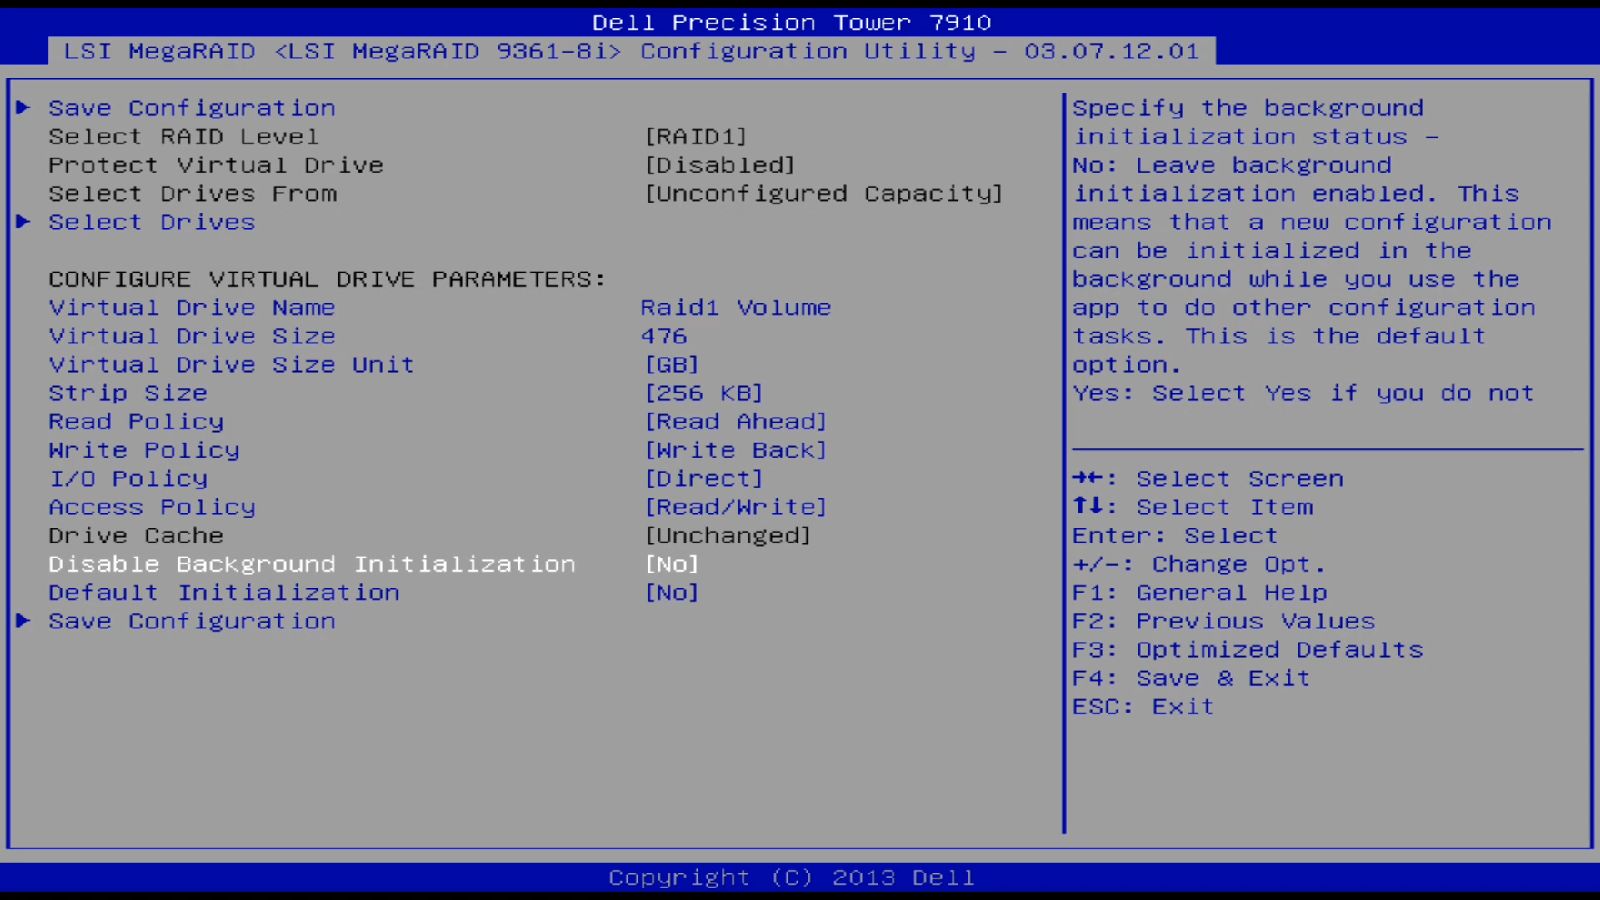
Read Policy
- No Read Ahead: The data used is not puffered.
- Read Ahead: Puffering of frequently used data for faster accessibility
- Adaptive Read Ahead: The controller automatically switches between Read Ahead active or inactive.
Write Policy.
- Write Through: The write process is marked as complete when all data is written on the hard drive.
- Write Back: The write process is marked as complete when the data is written to the controller's cache (a battery connected to the PERC is needed).
Note: Keep in mind that a new created RAID Volume has to be initialized before it is usable.
Intel Rapid Storage Technology
Before you can use the Intel Rapid Storage Technology to configure your RAID, you must set the SATA Operations to RAID On in the System Setup.
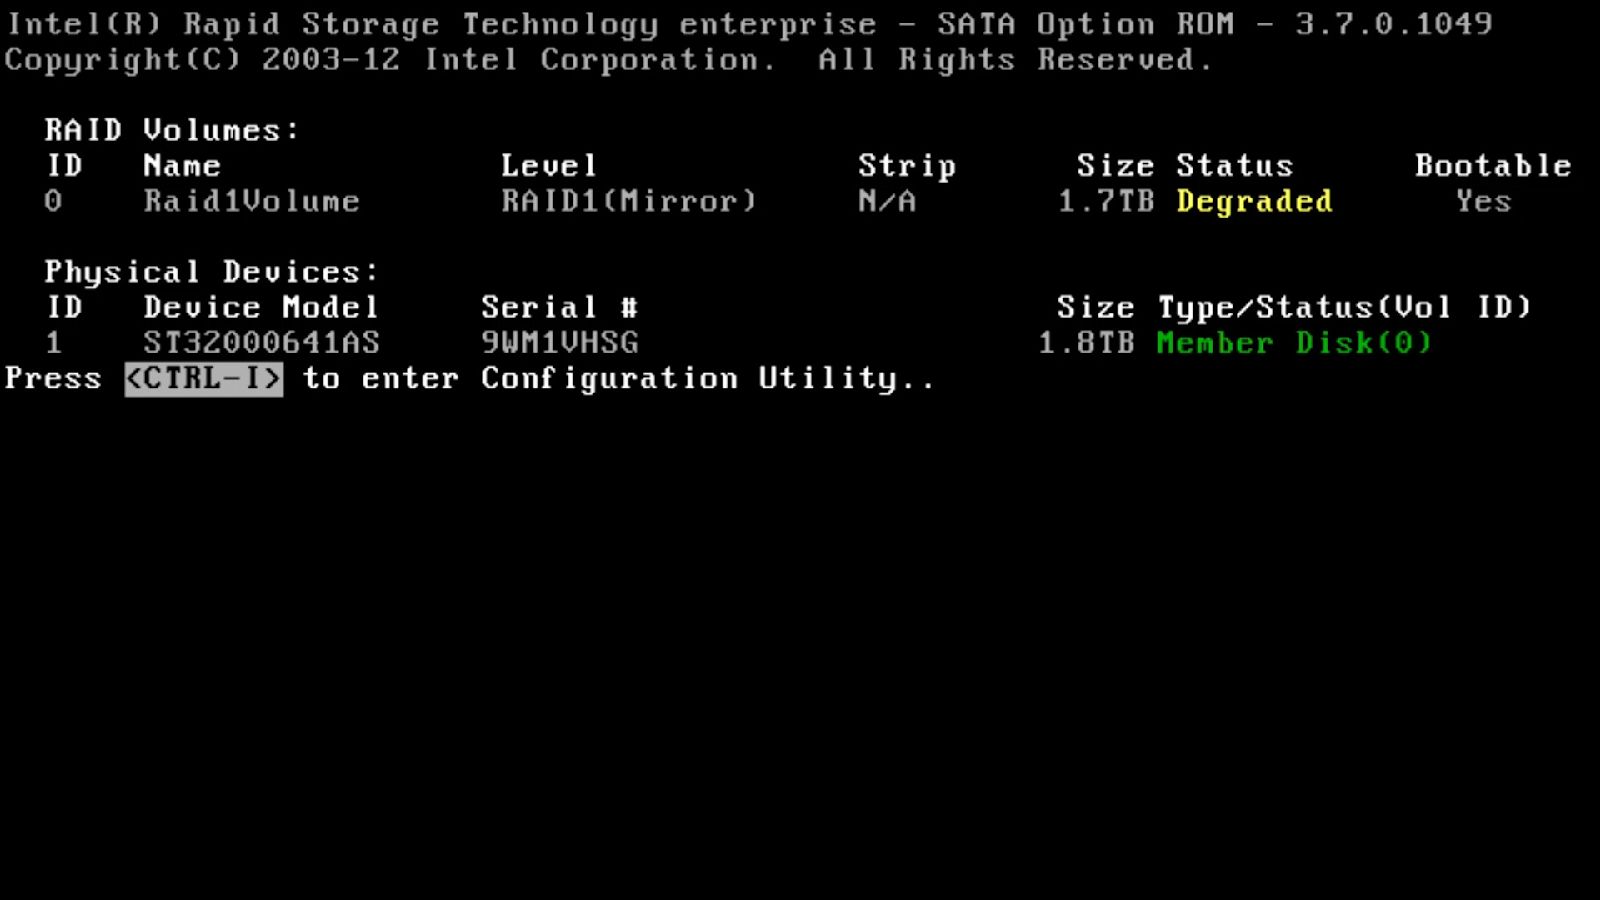
After the POST (Dell Logo) is complete, you see an overview of all hard disk drives and RAID volumes. The shortcut Ctrl + i brings up the Controller Setup.
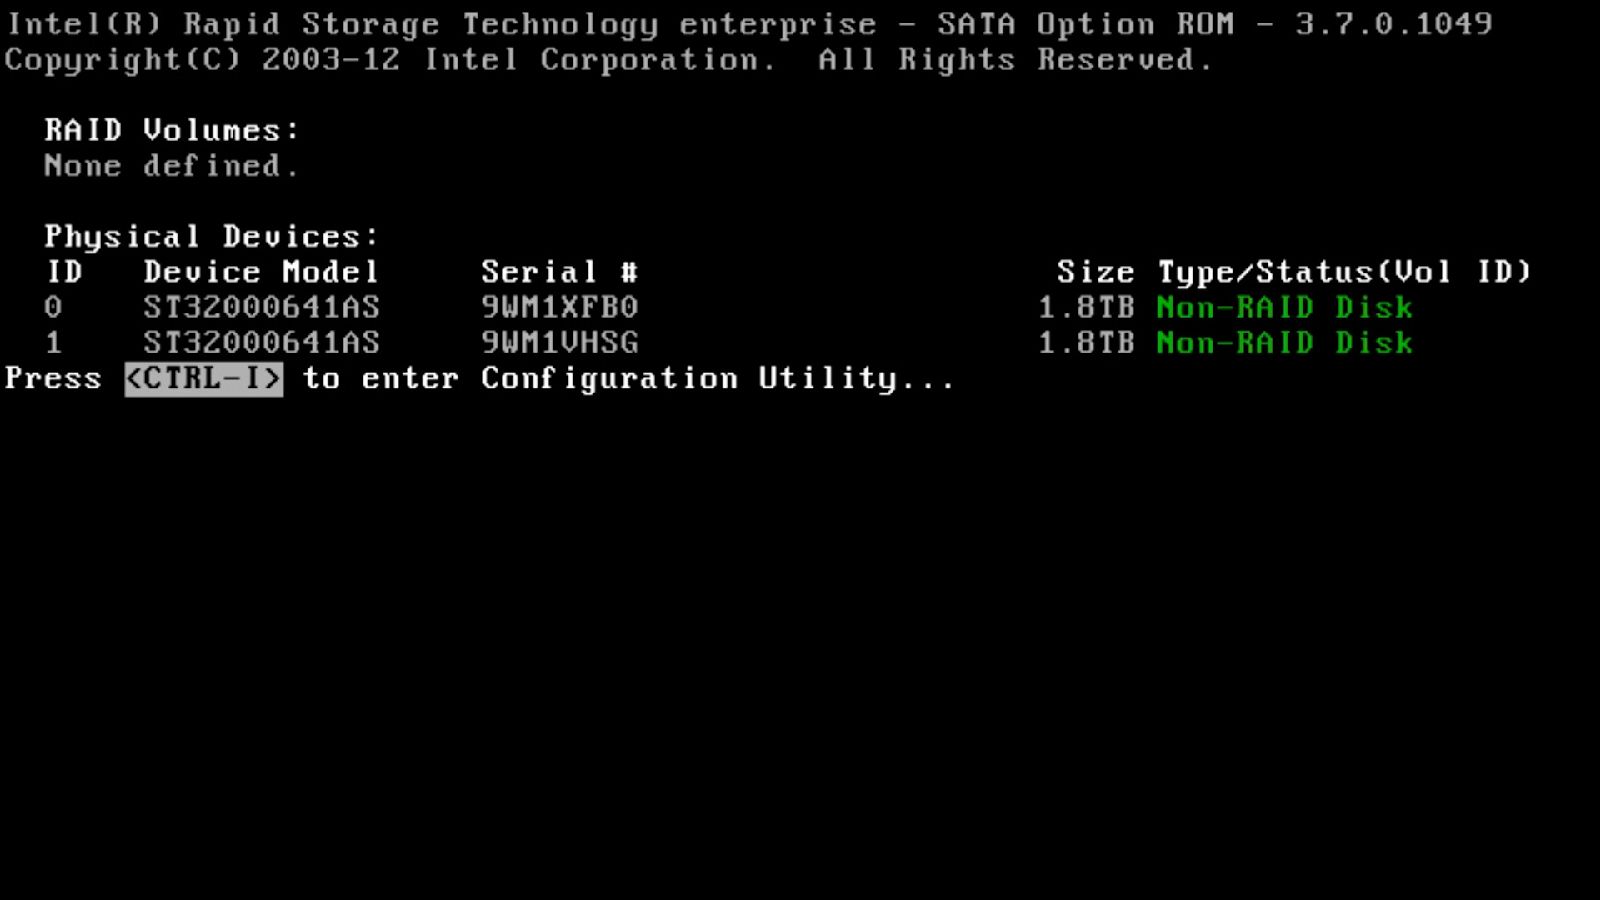
Note: On our latest Systems, you can find the entry Device Configuration in the boot menu (F12 while Dell Logo is shown). This leads you directly into the Controller Setup.
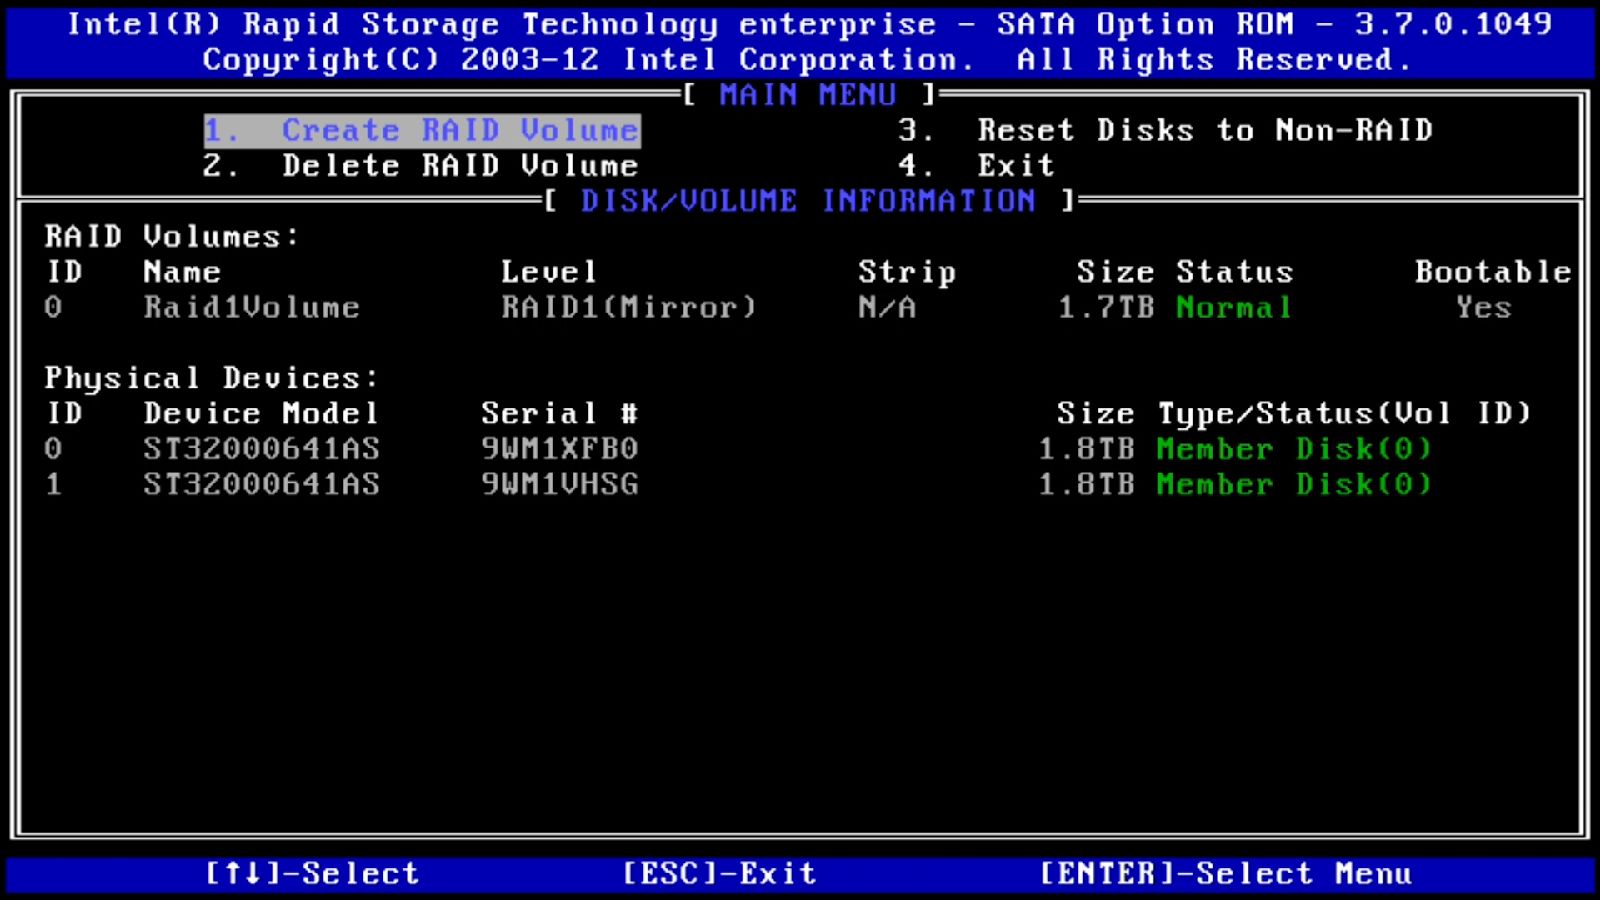
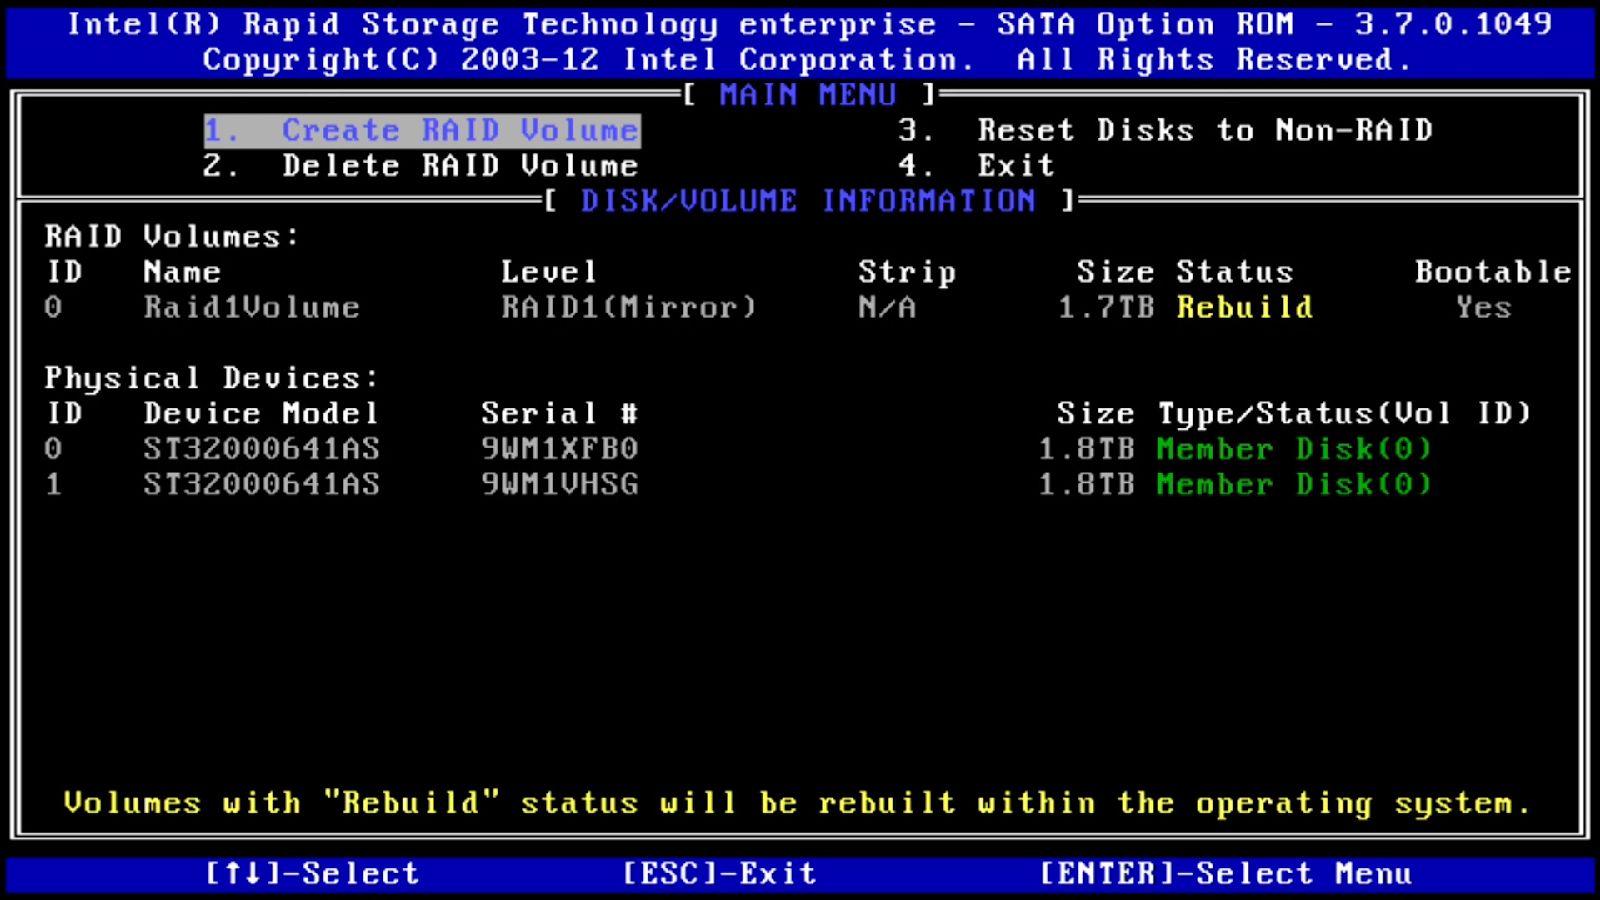
In the main menu, you can also see an overview of all available drives and RAIDs.
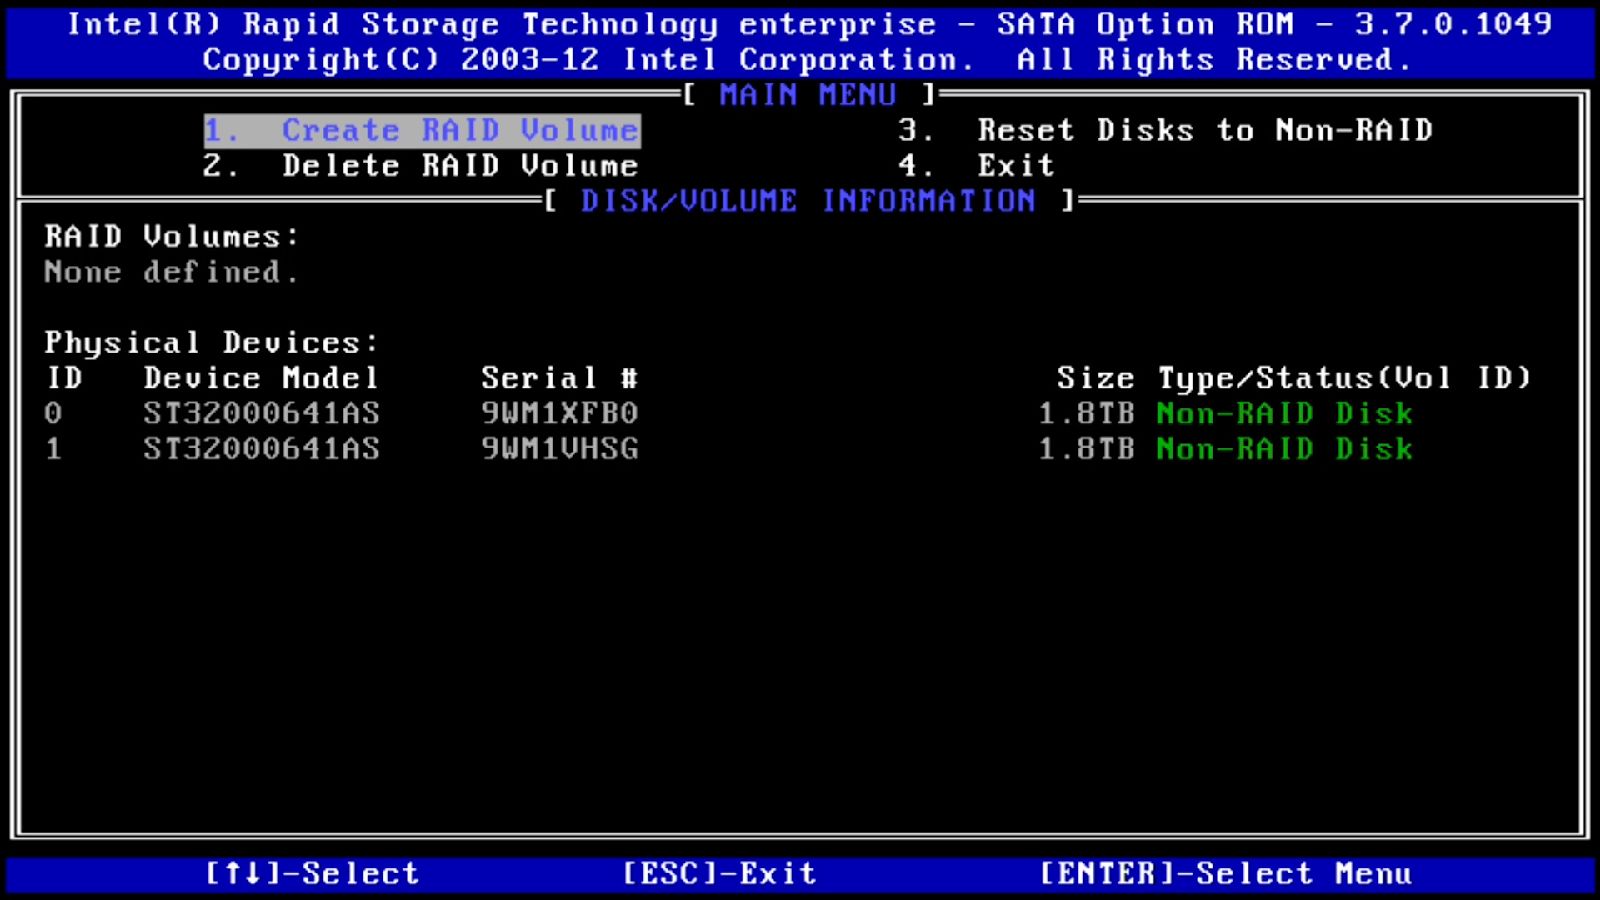
Navigate with the arrow keys to Create RAID Volume and confirm with the Enter-Key.
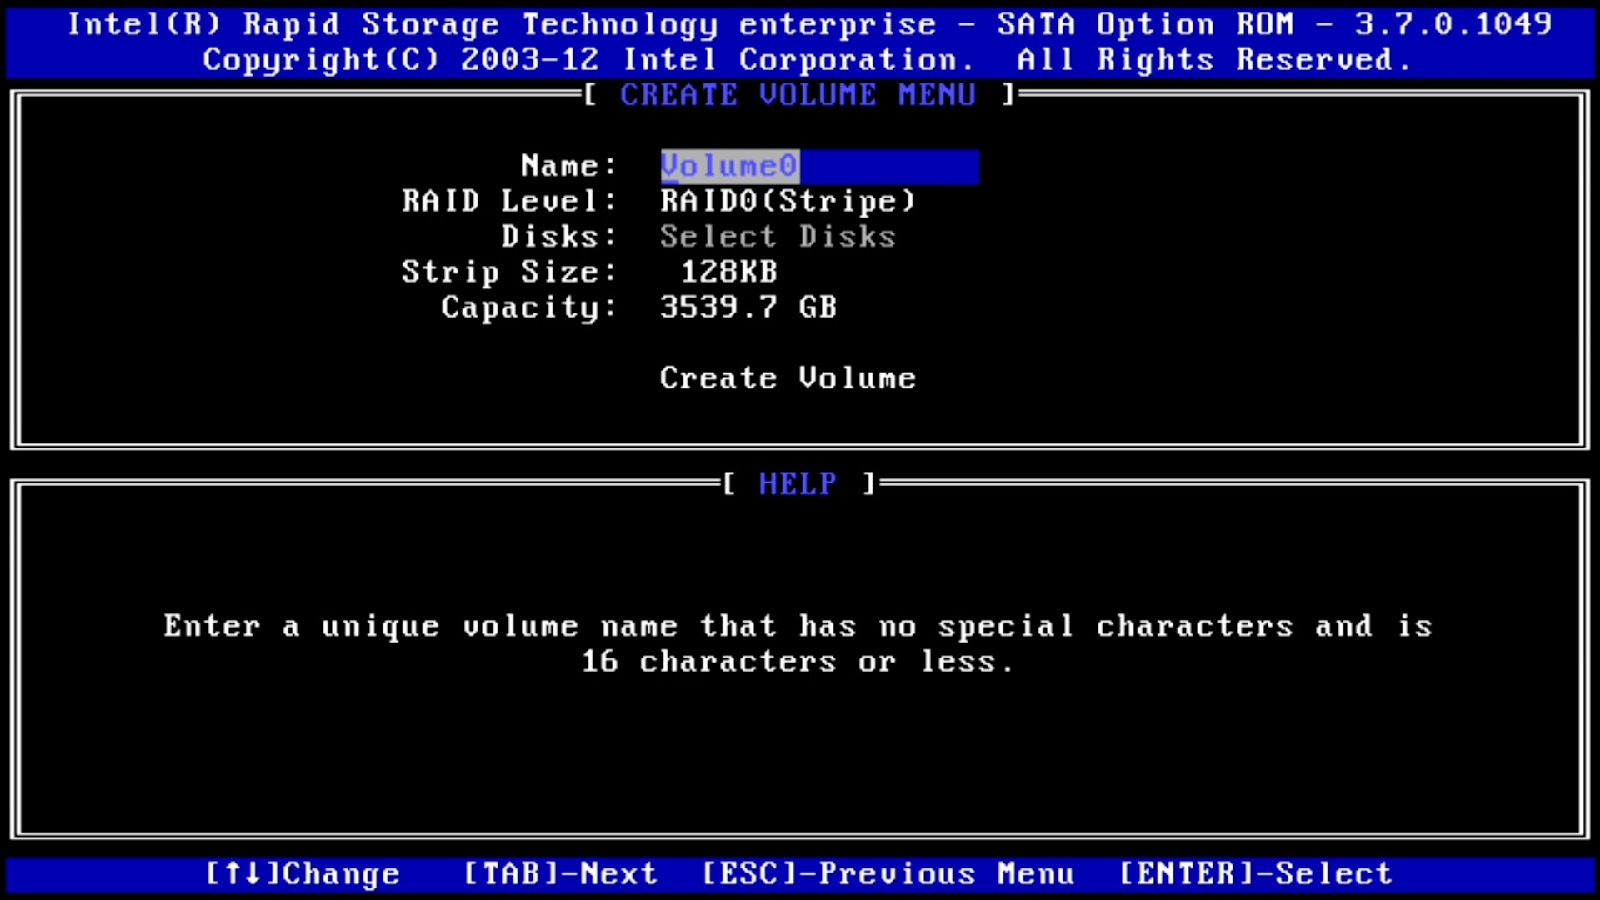
In the Create Volume Menu you can choose a Name for the RAID, set the RAID Level, select the Hard Drives you want to use, set the Strip Size and determine the Capacity of the RAID.
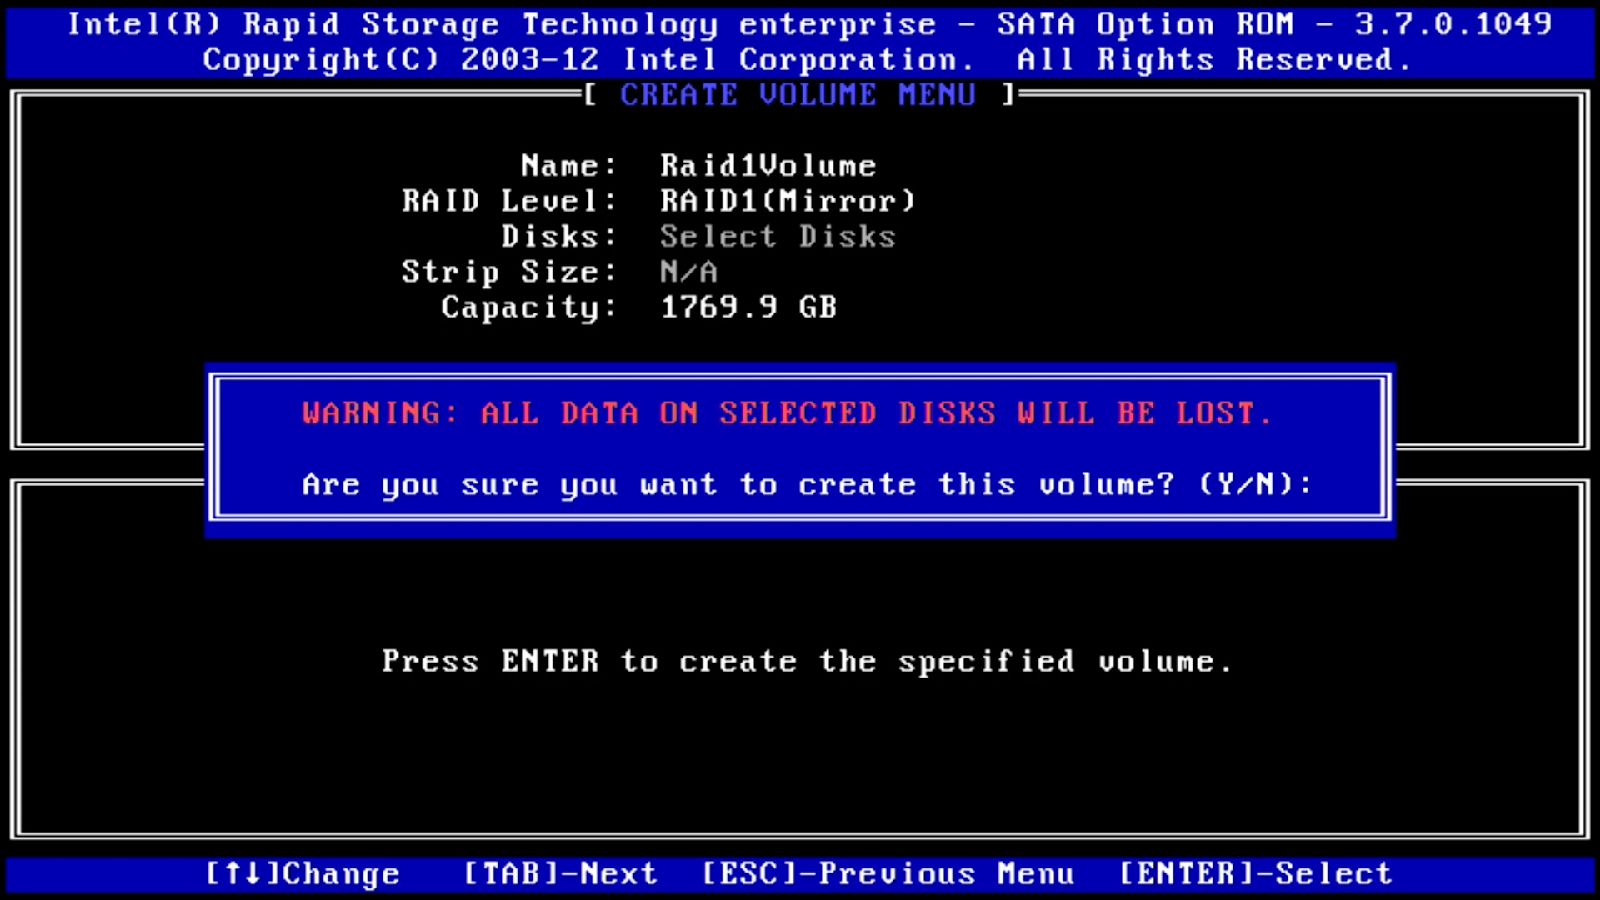
After the volume is created, it is available for installing the operating system.
Note: Keep in mind that you have to integrate the drivers for the RAID controller before you can select the RAID Volume during the installation of the operating system. This does not apply to all available operating systems.
PERC
When you built in the PERC card and all drives are connected, you can use the RAID functionality of the controller card.
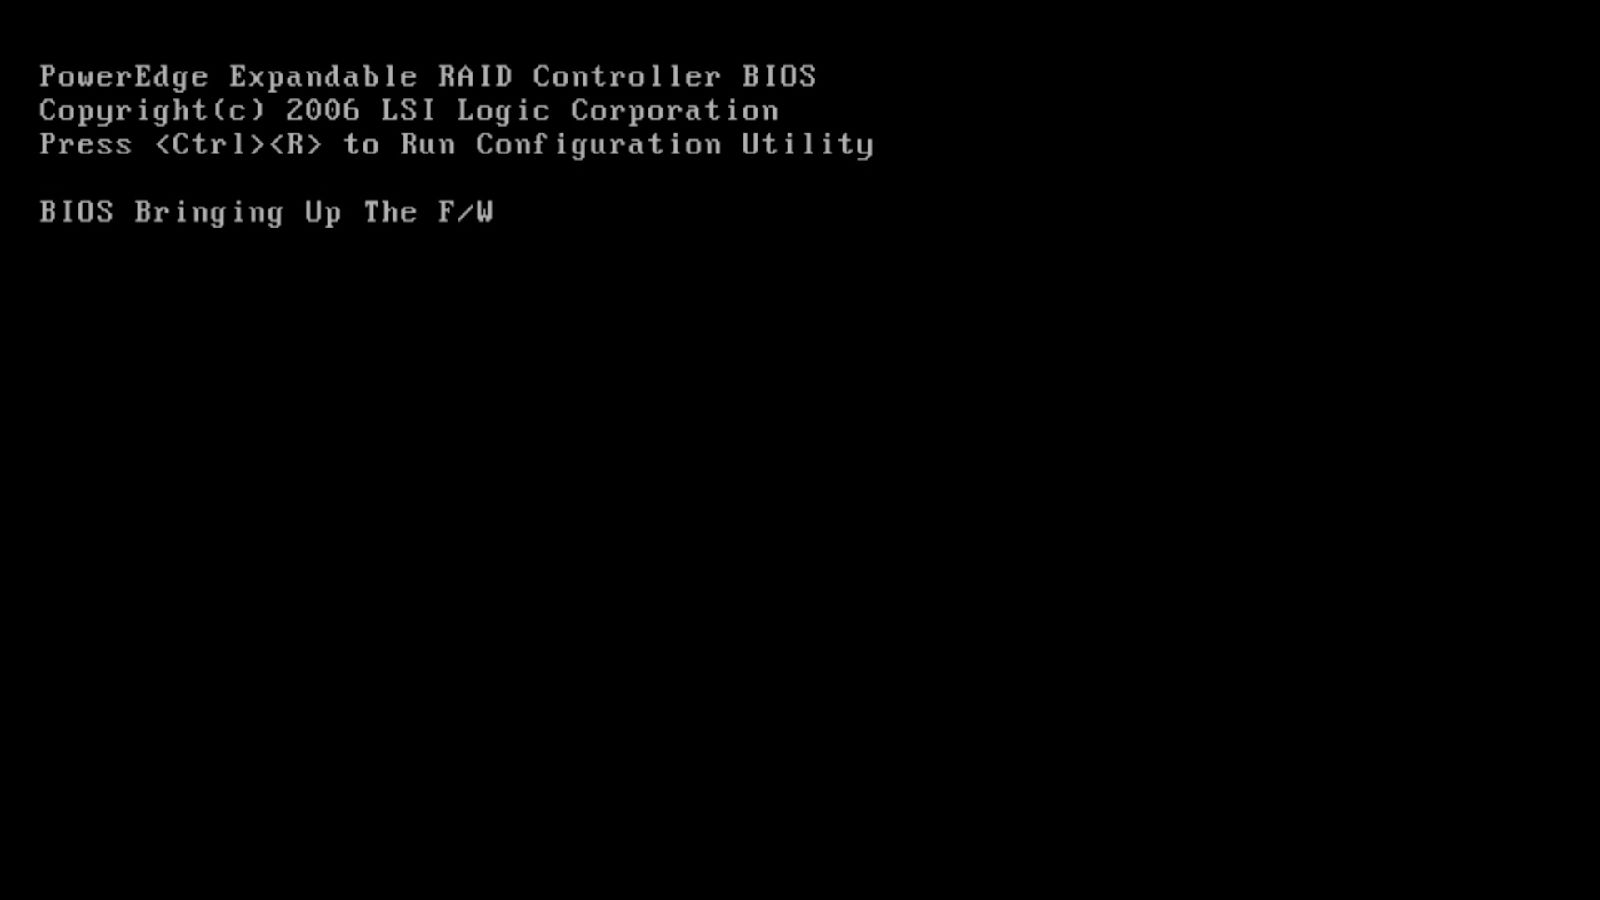
After the POST is complete, the controller BIOS will be initialized. Use the shortcut Ctrl + R to enter the configuration menu.
Note: On our latest Systems, you can find the entry Device Configuration in the boot menu (F12 while Dell Logo is shown). This leads you directly into the controller setup.
As seen at the bottom of the screen, you have to use the keyboard for navigation in the setup. In the VD Mgmt screen, you see an overview of all RAID volumes present.
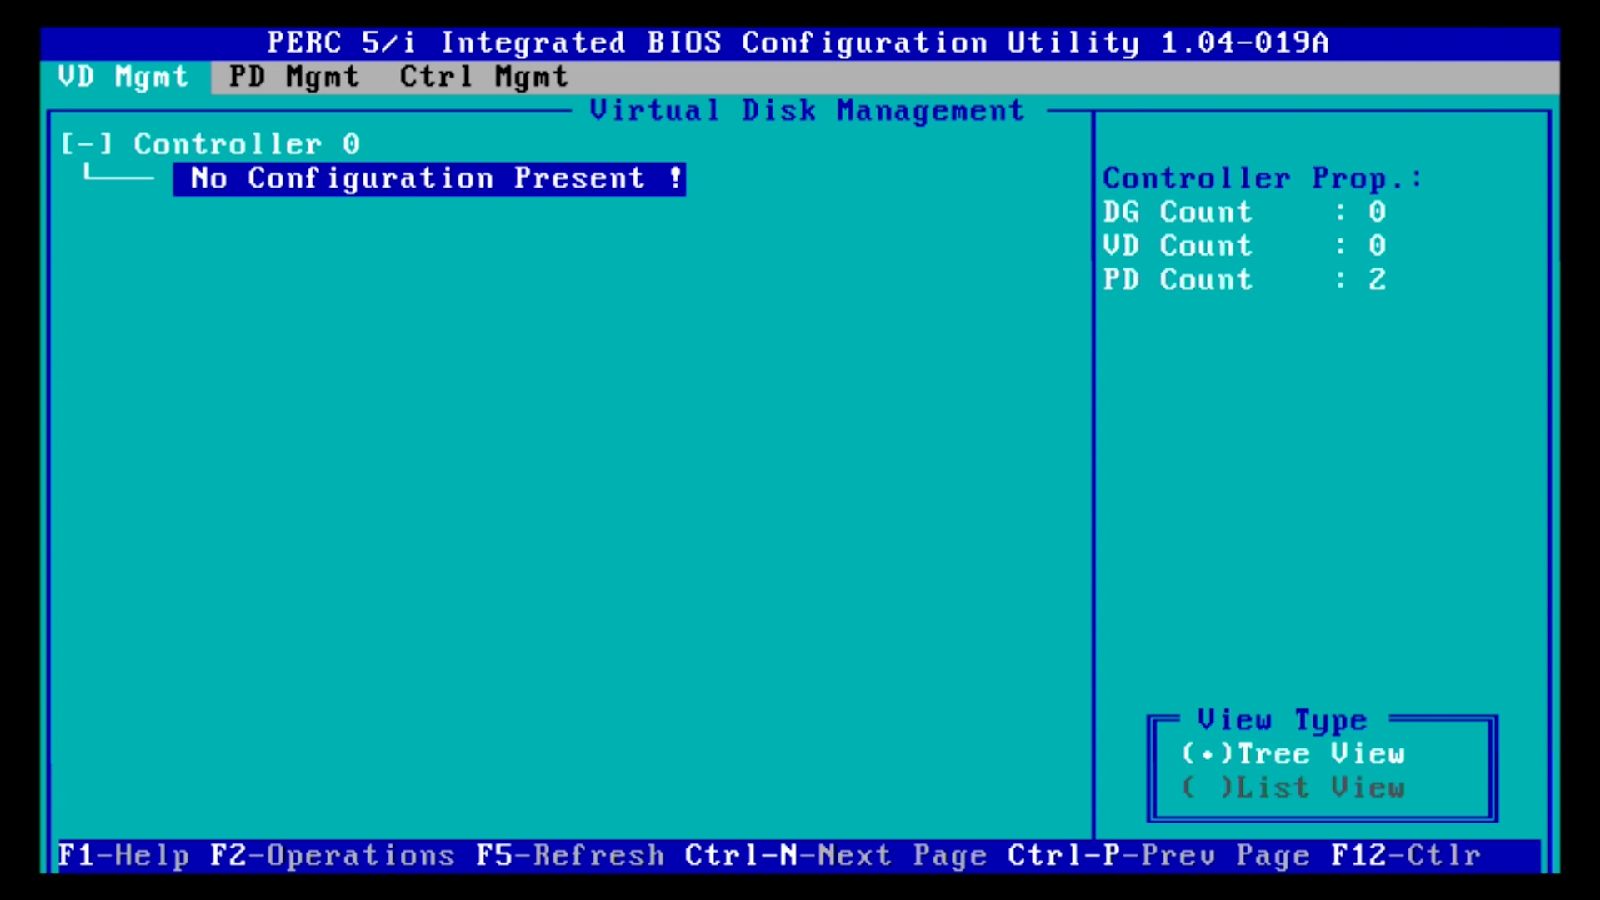
Press F2 to open the operations menu and select Create a new VD. At the following screen, you can configure the new RAID Volume. Choose the RAID-Level, select the Hard Drives you want to use and set the RAID Capacity. Then also set a name for the RAID Volume.
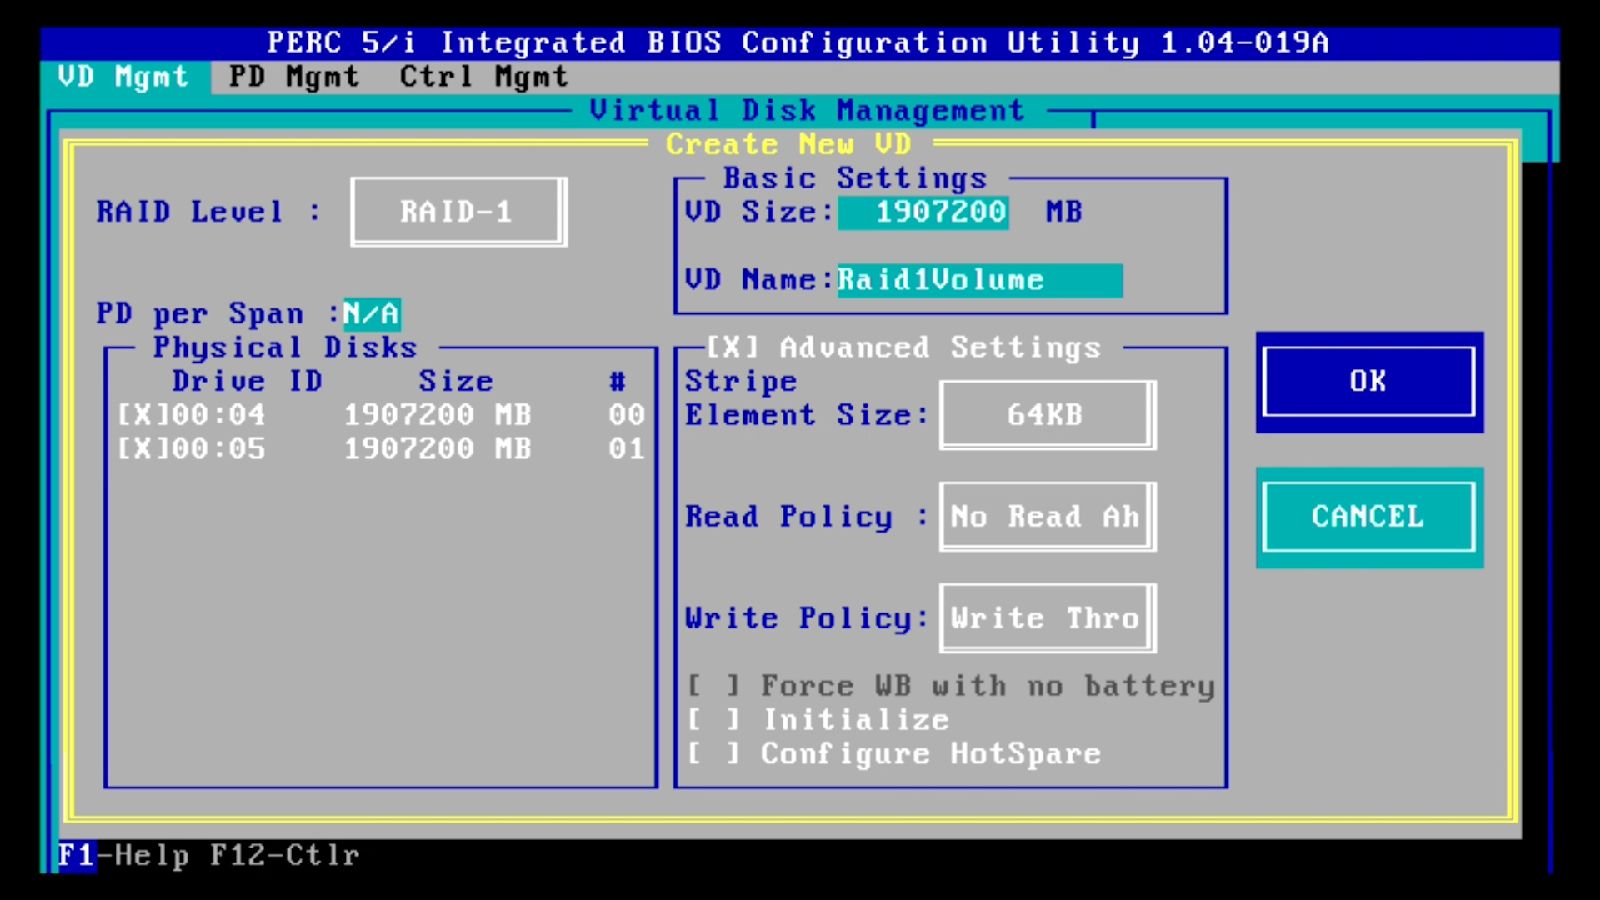
In the PERC you can also set some Advanced Settings like stripe size:
Read Policy
- No Read Ahead: The data used is not puffered.
- Read Ahead: Puffering of frequently used data for faster accessibility.
- Adaptive Read Ahead: The controller automatically switches between Read Ahead active or inactive.
Write Policy.
- Write Through: The write process is marked as complete when all data is written on the hard drive.
- Write Back: The write process is marked as complete when the data is written to the controller's cache (a battery connected to the PERC is needed).
Further Options
- Force WB with no battery: Is forcing Write Back without a battery connected
Caution: If the system is shut off while data is written in the cache and not on the hard drive, this data is lost and the RAID may be destroyed.
- Initialize: A new created RAID Volume has to be initialized. This can also be done in the VD Management menu.
- Configure HotSpare: Here you can select a hot spare drive to use if one drive of your RAID volume fails. (Not available for RAID 0)
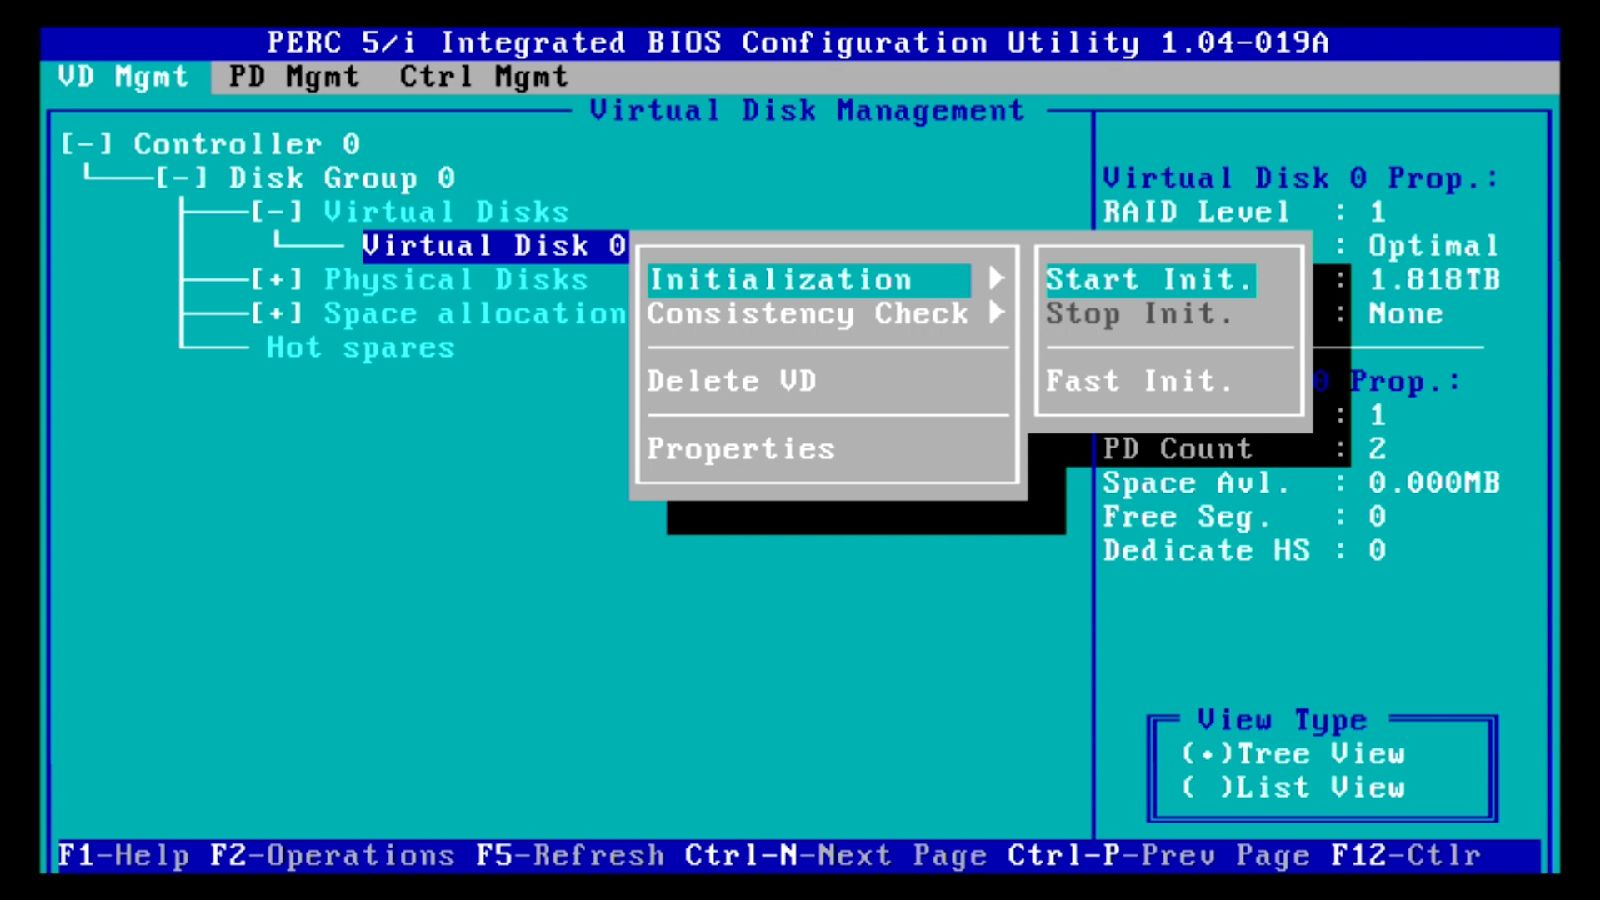
After the RAID is created, you can initialize the volume in the VD Management.
Note: Keep in mind that a new created RAID Volume has to be initialized before it is usable.
Troubleshooting RAID Problems
While using RAID Technology errors can occur, these are often wrong configurations, defective disks, or controllers. We show you how to solve the most common problems regarding RAID.
RAID degraded error
A RAID is degraded if one or more drives of this RAID fail. If this happens on a RAID 0, the volume and all Data will be lost if the Hard Drives are the source of the issue. If the Controller is the cause of the problem, then the RAID should not be available and a simple reseat or replace of the controller will solve the issue.
Intel Rapid Storage
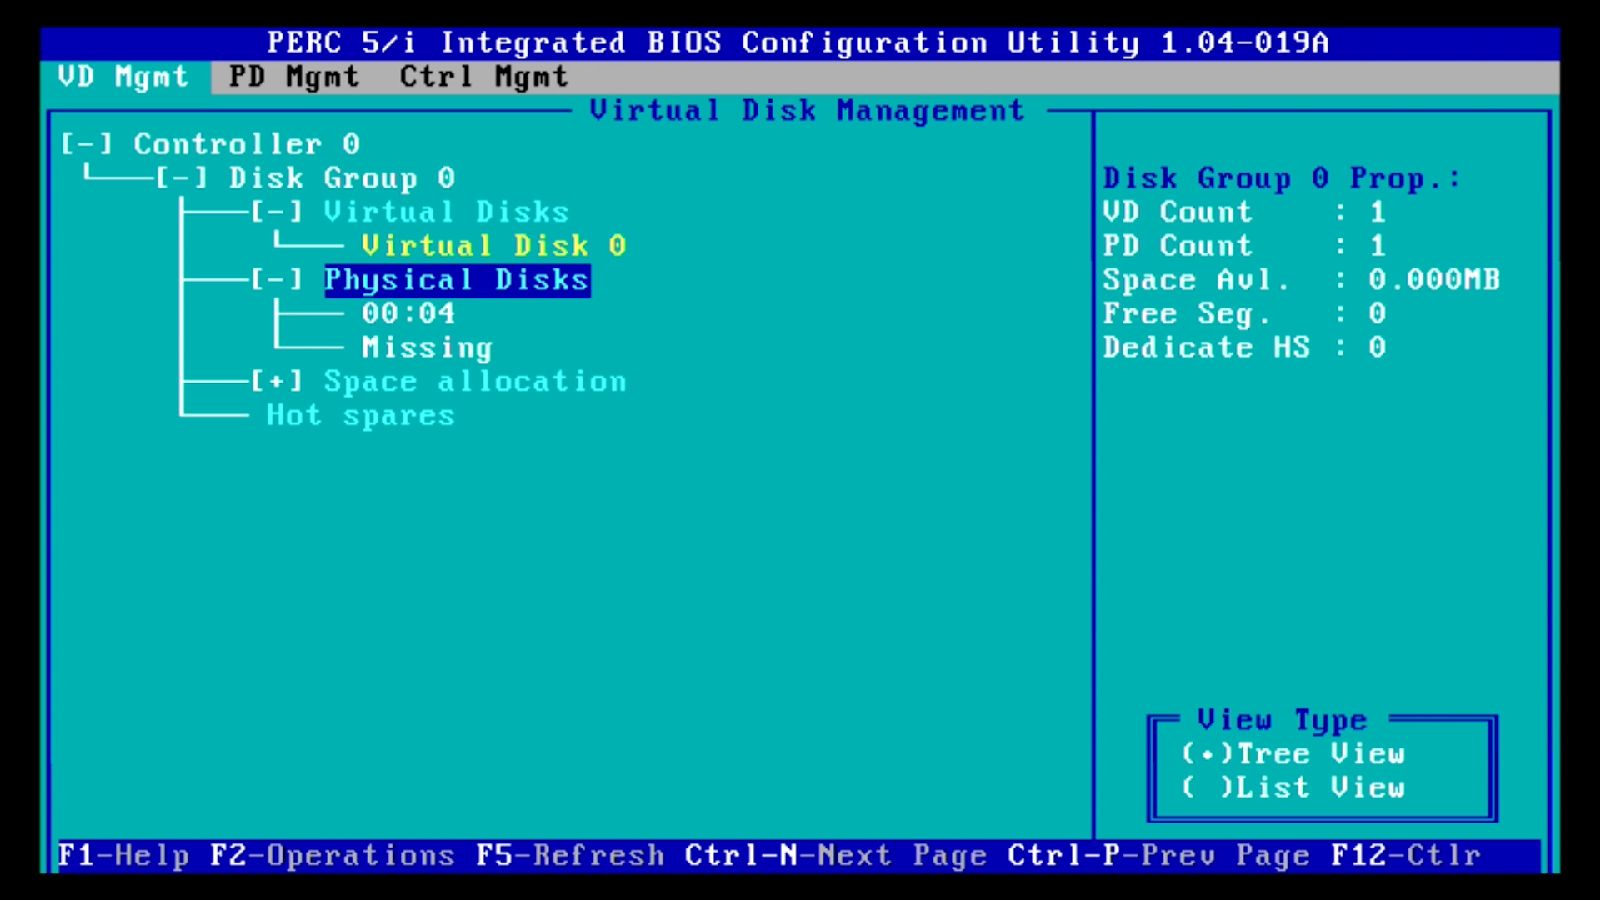
PERC
LSI MegaRAID
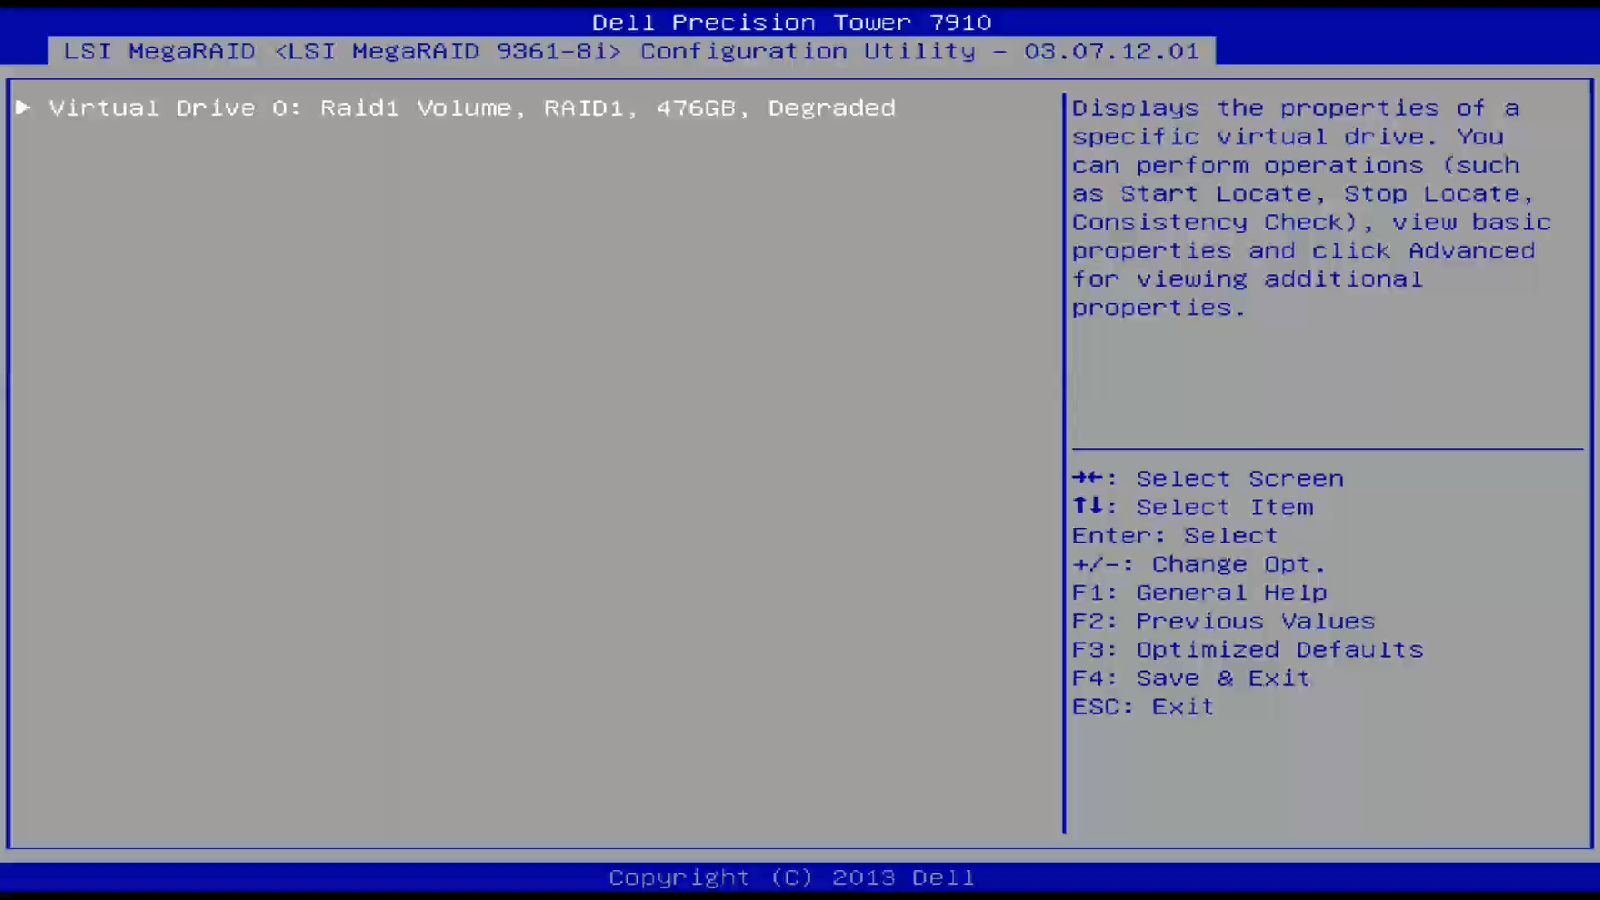
How to rebuild a RAID.
When the defective hard disk is replaced, you can start to repair your raid. To do so, open the Configuration Menu of your RAID-Controller.
Note: With a RAID 0, a rebuild is not possible because all data is lost when a hard disk fails.
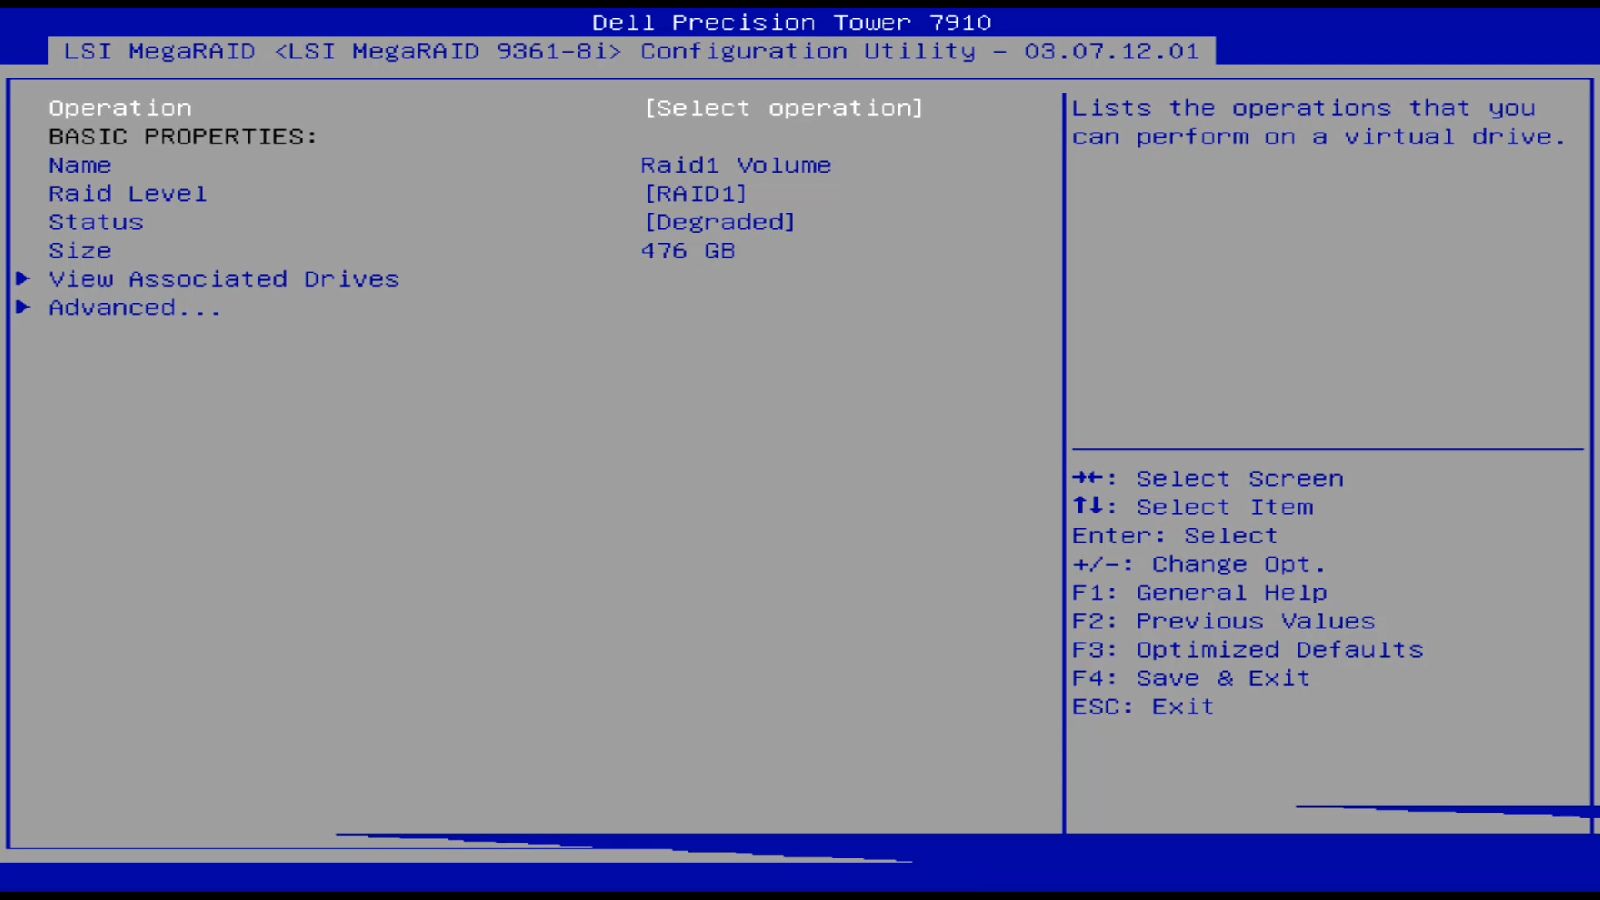
LSI MegaRAID
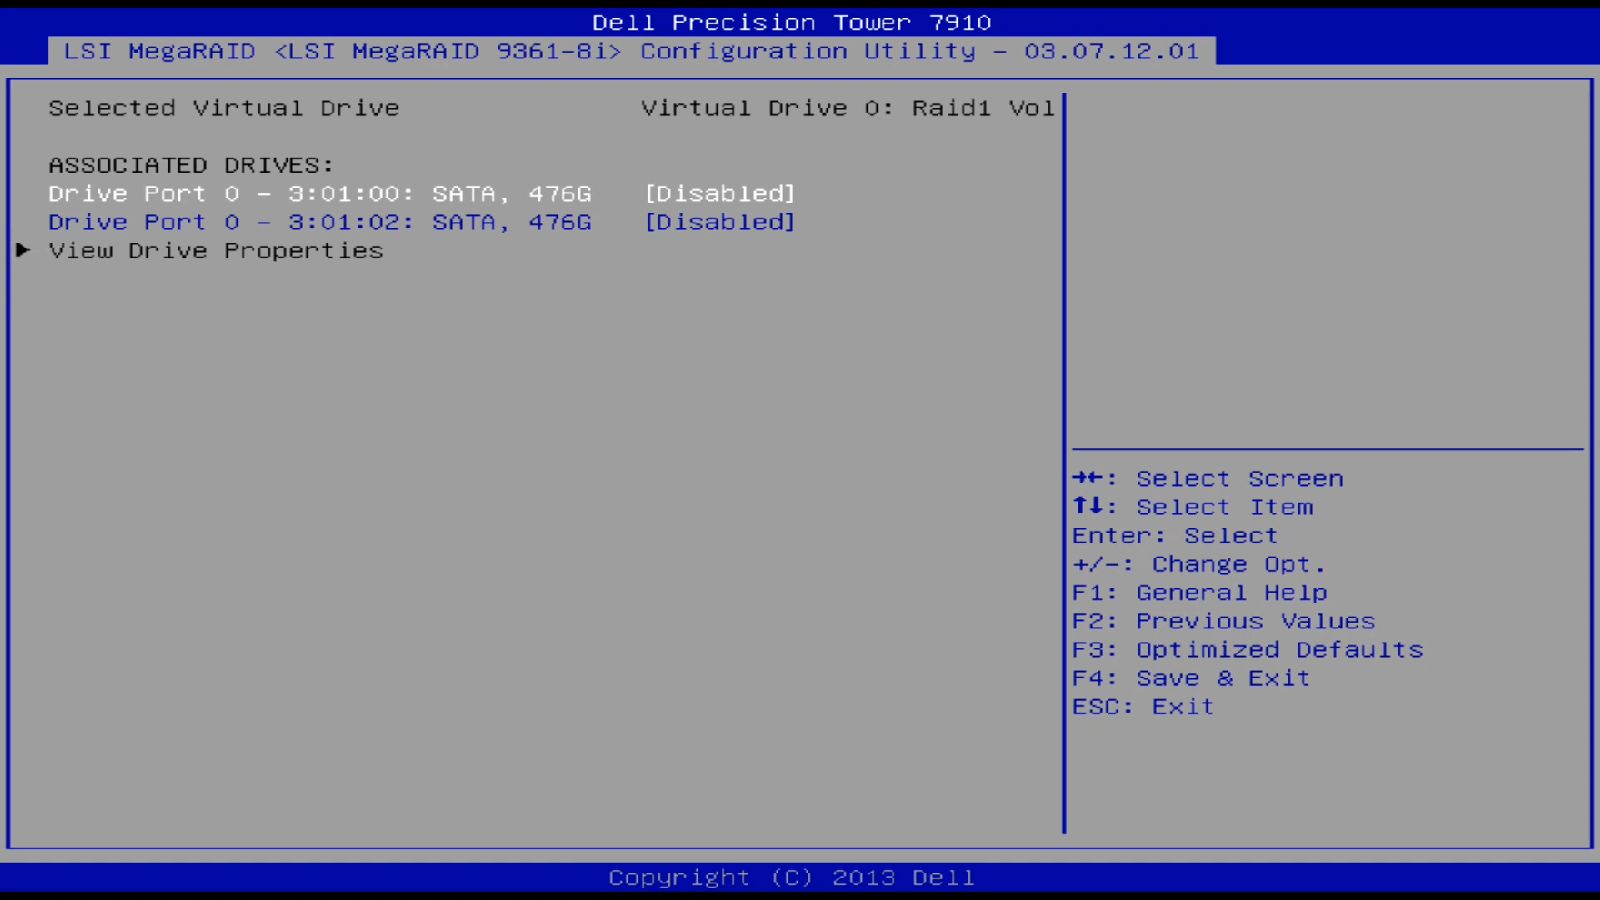
In the detailed view, you can go to View Associated Drives and select the new hard drive for the rebuild.
Set the specific hard drive as enabled.
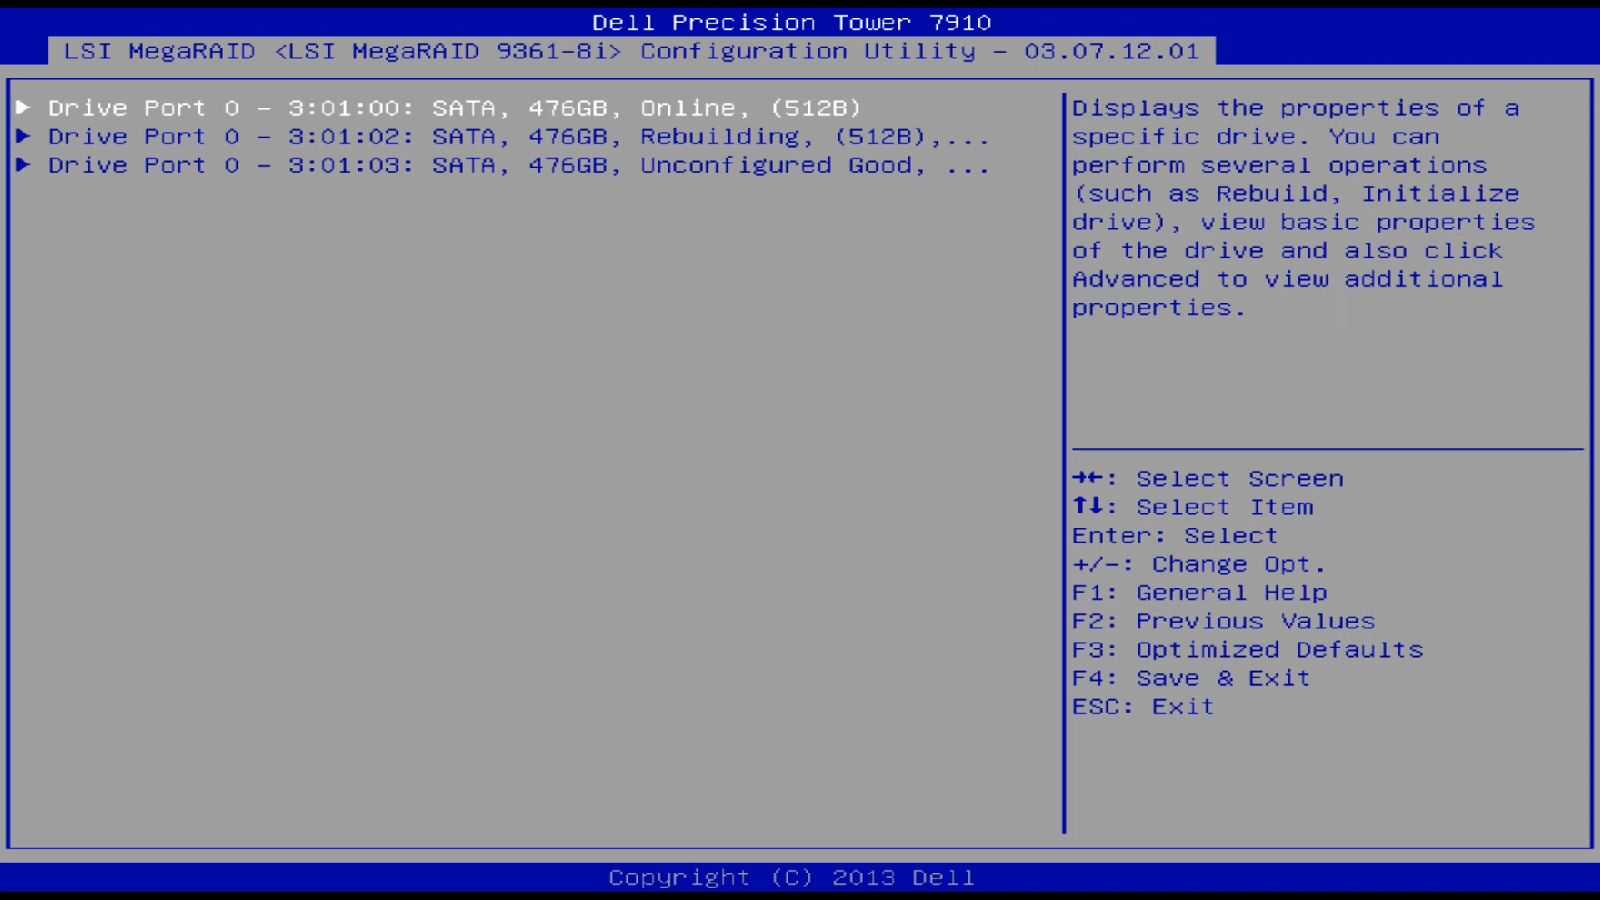
You can see in the Drive Management that the status of the hard drive is set to Rebuilding.
Intel Rapid Storage
For the Intel Rapid Storage Technology, it is enough to open up the Controller Setup. There you are prompted with a message that a new hard disk is available to start the rebuild of the degraded RAID.
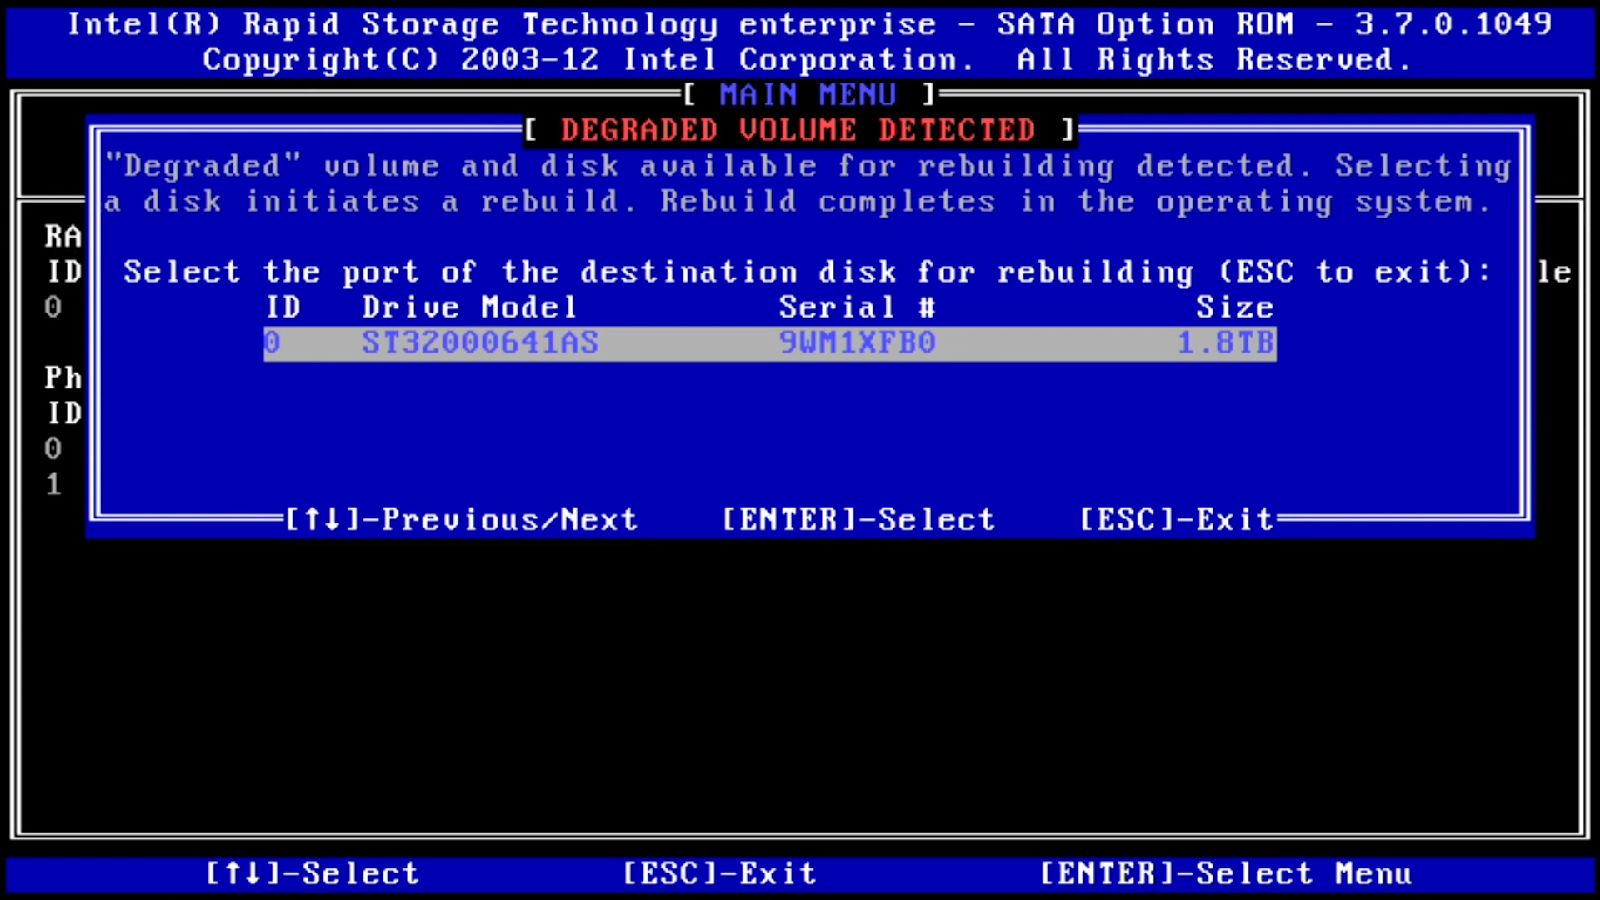
The rebuild starts when your operating system is loaded.
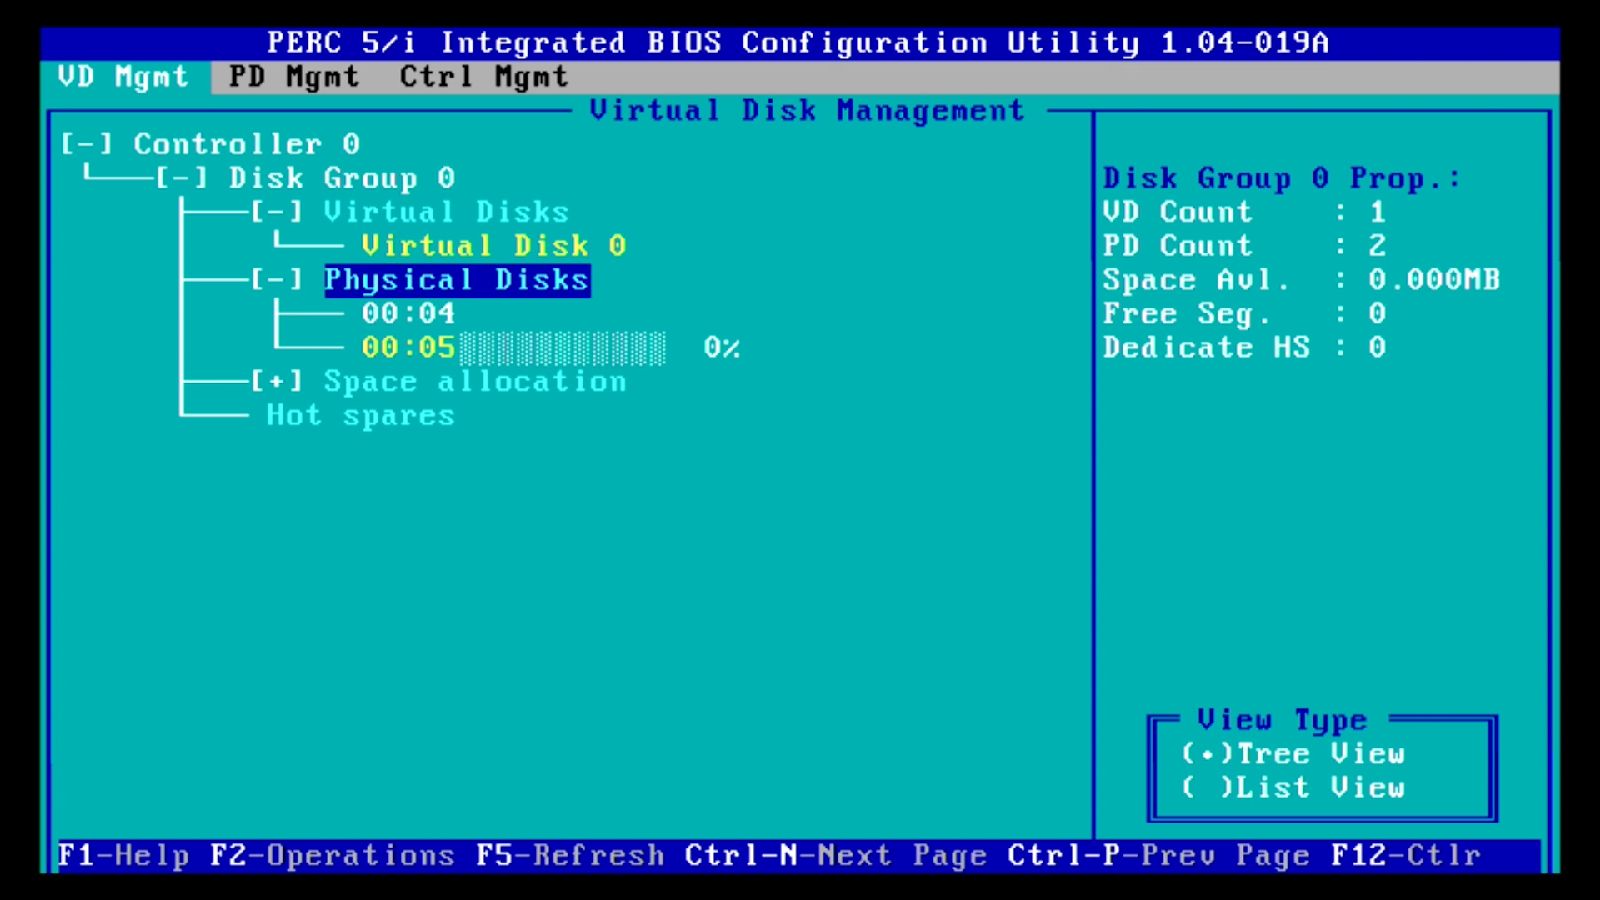
PERC
For the PERC, you have to select the hard drive and open the operations menu with F2 and select Make Global HS.
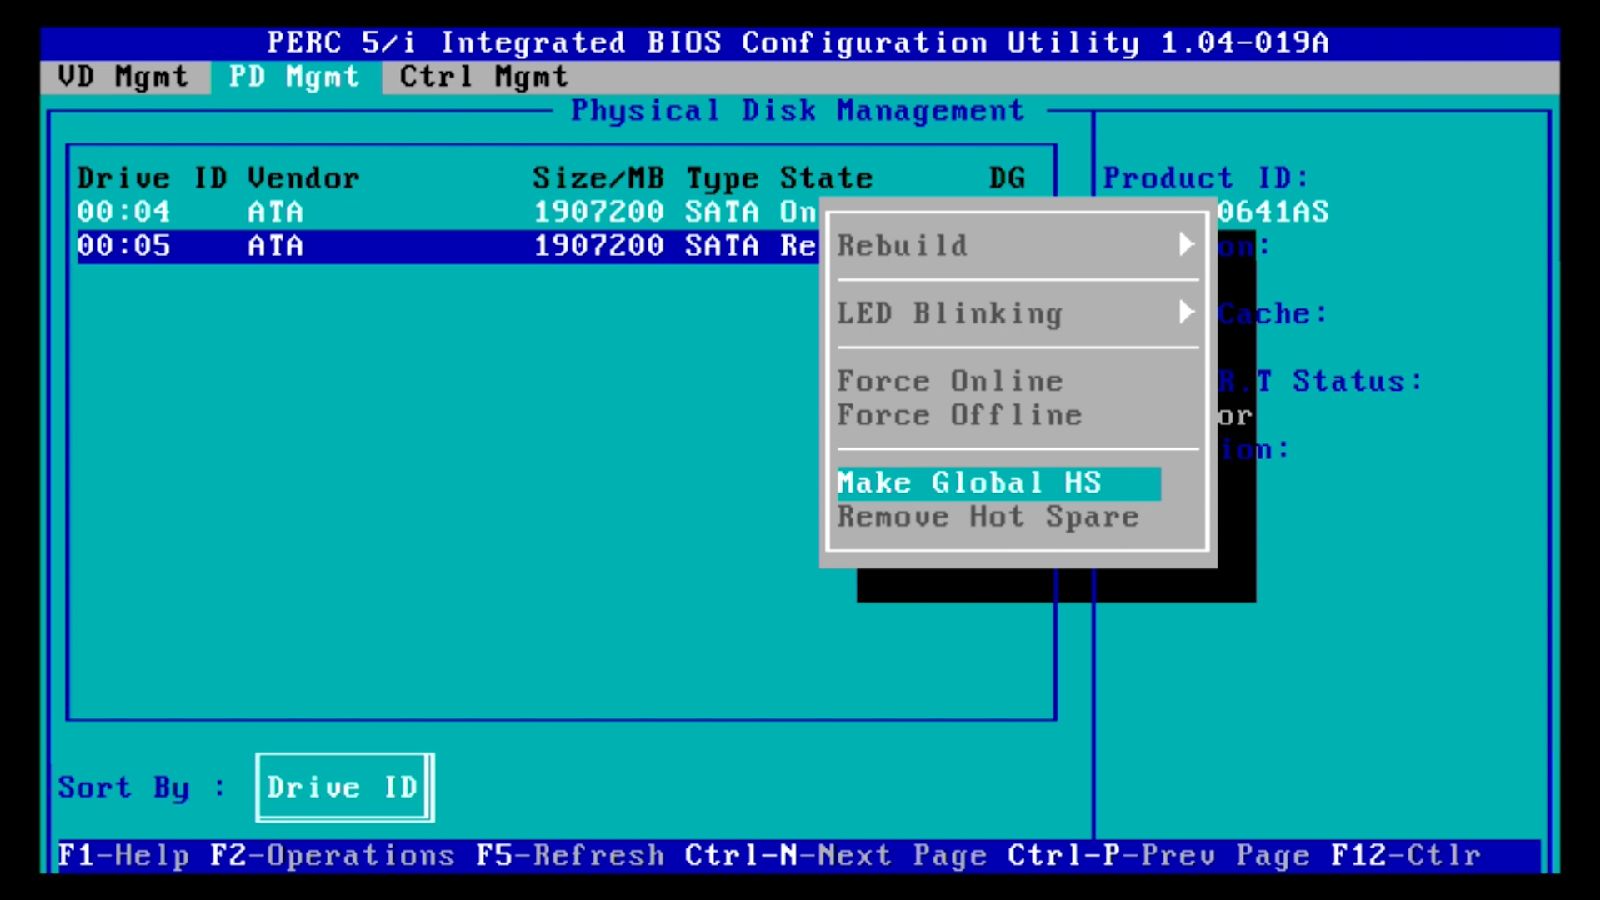
After that, the rebuild will start automatically.
What to do if a Foreign configuration is present.
Replacement hard drives can be configured in a RAID before and still have the configuration information stored in the drives cache. The RAID Controller will notice this configuration and needs advice what to do with this configuration.
Note: This only applies to LSI MegaRAID and PERC. The Intel controller will always use the configuration which is saved in the controller itself.
LSI MegaRAID
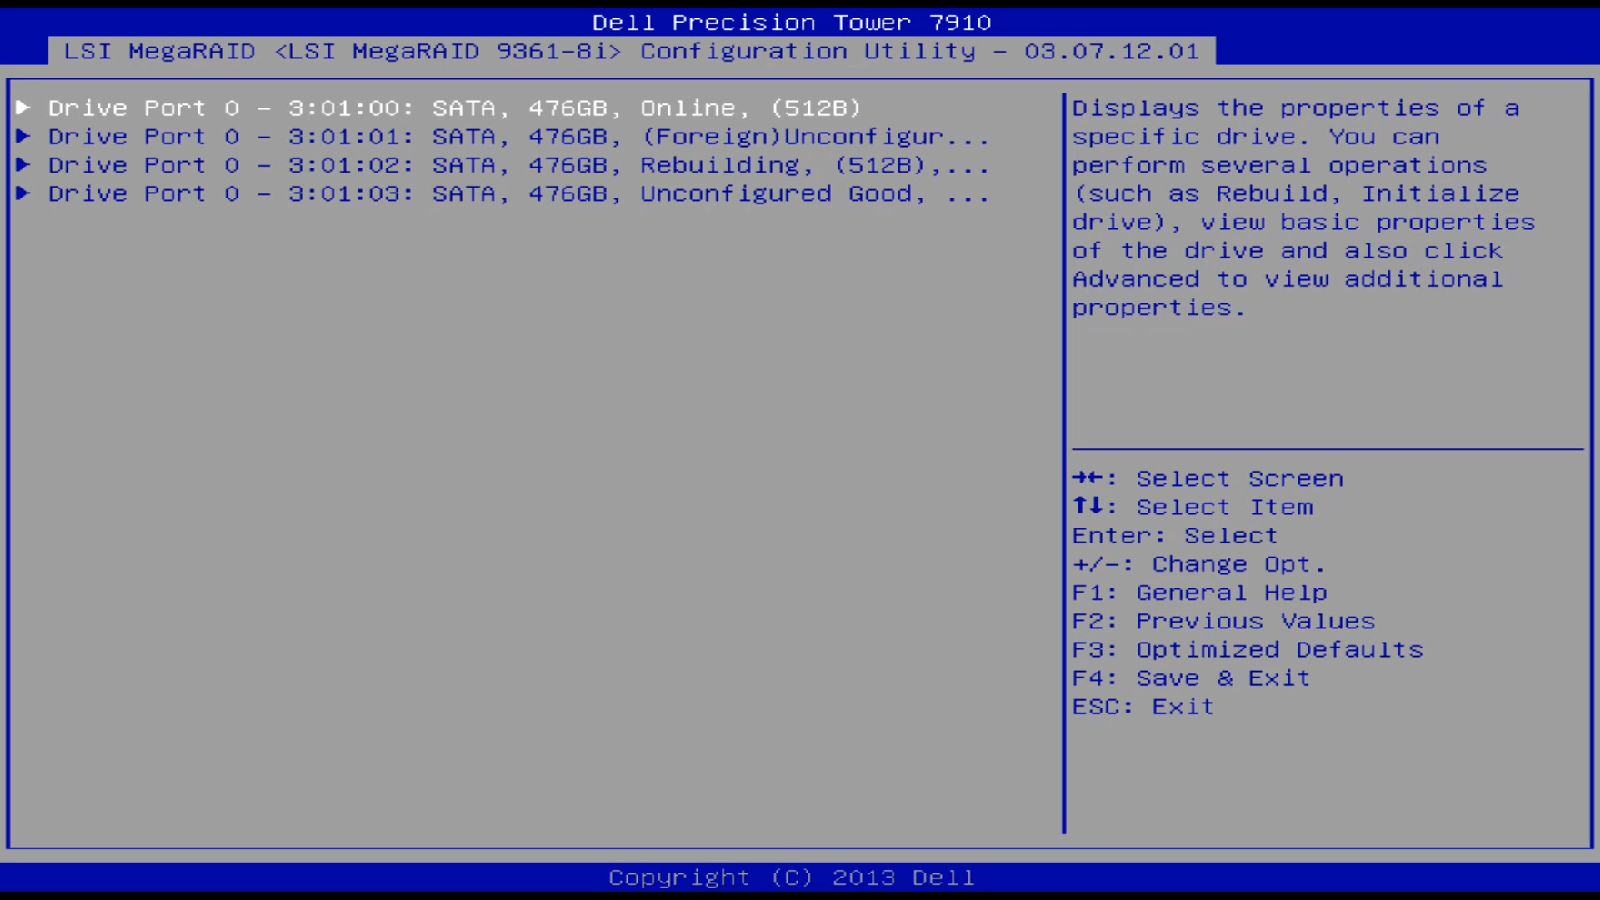
In Drives Management you can see if a hard drive already got a RAID configuration from another controller.
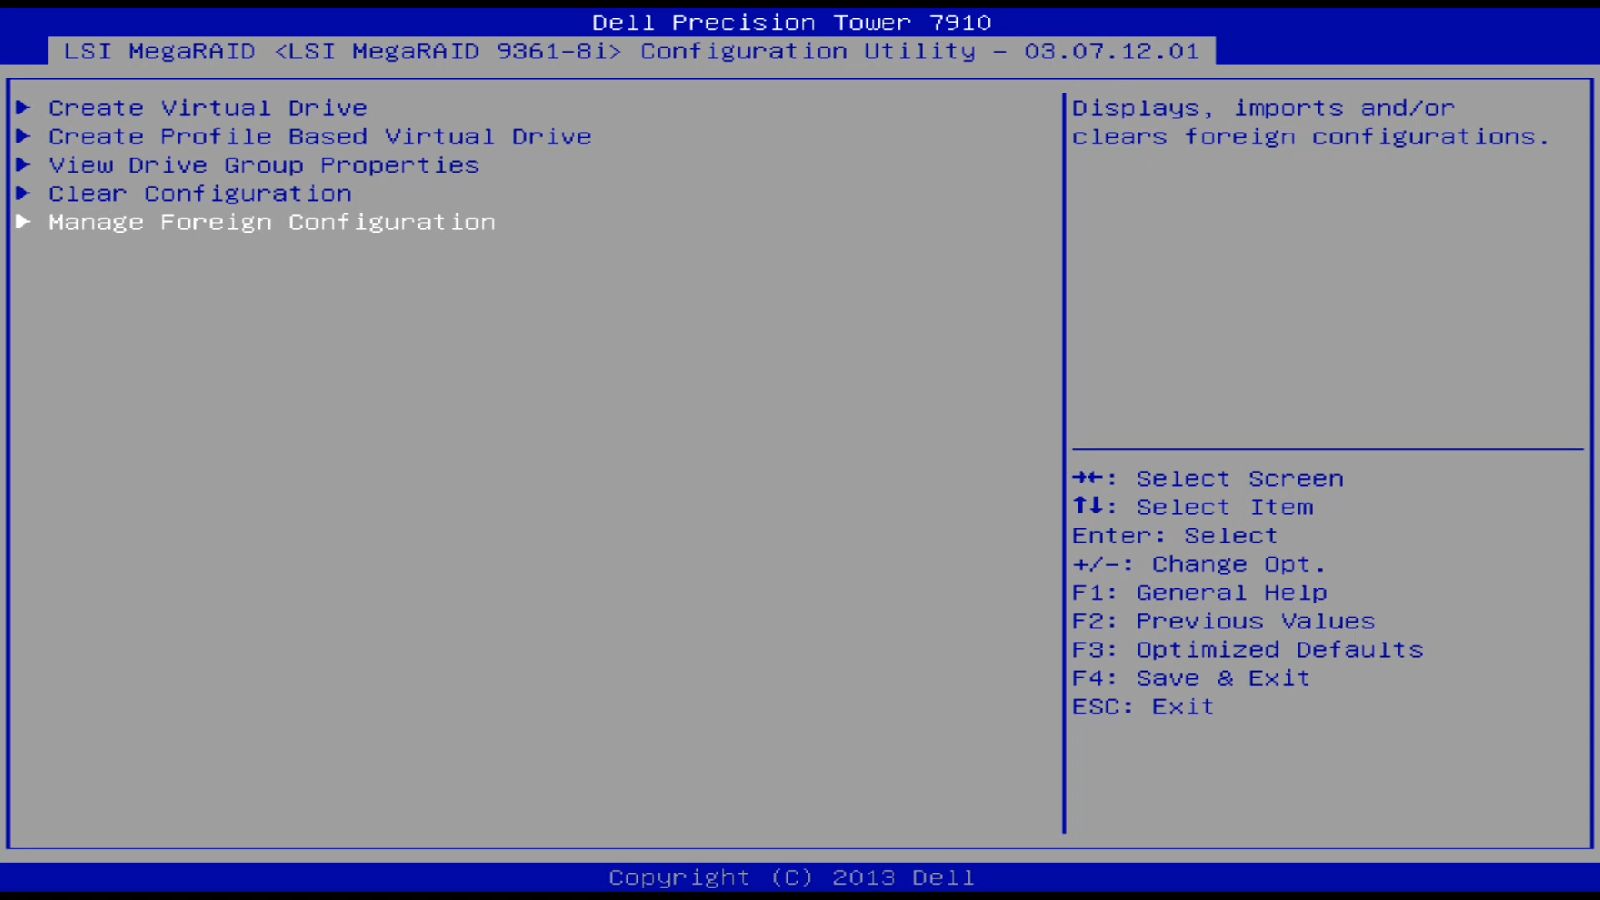
In the Configuration Management menu, you find a new option listed as Manage Foreign Configuration.
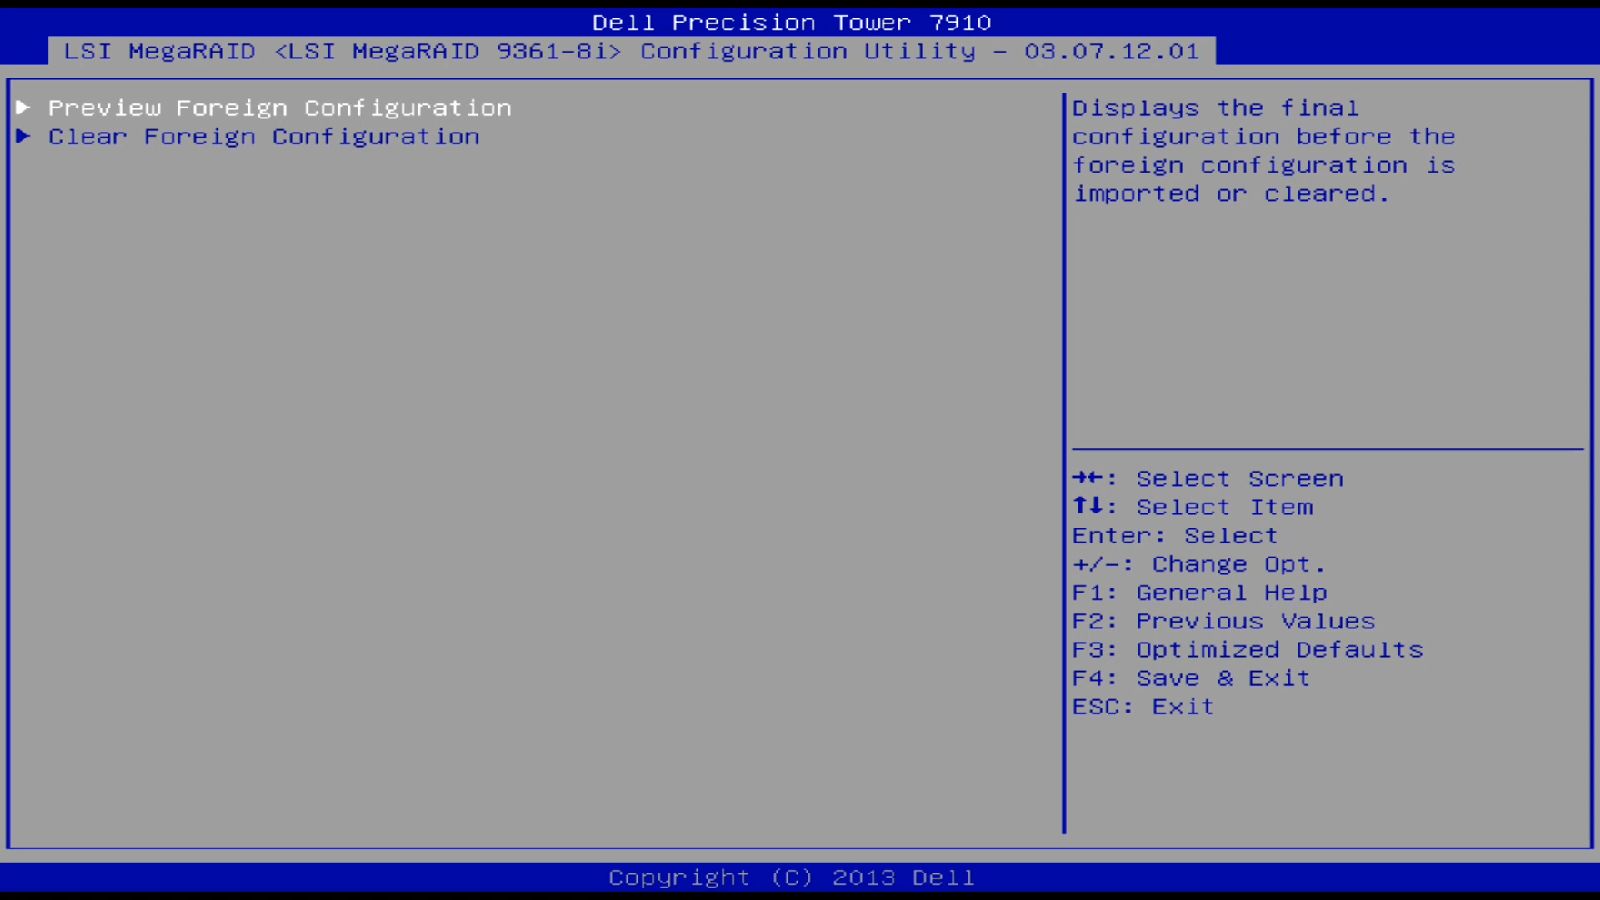
Use the Preview Foreign Configuration to check the details of the foreign configurations.
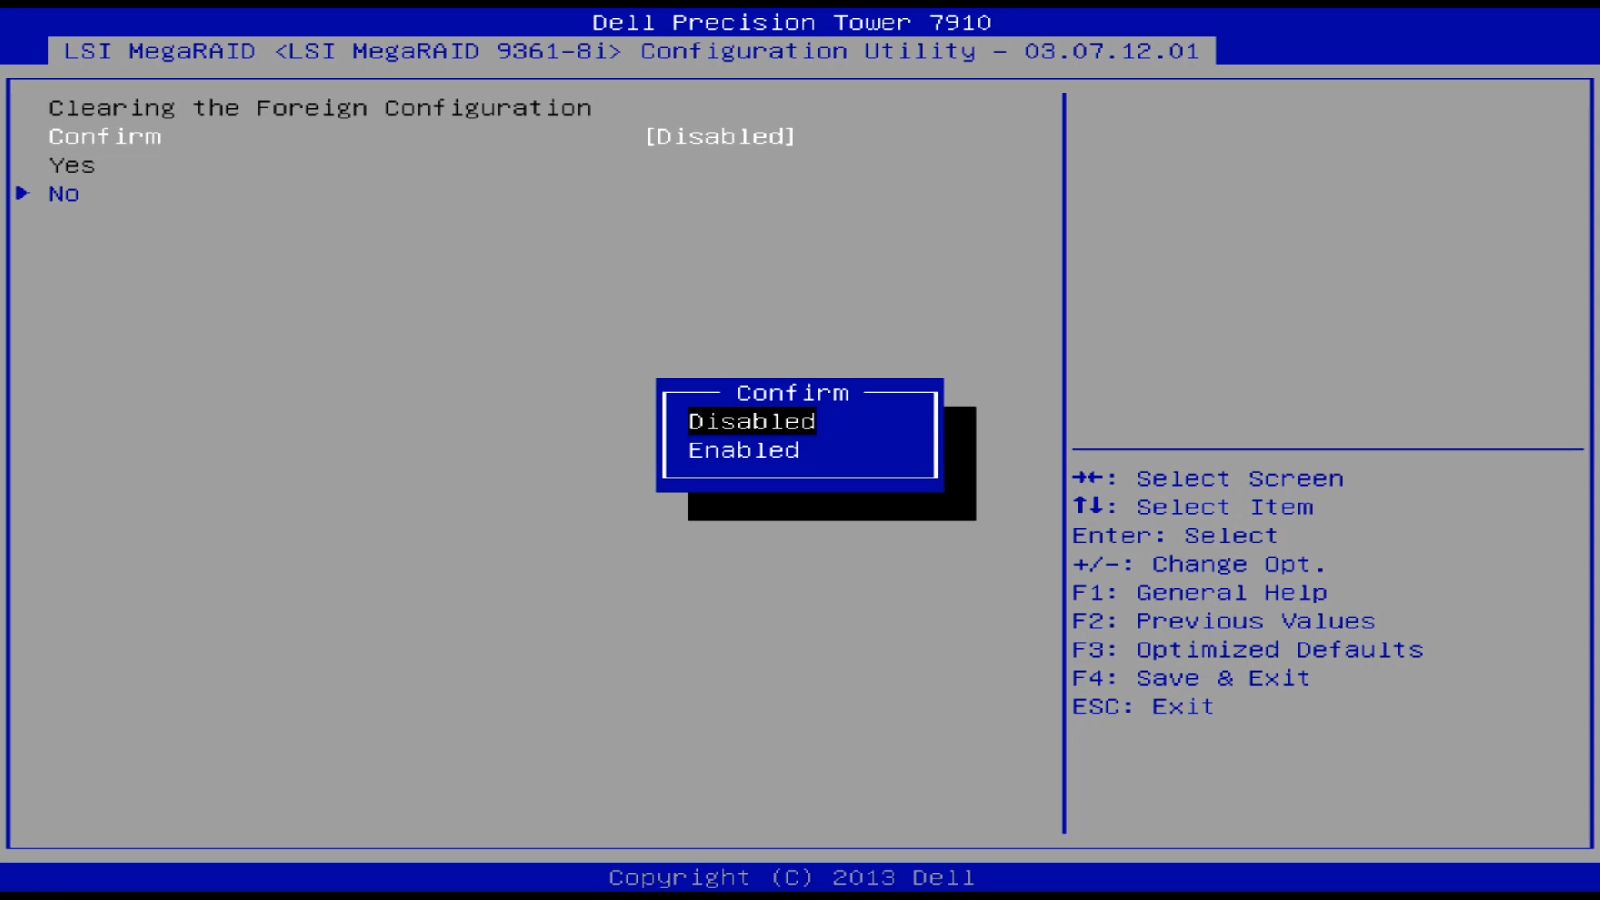
In this detailed view, you can import (Import Foreign Configuration) or delete (Clear Foreign Configuration) the unknown configuration from the hard drive.
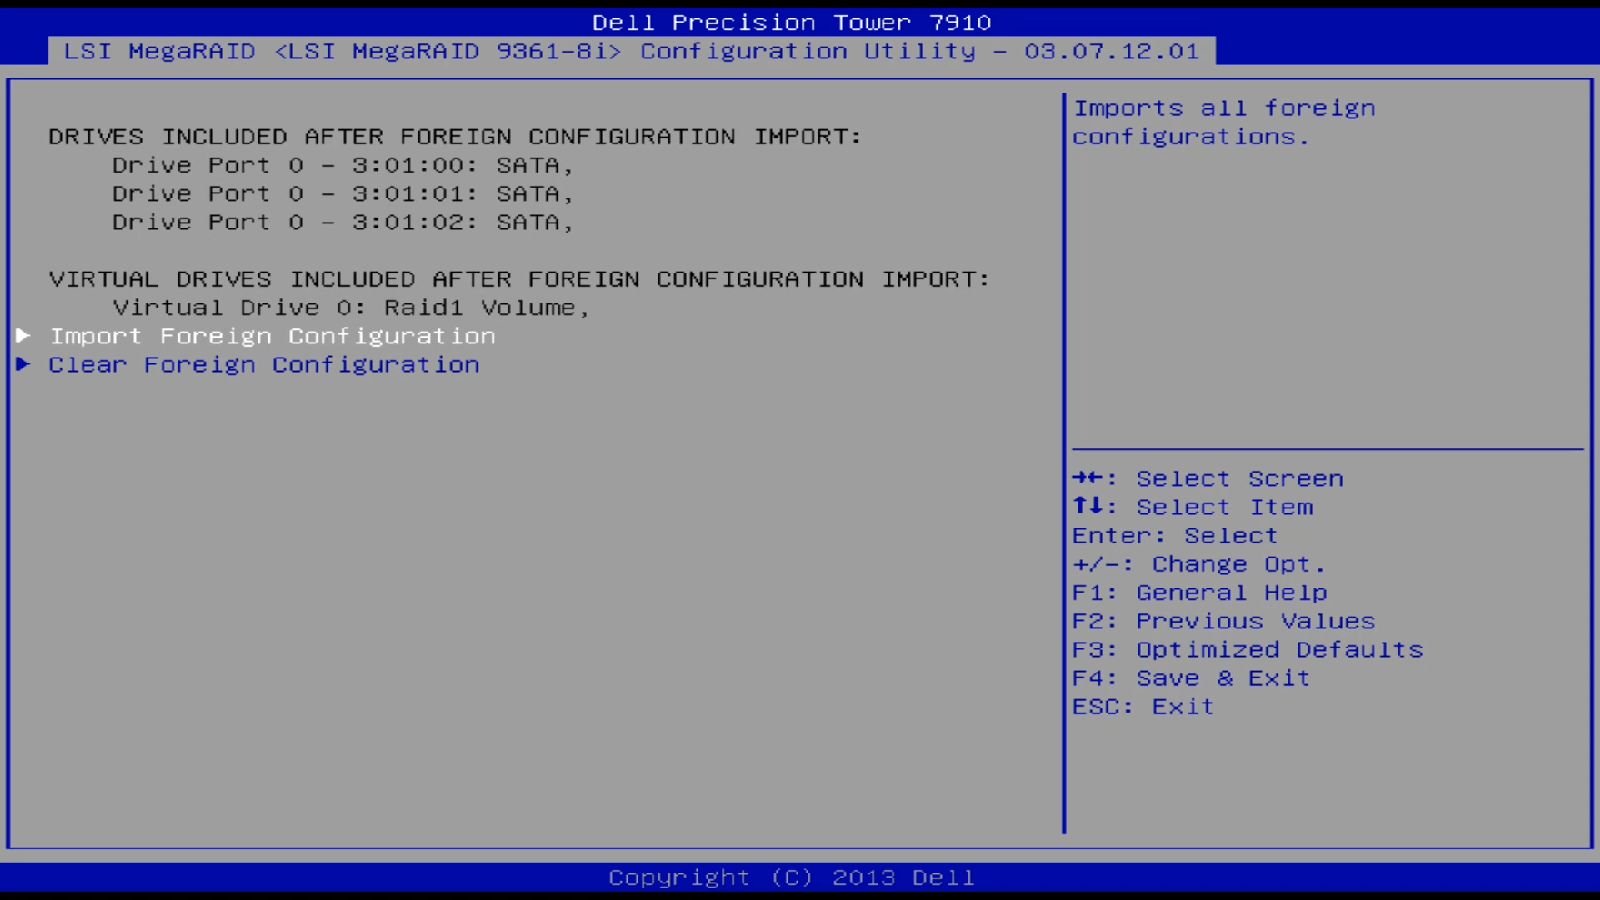
Note: This imports the configuration from the drive and delete the configuration of the controller! Use this only if you want to use a RAID configuration from a different system or to replace the controller. Clear: This deletes the configuration of the specific hard drive. After that you can use the drive for creating a new raid or rebuilding an existing one.
If you want to clear the configuration you have to confirm this separately.
PERC
In the controller menu is shown that there is a foreign configuration present.

You can Clear or Import the configuration in the Foreign View menu.
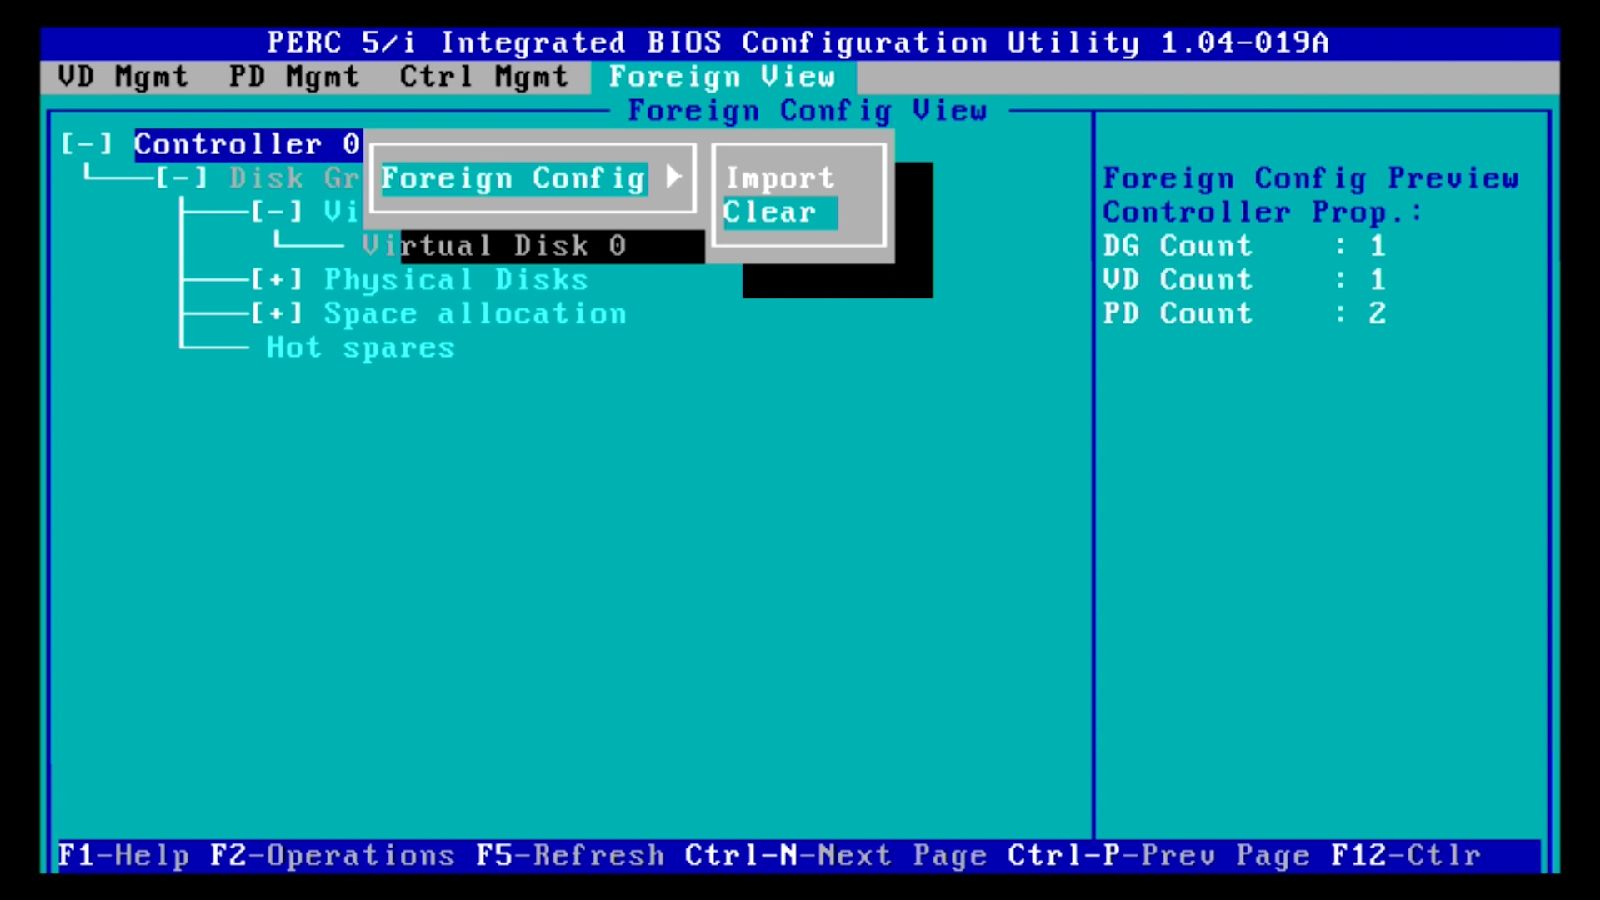
Note: This imports the configuration from the drive and delete the configuration of the controller! Use this only if you want to use a RAID configuration from a different system or to replace the controller. Clear: This deletes the configuration of the specific hard drive. After that you can use the drive for creating a new raid or rebuilding an existing one.
Affected Products
Fixed Workstations, Mobile WorkstationsProducts
Desktops & All-in-Ones, LaptopsArticle Properties
Article Number: 000148741
Article Type: How To
Last Modified: 03 May 2026
Version: 9
Find answers to your questions from other Dell users
Support Services
Check if your device is covered by Support Services.