How to Install Microsoft Office 365
Summary: Guide to installing Microsoft Office for Mac, Windows, iOS, and Android. Get started with Office 365 on your device today.
This article applies to
This article does not apply to
This article is not tied to any specific product.
Not all product versions are identified in this article.
Instructions
Affected Products:
- Office 365
Affected Operating Systems:
- Windows
- macOS
- Windows Mobile
- Android
- iOS
For detailed steps on how to install Office 365 for Windows, macOS, Windows Mobile, Android, or iOS use the installation instructions below.
Warning: Before installing Office, ensure that your computer meets the system requirements
 . For example, Office cannot be installed on computers running Windows Vista or Windows XP.
- Log in to your Microsoft account at www.office.com/signin
Note: If Microsoft Office is not seen, your plan probably does not include Office applications. If you know that your plan includes Office, then you may not have an assigned license. In this case, ask your Office 365 administrator to assign a license to you.
- On the Office page that is, go to the version of Office you want to install. For example, your admin may have given you the option to install either Office 2016 or Office 2013.
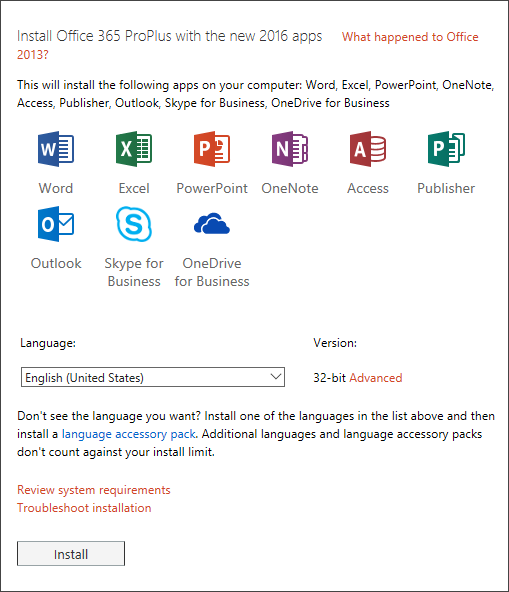
Figure 1: (English Only) Install Office 365 ProPlus with the new 2016 apps
Note: The process that installs Office 2016 also uninstalls all Office 2013 products.
- Select a language, and accept the default to install 32-bit, or select Advanced and choose 64-bit from the drop-down list. If you are not sure which version to install, reference Choose the 64-bit or 32-bit version below:
Note: If the 32-bit version of Office (or a single, stand-alone Office app such as Visio) is installed on your personal computer, you must uninstall that version. Once that version is uninstalled, proceed with installing the 64-bit version.

Figure 2: (English Only) Select a Language
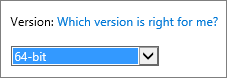
Figure 3: (English Only) Select Version
Note: If you have 32-bit Windows, you can only install 32-bit Office. If you have 64-bit Windows, you can install 32-bit Office or 64-bit Office.
Reasons to choose the 64-bit version
Computers running 64-bit versions of Windows generally have more resources such as processing power and memory than their 32-bit predecessors. Also, 64-bit applications can access more memory than 32-bit applications (up to 18.4 million Petabytes). If your scenarios include large files and or large datasets and your computer is running a 64-bit version of Windows, 64-bit is the right choice when:
- You are working with large datasets, like enterprise-scale Excel workbooks with complex calculations, many pivot tables, data connections to external databases, Power Pivot, 3D Map, Power View, or Get and Transform. The 64-bit version of Office may perform better in these cases.
- You are working with large pictures, videos, or animations in Microsoft PowerPoint. The 64-bit version of Office may be better suited to handle these complex slide decks.
- You are working with large pictures, videos, or animations in Microsoft PowerPoint. The 64-bit version of Office may be better suited to handle these complex slide decks.
- Your organization requires Hardware Data Execution Prevention (DEP) for Office applications. DEP is hardware and software technologies that some organizations use to enhance security. For 64-bit installs, DEP is always enforced, while on 32-bit installs you must configure DEP by using Group Policy settings.
- You are developing in-house Office solutions like add-ins or document-level customization. Using the 64-bit version of Office lets you deliver a 64-bit version of those solutions and a 32-bit version. In-house Office solution developers should have access to the 64-bit Office 2016 for testing and update these solutions.
Reasons to choose the 32-bit version
IT Professionals and developers should also review the following situations where the 32-bit version of Office is still the best choice for you or your organization.
- You have 32-bit COM Add-ins with no 64-bit alternative. You can continue to run 32-bit COM add-ins in 32-bit Office on 64-bit Windows. You can also try contacting the COM Add-in vendor and requesting a 64-bit version.
- You use 32-bit controls with no 64-bit alternative. You can continue to run 32-bit controls in 32-bit Office like Microsoft Windows Common Controls (Mscomctl.ocx, comctl.ocx), or any existing third-party 32-bit controls.
- Your VBA code uses Declare statements. Most VBA code does not change when using in 64-bit or 32-bit, unless you use Declare statements to call the Windows API using 32-bit datatype like long, for pointers and handles. Usually, adding PtrSafe to the Declare and replacing long with LongPtr makes the Declared statement compatible with both 32 and 64 bits. However, this might not be possible in rare cases where there is no 64-bit API to Declare.
- You have 32-bit MAPI applications for Outlook. With a growing number of 64-bit Outlook customers, rebuilding 32-bit MAPI applications, add-ins, or macros for 64-bit Outlook is the recommended option, but if needed you can continue to run them with 32-bit Outlook only, as well.
- You are activating a 32-bit OLE server or object. You can continue to run your 32-bit OLE Server application with a 32-bit version of Office installed.
- You are using SharePoint Server 2010 and you need the Edit in Datasheet view. You can continue to use the Edit in Datasheet view functionality in SharePoint Server 2010 with 32-bit Office.
- You need 32-bit Microsoft Access .mde, .ade, and .accde database files. While you can recompile 32-bit .mde, .ade, and .accde files to make them 64-bit compatible, you can continue to run 32-bit .mde, .ade, and .accde files in 32-bit Access.
- You require Legacy Equation Editor or Word Add-in libraries (WLL) files in Word. You can continue to use Legacy Word Equation Editor and run WLL files in 32-bit Word.
- You have an old embedded media file in your Microsoft PowerPoint presentation with no available 64-bit codec.
Click Install.
- Go to the install display that appears in your browser:
- Internet Explorer
- Click Run
- Chrome
- Click Setup
- Firefox
- Click Save File
- Edge
- Click Save
- Click Run
- Internet Explorer
- If you see the User Account Control prompt that says, Do you want to allow this app to make changes to your device? Click Yes.
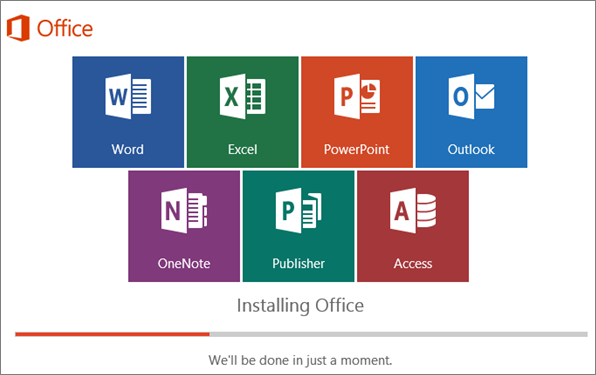
Figure 4: (English Only) Installing Office
- The installation of Office 2016 is finished when you see the message, You are all set! Office is installed now, an animation plays to show you where to find Office applications on your computer. Follow the instructions in the window, for example, Select Start > All Apps to see where your apps are, and click Close.
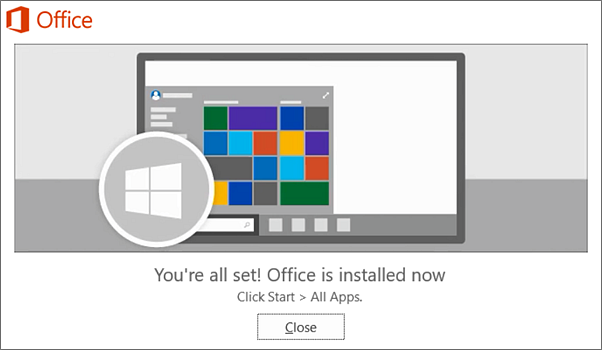
Figure 5: (English Only) Click Close
- Start using Office right away by opening any application such as Word or Excel. Usually, Office is activated once you start an application and after you agreed to the License terms by clicking Accept.
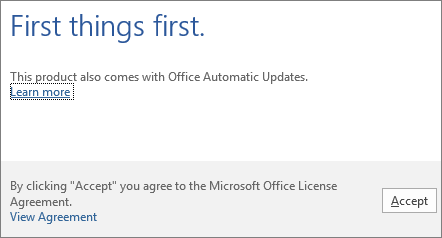
Figure 6: (English Only) Click Accept
- Log in to your Microsoft account at www.office.com/signin
Note: If you do not see Microsoft Office, your plan may not include Office applications. If you know that your plan includes Office, then you may not have an assigned license. In this case, ask your Office 365 administrator to assign a license to you.
- On the Office page, under Install Office 2016 for Mac, select Install to begin downloading the installer package.
Note: The process that installs Office 2016 also uninstalls all Office 2013 products.
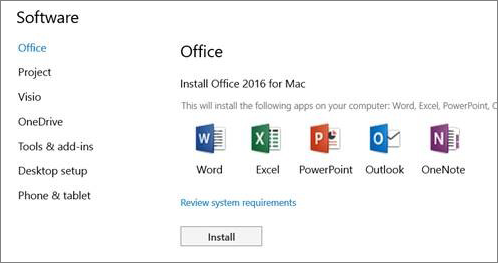
Figure 7: (English Only) Select Install
- Once the download has been completed, open Finder, go to Downloads and double-click Microsoft_Office_2016_Installer.pkg. (The name might vary slightly.)
Note: If you see an error that says the Microsoft_Office_2016_Installer.pkg cannot be opened because it is from an unidentified developer, wait 10 seconds and then try double-clicking the installer package again. If you are stuck at the Verifying Progress bar, close, or cancel the progress bar and try again.
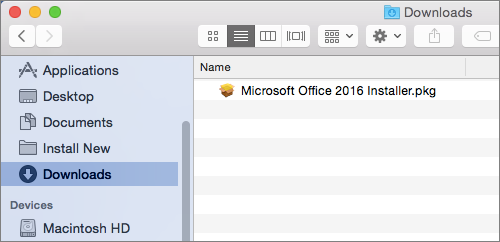
Figure 8: (English Only) Double-click Microsoft_Office_2016_Installer.pkg
- On the first installation screen, select Continue to begin the installation process.
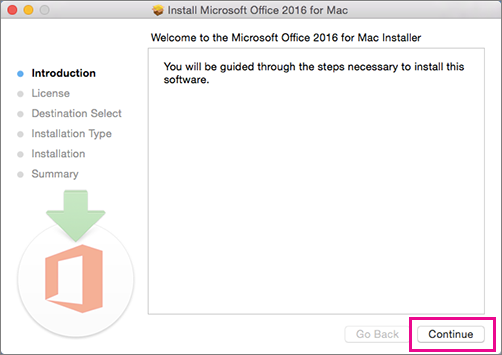
Figure 9: (English Only) Click Continue
- Review the software license agreement, and then click Continue.
- Click Agree to agree to the terms of the software license agreement.
- Choose how you want to install Office and click Continue.
- Review the disk space requirements or change your install location, and then click Install.
Note: If you want to install only specific Office applications and not the entire suite, click the Customize button and clear the programs that you do not want.
- Enter your Mac login password if prompted, then click Install Software. (This is the password that you use to log in to your Mac.)
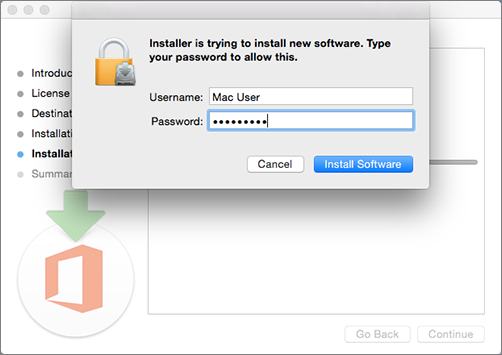
Figure 10: (English Only) Enter login password
- The software begins to install. Click Close when the installation is finished.
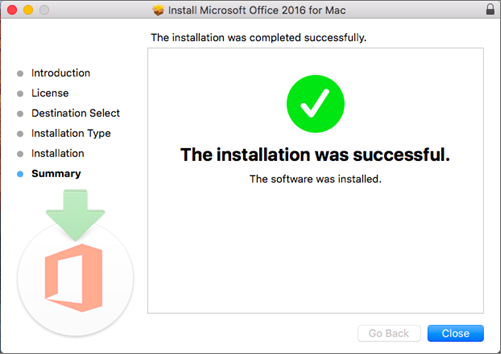
Figure 11: (English Only) Click Close
- Launch an Office for Mac app and start the activation process.
- Click the Launchpad icon in the Dock to display all your apps.

Figure 12: (English Only) Click the Launchpad icon
- Click the Microsoft Word icon in the Launchpad.
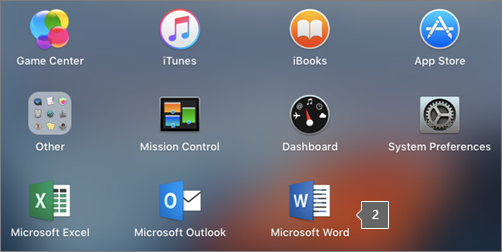
Figure 13: (English Only) Click the Microsoft Word Icon
- The What's New window opens automatically when you launch Word. Click Get Started to activate your license by entering your windows credentials.
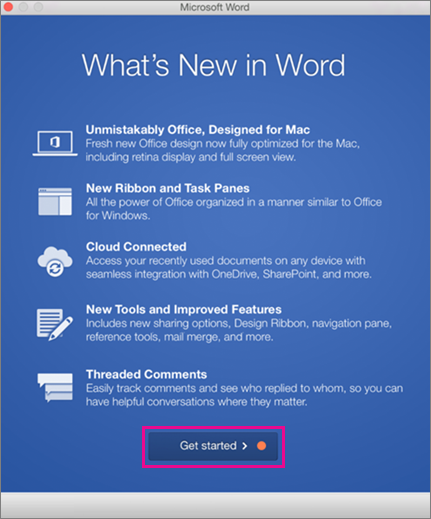
Figure 14: (English Only) Click Get started
The Office Mobile apps (Excel Mobile, Microsoft PowerPoint Mobile, Word Mobile, and OneNote) might be installed on your Windows device already. However, if you upgraded to Windows 10 or purchased a new device, you may want to install them.
Note: These apps are best for reading and quick editing on devices with a screen size of 10.1 inches or smaller. If your tablet has a screen size of more than 10.1 inches, like a Surface Pro, you should access the desktop versions of the Office apps for the full range of editing capabilities.
Install on a Windows 10 Device.
- If you do not have any Office Mobile apps that are installed, go to the Windows Store to download them individually.
- The first time an app from the Windows Store is installed, sign in with your Microsoft account that you use with Office 365.
- When the apps are installed, you see them on your Windows Start Screen. Tap the All Apps button and then tap any of the apps you downloaded.
Note: If you are using Windows 10 Mobile, from the Start screen, swipe to the right to see all your apps. Then, tap the app you want to open.
Set up the Office app with the same Microsoft account you used to set your phone up
If you added a Microsoft account when you set up your Windows phone, this account is automatically associated with your Office apps. When you first sign into the app, you have access to documents you saved to the OneDrive service associated with that Microsoft account. Select the steps that match your device's operating system.
- From the App list, tap Office.
- Tap OneDrive to open any of the documents you saved to the OneDrive service. This is the OneDrive associated with your Microsoft account.
- Tap any Office app to open.
- Swipe through the introduction and then tap Start using Word. A list of any Word documents you save to OneDrive is shown.
Add the work account that is connected to your organization’s Office 365 subscription.
If your organization uses Office 365 and you add your work account to your device, OneDrive for Business is automatically added to the Office app in Windows 8, it appears as OneDrive - (Company Name). If you have not already added a work account, first, set up your email on your Windows phone and then you can access your documents using the steps in the table below.
Access Office documents saved to OneDrive for Business:
- Tap Office > Places.
- Tap OneDrive - (Company Name) to see documents that you saved to that service.
Add a SharePoint team site:
- Tap the New folder icon.
- Type the URL for the SharePoint site that you want to add.
- Tap any Office app to open.
- A list of any documents you save to OneDrive is shown.
If you have a free Microsoft account or an Office 365 subscription, you have access to the app's extra features .
How do I open a document in an Office app?
Tap the service where you want to view your files. For example, to open a Word document, tap Open > OneDrive - (your business name) or Personal and select the wanted document. You see the list of files that you saved to OneDrive or OneDrive for Business. The files that you see are specific to the app you opened them in. For example, if you open the Word app, you only see Word documents or if you open the Excel app, you see Excel spreadsheets.
Tap the service where you want to view your files. For example, to open a Word document, tap Open > OneDrive - or Personal and select the wanted document. You see the list of files that you saved to OneDrive or OneDrive for Business. The files that you see are specific to the app you opened them in. For example, if you open the Word app, you only see Word documents or if you open the Excel app, you see Excel spreadsheets.
From the app, open or create a document and tap Auto-Save > Help and Support.
From the OneNote app, tap Settings > Help.
System Requirements for Android
Office for Android can be installed on Android phones or tablets running:
- Android KitKat 4.4.X (Android M is not yet supported)
- 1 GB RAM or more
- A screen size of 10.1 inches or smaller
- If you do not have any Office for Android apps that are installed, download them individually from the Google Play Store. Available applications include Word, Excel, Microsoft PowerPoint, and OneNote.
Note: If you try to install and receive the error Device is not compatible, your device may not meet the system requirements.
- Tap any Office app to open it. Enter your Office 365 account and tap Next.

Figure 15: (English Only) Enter account and click next
- Enter your password then tap Sign in. If you have other Office apps that are installed on your Android device, your account and OneDrive files are automatically added.

Figure 16: (English Only) Click Sign in
- Tap Start using… to get started with the app.
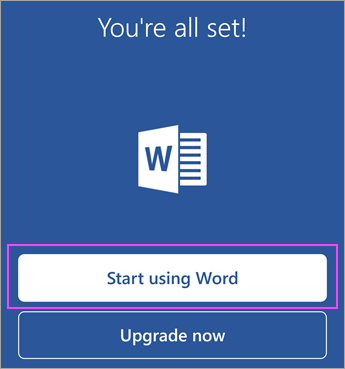
Figure 17: (English Only) Click Start using Word
- To add another account, tap Open > Add a place. If you are using OneNote, tap Settings > Accounts.
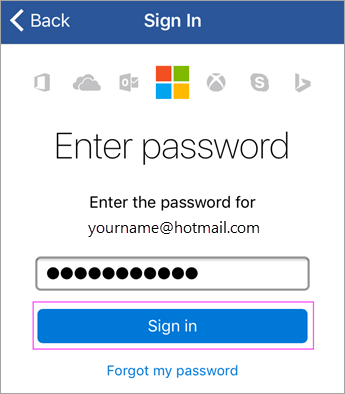
Figure 18: (English Only) Sign in
- Choose the cloud service that you want to add, such as OneDrive for business. Enter your email address and password that you use to sign into that service.
Other Office Apps for Android
There is more to Office than Word, Excel, Microsoft PowerPoint, and OneNote. You can install other Office mobile apps on your Android phone or tablet to optimize the way you spend your time. The following mobile apps are only available to those with a qualifying Office 365 for business accounts.
- Skype for Business
- Office Delve
- SharePoint
- Yammer
To install apps, go to the Google Play Store search and download the wanted app.
If you have a free Microsoft account or an Office 365 subscription, you have access to the app's extra features and other Office 365 apps for iOS.
- If you do not have any Office apps installed, download them each individually from the App Store. Available applications include Word, Excel, Microsoft PowerPoint, and OneNote.
- Tap any Office app to open it. Enter your Office 365 account and tap Next.
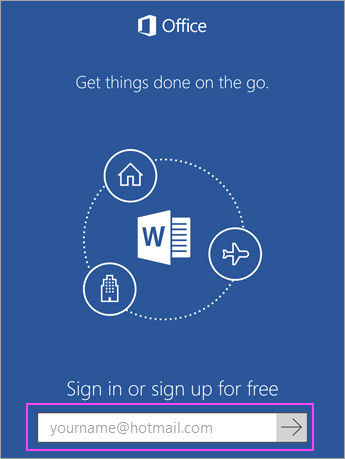
Figure 19: (English Only) Enter Office 365 account
- Enter your password then tap Sign in.
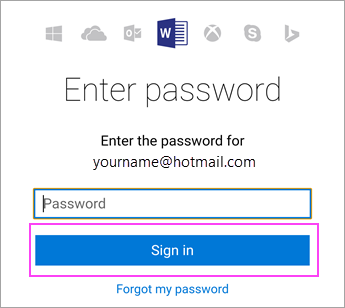
Figure 20: (English Only) Enter Password
- Tap Turn on Notifications to enable alerts or Not Now to opt out. Tap Create and Edit Documents to start working on your documents.
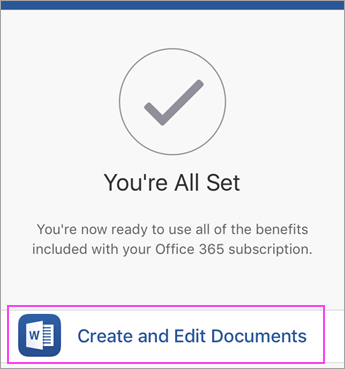
Figure 21: (English Only) Click Create and Edit Documents
- To add another account, tap Account > Add a Service. If you are using OneNote, tap Settings > Accounts.
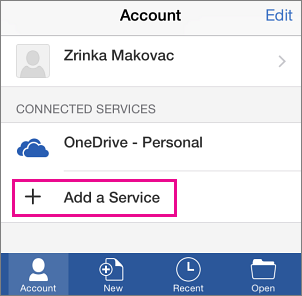
Figure 22: (English Only) Click Add a Service
- Choose the cloud service that you want to add, such as OneDrive for business. Enter your email address and password that you use to sign into that service.
Other Office Apps for iOS
There is more to Office than Word, Excel, Microsoft PowerPoint, and OneNote. You can install other Office mobile apps on your iPhone or iPad to optimize the way you spend your time. The following mobile apps are only available to those with a qualifying Office 365 for Business account.
- Skype for Business
- Office Delve
- SharePoint
- Yammer
To install apps, go to the App Store search and download the wanted app.
Affected Products
Microsoft 365 from DellProducts
Microsoft 365 from DellArticle Properties
Article Number: 000184622
Article Type: How To
Last Modified: 27 Nov 2024
Version: 12
Find answers to your questions from other Dell users
Support Services
Check if your device is covered by Support Services.