NetWorker Virtual Edition: How To Expand "data01" Partition Ext3
Summary: This article describes how to increase the /data01 partition size on a NetWorker Virtual Edition (NVE) server when /data01 is an an Ext3 partition.
This article applies to
This article does not apply to
This article is not tied to any specific product.
Not all product versions are identified in this article.
Instructions
NOTE: This process is not intended or appropriate for standard technical support. If you require assistance, contact your Dell Site Account Manager (SAM) or Dell Site Sales Rep to engage with our Global Professional Services (PS) team.
Sizing and scaling information can be found in the NetWorker Virtual Edition Deployment and NetWorker Performance Optimization Planning guides available through Dell NetWorker Product Page.
To identify the file system type of the NVE, run the following command from an SSH session:
mountThe output lists all the mountpoints but
/data01 shows:
/dev/sdb1 on /data01 type ext3 (rw,noatime,data=ordered)
CAUTION: This article is only applicable for NVE's using Ext3 for the
/data01 partition. High-Performance Scalable File System (XFS) is the default file system for /data01 on all NVE upgraded to or deployed after 19.4.x.
If the
/data01 file system is XFS, see NetWorker Virtual Edition: How to increase /data01 partition size (XFS) instead. NetWorker 19.3 has reached End of Support Life (EOSL) as of June 2023. If the NVE is using an EOSL, increase the /data01 following this article, then upgrade to a supported release NetWorker Virtual Edition: How To Upgrade NetWorker Software and NVE System.
Prerequisites:
NOTE: Depending on the NVE's state, it may not be possible to perform some of these steps. For example, if NetWorker services do not start because
/data01 is at 100% capacity. The steps provided are precautionary to ensure NetWorker data is protected.
- Create a server bootstrap backup:
- From the NetWorker Management Console (NMC) or NetWorker Web User Interface (NWUI), perform a Server Protection backup job.
- Open an admin SSH session on the NVE and collect the bootstrap save set details:
mminfo -B
- If bootstrap email notifications are not configured, copy the
mminfooutput off of the NVE and save it in a file. Email notifications can be configured by following NetWorker: How To Configure Policy Email Notifications
- Stop all running NetWorker server services:
nsr_shutdown
- Disable NetWorker from starting up on the next OS boot:
systemctl disable networker
- From VMware, shut down the NVE Virtual Machine (VM) and Increase the Hard Disk 2 from the VM's settings.
NOTE: The option to increase disk size may be unavailable if snapshots exist.
- Create a VMware snapshot of the NVE, then power it up.
NOTE: This snapshot can be deleted once the disk expansion is complete and the NVE and NetWorker are in an operational state.
Process:
- Once the VM has rebooted, open an SSH session to the NVE VM
- Log in as admin, then switch to the root user by running:
sudo su -
- Stop the NetWorker Management Console (NMC) service:
systemctl stop gstd
- Unmount the
/data01partition:
umount /data01
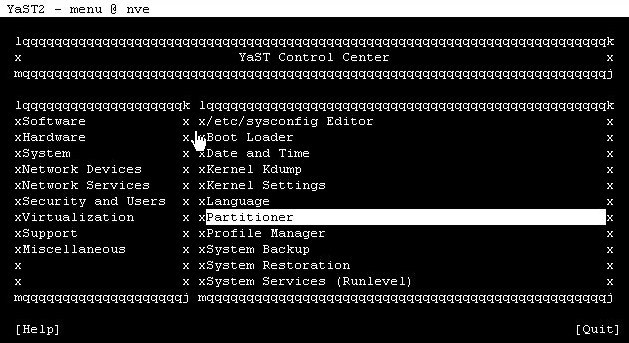
- Use the
YASTutility by enteringyaston the command line. - Use Tab to change a frame or menu, and arrow keys to select within a frame, and Enter to confirm.
Tab to System frame, use arrows to select Partitioner and confirm with Enter.
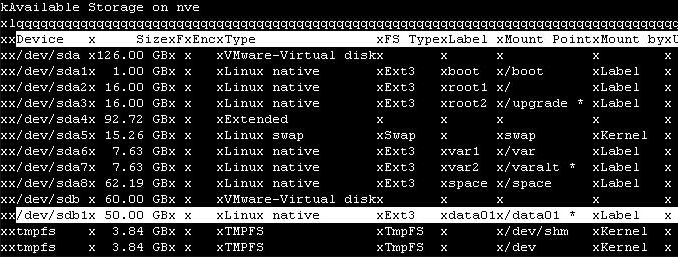
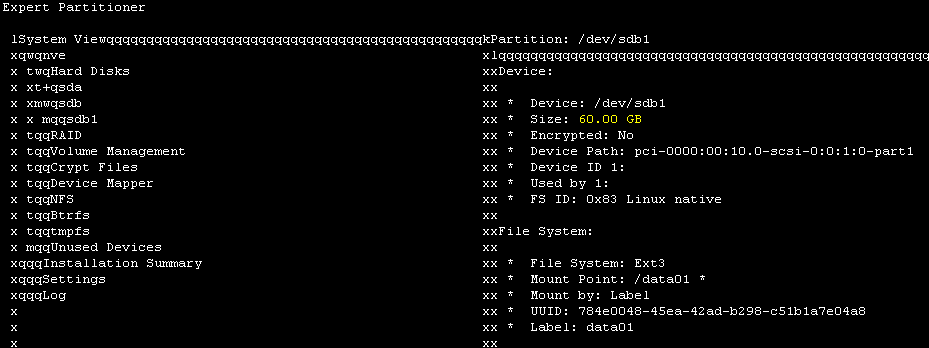
- The partitioner frame reflects
/dev/sdbthe size increase to Hard Disk 2 in VMware;/dev/sdb1is the current size of the/data01partition.
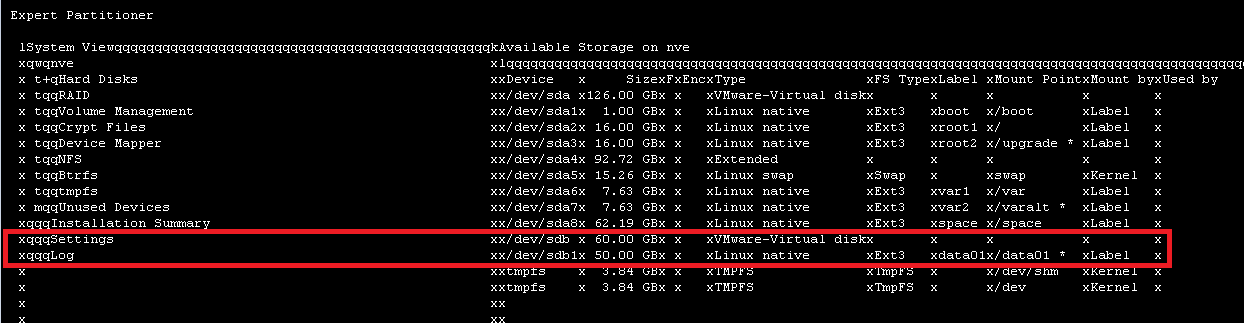
- Change to the Available storage on the host frame and select
/dev/sdb1.
- Confirm that you see a summary of the device. Change to Resize menu option and confirm.
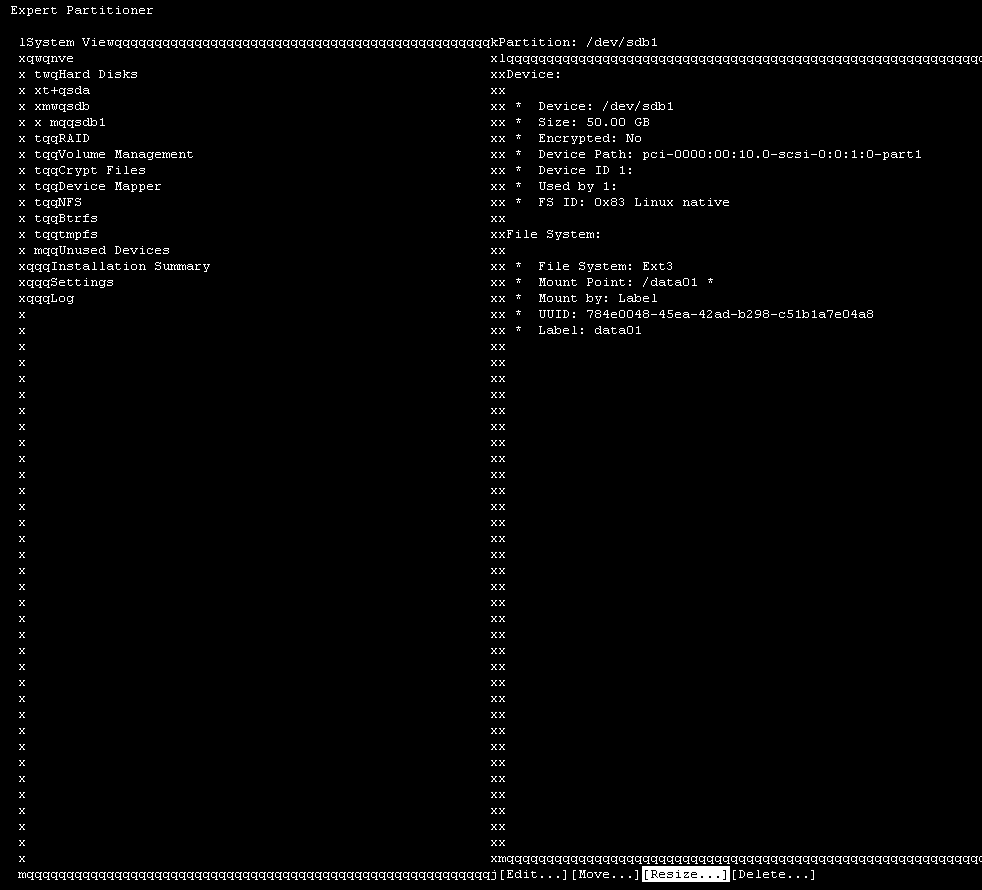
- The default option is set to Maximum Size. This option should retrieve the newly changed size from VMware. Ensure that the Maximum Size option is selected and select OK.
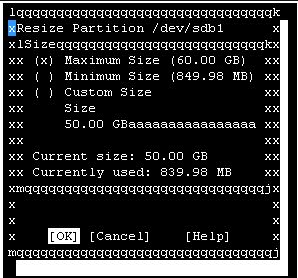
The new size appears in the summary screen:
- Confirm Finish and review the summary indicating that the partition
/dev/sdb1is extended.

- Confirm Finish when finished reviewing the summary to proceed.
- Once the progress window completes, select Next and confirm.
- Select Quit and confirm at the main
YASTmenu. - Remount the
/data01partition:
mount /data01
- Start NetWorker services by running:
systemctl start networker
- Reenable Automatic Service startup:
systemctl enable networker
- Start the NMC
gstdservice:
systemctl start gstd
- Confirm that NetWorker services are running:
nsrrpcinfo -p localhost
NOTE: It may take a few minutes for all NetWorker services to start.
- The output of
df -hreflects the increased/data01partition size
nve:~ # df -h | grep "Filesystem\|data01"
Filesystem      Size  Used Avail Use% Mounted on
/dev/sdb1        60G  840M   56G   2% /data01
CAUTION: If the
/data01 partition reached 100% capacity, this can lead to corruption of NetWorker databases. Validate that the NetWorker server is healthy (no missing clients, groups, policies, devices, backups, and so forth).
If a data loss issue is observed, contact Dell NetWorker Support immediately. If the NVE is using EOSL versioning, the NVE must be upgraded after a NetWorker Server Disaster Recovery (
nsrdr) is performed. The backup administrator must perform the NVE upgrades, see NetWorker Virtual Edition: How To Upgrade NetWorker Software and NVE System.
If you require assistance performing upgrades, contact your Dell Site Account Manager (SAM) or Dell Site Sales Rep to engage with our Global Professional Services (PS) team.
Affected Products
NetWorkerArticle Properties
Article Number: 000187566
Article Type: How To
Last Modified: 30 May 2025
Version: 8
Find answers to your questions from other Dell users
Support Services
Check if your device is covered by Support Services.